Payment Links - Legacy
You can perform the following Payment Link operations via the Razorpay Dashboard:
You can create a Payment Link to collect funds from your customers via the Dashboard or APIs. When you create a Payment Link, it moves to issued state by default.
- Log into your Dashboard.
- Navigate to Payment Links.
- Click + Create Payment Link.
- Enter the required details in the Standard Payment Link pop-up that appears.
- Review the details and click Create Payment Link.

Once created, it appears on the list of Payment Links.
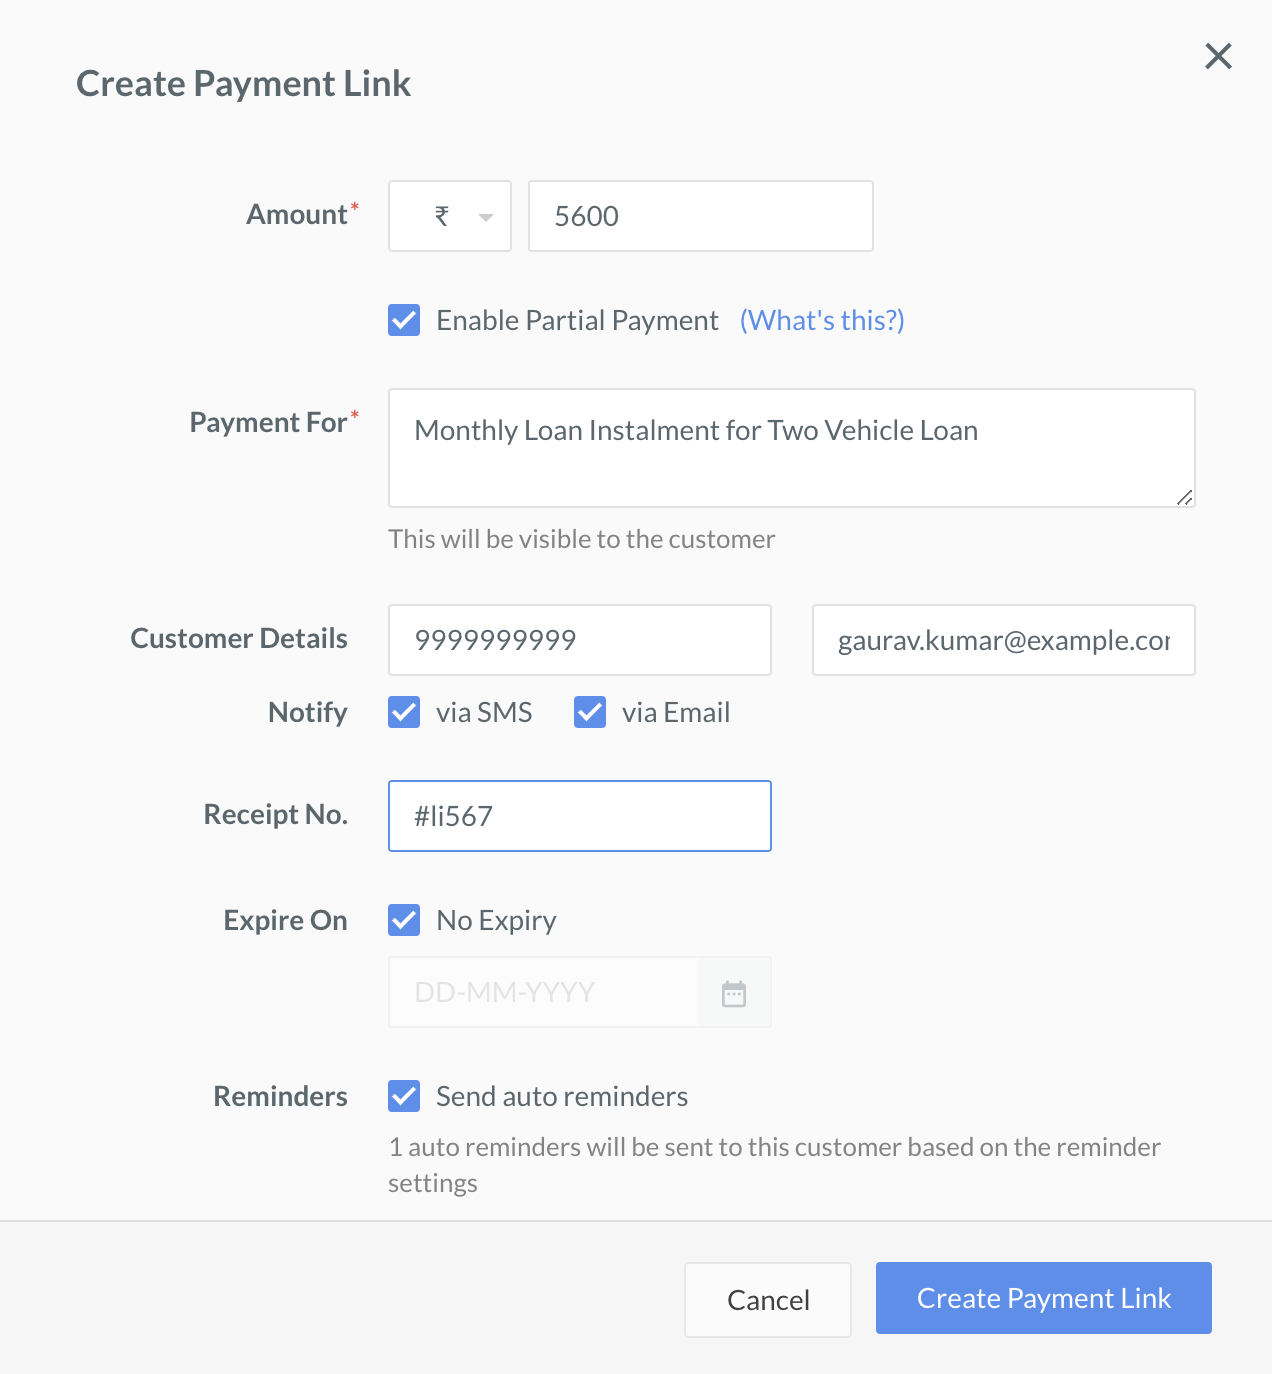
Listed below are the various fields available when creating a payment link via the Dashboard.
Amount mandatory-
Currency and amount for the payment link. You can accept payments in international currencies. The amount is in the currency unit. For example, select ₹ and enter1000 for ₹1,000.
Payment For optional-
A description entered by you for the payment link. For example, Payment link for monthly cake - Acme Corp.
Customer Details optional-
The customer's email and phone number. For example, 9876543210 and pooja.kumar@example.com.
Notify via Email optional- Select this option if you want us to send the payment link to the customer via email. Available only if you have entered the customer's email.
Notify via SMS optional- Select this option if you want us to send the payment link to the customer via email. Available only if you have entered the customer's phone number.
Receipt No-
A unique reference number entered by you for the payment link. For example, Adbb001.
Link Expiry-
The date and time when the payment link should expire.
Internal Notes-
Internal notes entered by you for the payment link. For example
- Title (key) - Acme Corp.
- Description (value) - Birthday cake Feb.
You can search for a Payment Link by one or a combination of following fields:
- Payment Link Status
- Payment Link ID
- Batch Id
- Receipt No.
- Customer Contact
- Customer Email
- Notes
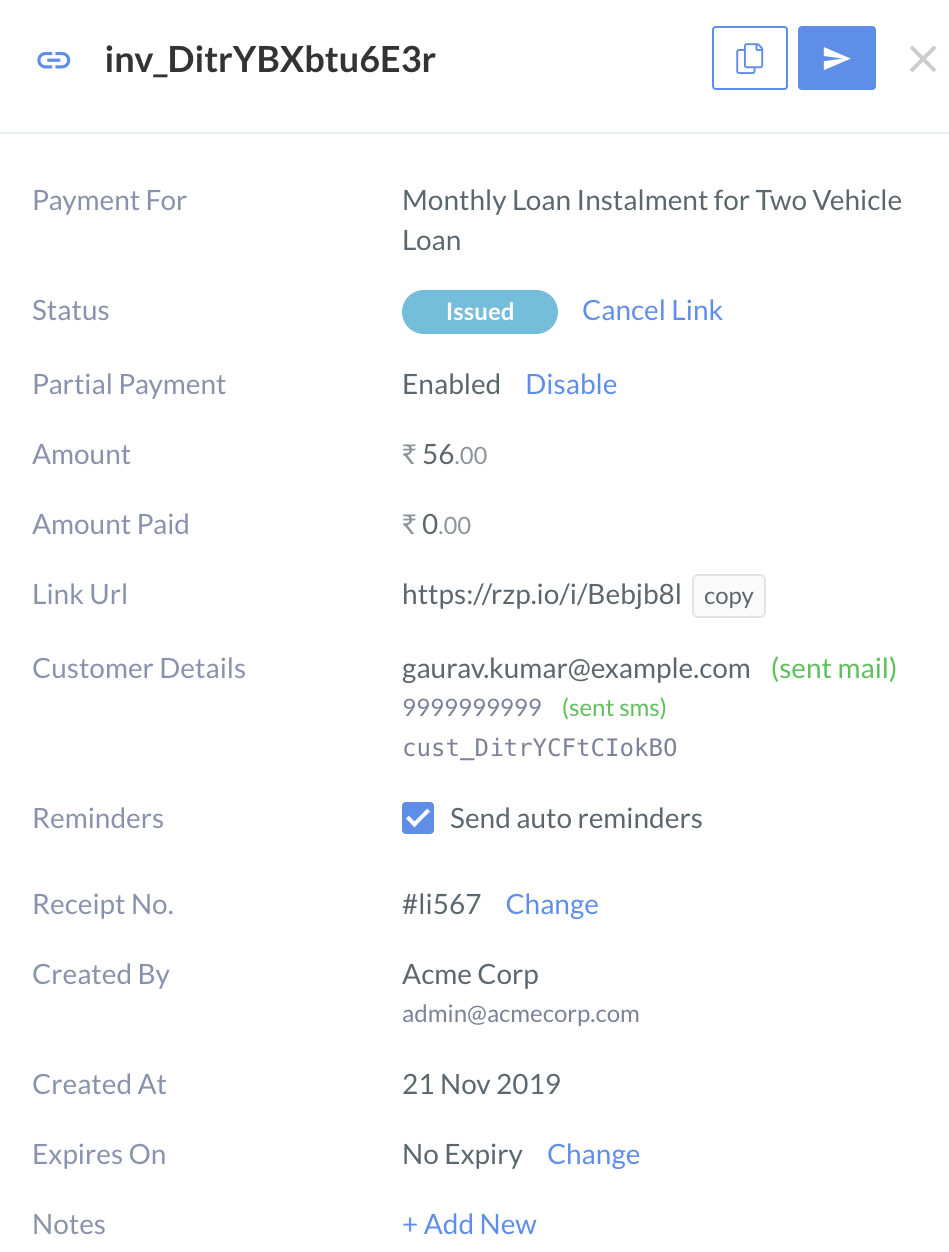
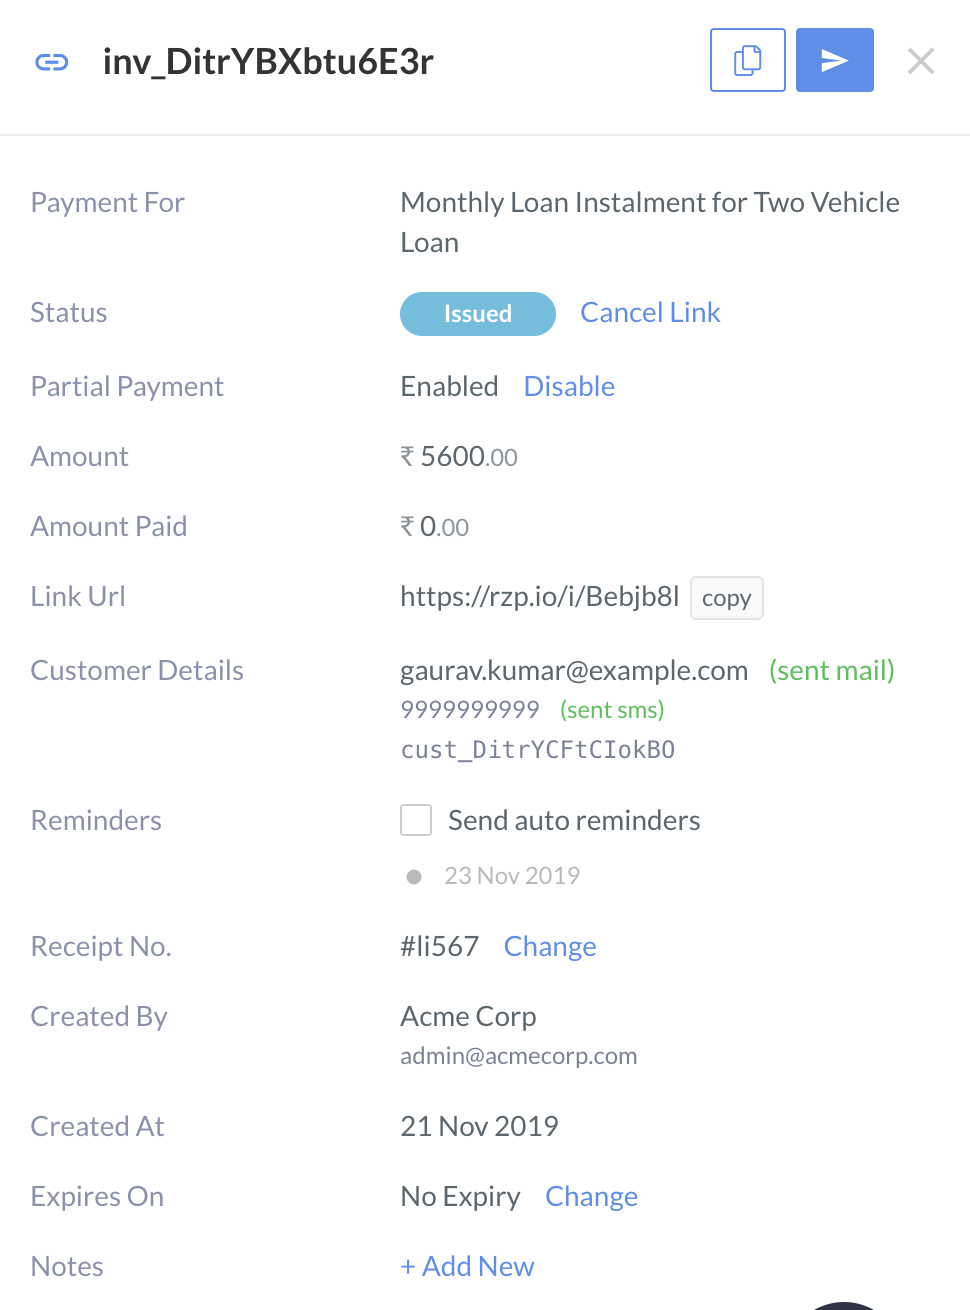
You can allow customers to make partial payments on their orders.
Note:
- You can enable or disable partial payments during creation.
- After creation, you can only enable or disable partial payments for payment links in the Issued state.
- Log into your Dashboard.
- Navigate to Payment Links.
- Click + Create Payment Link.
- Select Enable Partial Payment.
- Log into your Dashboard.
- Navigate to Payment Links.
- Select the payment link for which you want to enable/disable partial payments.
- Click Enable or Disable.
You can edit payment links that you have issued. You can edit different fields depending on the state of the payment link.
Action
| Issued
| Partially Paid
| Paid
| Cancelled
| Expired
|
|---|
Enable/disable Partial Payments
| ✓
| x
| x
| x
| x
|
Enable/disable Reminders
| ✓
| x
| x
| x
| x
|
Add/edit Reference ID
| ✓
| x
| x
| x
| x
|
Add/edit Expiry Date
| ✓
| x
| x
| x
| x
|
Add/edit Notes
| ✓
| ✓
| ✓
| ✓
| ✓
|
To edit a payment link:
- Log into your Razorpay Dashboard.
- Navigate to Payment Links.
- Click the payment link you want to edit. Details of the payment link appears on the right.
- Add/edit the required options.
If you do not want your customers to use the Payment Link you have issued, you can cancel it.
Note:
You can only cancel payment links that are in the **Issued state.
To cancel from the Dashboard:
- Log into your Dashboard.
- Go to Payment Links.
- Click on the payment link you want to cancel. Details of the payment link appears on the right.
- Click Cancel Link.
- Click Yes, Cancel.
To save time and reduce possibilities of mistakes while creating Payment Links, you can duplicate an existing Payment Link.
- Log into your Razorpay Dashboard.
- Go to Payment Links.
- Click on the payment link you want to duplicate. Details of the payment link appears on the right.
- Click Duplicate Payment Link icon.
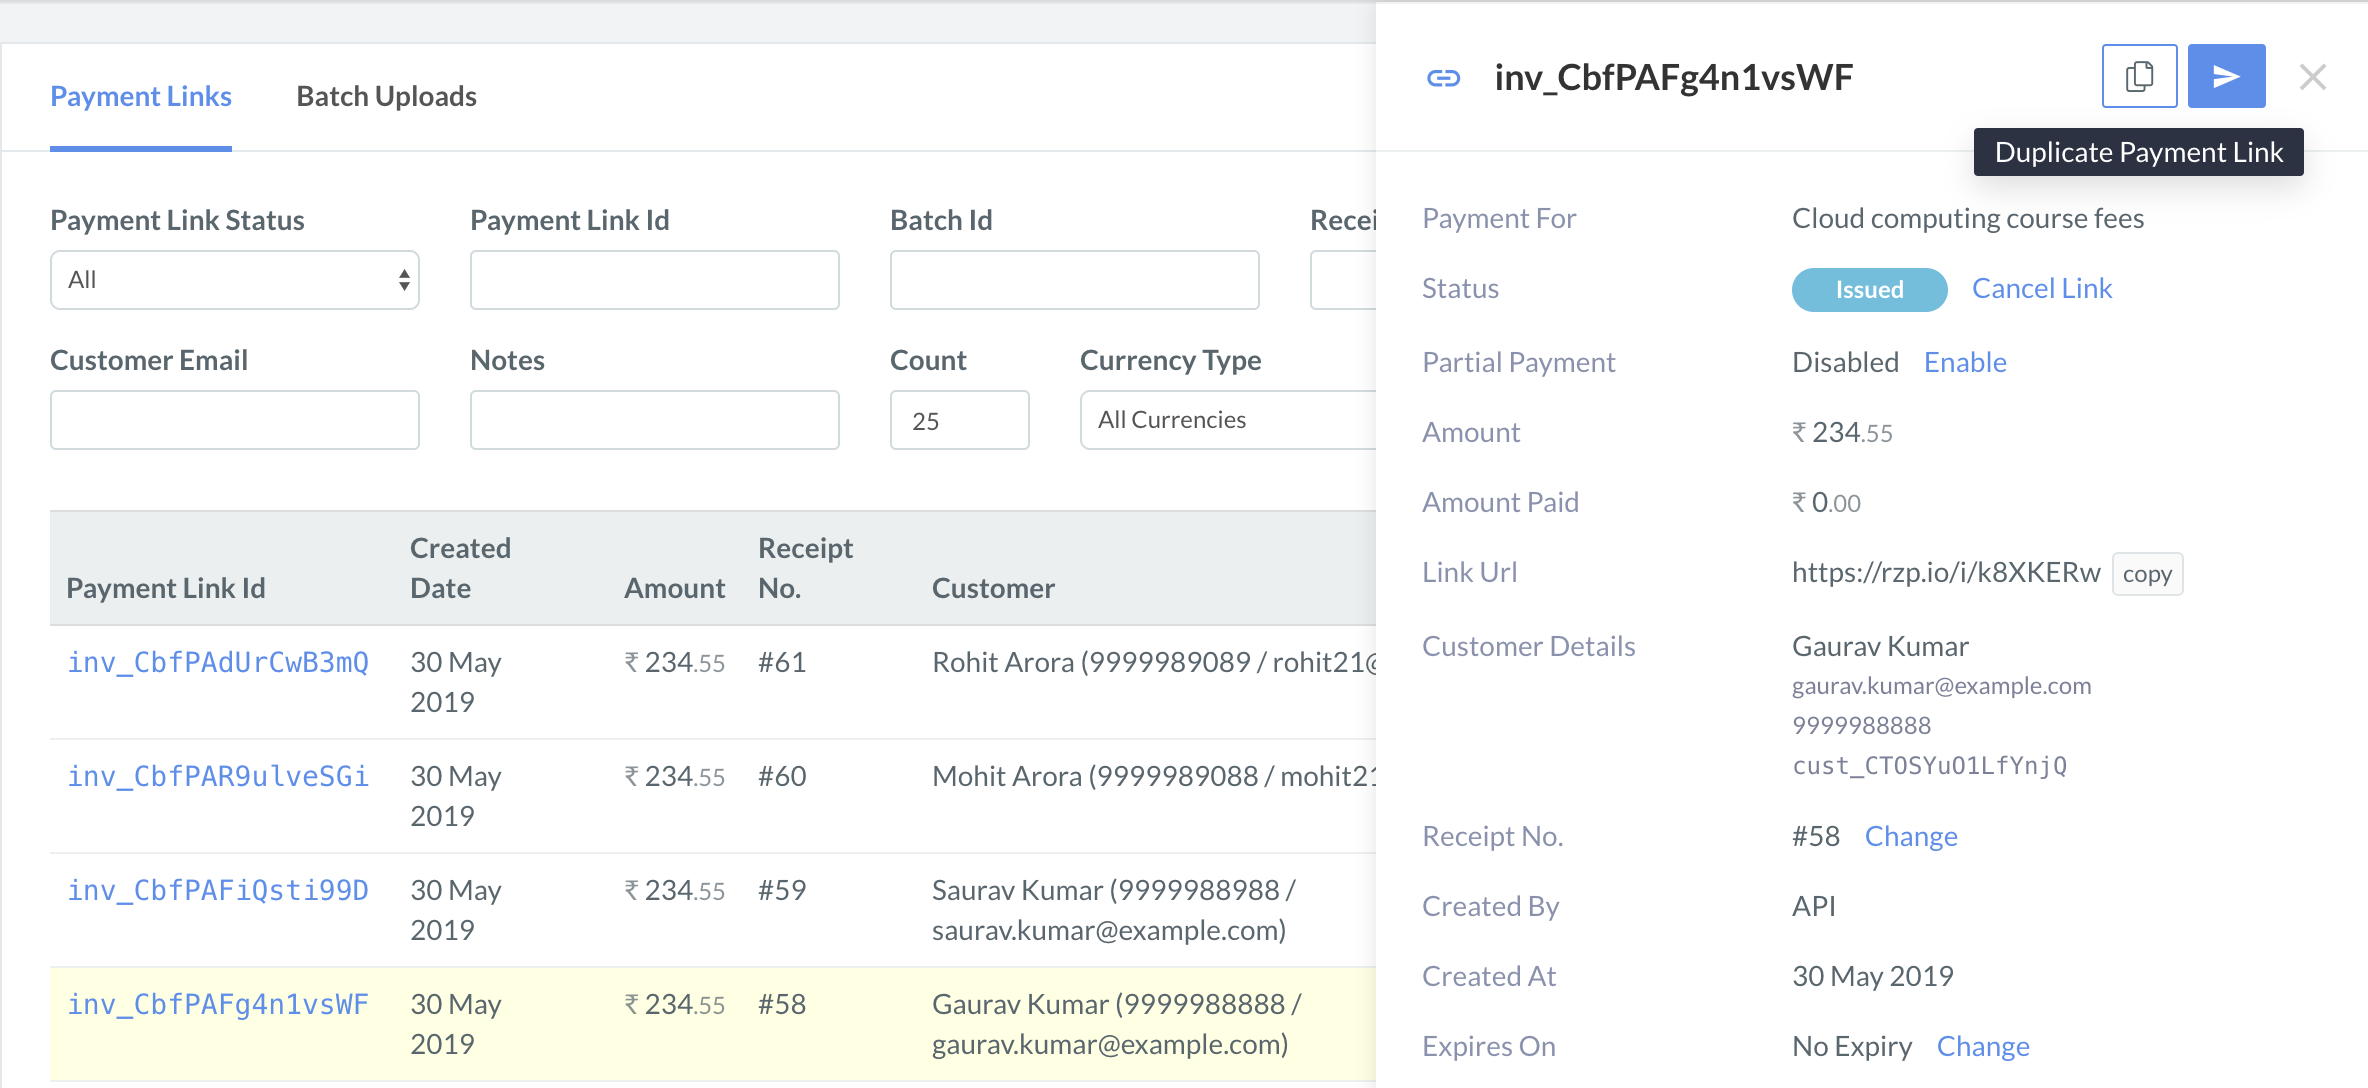
- In the Create Payment Link window, amend the required payment details. For example, you can change the Amount or modify the description in Payment For.
- Click Create Payment Link.
You can resend a payment link to your customer, if required. To resend:
- Log into your Dashboard.
- Go to Payment Links.
- Click on the payment link you want to resend. Details of the payment link appears on the right.
- Click the resend icon.
- Select the modes (Email or SMS or both) in which you want to resend the payment link.
- Click Send Link.