Advantages🔗
- There is no need to create Plans or Subscriptions using the Razorpay Dashboard or Razorpay APIs. All this can be done easily from your WooCommerce Dashboard.
- Customers are not redirected from your website to make payments.
You can now accept recurring payments on your WooCommerce-enabled WordPress site using the Razorpay Subscriptions for WooCommerce plugin. This plugin is built on the Razorpay Subscriptions product and offers seamless integration, allowing you to create and sell subscription services on your website.
Watch this video to learn how to integrate Razorpay Payment Gateway with your WooCommerce Subscriptions website using our plugin.
You must have the following installed for the plugin to work:
Platform/Plugin/Language | Version |
|---|---|
WordPress | 3.9.2 or higher |
WooCommerce Plugin for WordPress | 2.4 or higher |
WooCommerce Subscriptions Plugin | 2.2 and above |
Razorpay WooCommerce Plugin | 2.0.0 and above |
PHP | 5.6.0 or higher |
PHP-cURL |
To start accepting subscription payments using the plugin:
On Your WordPress Site:
On Razorpay Dashboard:
There are two methods to install the Razorpay Subscription for WooCommerce plugin:
You can search for the plugin on the WordPress Admin Dashboard and add it.

wp-content → Plugins.
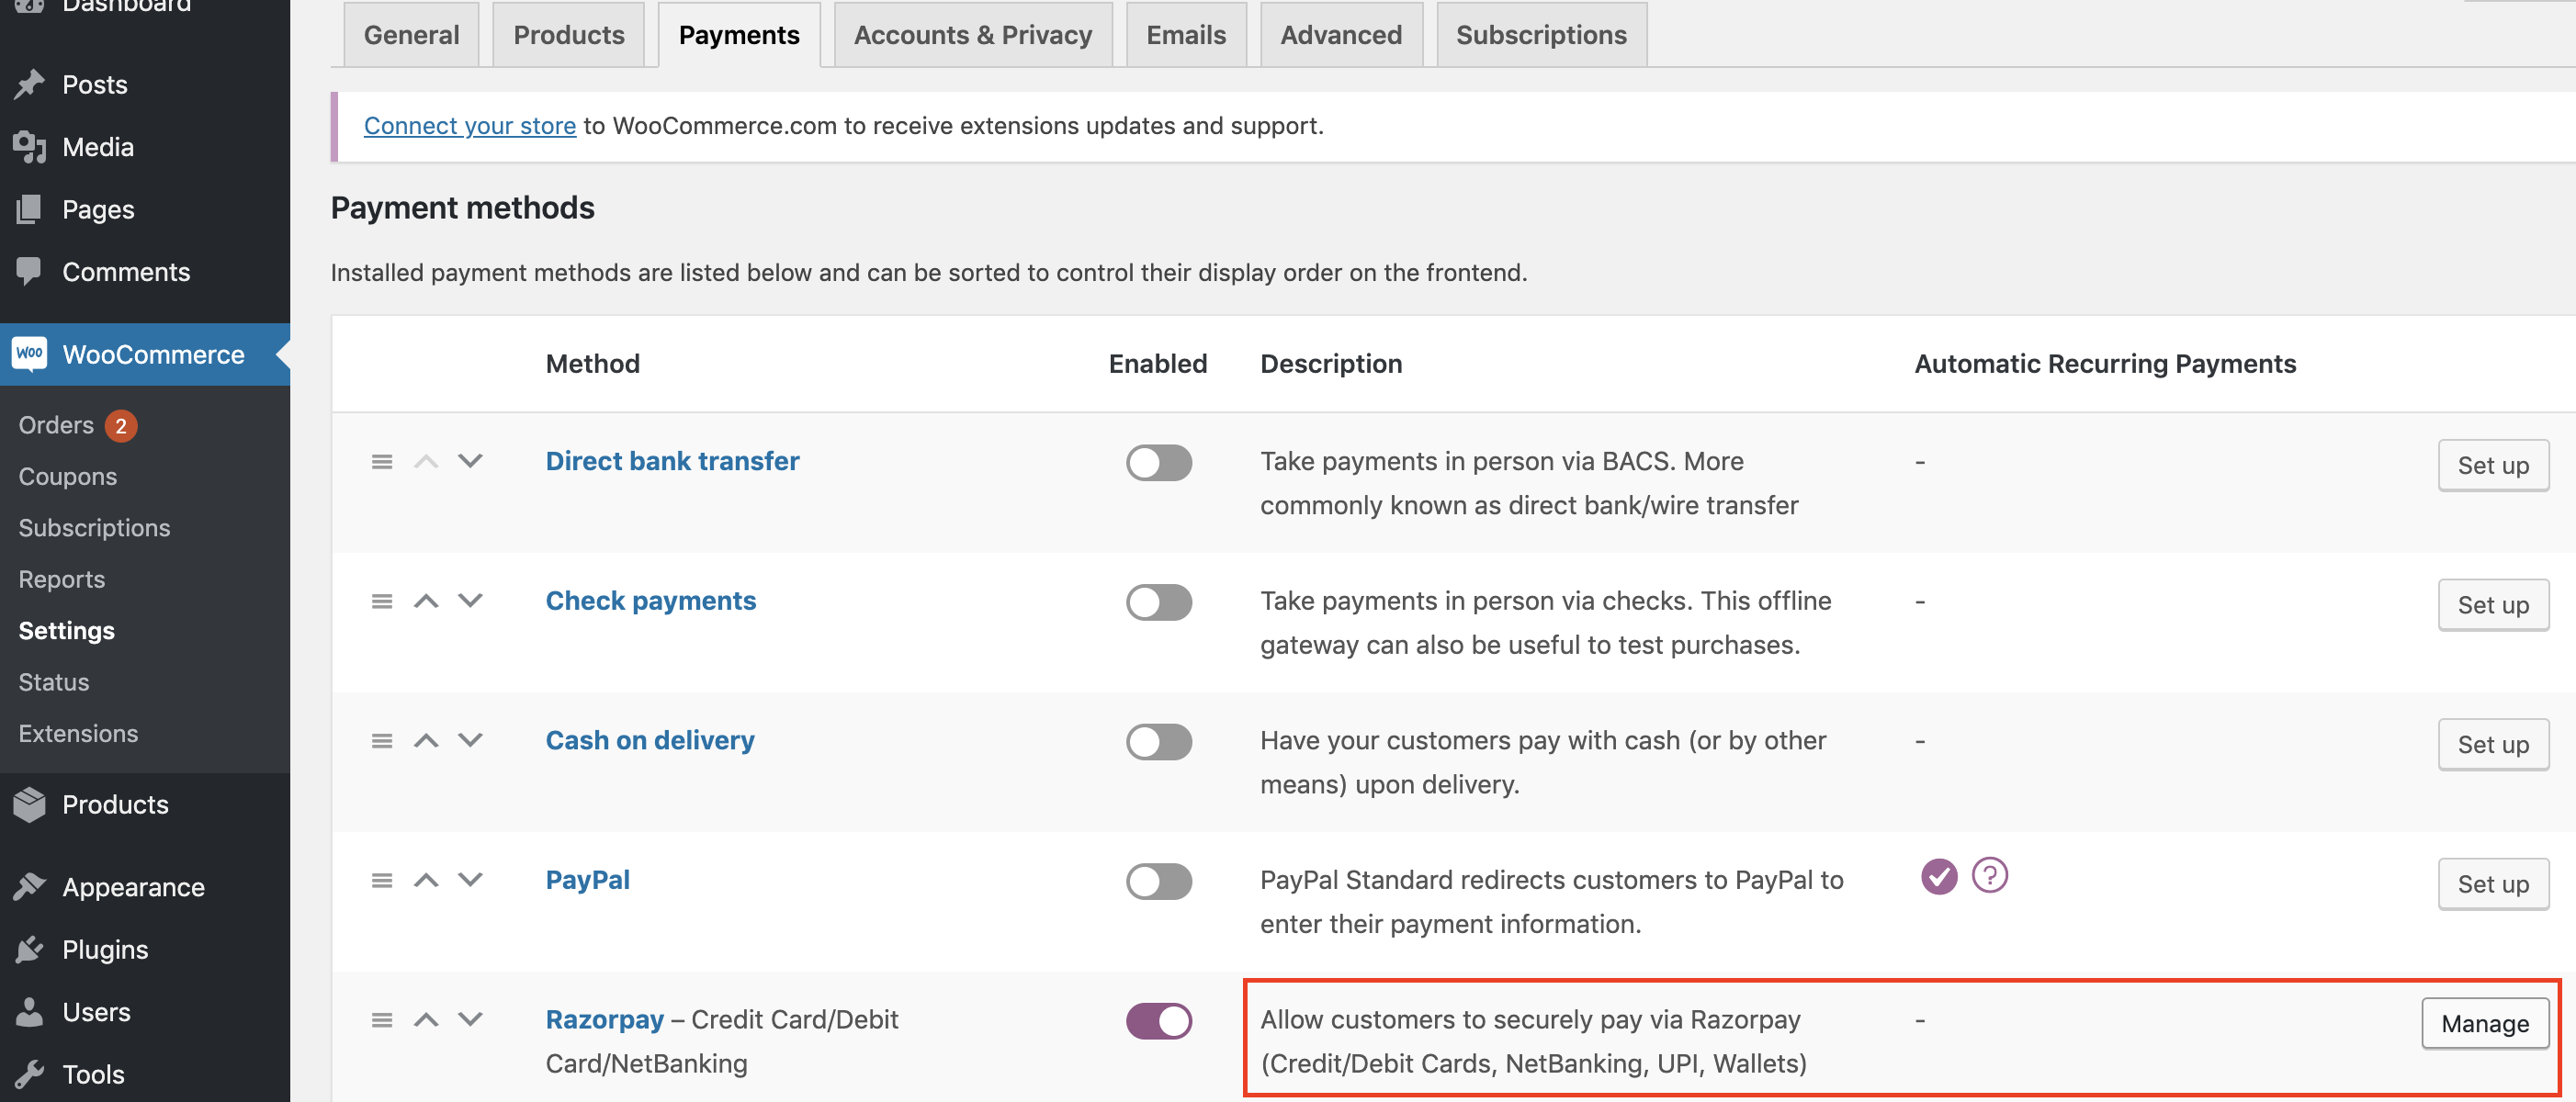
On your WordPress Dashboard, navigate to WooCommerce → Settings → Payments tab.
In the Payments tab, go to Razorpay → Allow customers to securely pay via Razorpay and click Manage.
Field | Description |
|---|---|
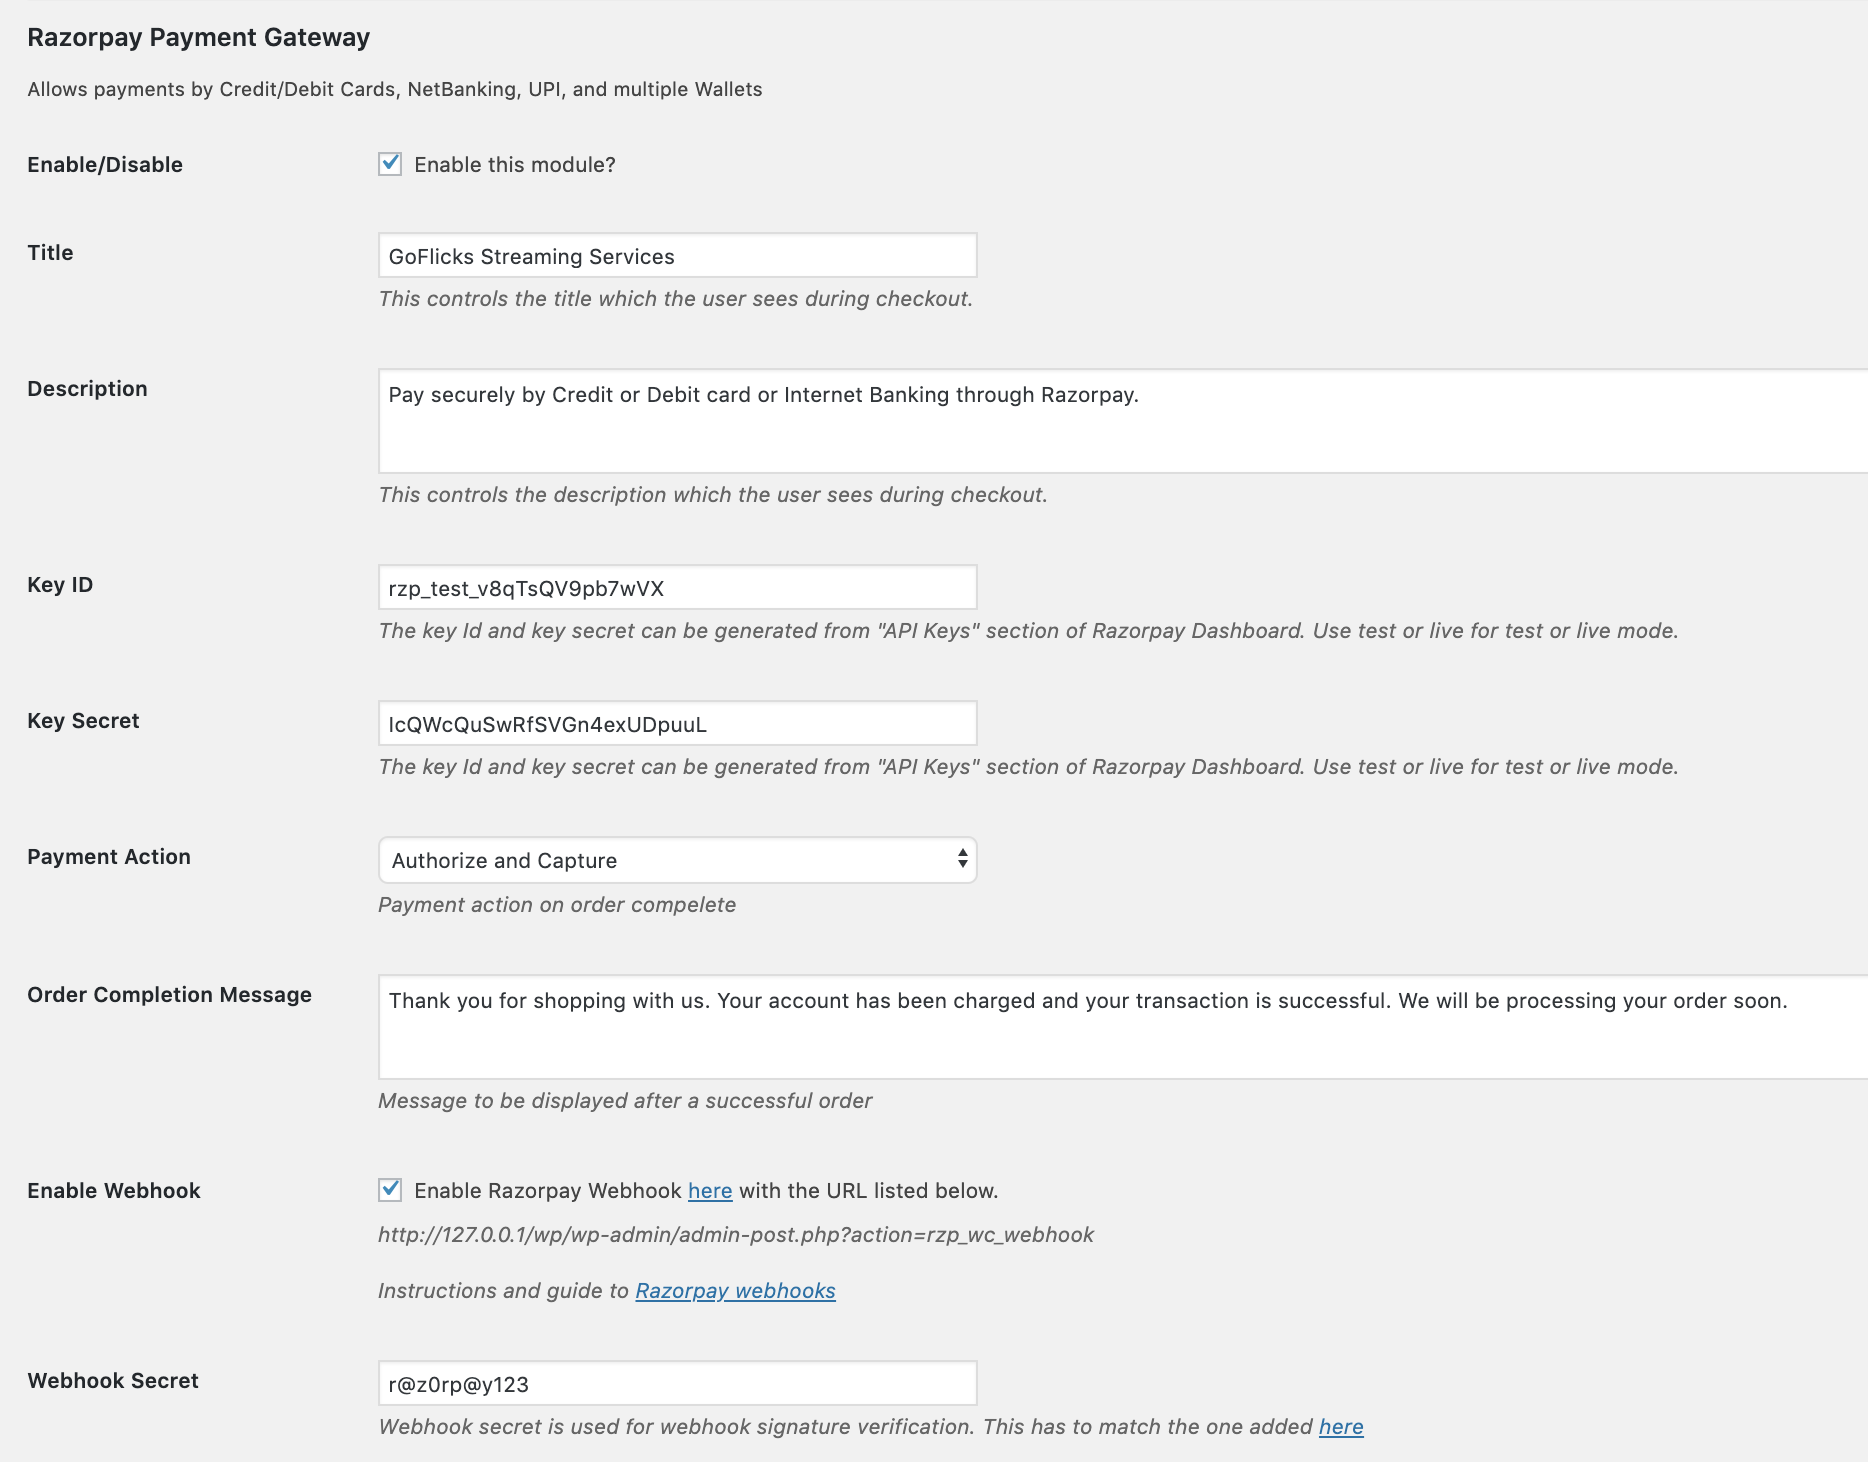
Enable/Disable | Ensure that the Enable this module? option is selected. |
Title | Add the title that is visible to the customer during checkout of a product with type - |
Description | Enter a short description that is visible to the customer during checkout. |
Key ID | Enter the Key ID generated from the Razorpay Dashboard. |
Key Secret | Enter the API Key Secret generated from the Razorpay Dashboard. |
Payment Action | To automatically capture successful payments, select |
Order Completion Message | Enter the message that must be displayed after an order is successfully placed. |
Enable Webhook | Ensure that Enable Razorpay Webhook option is selected. Complete the webhook enablement process on Razorpay Dashboard. |
Webhook Secret | Enter the webhook secret here. Webhook secret is used for webhook signature verification. This must match with the one added in the Razorpay Dashboard. |
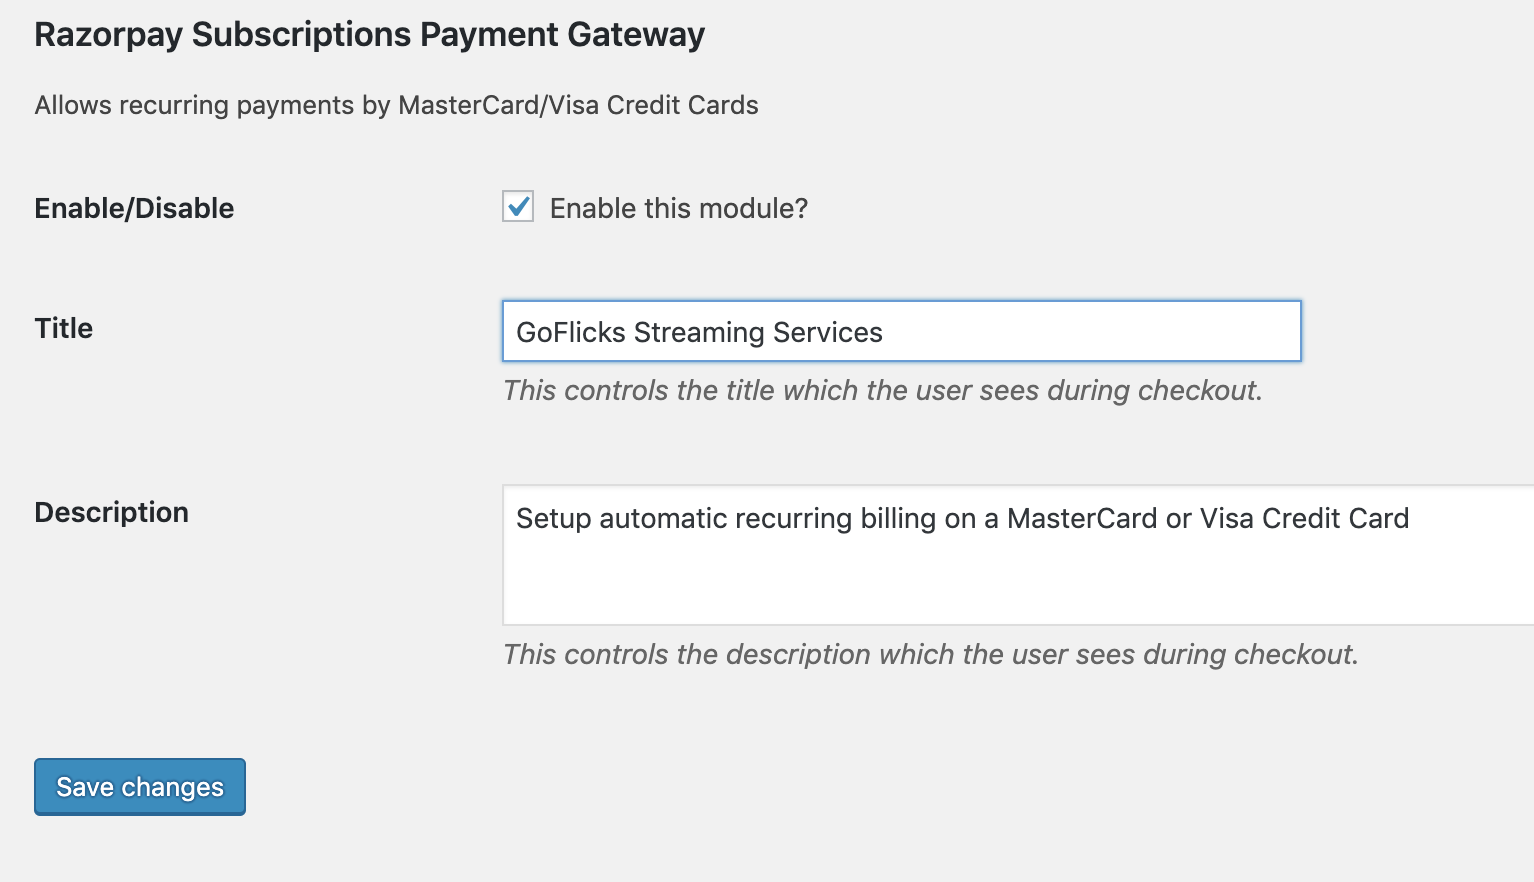
In the Payments tab, go to Razorpay Subscriptions → Allow customers to securely pay via Razorpay and click Manage.
In the Razorpay Subscriptions Payment Gateway screen, fill in the following field details and click Save:
Field | Description |
|---|---|
Enable/Disable | Ensure that the Enable this module? option is selected. |
Title | Add the title that is visible to the customer during checkout of the subscription product with type |
Description | Enter a short description that is visible to the customer during checkout. |
Let's assume Acme Corp. provides a streaming service called GoFlicks. There are two plans, GoFlicks PremiumWatch and GoFlicks StandardWatch. The details are mentioned below:
Plan Name | Rate/Month (₹) | Free Trial (days) |
|---|---|---|
GoFlicks PremiumWatch HD | 999 | 15 |
GoFlicks StandardWatch | 499 |
Let us create a Subscriptions product for GoFlicks PremiumWatch HD.
GoFlicks is a streaming service.
Similarly, create another Subscriptions product for GoFlicks StandardWatch.
Your product has been successfully created. Ensure that the product is visible to the website users so that they can add it to their cart. You can do this by displaying the product on your website's Shop page.
Users on your site can visit this page and buy the product. For example, they can add GoFlicks PremiumWatch HD to their cart and complete the payment.
Learn how to make a test transaction to ensure that the integration is working properly.
You can set up a webhook from your Razorpay Dashboard and configure separate URLs for live mode and test mode.
For details of available events and sample payloads, refer to the Webhook Events section.
Watch this video to see how to set up a webhook.
To set up webhooks:
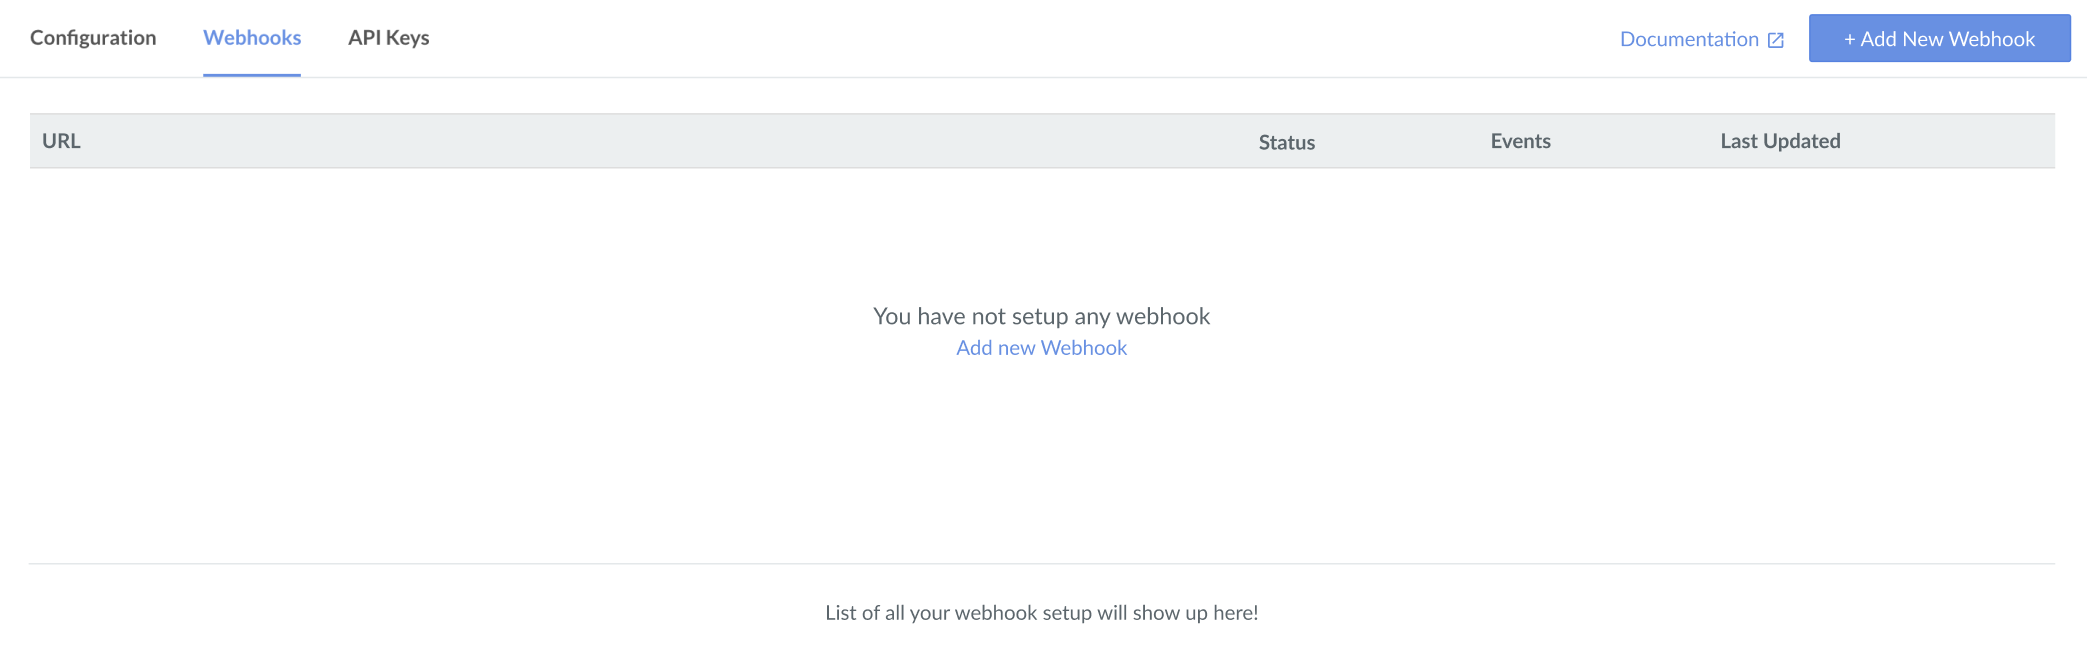
Log into the Razorpay Dashboard and navigate to Settings → Webhooks.
Click the + Add New Webhook button.
In the Webhook Setup pop-up page:
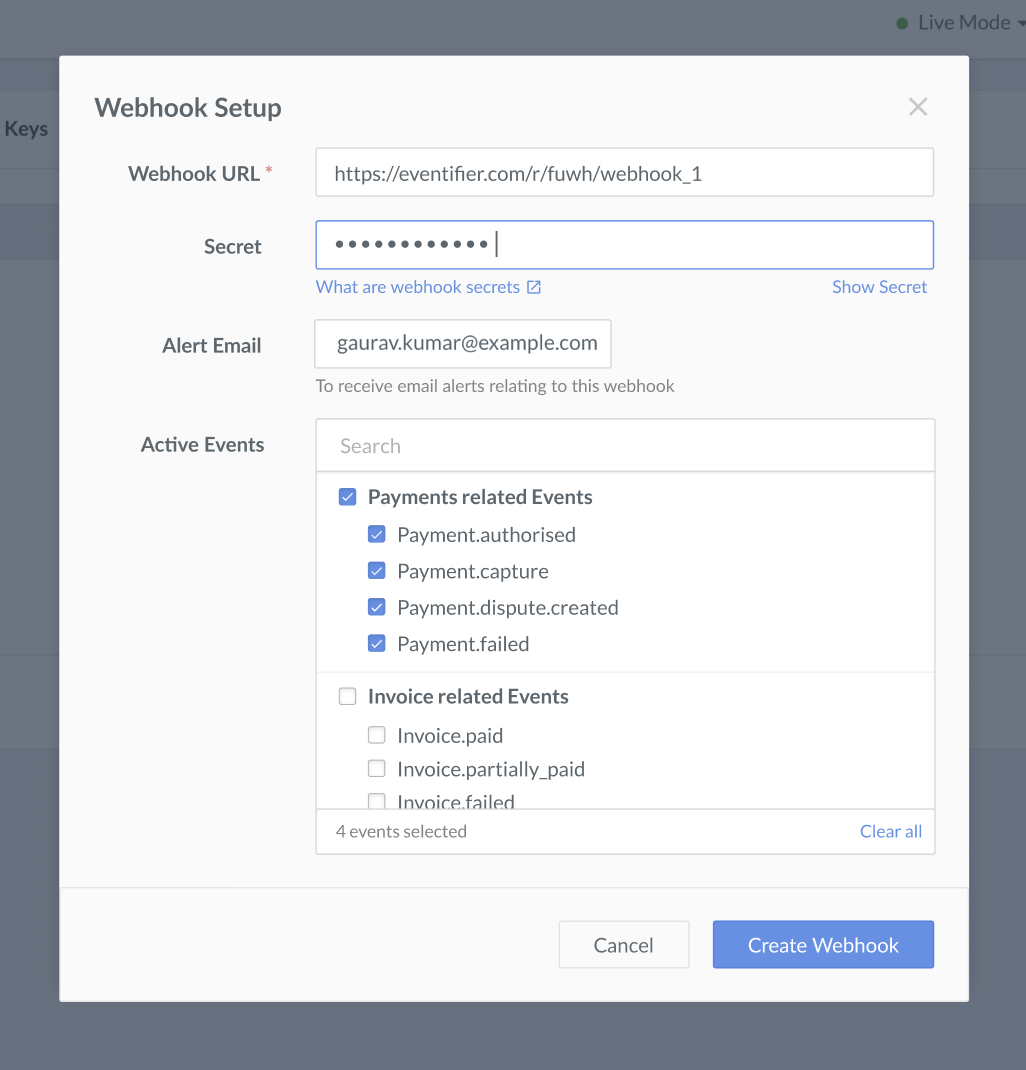
Click Create Webhook.
After you set a webhook, it appears on the list of webhooks.
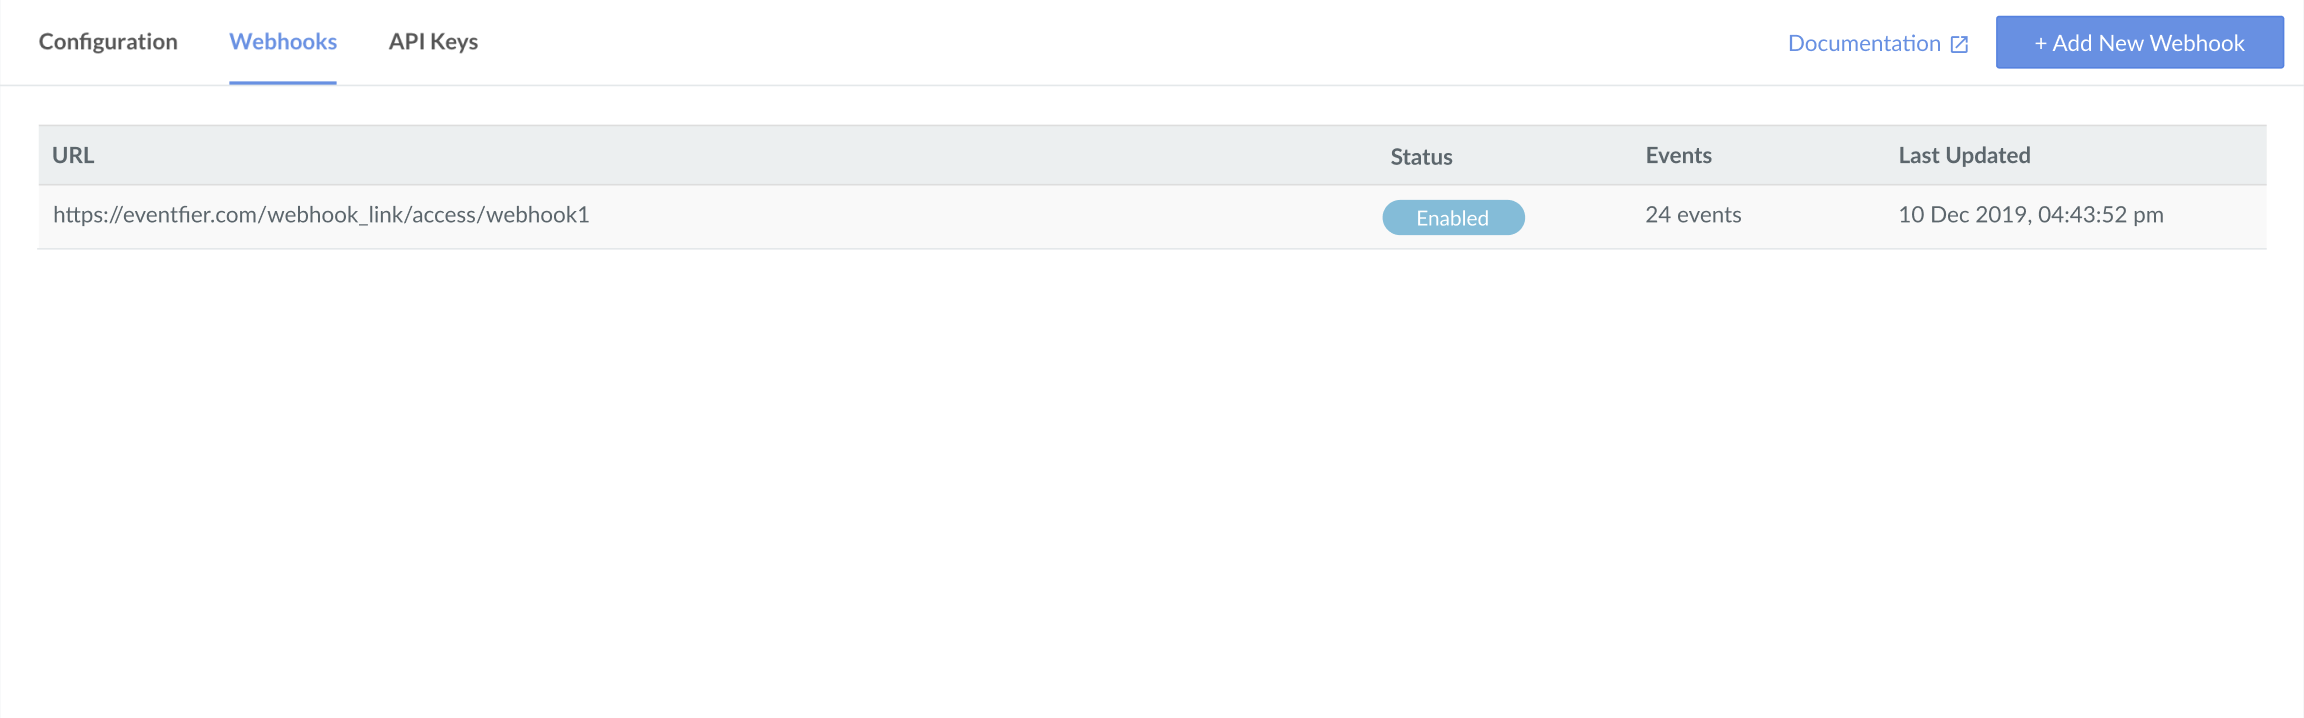
You can click Edit to make changes to the webhooks.