Integration Steps🔗
Follow these steps to complete the integration:
- Download the Razorpay Gravity Forms plugin and configure settings.
- Create a Gravity Form.
- Add Form in Webpage.
Step 1: Download Razorpay Gravity Forms Plugin and Configure Settings🔗
Follow the steps given below:
-
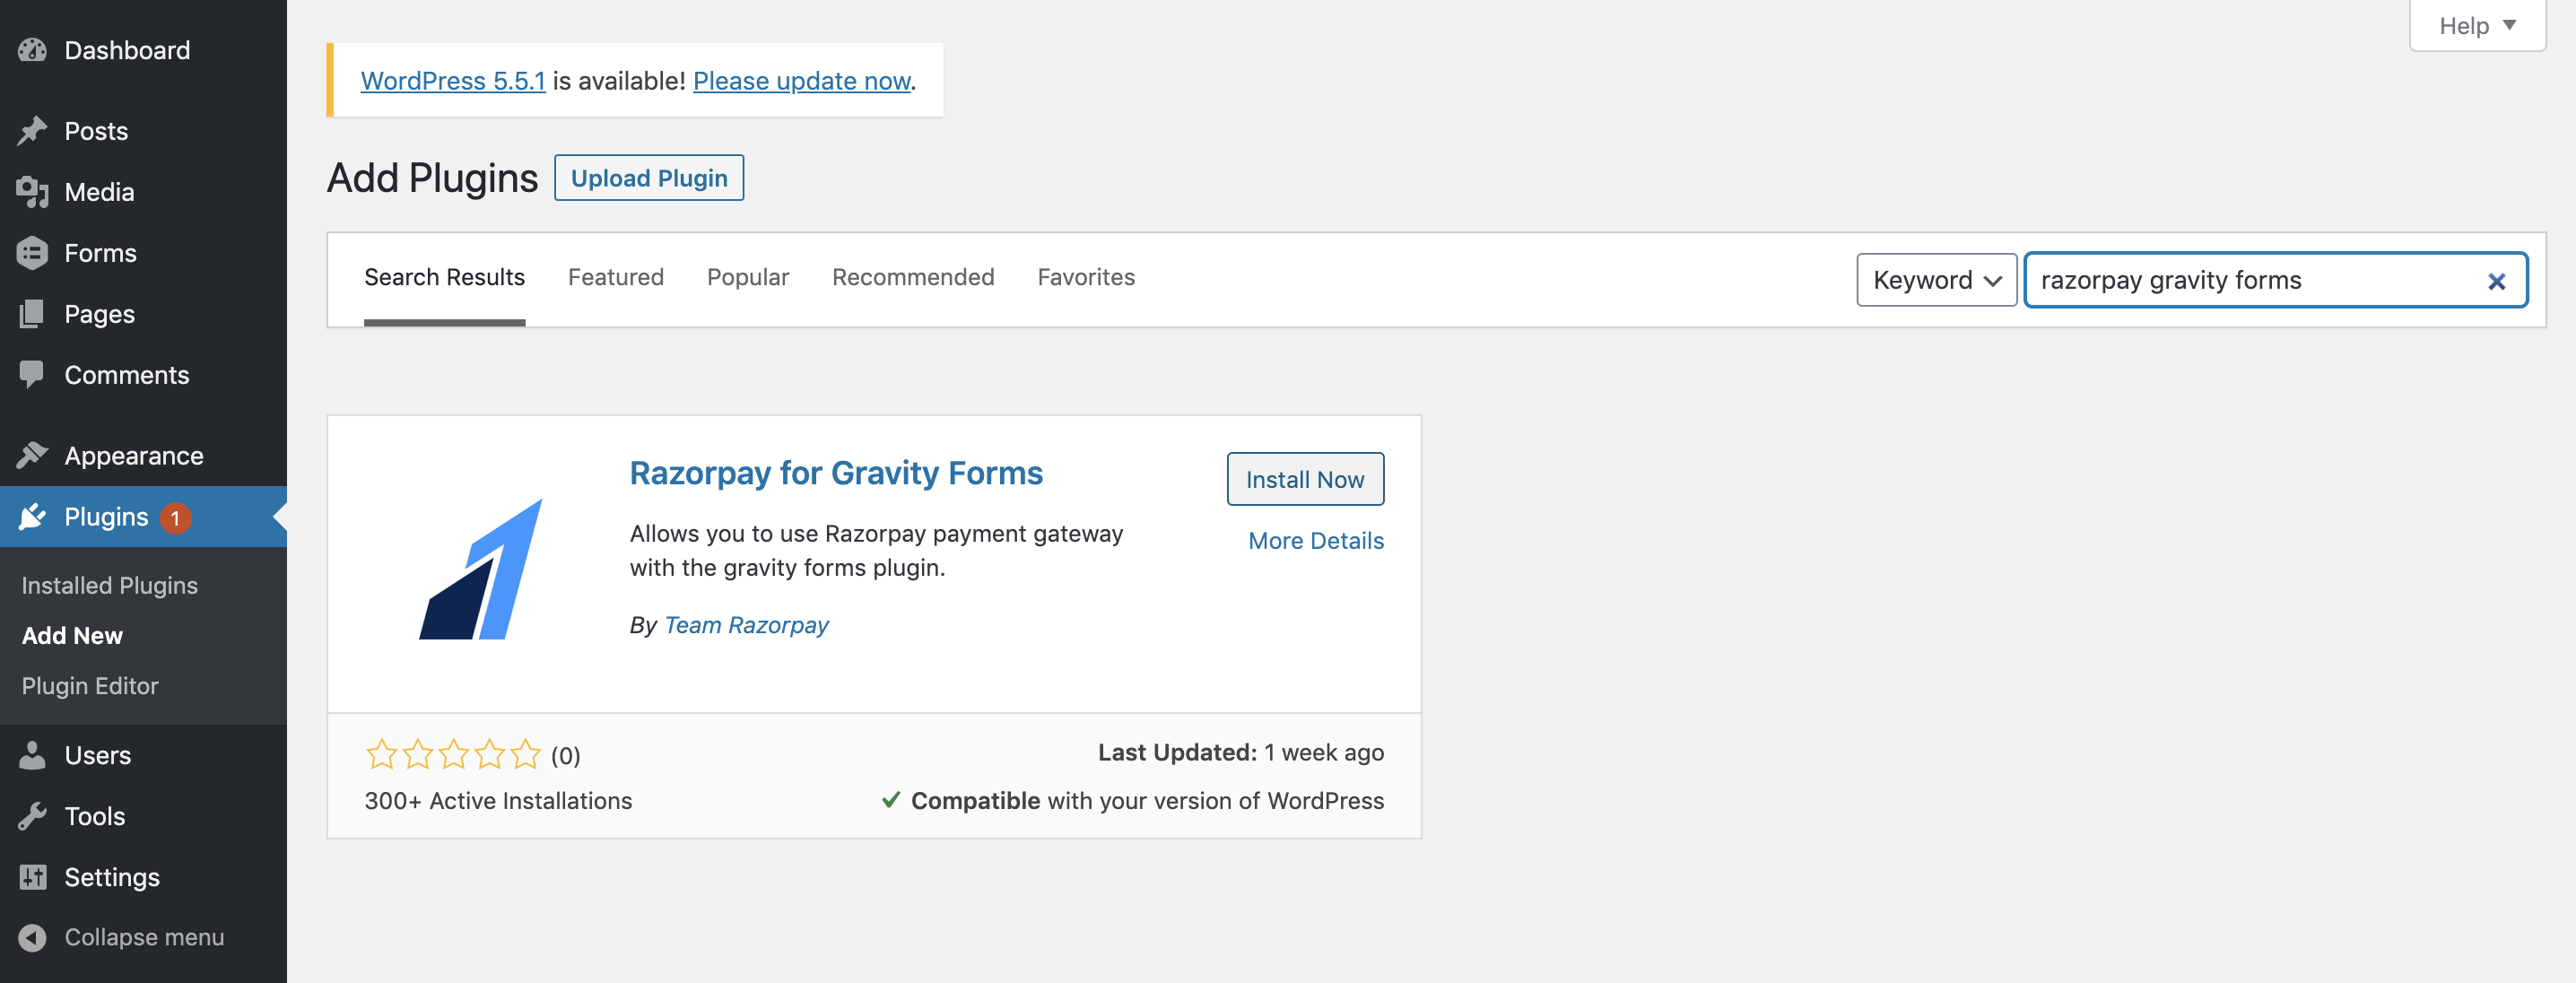
Download and install the Razorpay Gravity Forms Plugin. You can do this using either of these methods:
-
Download the plugin from the WordPress Plugin Directory and add the zip file to your WordPress website's Plugins folder.
-
Add the plugin directly on your WordPress website from the Plugin page.
-
-
On your WordPress site, activate the plugin in the WordPress Plugin Manager.
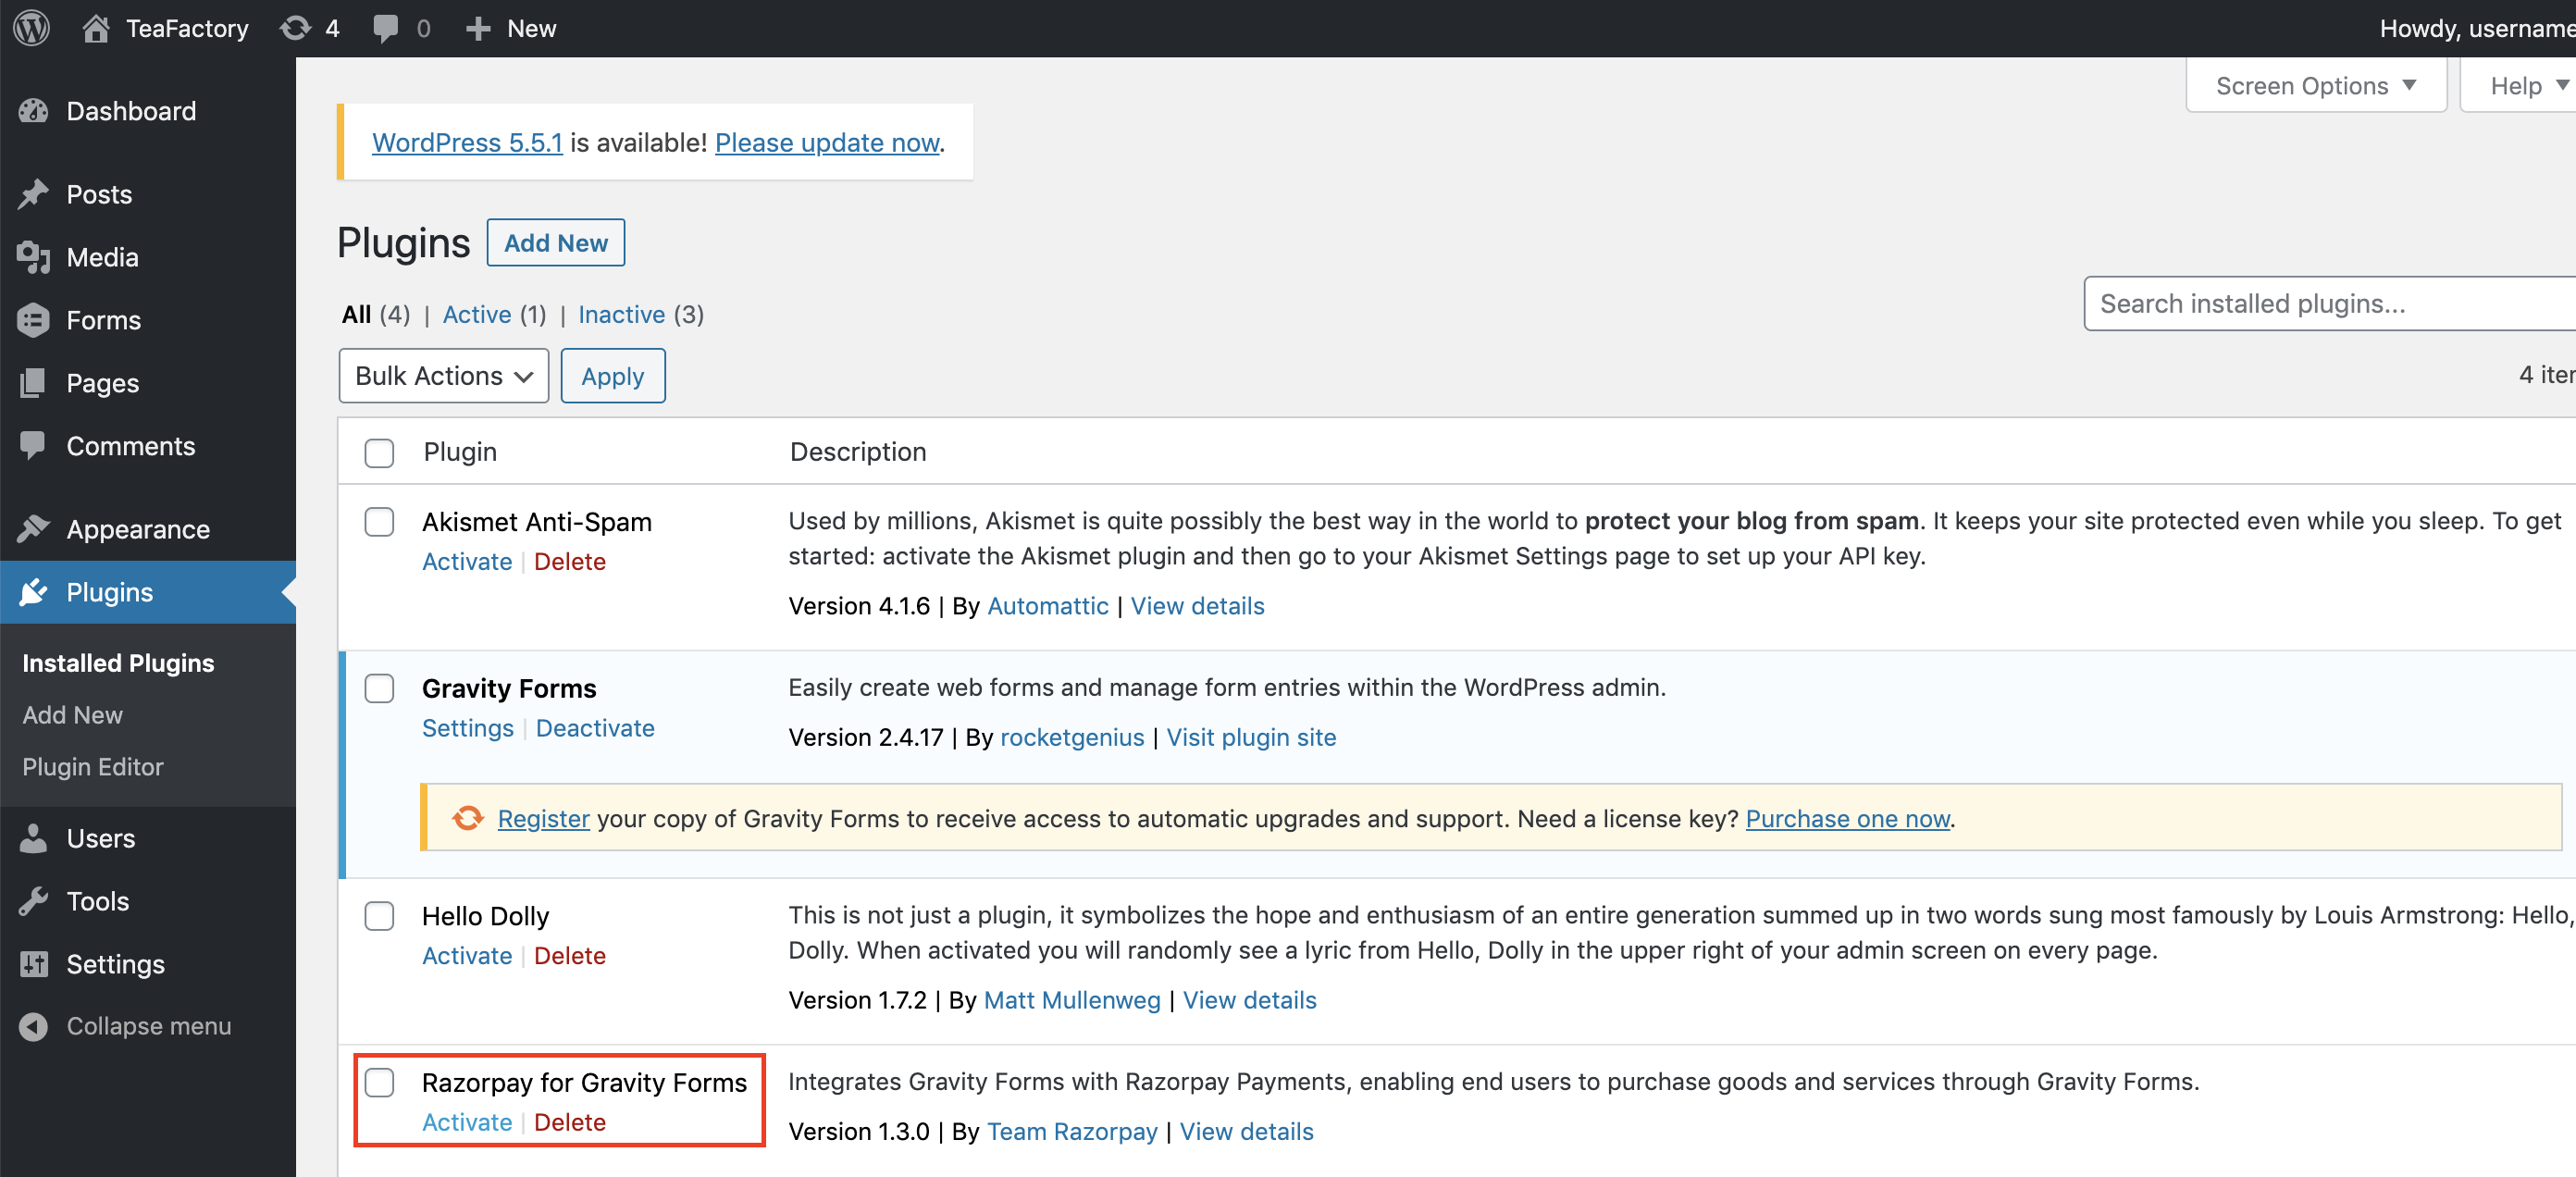
-
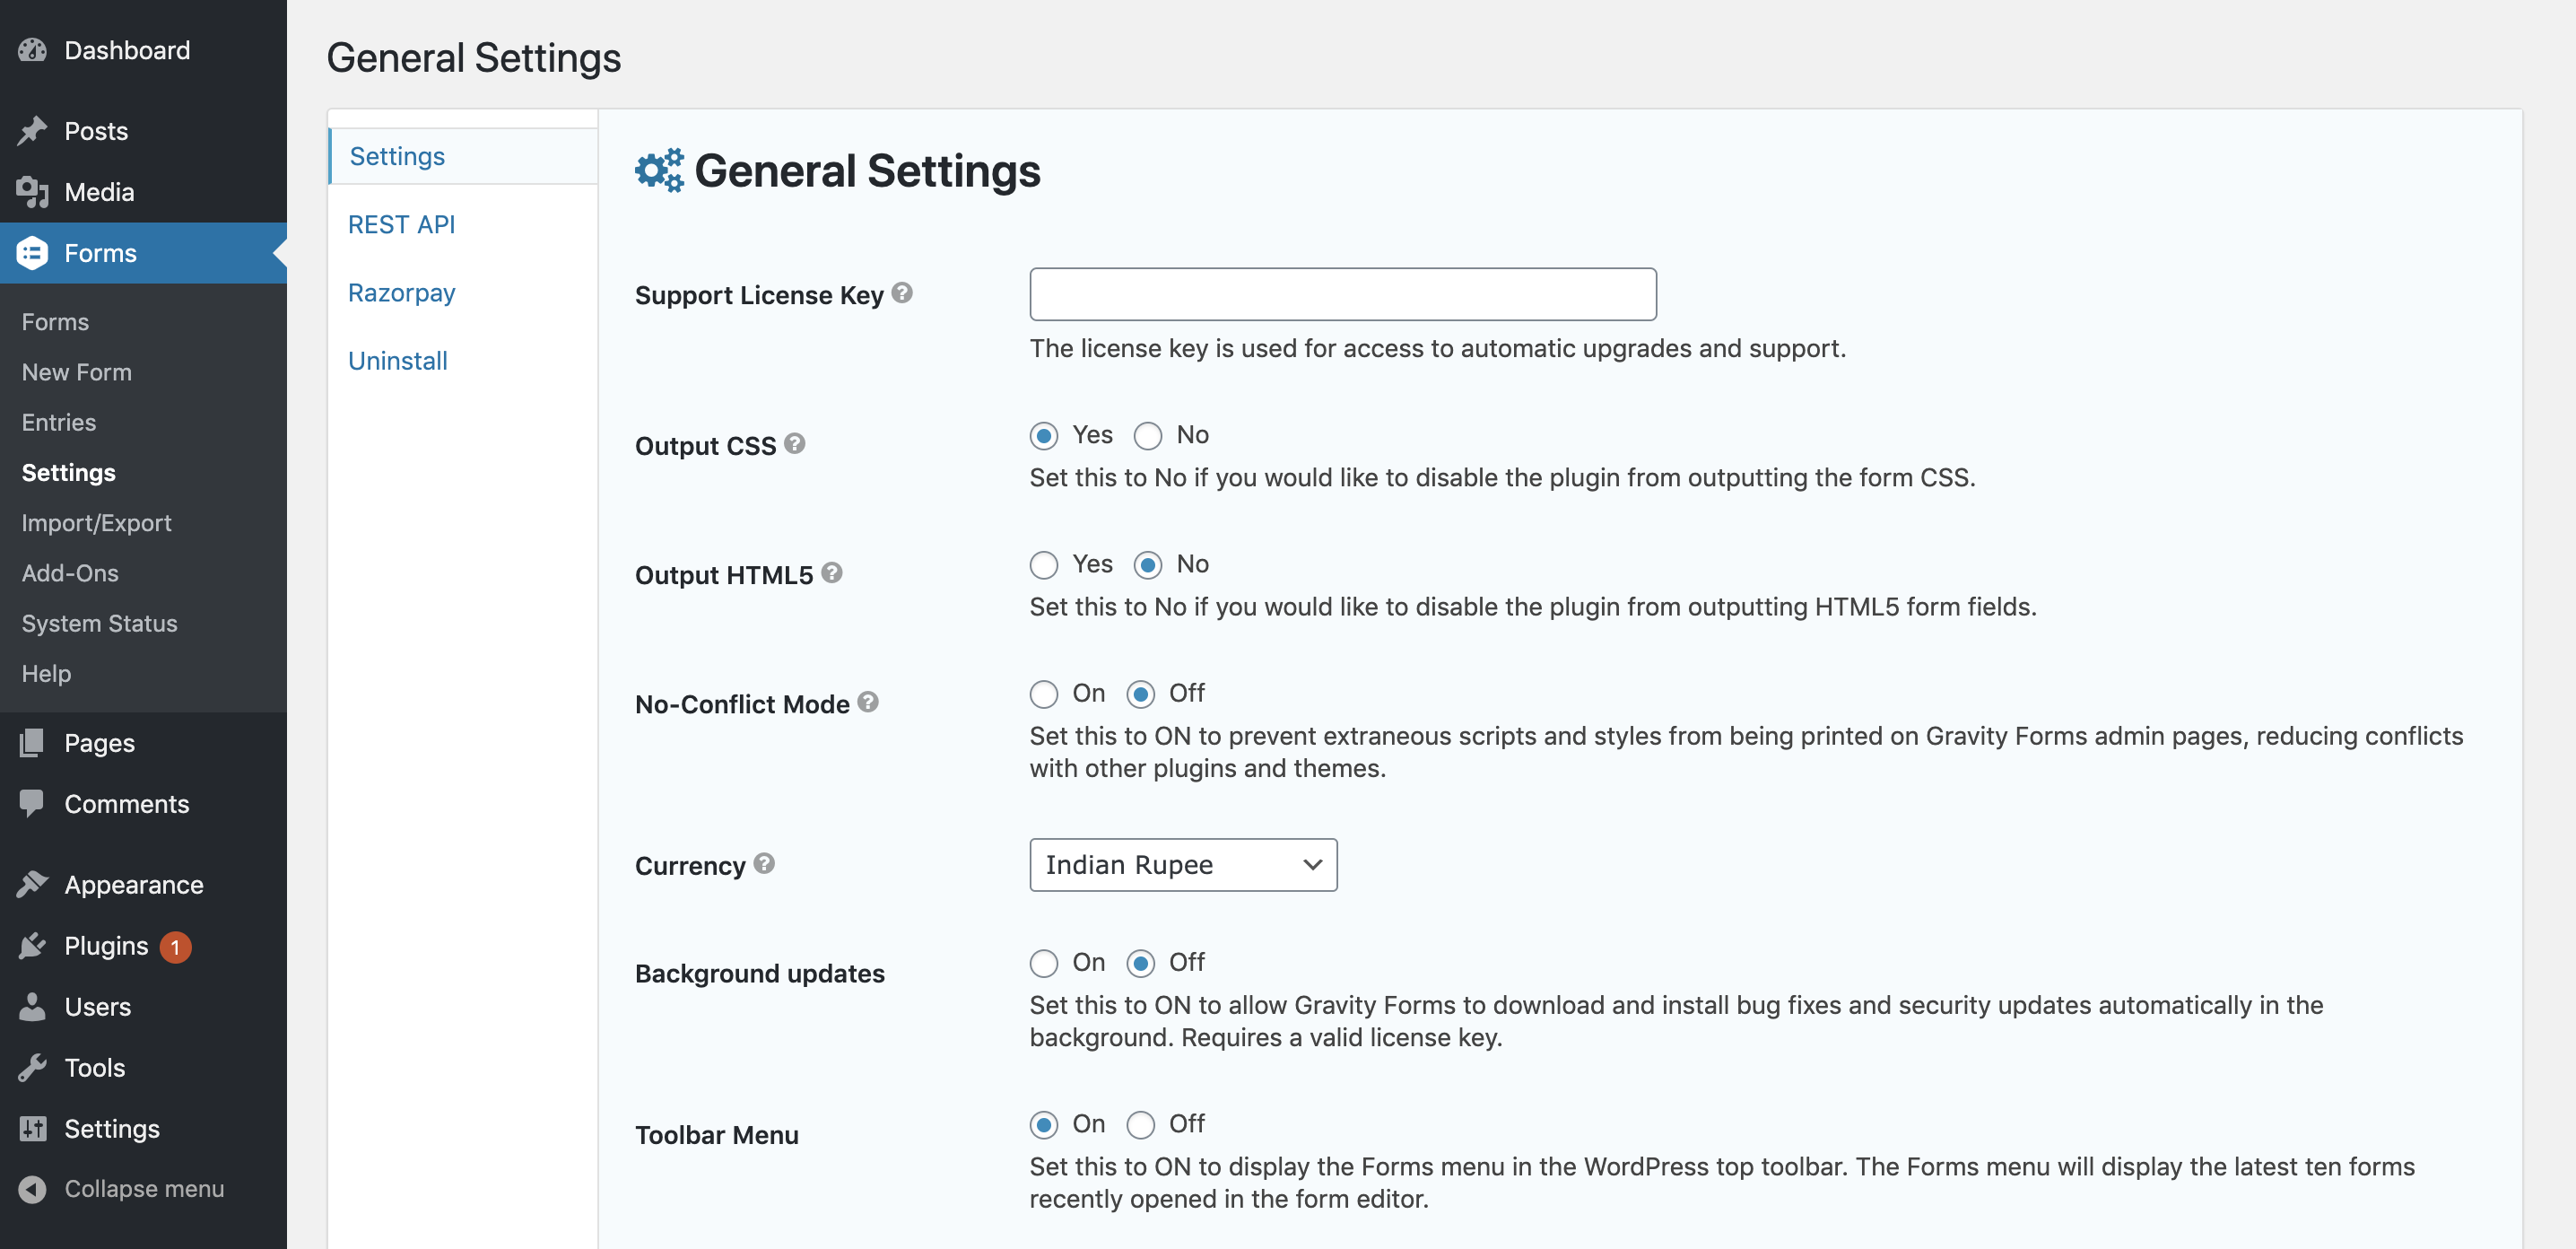
Click Settings.
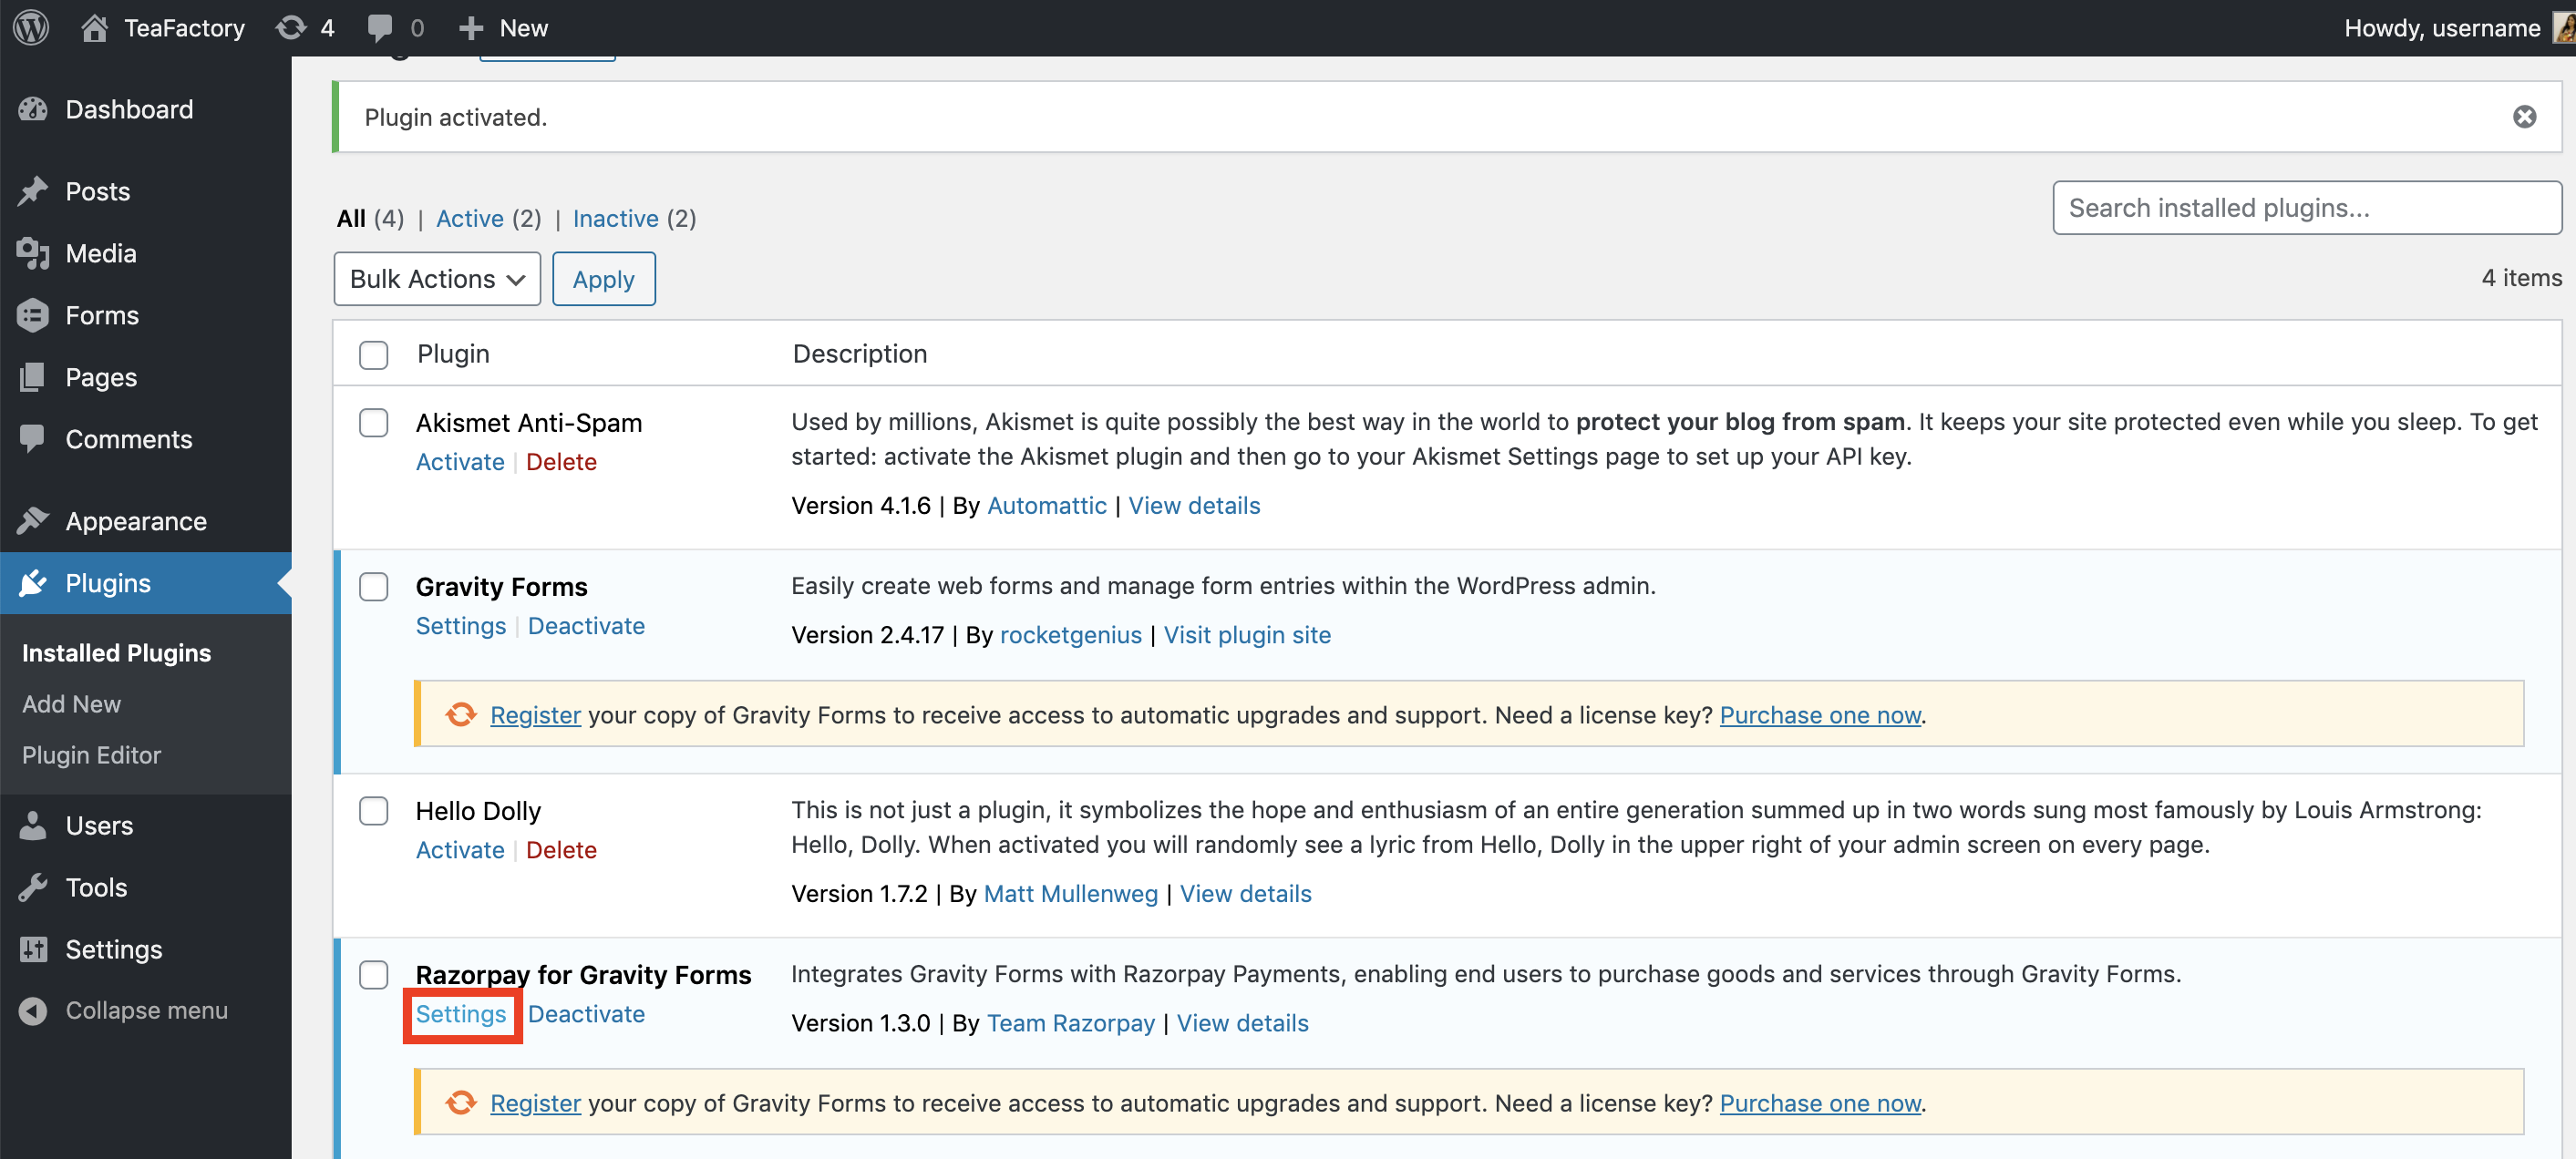
-
Configure the following information and click Update Settings:
- Add in your [KEY_ID] and [KEY_SECRET] generated from the Razorpay Dashboard.
- Payment Action: Set this to Authorize and Capture.
-
Select the currency in which the payment must be accepted.
- Navigate to Forms → Settings.
- Under General Settings, go to the Currency field and choose the relevant currency. For this example, we will select Indian Rupee.
Step 2: Create a Gravity Form🔗
To create a Gravity Form:
-
Navigate to Forms → New Form and click Add New.
-
On the Create a New Form dialog box, enter the form title and description.
-
Click Create Form.
-
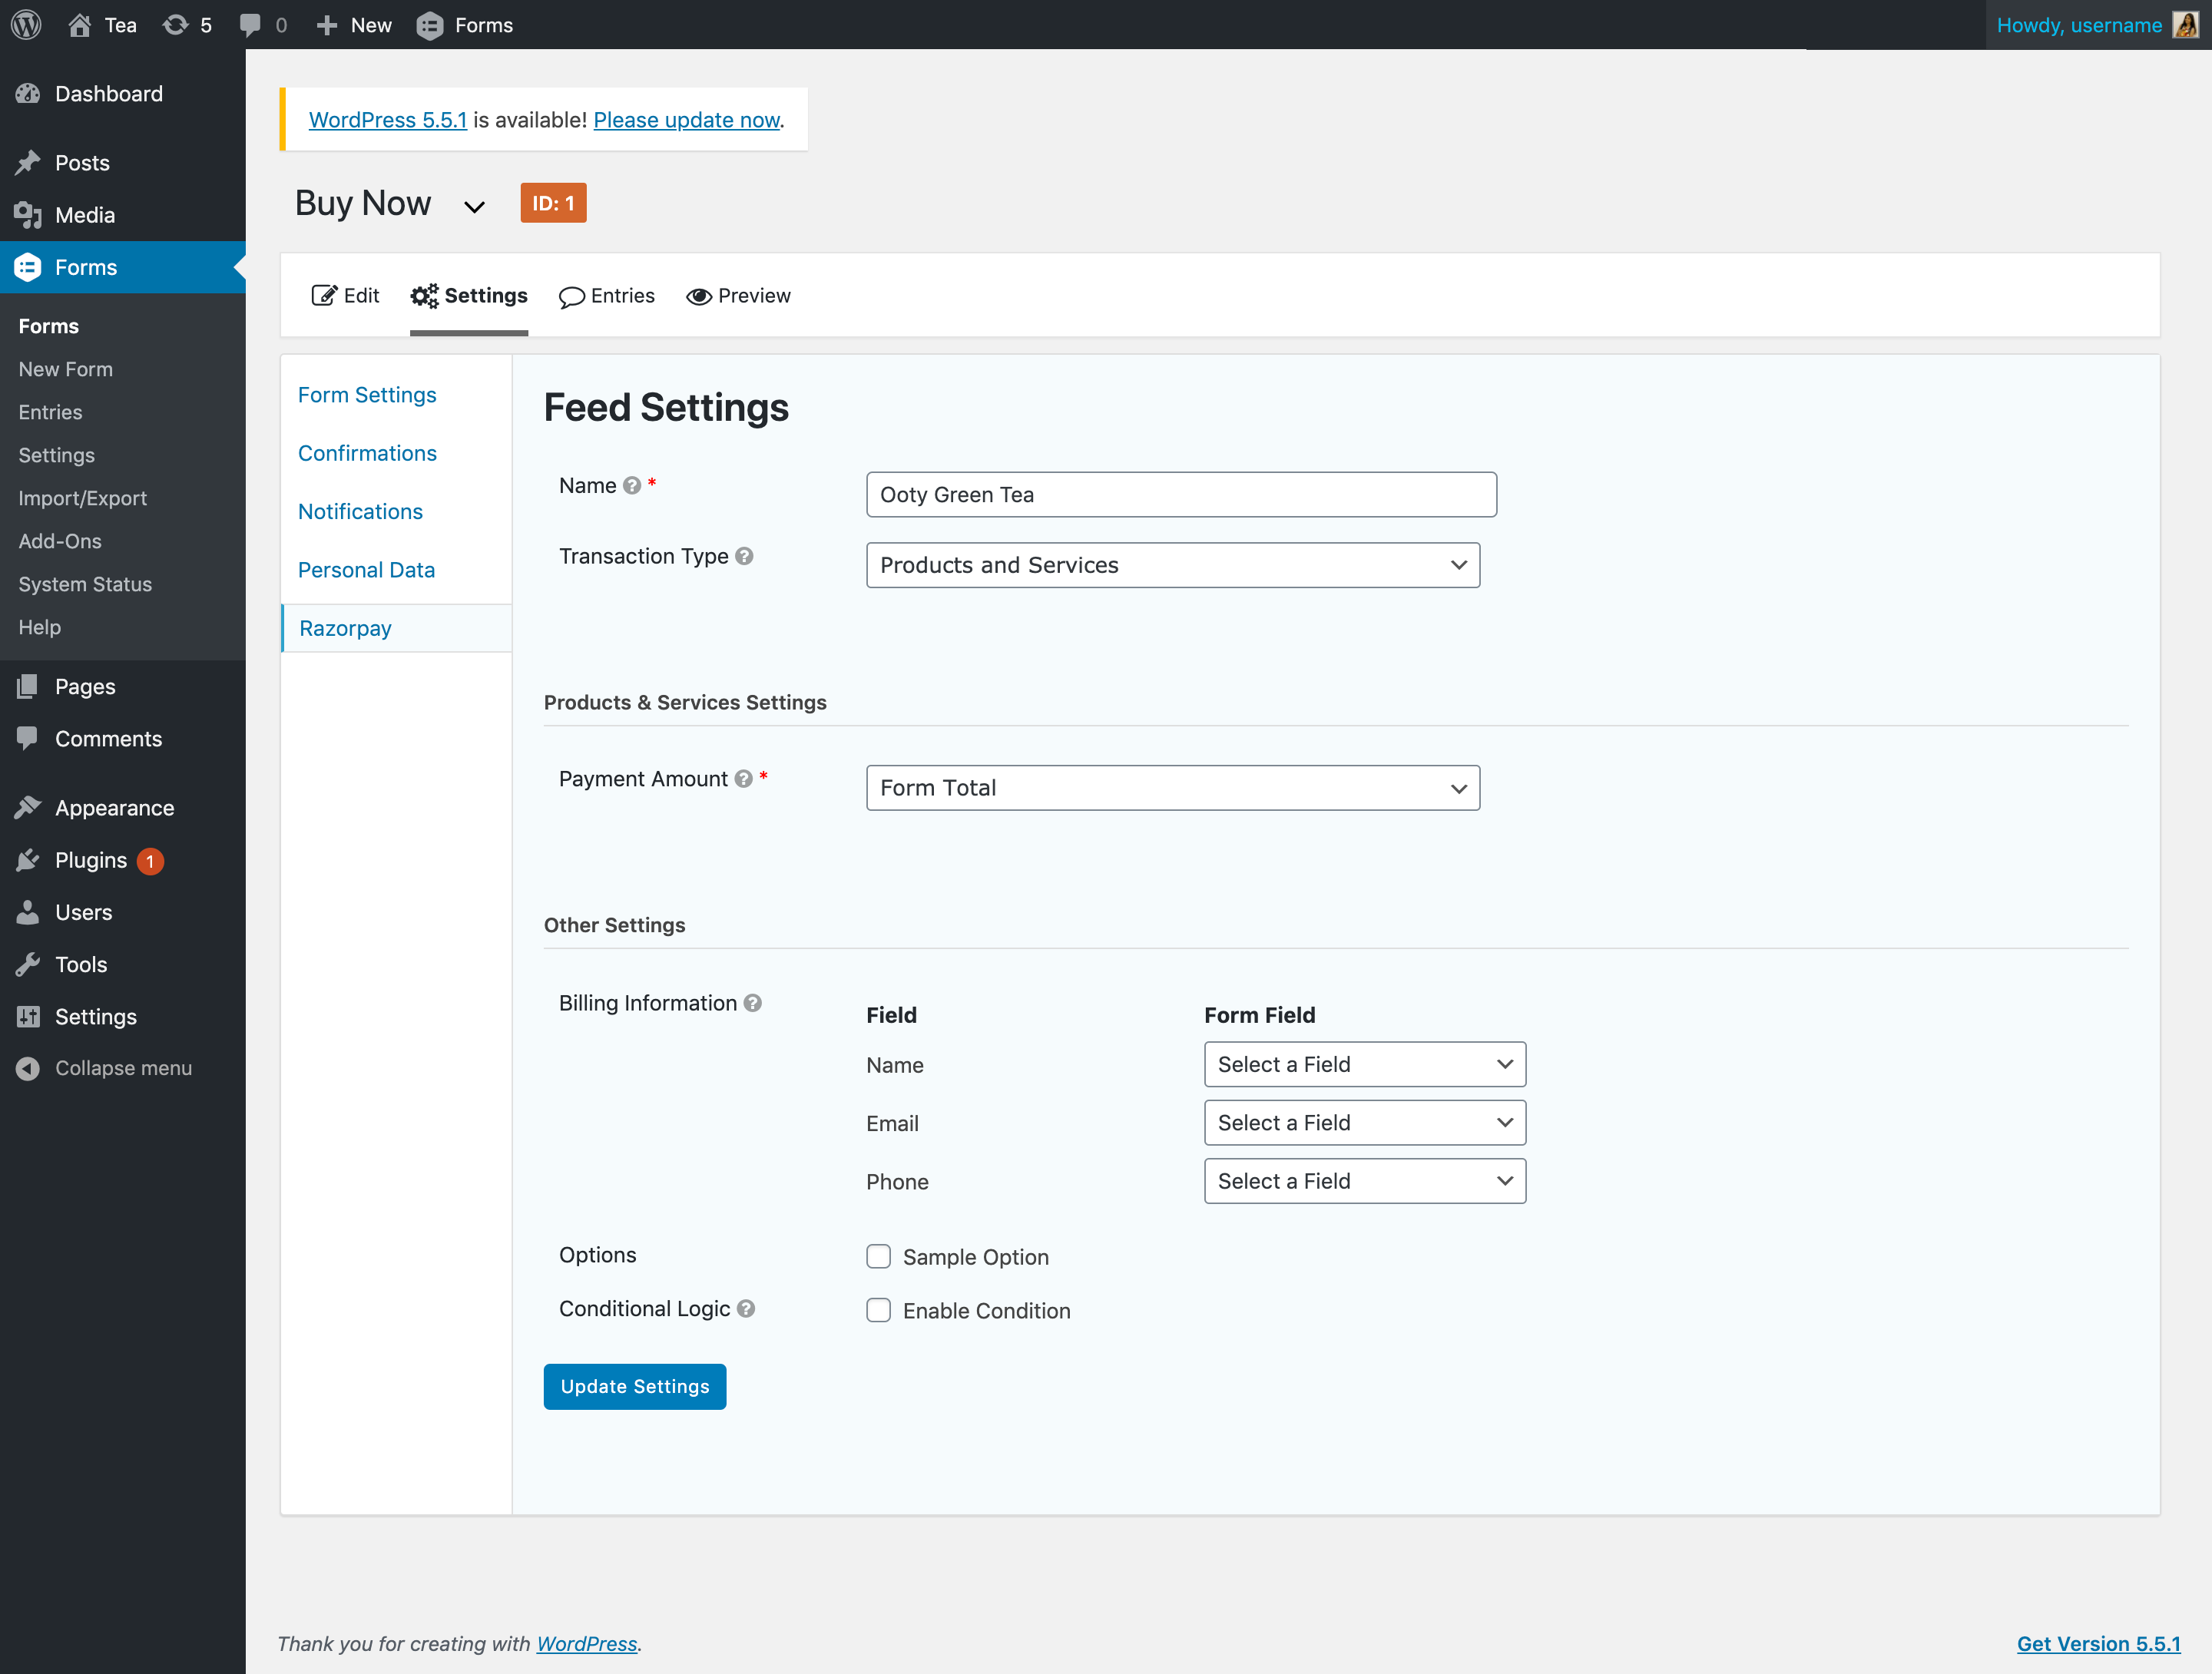
Before entering the product details, you must select whether you are selling a subscription or a product/service. Navigate to Settings → Razorpay and configure the Razorpay Feed.
- In the Razorpay Feed settings, click Add New.
- Add a name for the feed. For example,
Ooty Green Tea. - Select
Products and Servicesas the Transaction Type. - Click Update Settings.
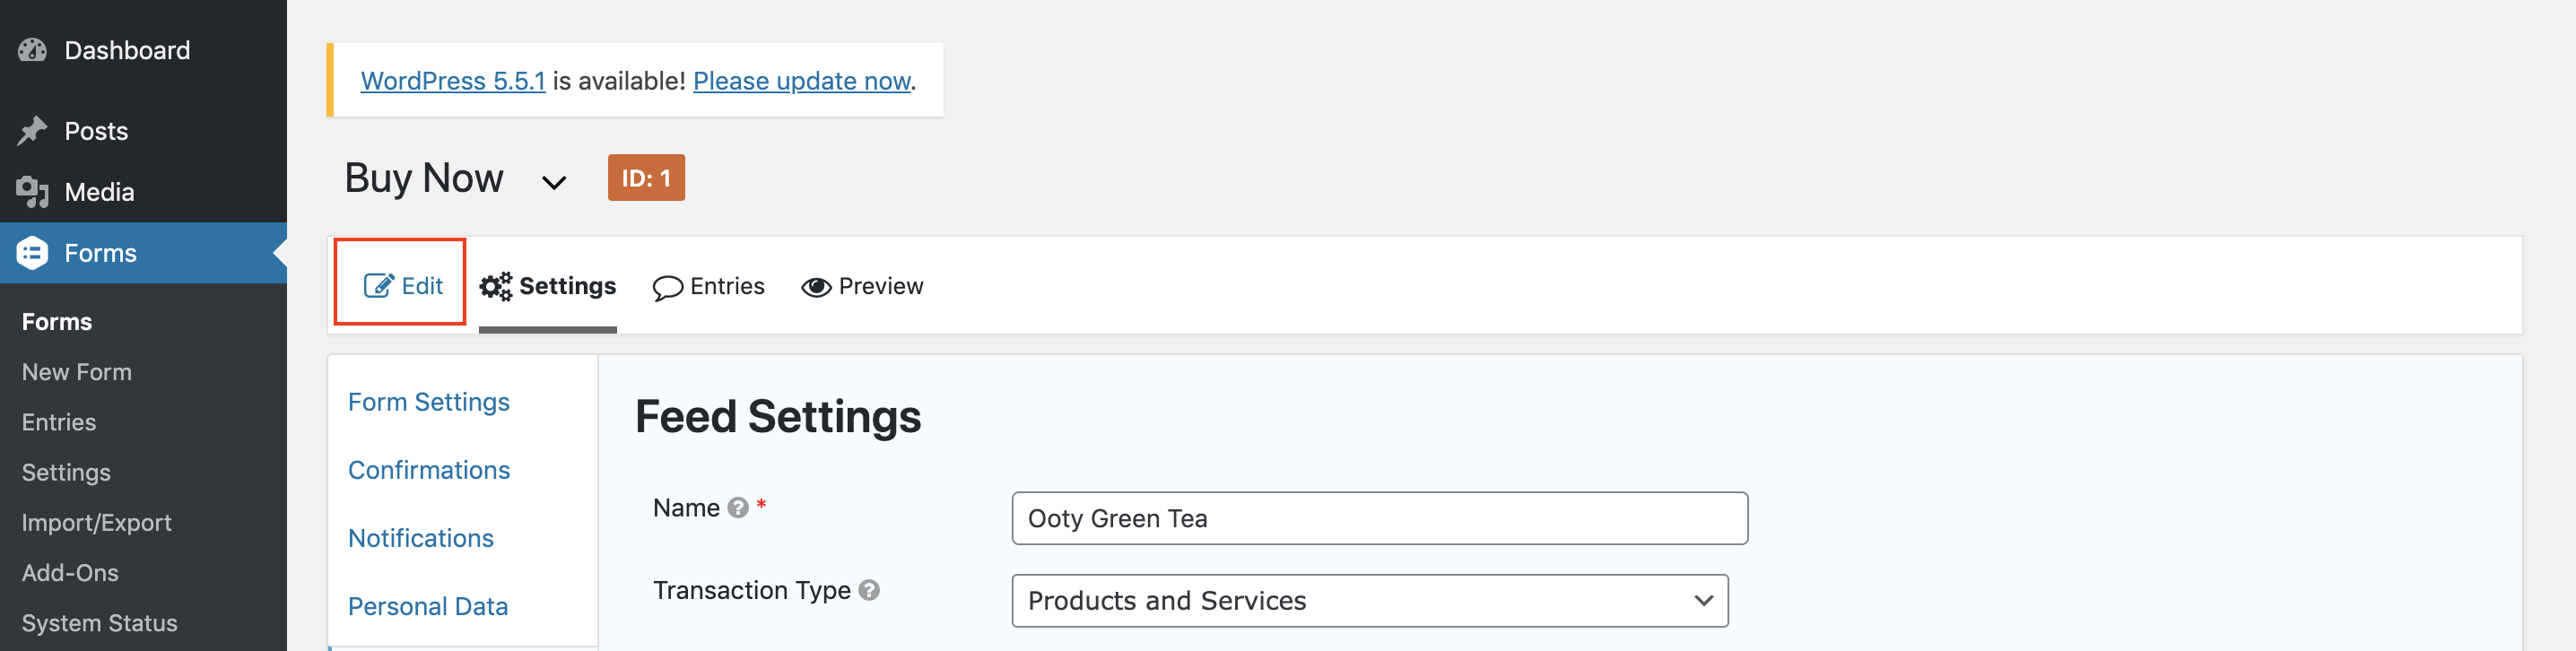
-
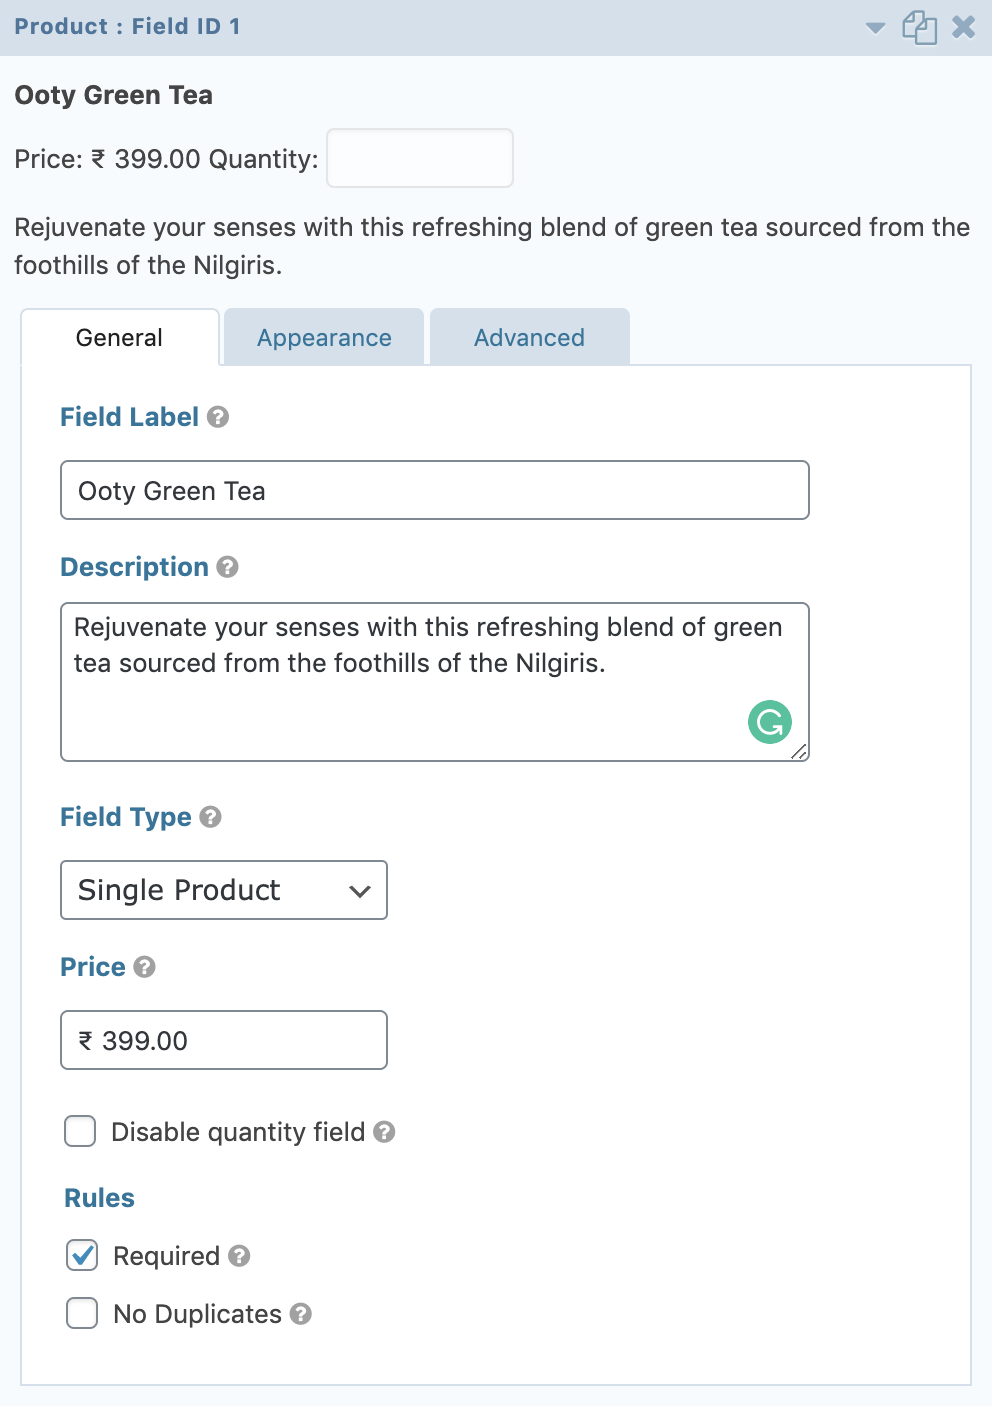
Click Edit to start adding product details:
-
Click Pricing Fields and select Product.
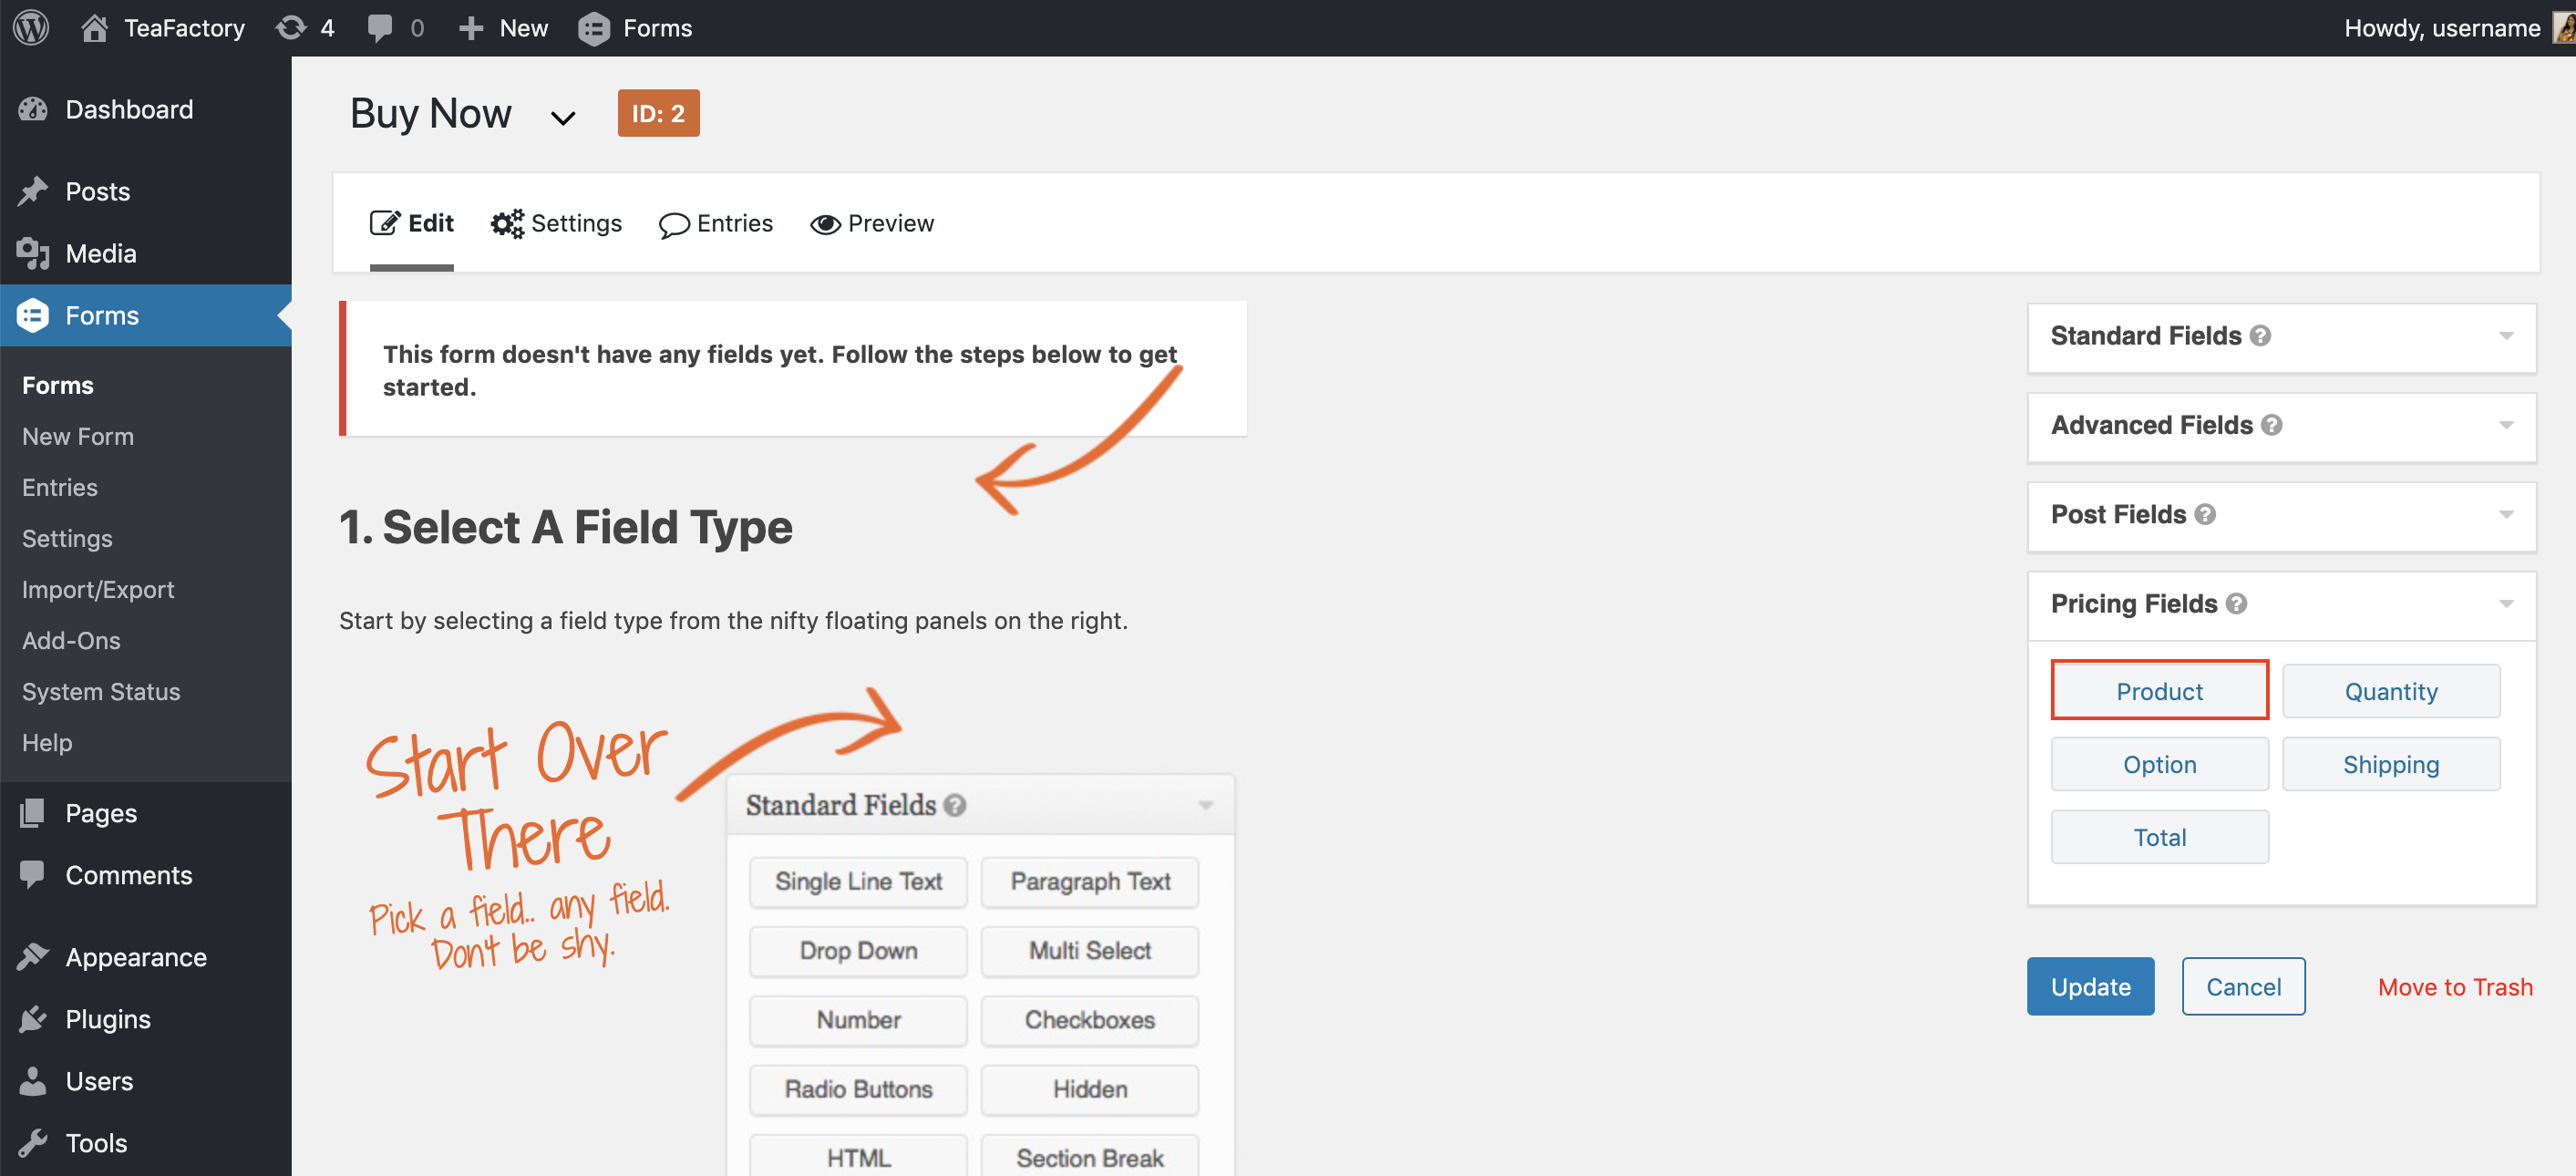
-
Click the form to enter the product details and click Update.
- Field Label: Enter the product name. For example,
Ooty Green Tea. - Description: Enter a description for the product.
- Field Type: Select field type as required.
- Price: Enter the product price in INR. For example,
399.99. - Disable Quantity Field: Do not select this option if you want your customer to select a quantity.
- Rules: Enable the Required check box to make the quantity field mandatory.
- Field Label: Enter the product name. For example,
-
The form is now ready to be added to your webpages.
Step 3: Add the Form to a Webpage🔗
To add the form on a webpage:
-
Click Pages to navigate to the relevant page.
-
Add a block and click the form icon.
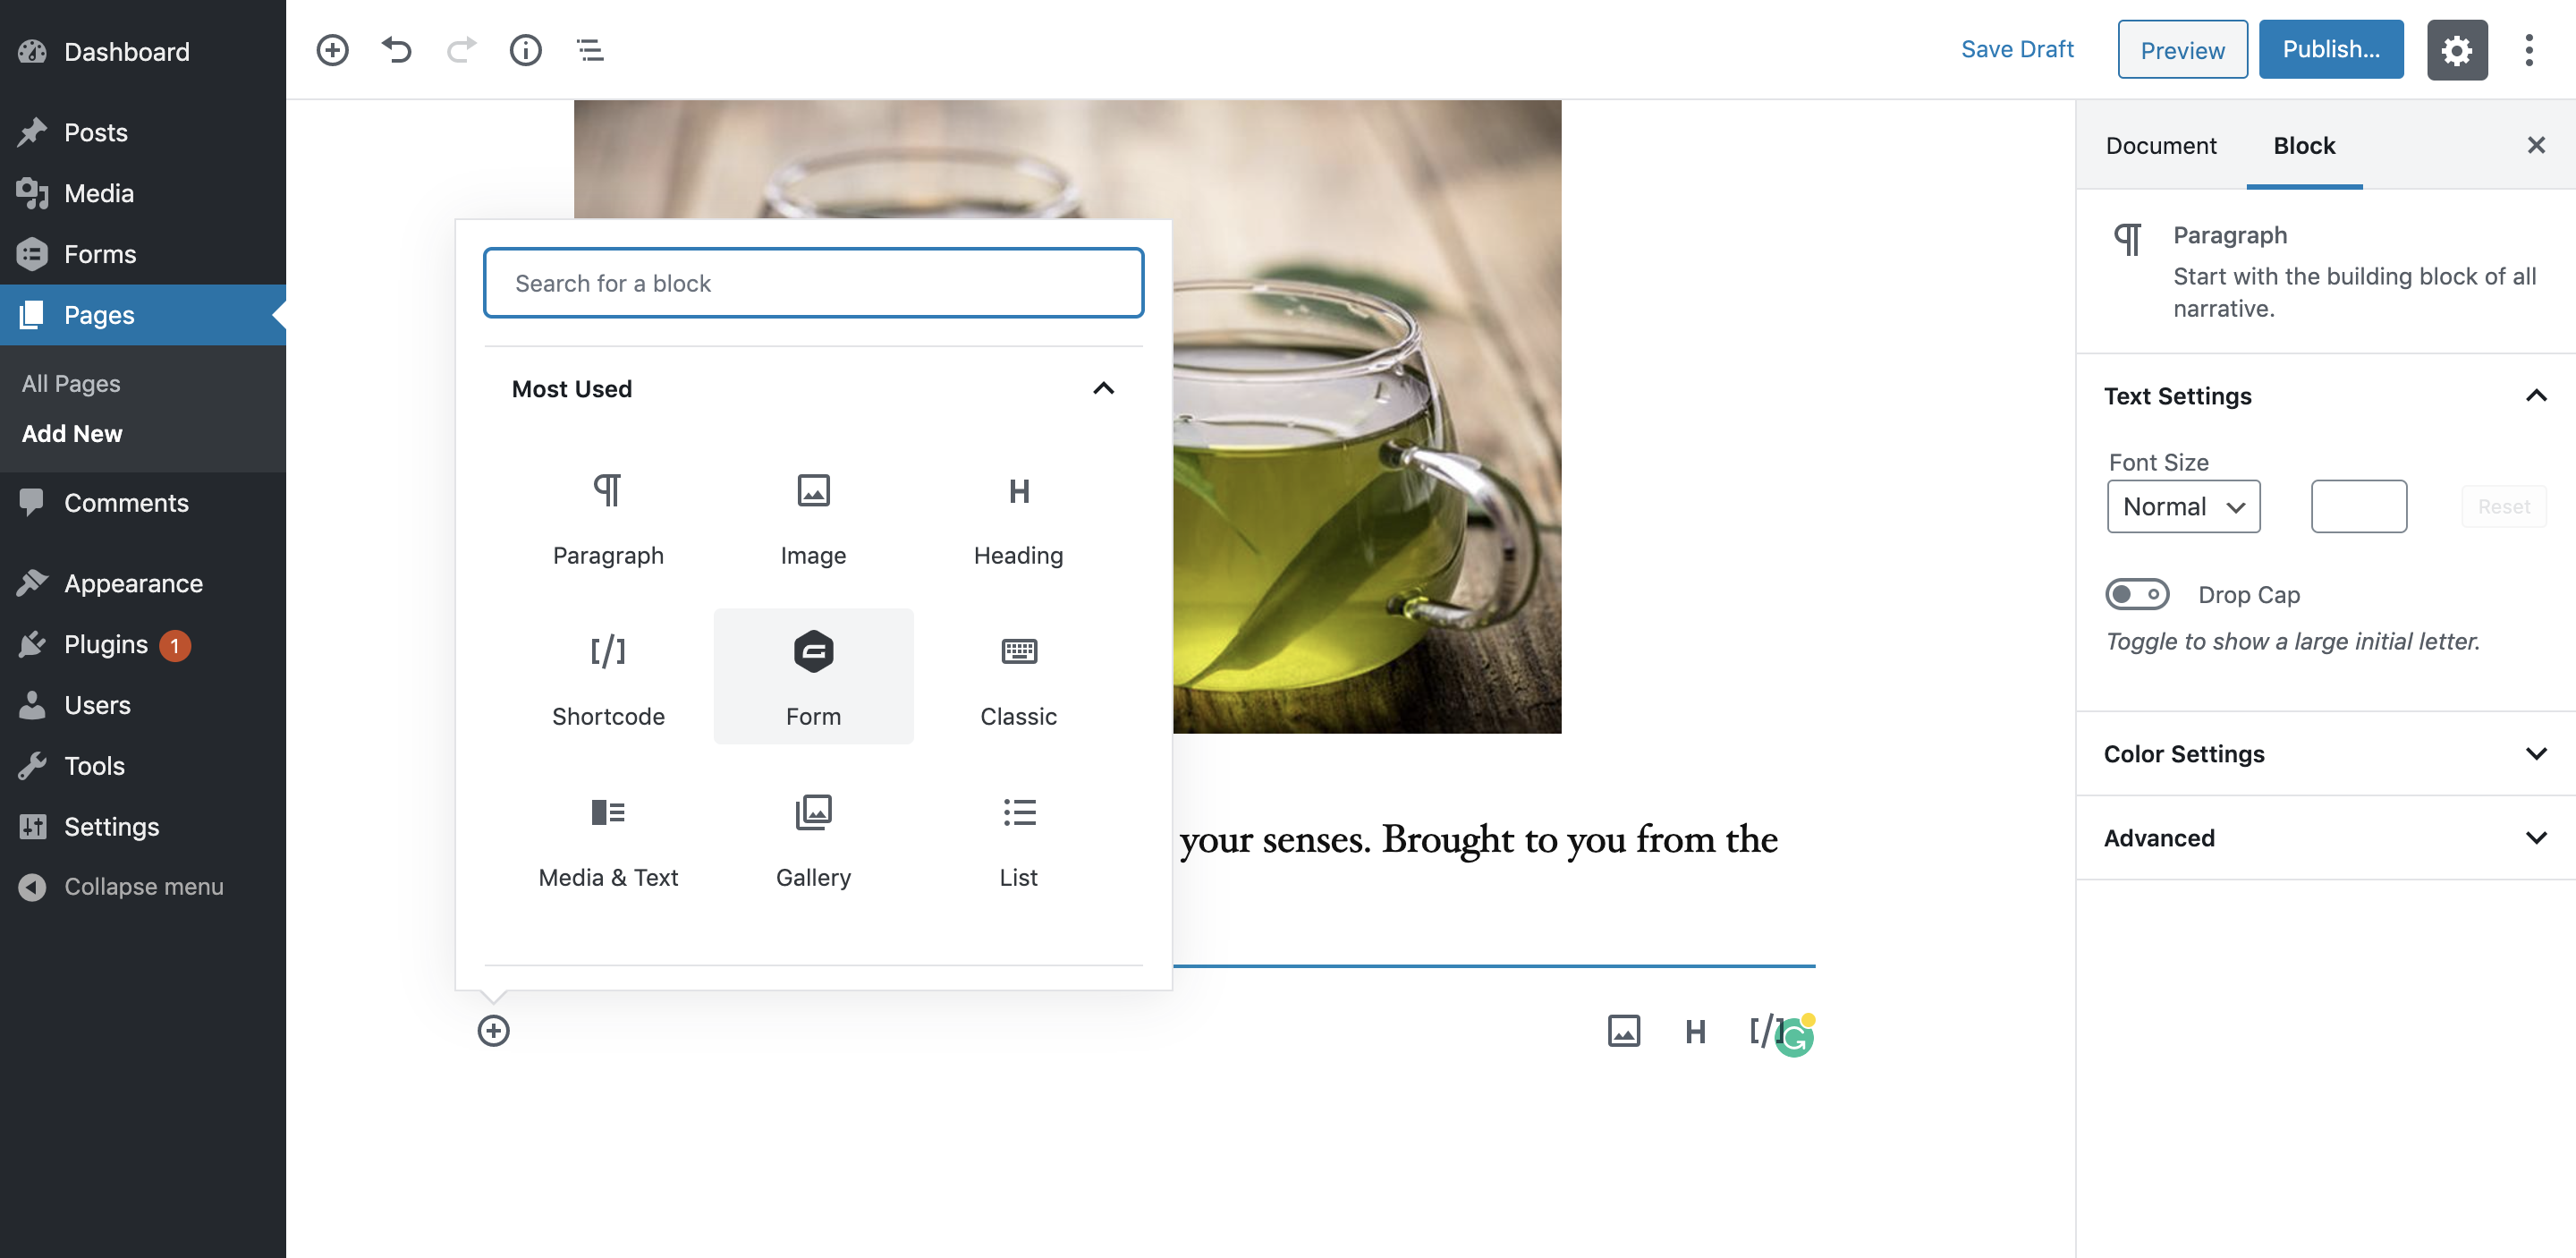
-
Select the form to be added to the page.
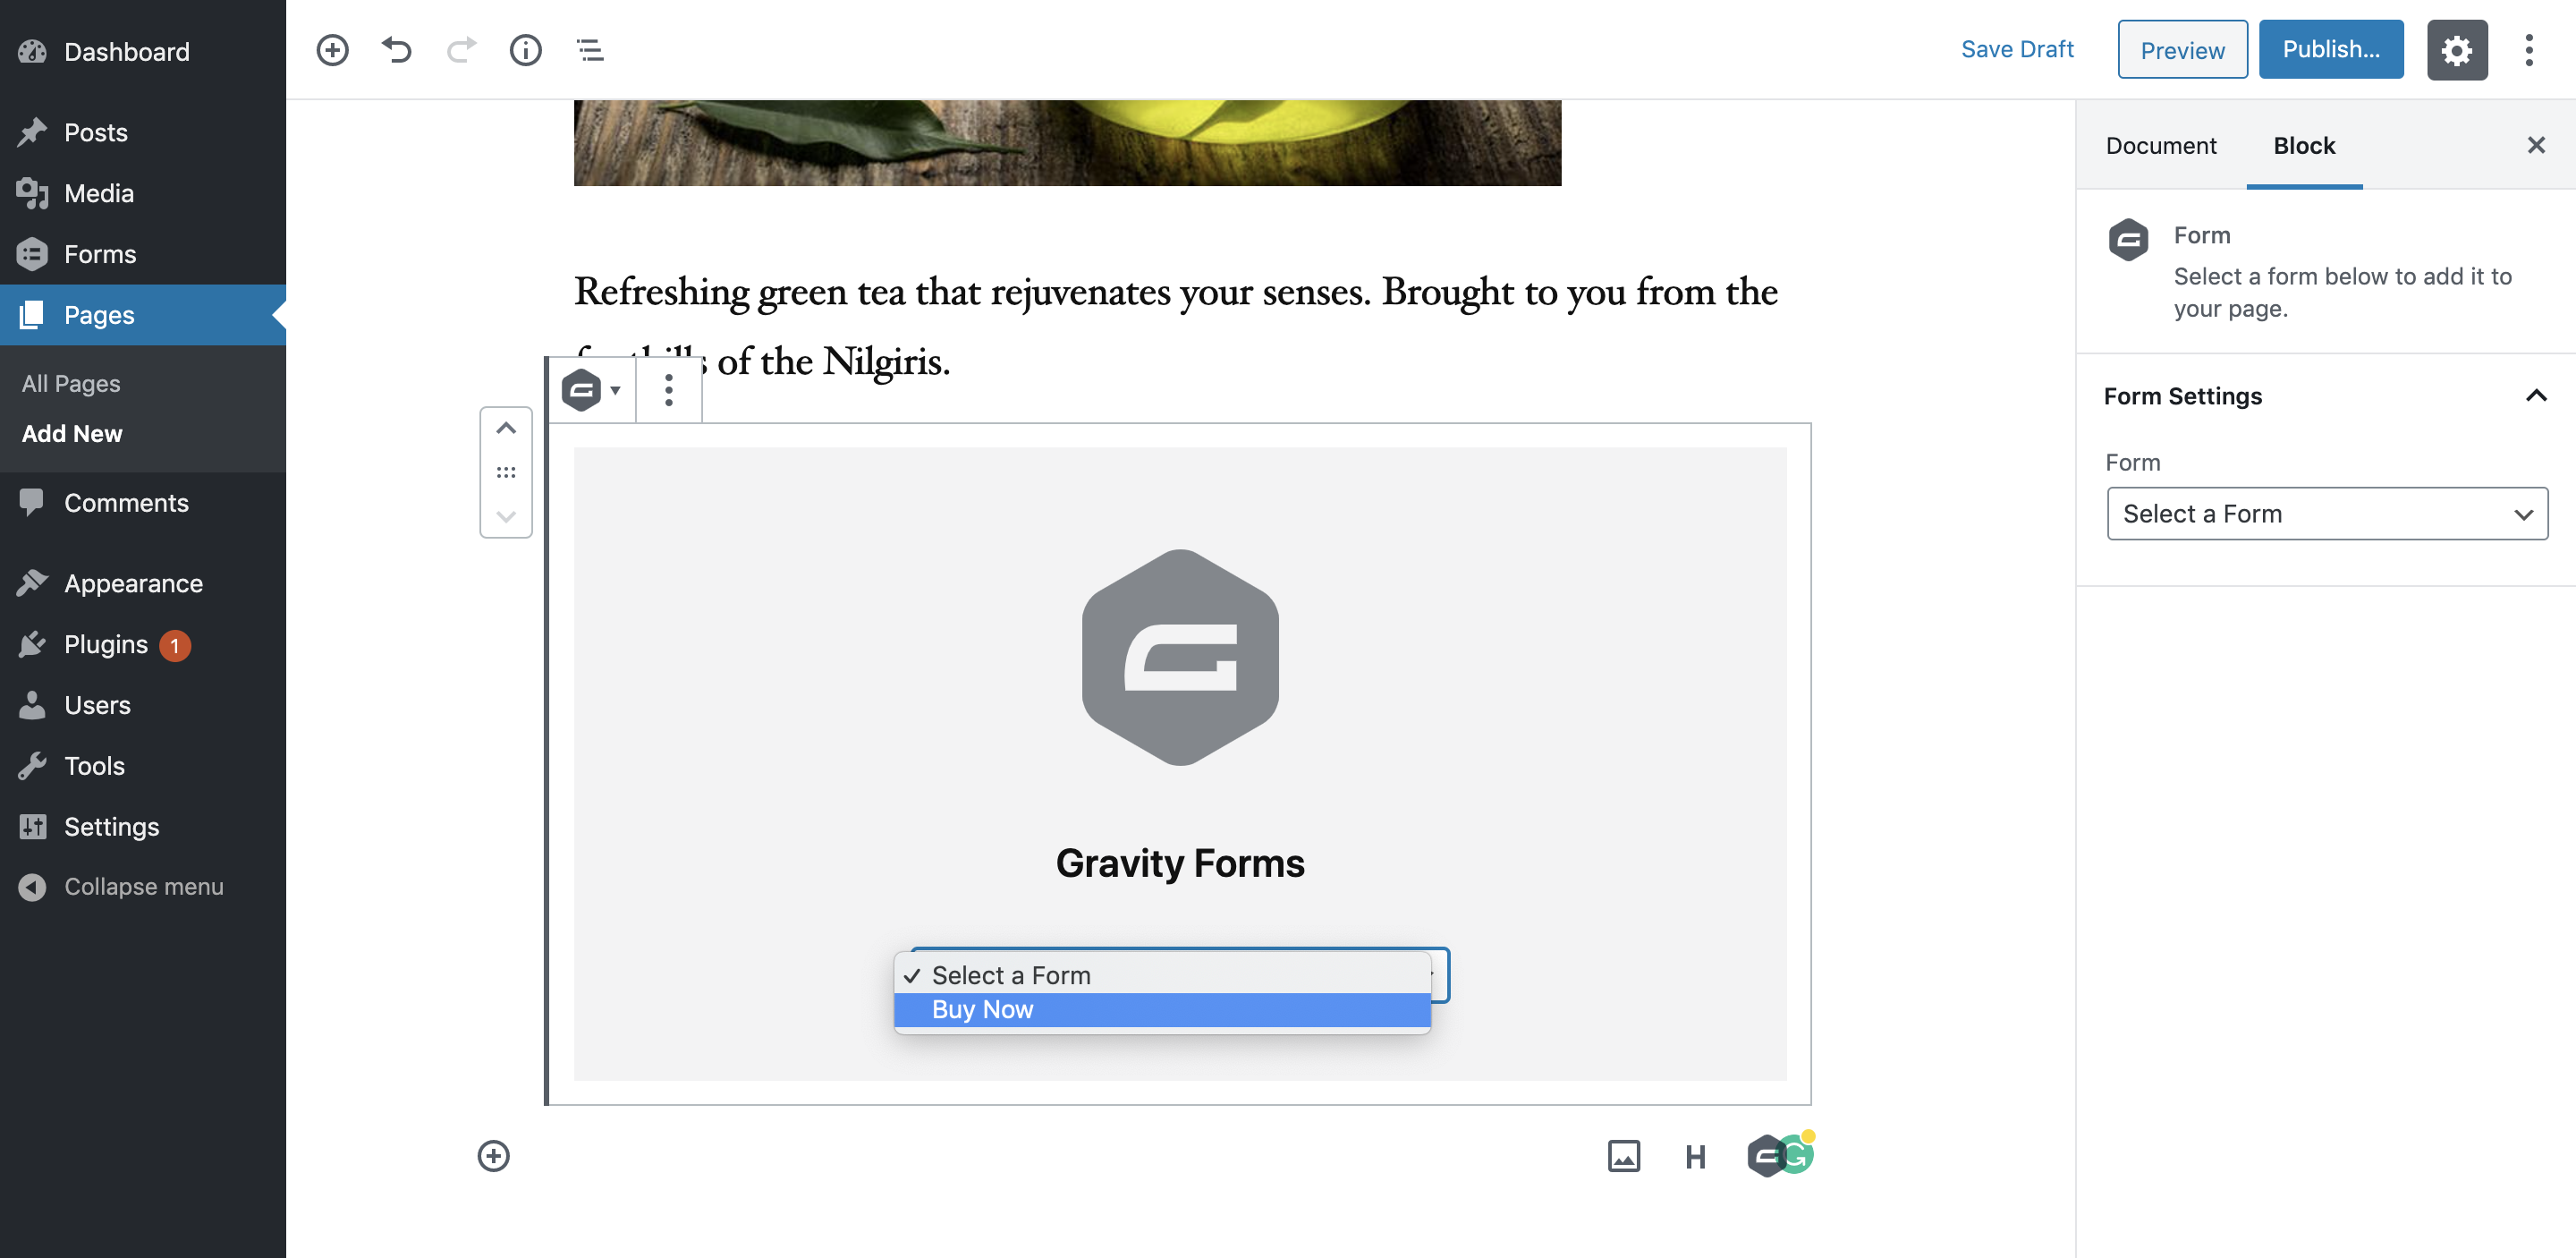
-
Once the form is added, you can choose to hide the form title and description.
-
Click Publish or Update.
Handy Tips
Webhook is auto-configured when you enter and save the API key ID and secret on the plugin settings page. You need to verify if webhooks are enabled on your Razorpay Dashboard. However, for versions lower than 1.3.2, you need to configure webhooks manually.