Ecommerce Plugins
Build Integration
1. Build Integration
Follow the step-by-step guide on how to integrate the Razorpay Payment Gateway with your Magento 1.x and 2.x Extensions.
Follow the steps given below to integrate Razorpay Payment Gateway with your Magento 1.x and 2.x Extensions.
- Download and Install via Repository.
- Configure Magento Store 1.x.
-
Download the Razorpay-1.1.31.tgz file from the latest release.
-
If you have Onepage Checkout (IWD or Fire Checkout), download the Source Code zip from the latest release. With Onepage Checkout you can gather the required information from the shopper and complete the checkout process quickly. When Onepage Checkout is enabled, the entire checkout process takes place on a single page.
- Go to Magento Connect Manager.
- Go to
Direct package file upload.
- Click on
Choose File and select the tgz file from Step 1.
- Click on
upload.
- Unzip and open the downloaded folder.
- Copy the app folder.
- Paste and merge it into the Magento root folder.
- Copy the js folder.
- Paste and merge it into the Magento root folder.
Once installed, navigate to Configuration and then to Payment Gateways and configure the extension to suit your needs.
To configure your Magento store for Razorpay:
-
Log into your Magento store.
-
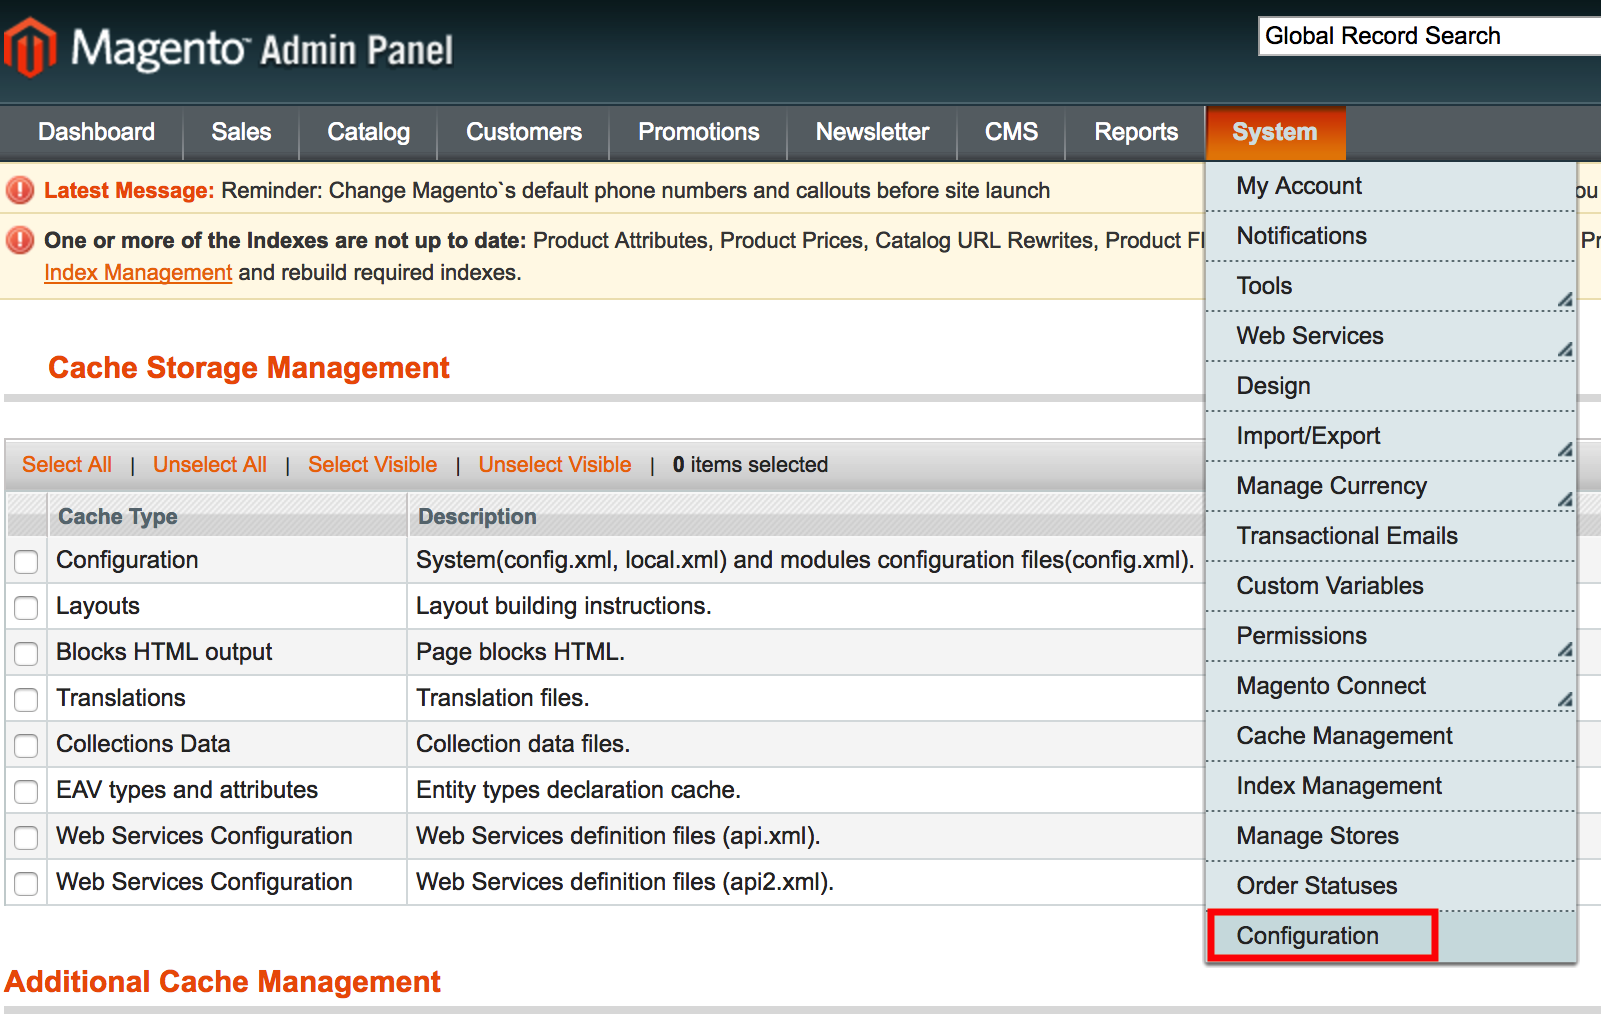
Click on the System tab and then select Configuration option from the drop-down list.
-
Click Payment Methods in the menu panel.
-
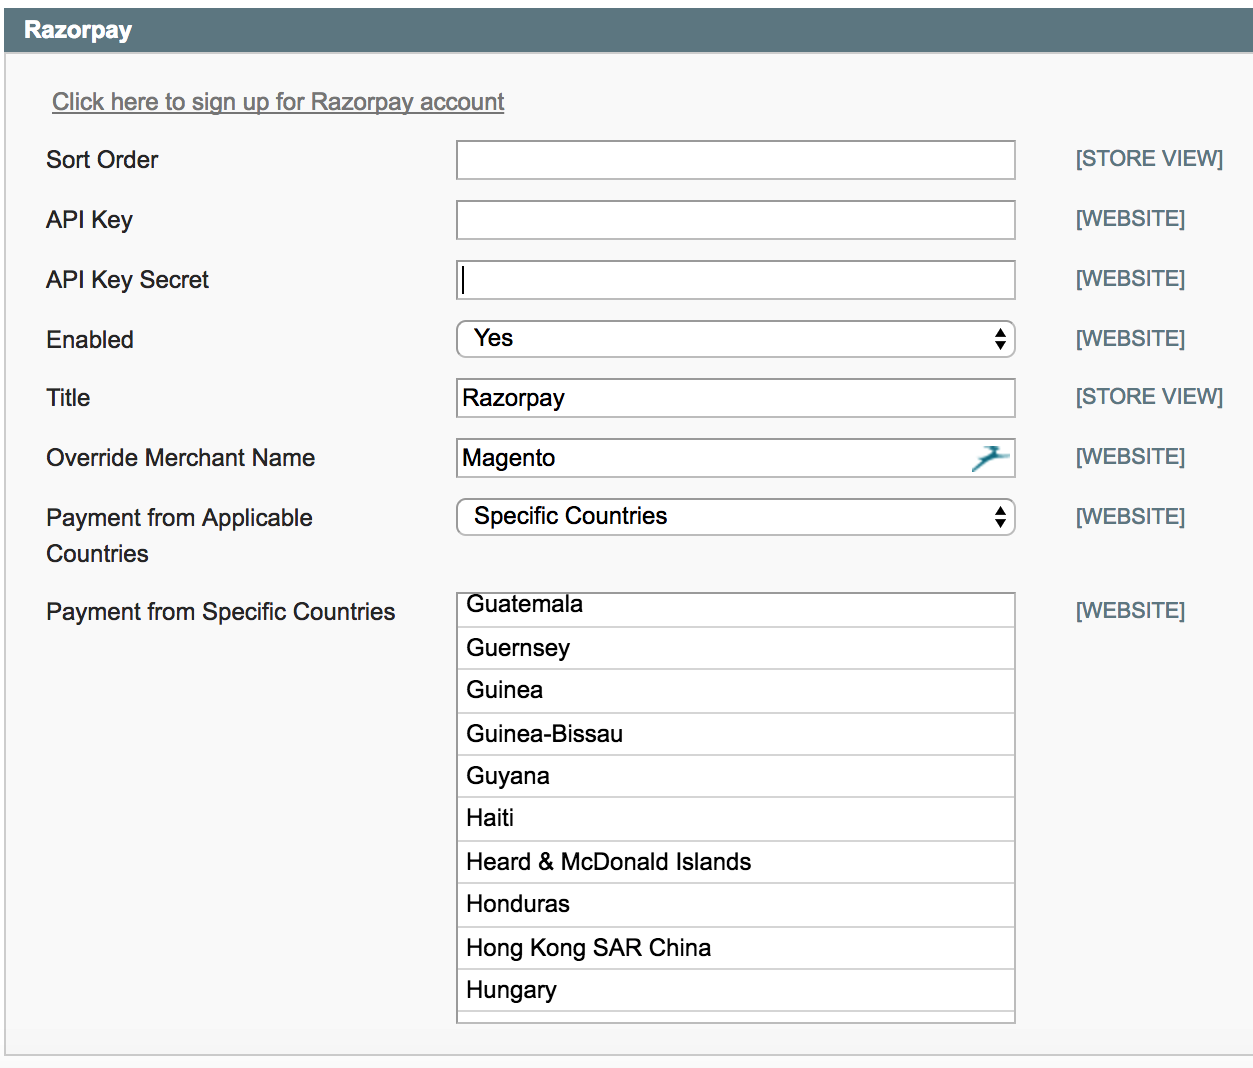
Scroll down. Click Razorpay, and enter your test mode [KEY_ID] and <KEY_SECRET>.
-
Select Yes for the Enabled option.
-
Click Save Config button. This activates your account in the Test Mode. You can use this account to make a few test payments to ensure a successful workflow.
Handy Tips
In test mode, no real money is deducted from your account.
- Download and Install Extension.
- Configure Magento Store 2.x.
- Set Up Webhooks.
-
Install the extension on your Magento store using the Composer Package Manager. Composer is an application-level package manager for the PHP programming language that provides a standard format for managing dependencies of PHP software and required libraries.
-
Go to your installation root directory of Magento and execute the following command:
Copycomposer require razorpay/magento
bin/magento module:enable Razorpay_Magento
-
You can check if the installation was successful by executing the following command in the Magento root directory.
Copybin/magento module:status
Handy Tips
You should see Razorpay_Magento in the status. It might appear on the disabled modules list.
-
Enable and deploy the Razorpay module using commands:
Copybin/magento module:enable Razorpay_Magento
bin/magento setup:upgrade
bin/magento setup:static-content:deploy
Upgrade Magento Extension
If you are an existing user of this extension, you can upgrade to the the latest version using composer.
-
Download the code.zip file from the latest release. Extract the zip.
-
Place the code folder from Step 1 in your app folder. If you're performing an update, replace/overwrite the existing code folder.
-
Enable and deploy the Razorpay module using commands:
Copybin/magento module:enable Razorpay_Magento
bin/magento setup:upgrade
-
Import the SQL file (razorpay_sales_order.sql) into your project database.
To configure your Magento store for Razorpay:
-
Log into your Magento store.
-
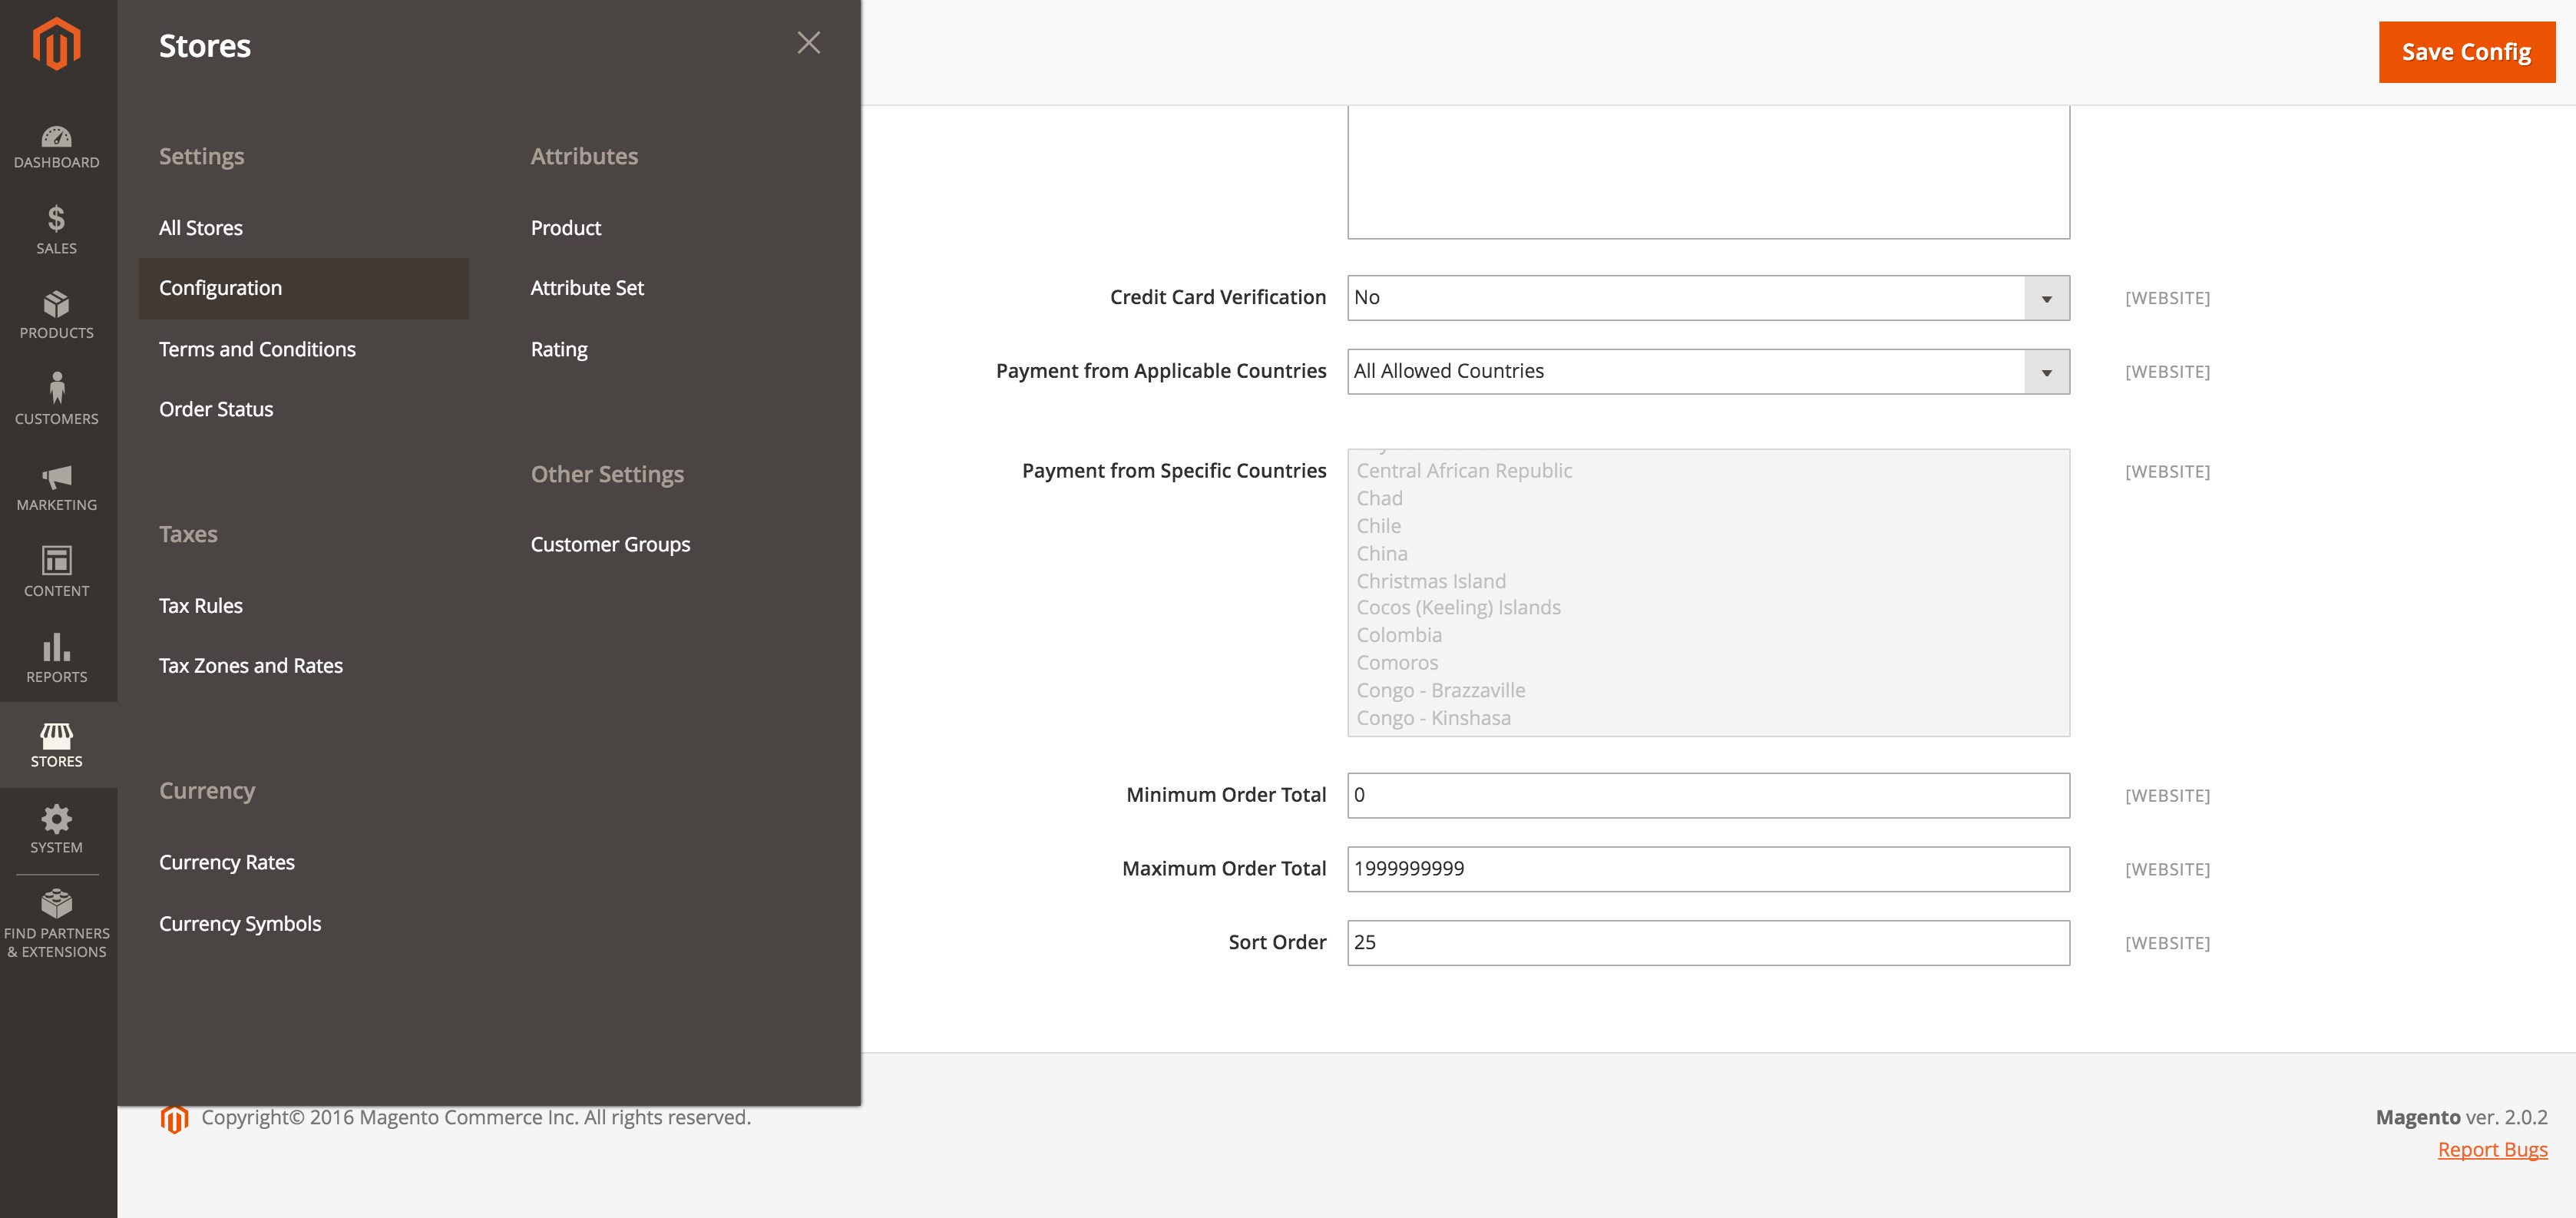
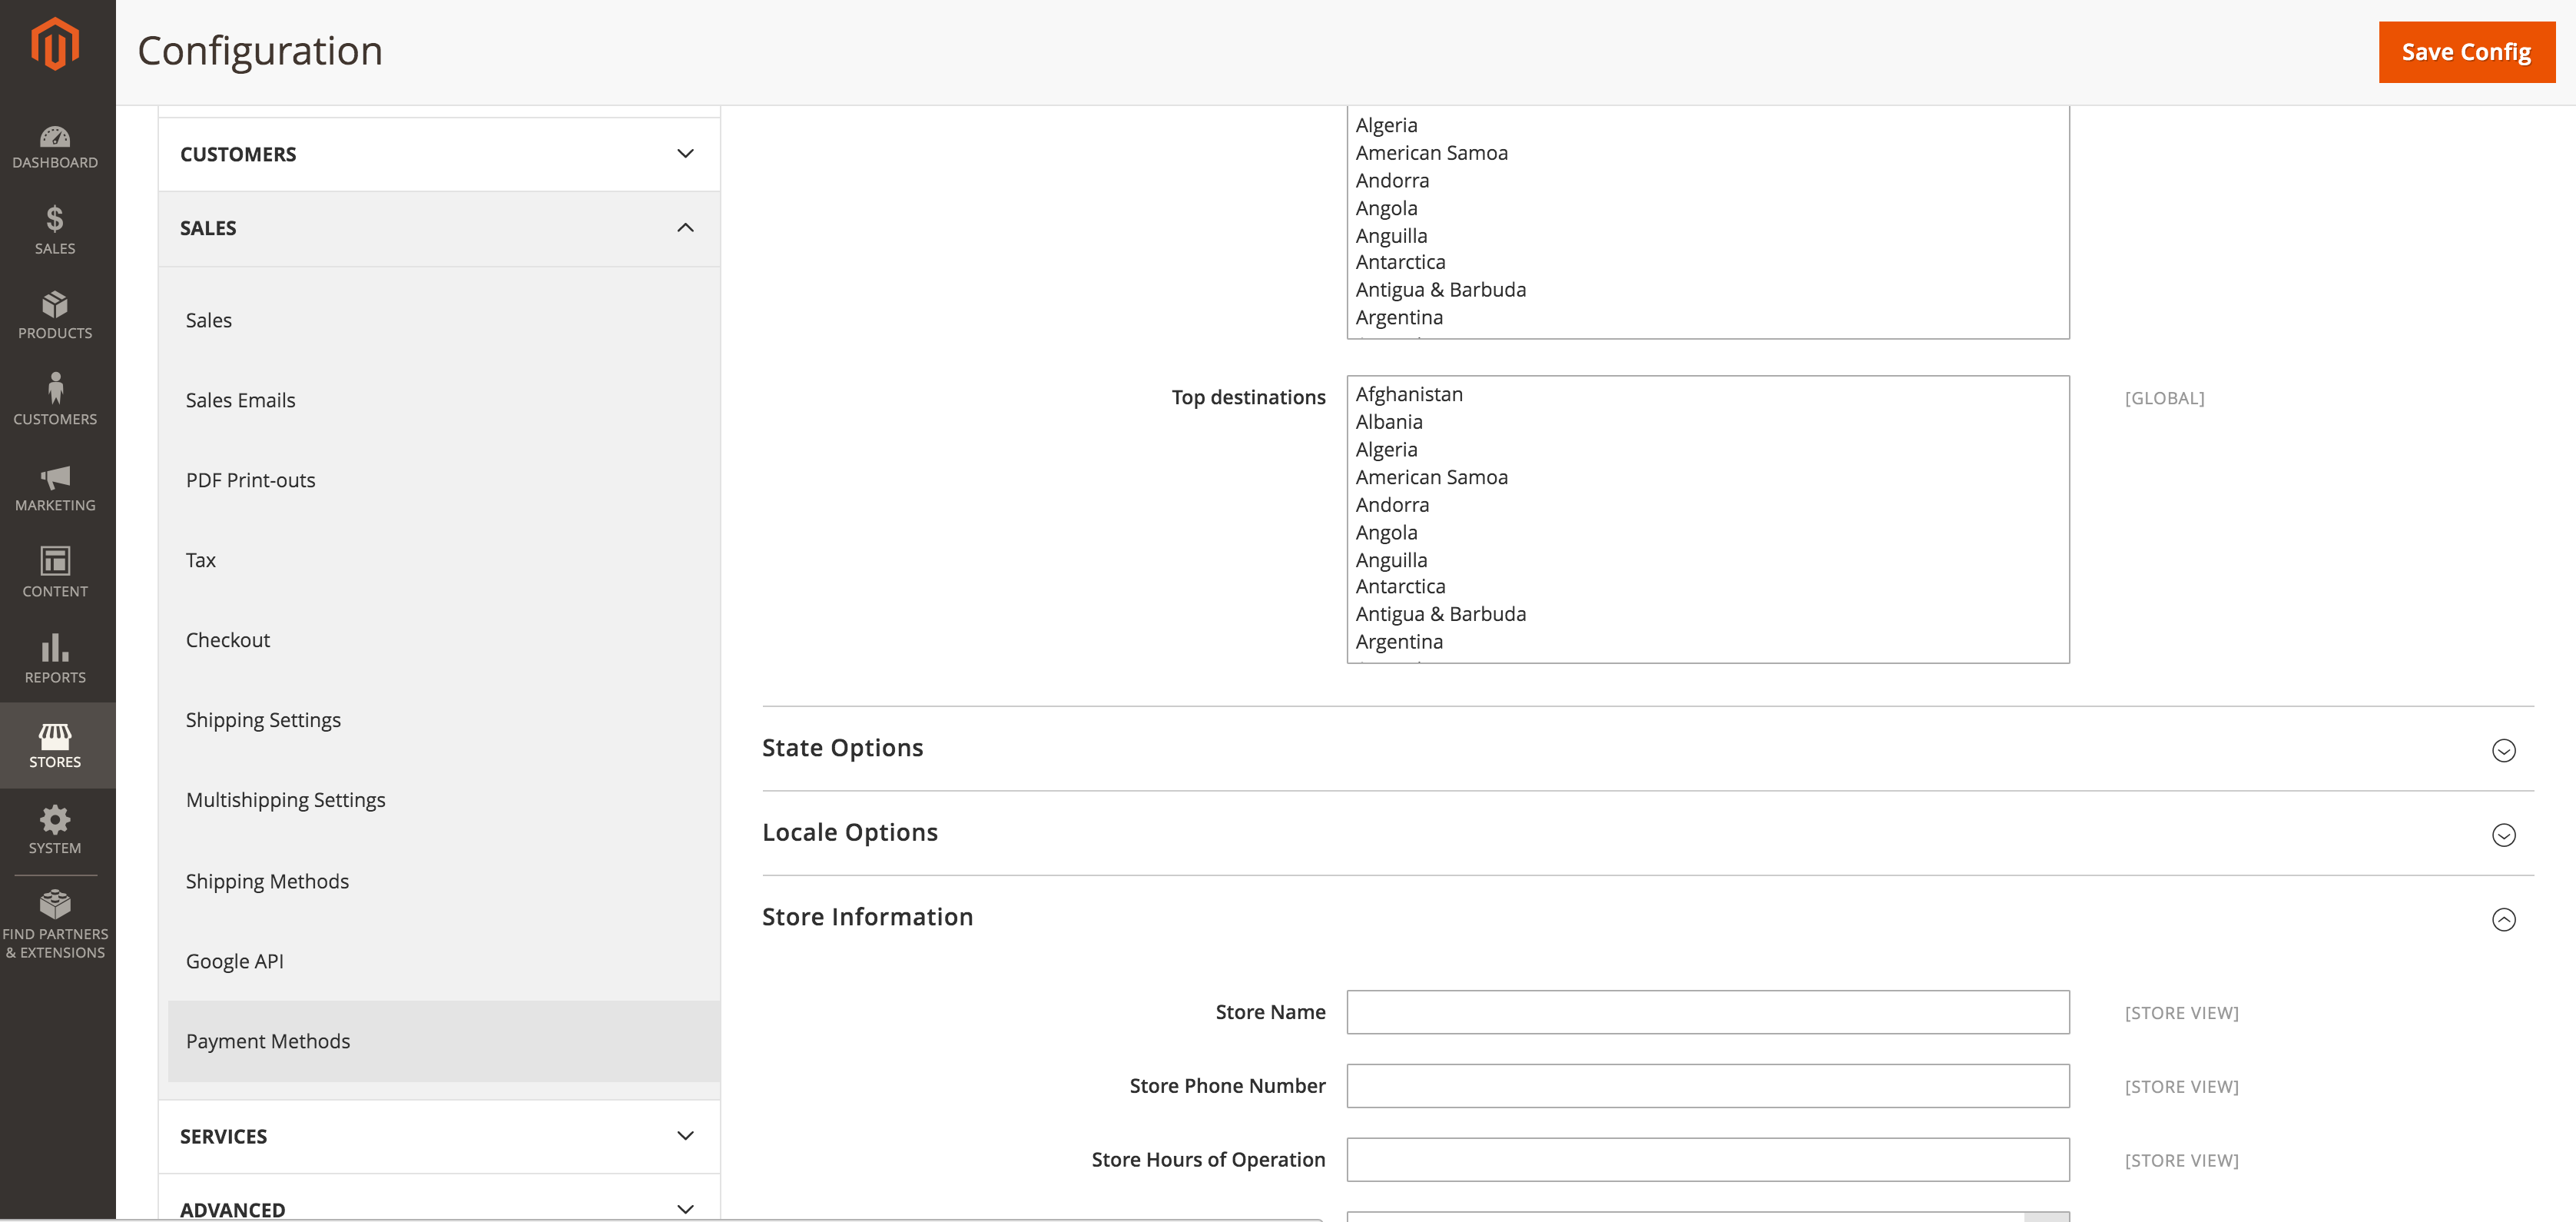
Choose Stores on the Admin sidebar to the left. Now go to Settings > Configuration.
-
In the Configuration page, click on Sales on the left and choose Payment Methods.
-
In the Payment Methods page, navigate to Razorpay.
-
Enter your test mode [KEY_ID] and [KEY_SECRET]. These can be generated from your Dashboard.
-
Select Yes for the option Enabled.
-
Click Save Config. This activates your account in the Test Mode. You can use this account to make a few test payments to ensure a successful workflow.
Handy Tips
In test mode, no real money is deducted from your account.
Webhooks are triggered when certain events occur. Subscribe to webhook events to receive notification (in the form of a webhook payload) when these events occur.
Setting up webhooks makes your integration more robust, and guards against issues arising from poor connectivity. The webhook URL is available on the plugin's settings page. You must copy it from there and use it to set up webhook on the Razorpay Dashboard.
Handy Tips
If you are using Magento plugin version 3.4.1, ensure the webhook delay is set to a minimum 300 seconds.
To set up webhooks in the Razorpay Dashboard:
- Log into the Razorpay Dashboard.
- Navigate to Settings → Webhooks.
- Click + Add New Webhook.
- In the Webhook Setup modal:
- Paste the URL copied from the Magento site.
Handy Tips
Webhooks can only be delivered to public URLs. If you attempt to save a localhost endpoint as part of a webhook set-up, you will notice an error. Please refer to the test webhooks section for alternatives to localhost.
- Enter the Secret you had provided on the Magento site. The secret is used to validate that the webhook is from Razorpay. Do not expose the secret publicly. Know more about webhooks validation.
- In the Alert Email field, enter the email address to which notifications must be sent in case of webhook failure.
- Select only the
order.paid event from the list of Active Events.
- Click Create Webhook.
Know more about webhooks.
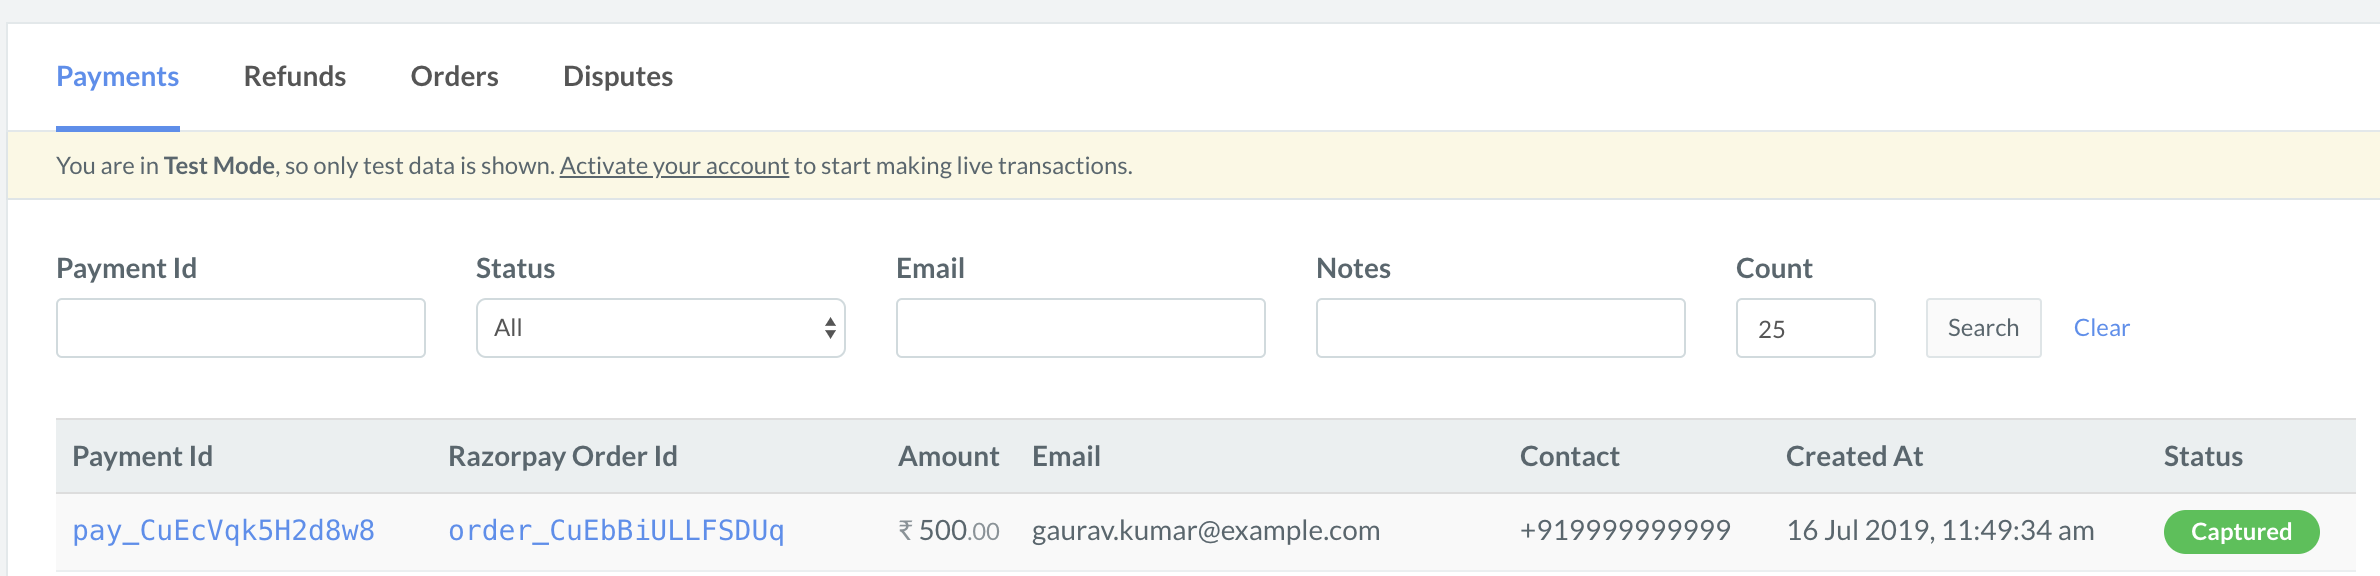
You can track the payment status from the Razorpay Dashboard, subscribe to the Webhook event or poll our APIs.
- Log into the Dashboard and navigate to Transactions → Payments.
- Check if a
payment_ID has been generated and note the status. In case of a successful payment, the status is marked as captured.
You can use Razorpay Webhooks to configure and receive notifications when a specific event occurs. When one of these events is triggered, we send an HTTP POST payload in JSON to the webhook's configured URL. Know how to set up Webhooks.
If you have subscribed to the order.paid webhook event, you will receive a notification every time a customer pays you for an order.
Step 2: Test Integration