Configure auto and manual payment capture settings from Dashboard and using APIs.
Razorpay enables you to accept online payments from your customers. When a customer makes a payment, it usually flows through the following states:
States
Description
created
This is the initial step wherein the customer submits the payment information and it is sent to Razorpay. The payment has not been processed at this stage.
authorized
An authorisation is performed when the bank successfully authenticates the customer's payment details. The money is deducted from the customer’s account by Razorpay, but will not be settled to your account until the payment is captured, either manually or automatically. Any payment in this state is auto-refunded to the customer if not captured within 5 days of creation.
captured
When the payment status is changed to captured, the payment is verified as complete by Razorpay. After the capture, the amount is settled to your account as per the settlement schedule.
refunded
You can refund the payments that have been successfully captured at your end. The amount is reversed to the customer's account.
failed
Any unsuccessful transaction is marked as failed and the customer will have to retry the payment.
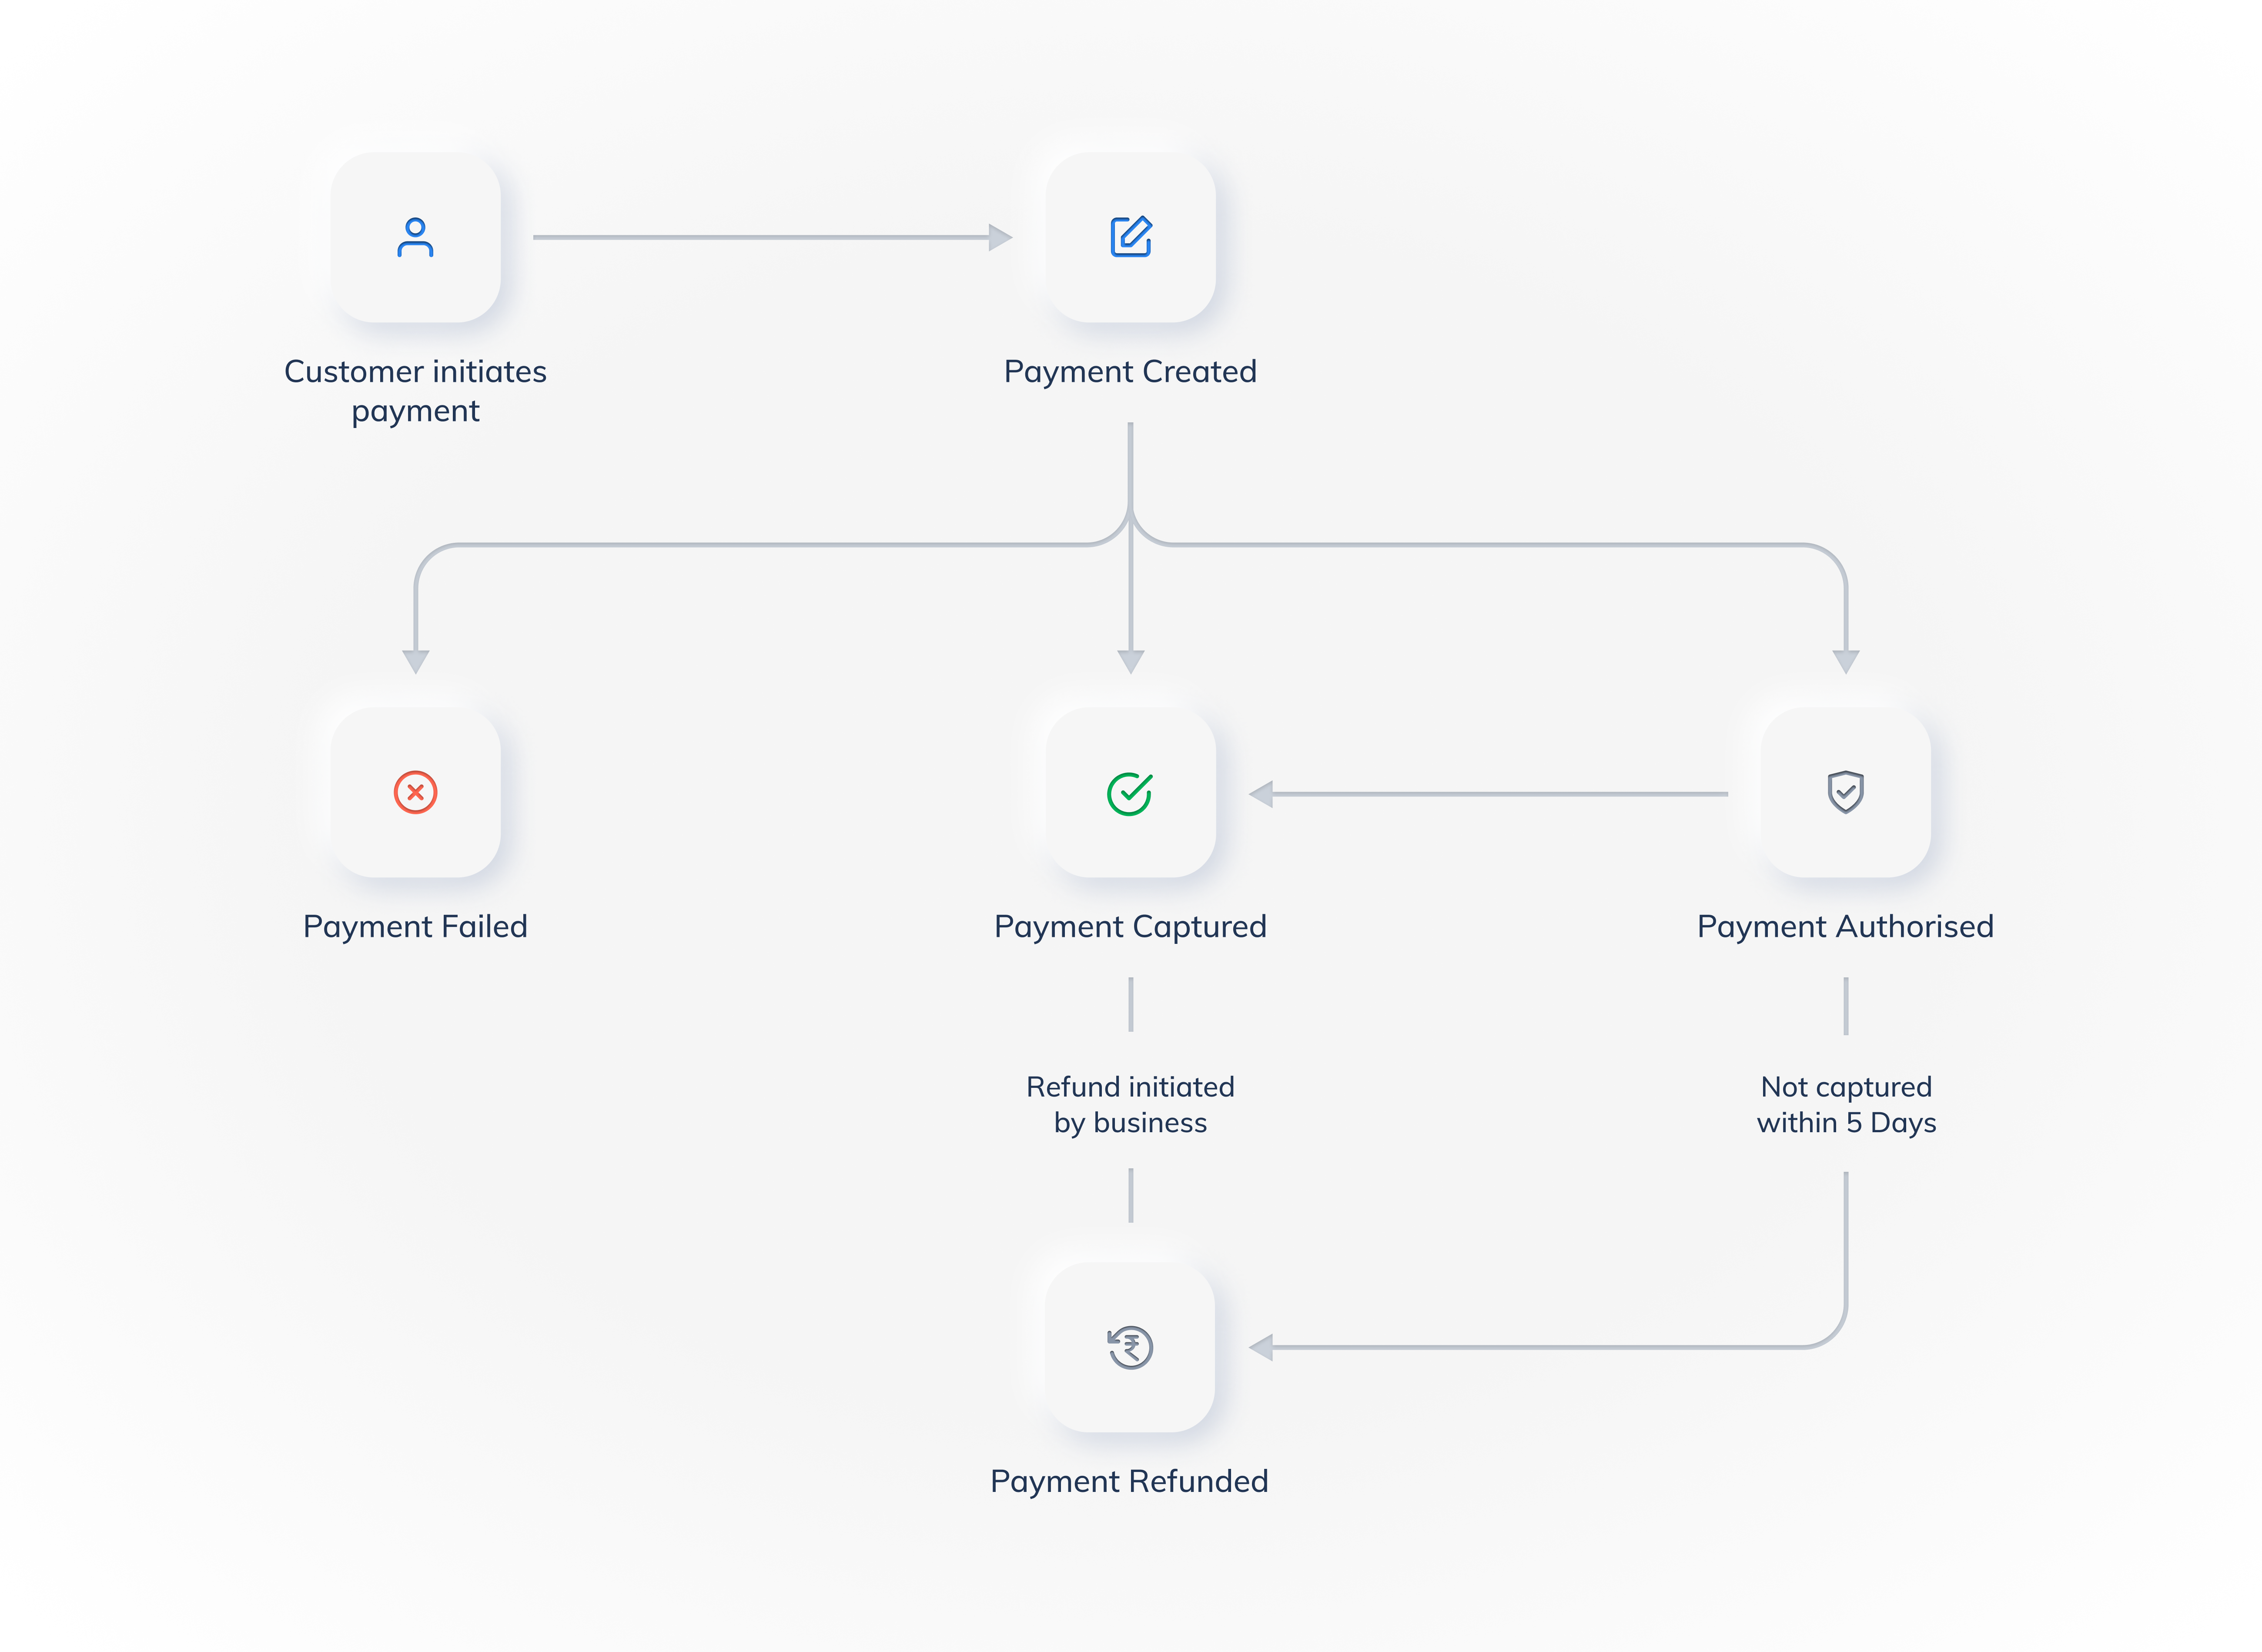
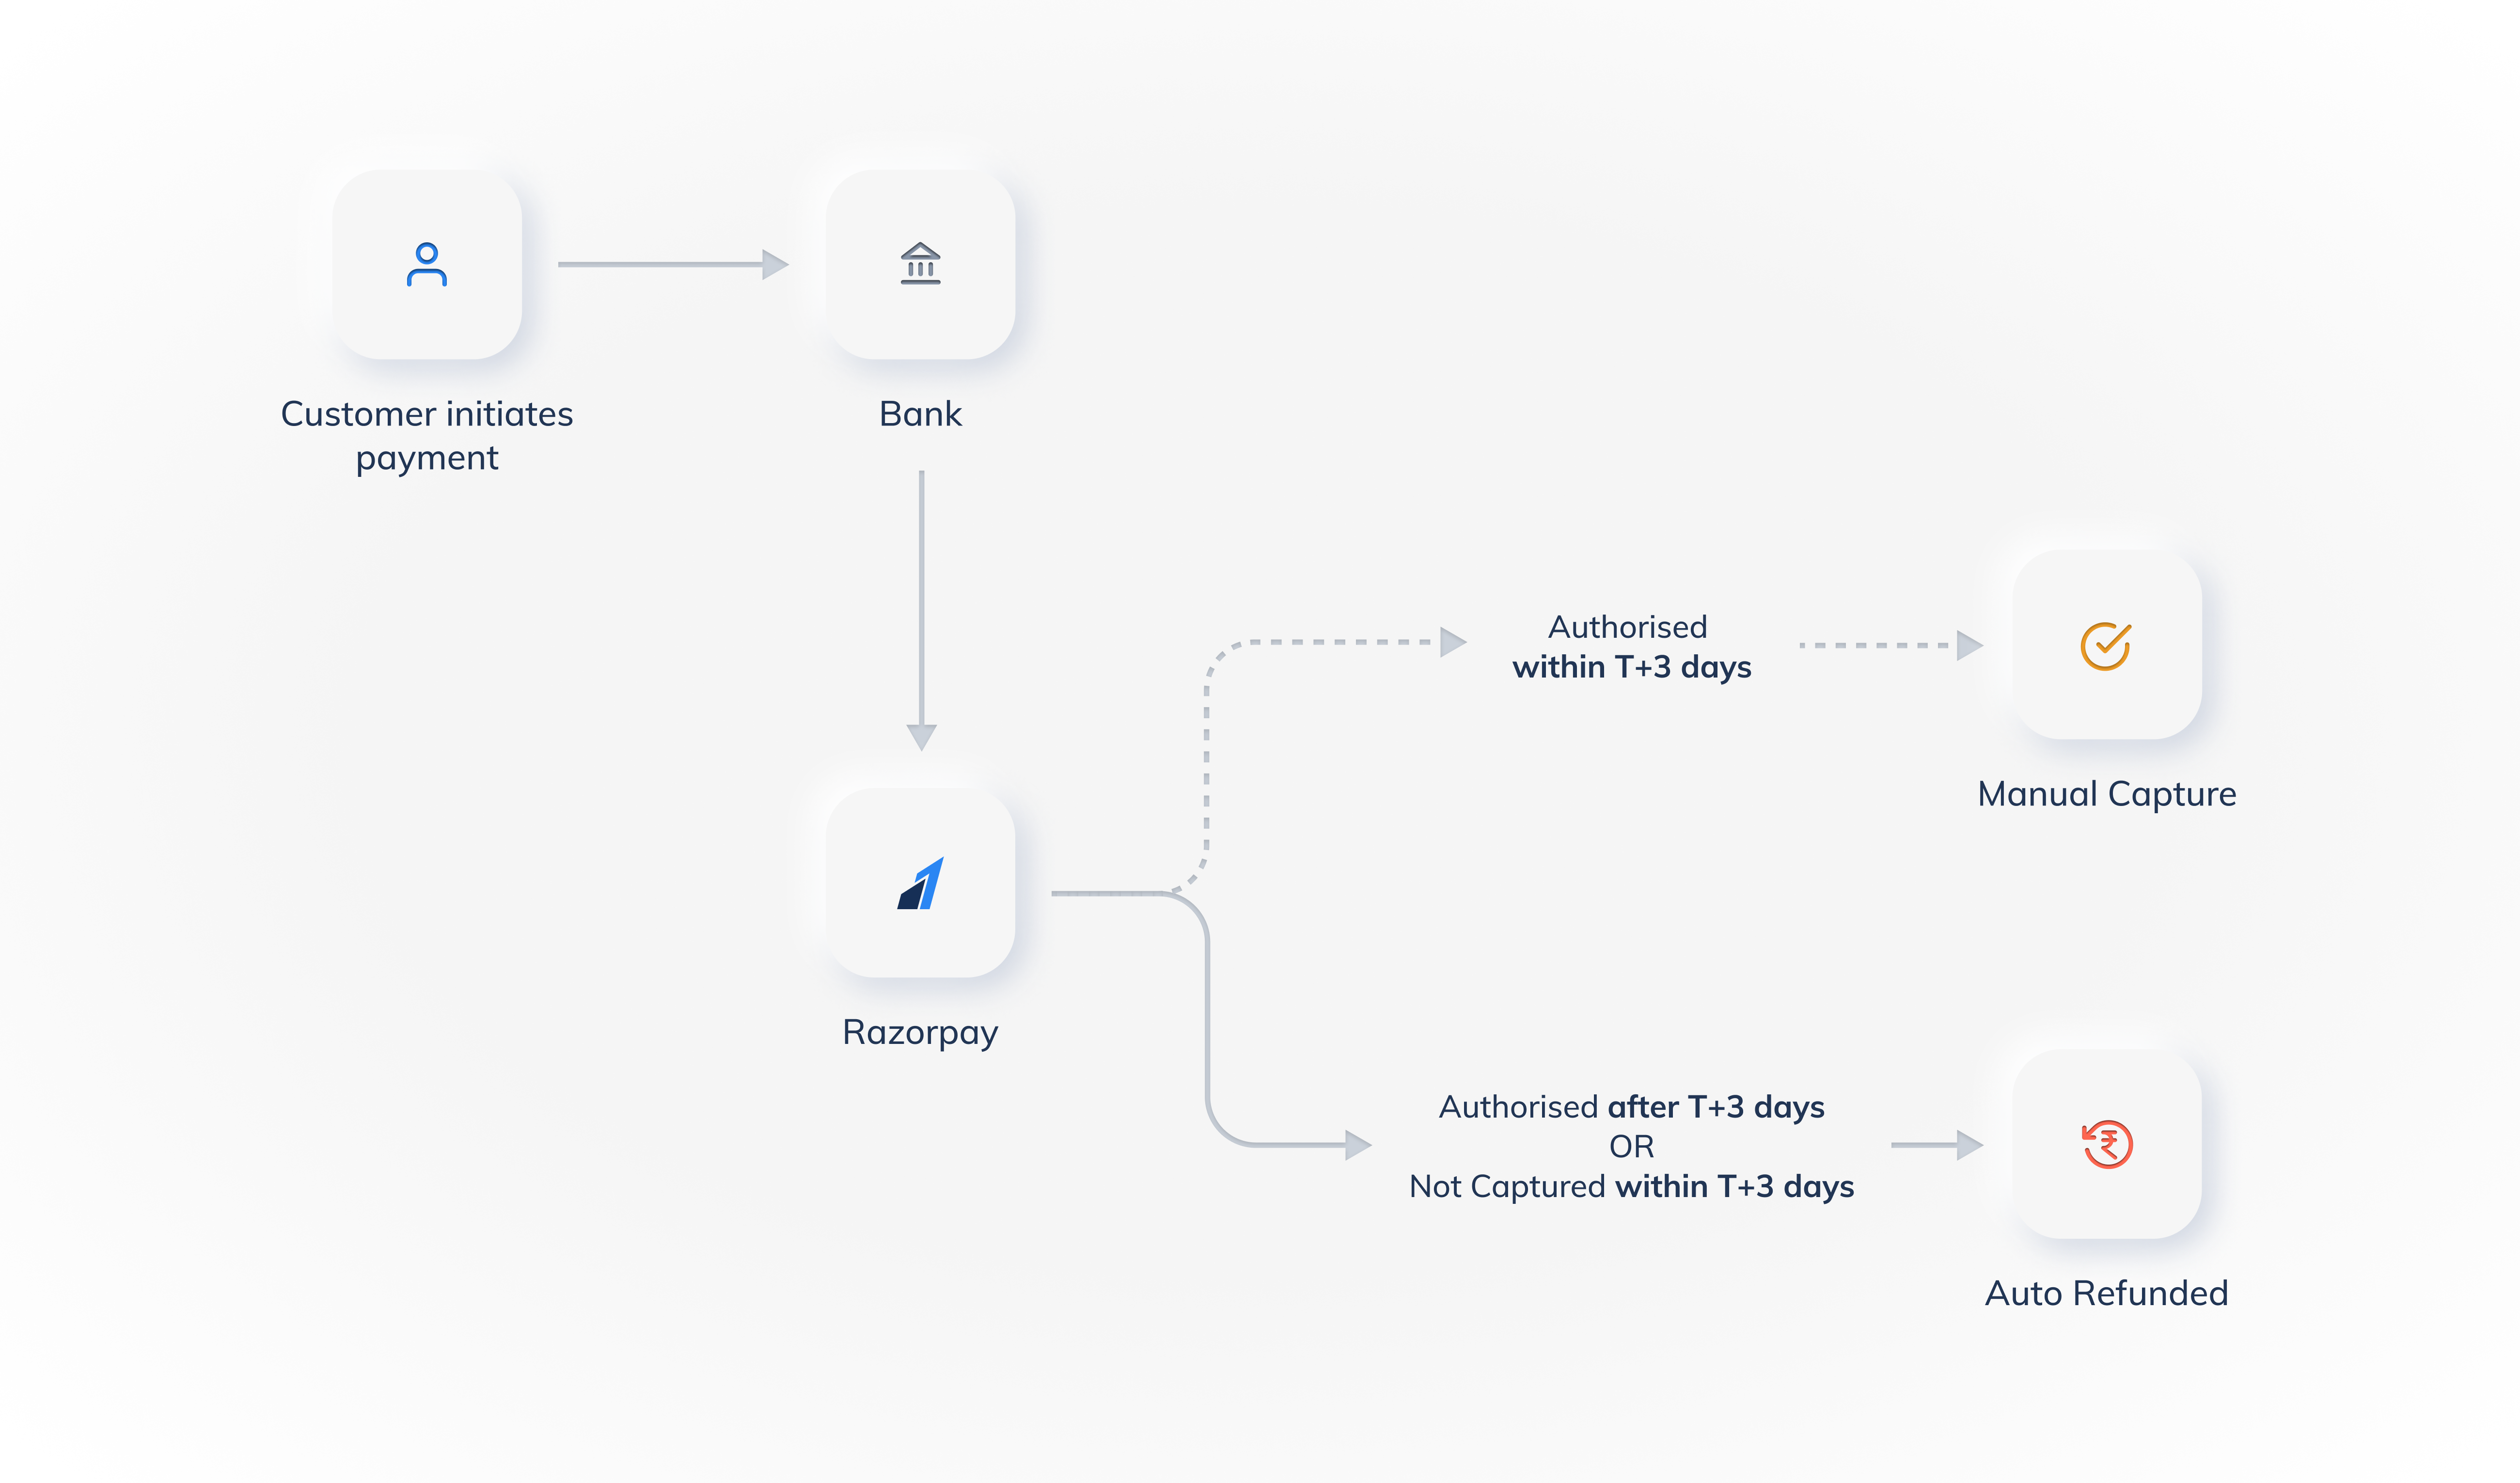
The following state diagram depicts the flow of money through the payment states:
By default, once your customer completes a payment, it is automatically moved to the captured state. However, the payment can remain in the authorized state in the following scenarios:
Late authorization
Due to external factors such as network issues or technical errors, Razorpay may not immediately receive payment status from the bank. In this case, Razorpay polls the APIs intermittently for 5 days to check the status. If we receive the payment status as successful, the payment is moved to the authorized state. Know more about late authorization.
Specific business use case
Some businesses such as those in the Ecommerce industry, may retain the payment in the authorized state and later move them to the captured state.
You must ensure that all payments in the authorized state are moved to captured state within 5 days of creation. This is mandatory because payments that are not captured within this time period will be refunded automatically to customers.
You can configure Payment Capture settings on the Razorpay Dashboard. You can choose to:
Handy Tips
Only a Razorpay account owner can configure payment capture settings on the Razorpay Dashboard. Users with other roles are not allowed to configure this setting.
Option
Description
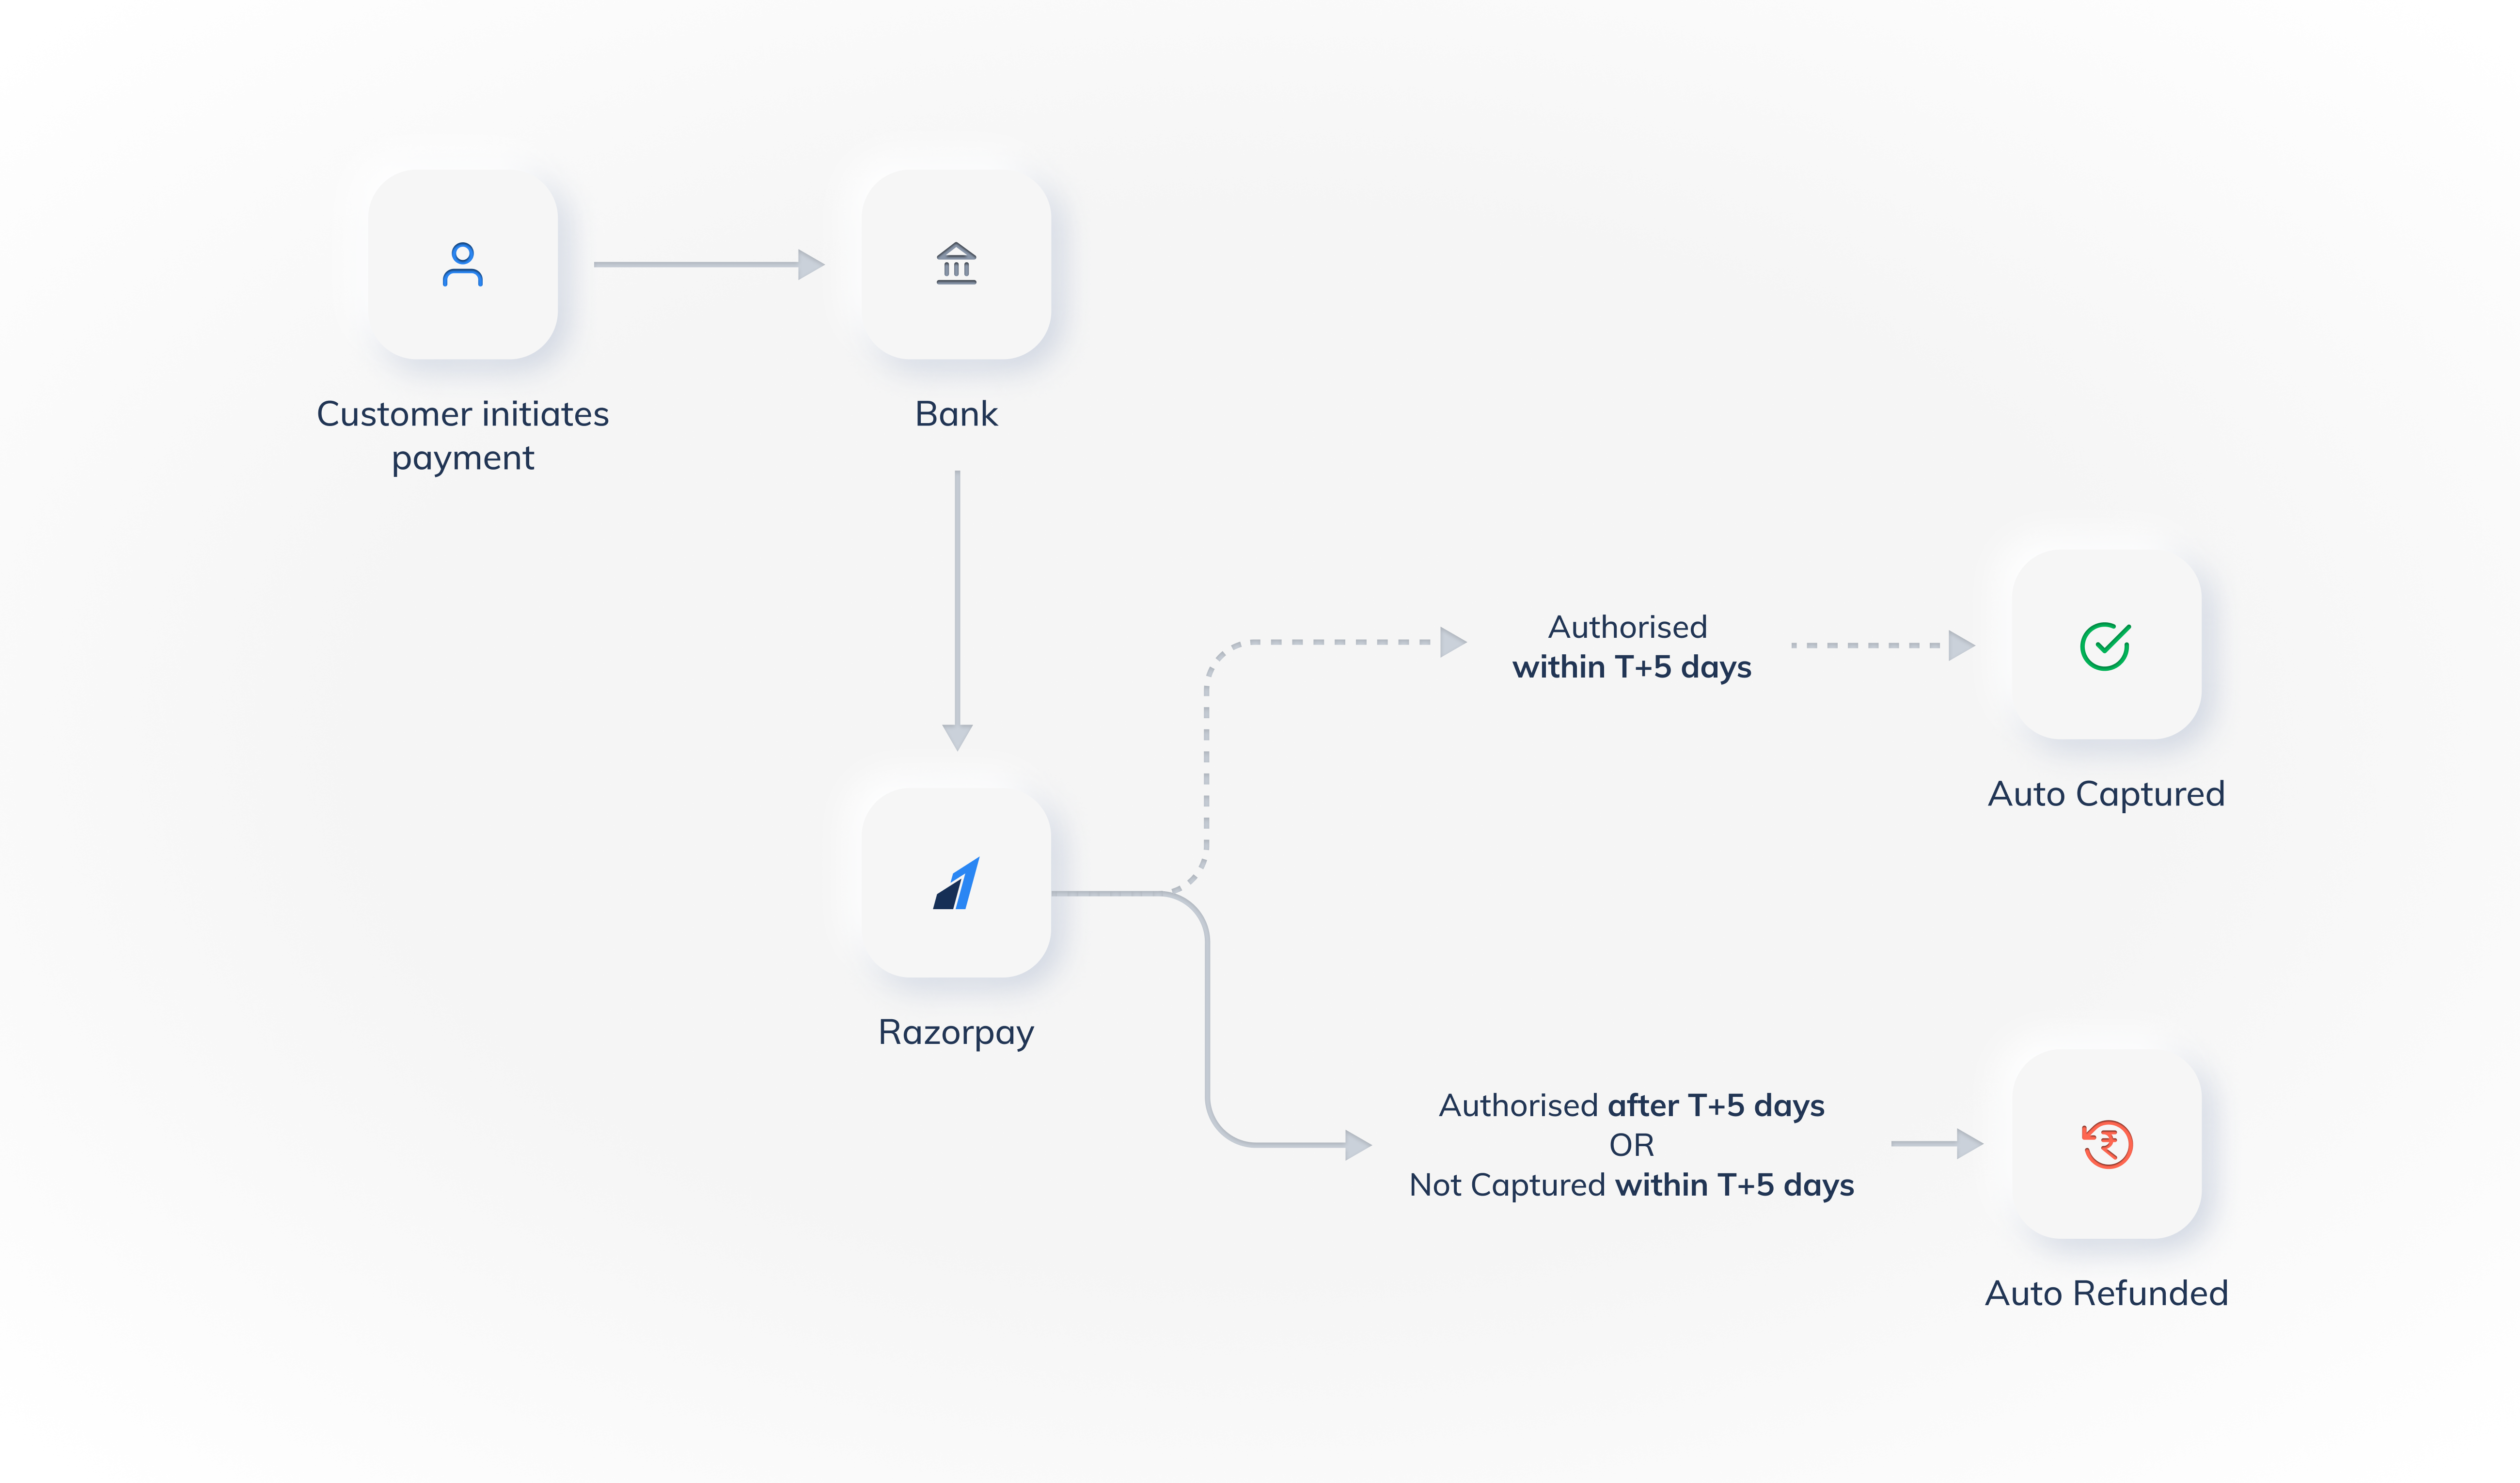
Auto-capture all payments
All payments authorized within 5 days from the time of creation are auto-captured.
Auto-capture timeouts
Allows you to define custom auto-capture timeout.
The minimum value is 12 minutes.
The maximum value (default) is 5 days.
Manual capture timeout
Allows you to define custom manual capture timeout.
The minimum value is 12 minutes.
The maximum value (default) is 5 days.
Auto-refund speed
Payments in the authorized state are auto-refunded after the timeout. Available option is Normal Refund: The payment is refunded to your customer in 5-7 working days.
Refund Speed The refund speed selected here is only applicable to payments that are auto-refunded.
Prerequisites
Payment Capture settings are applicable only for payments created using the Orders API.
For Direct Settlement merchants, payments will be auto-captured even if they are created without using the Orders API.
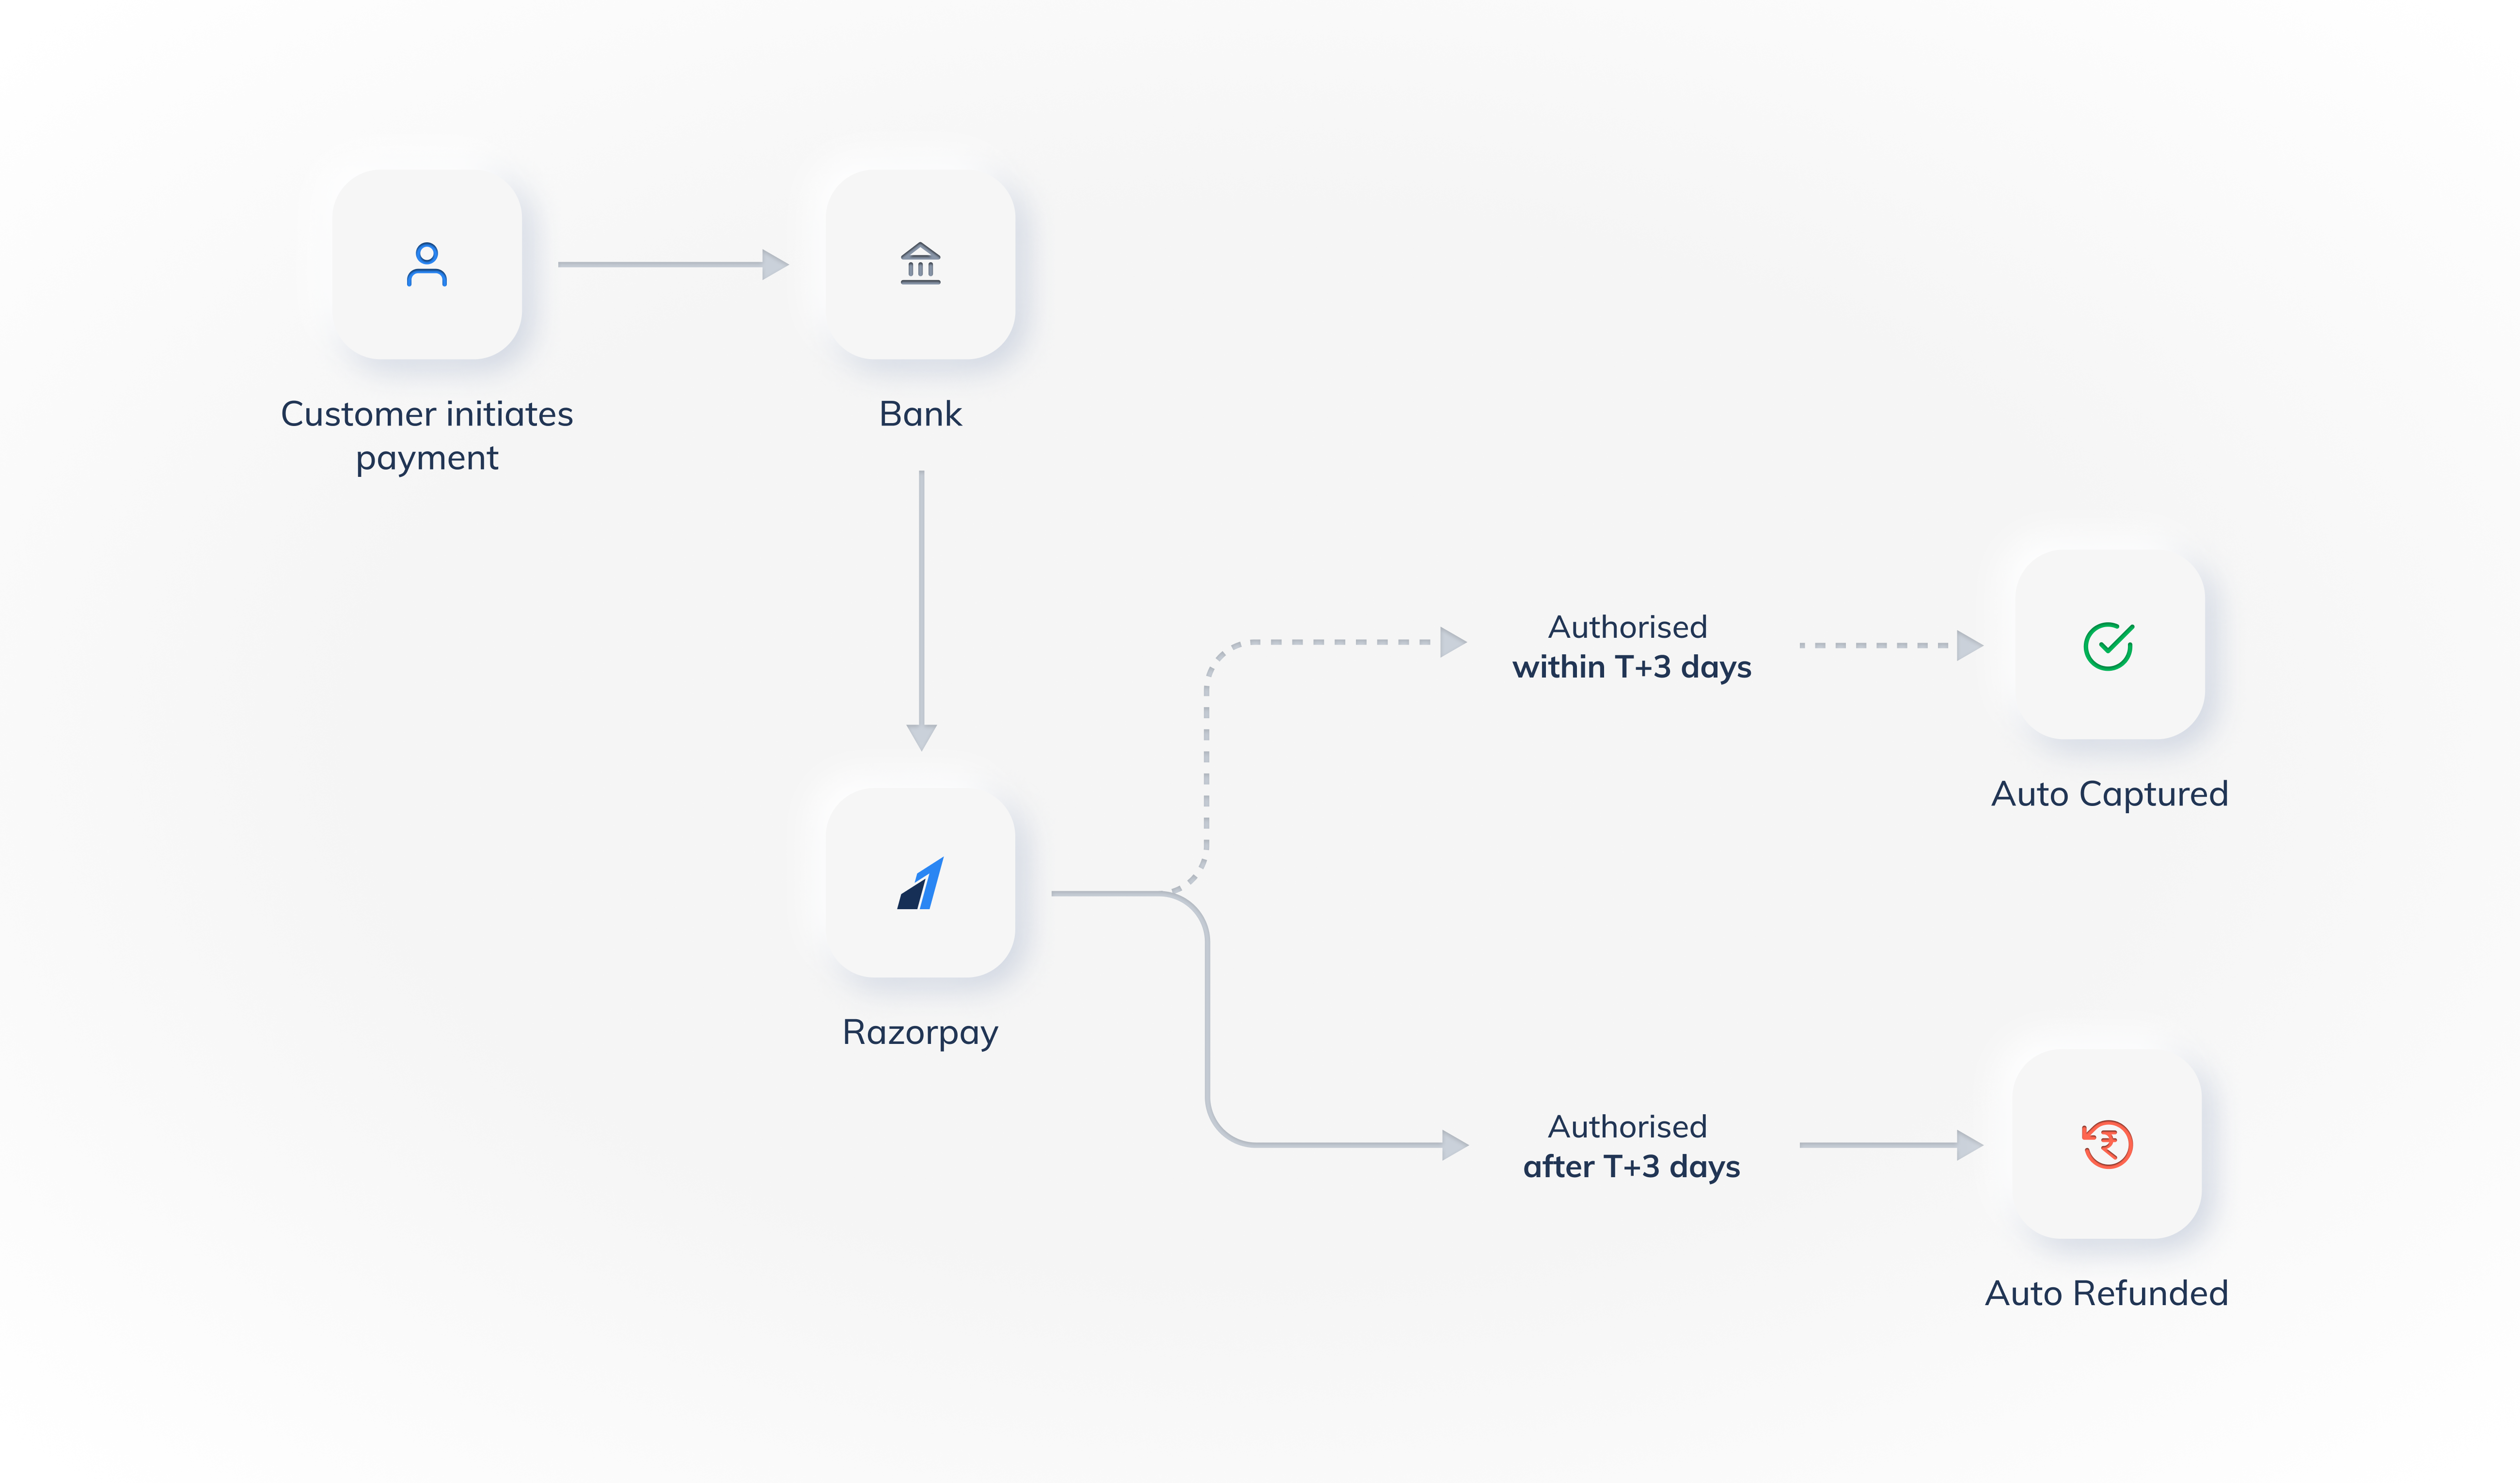
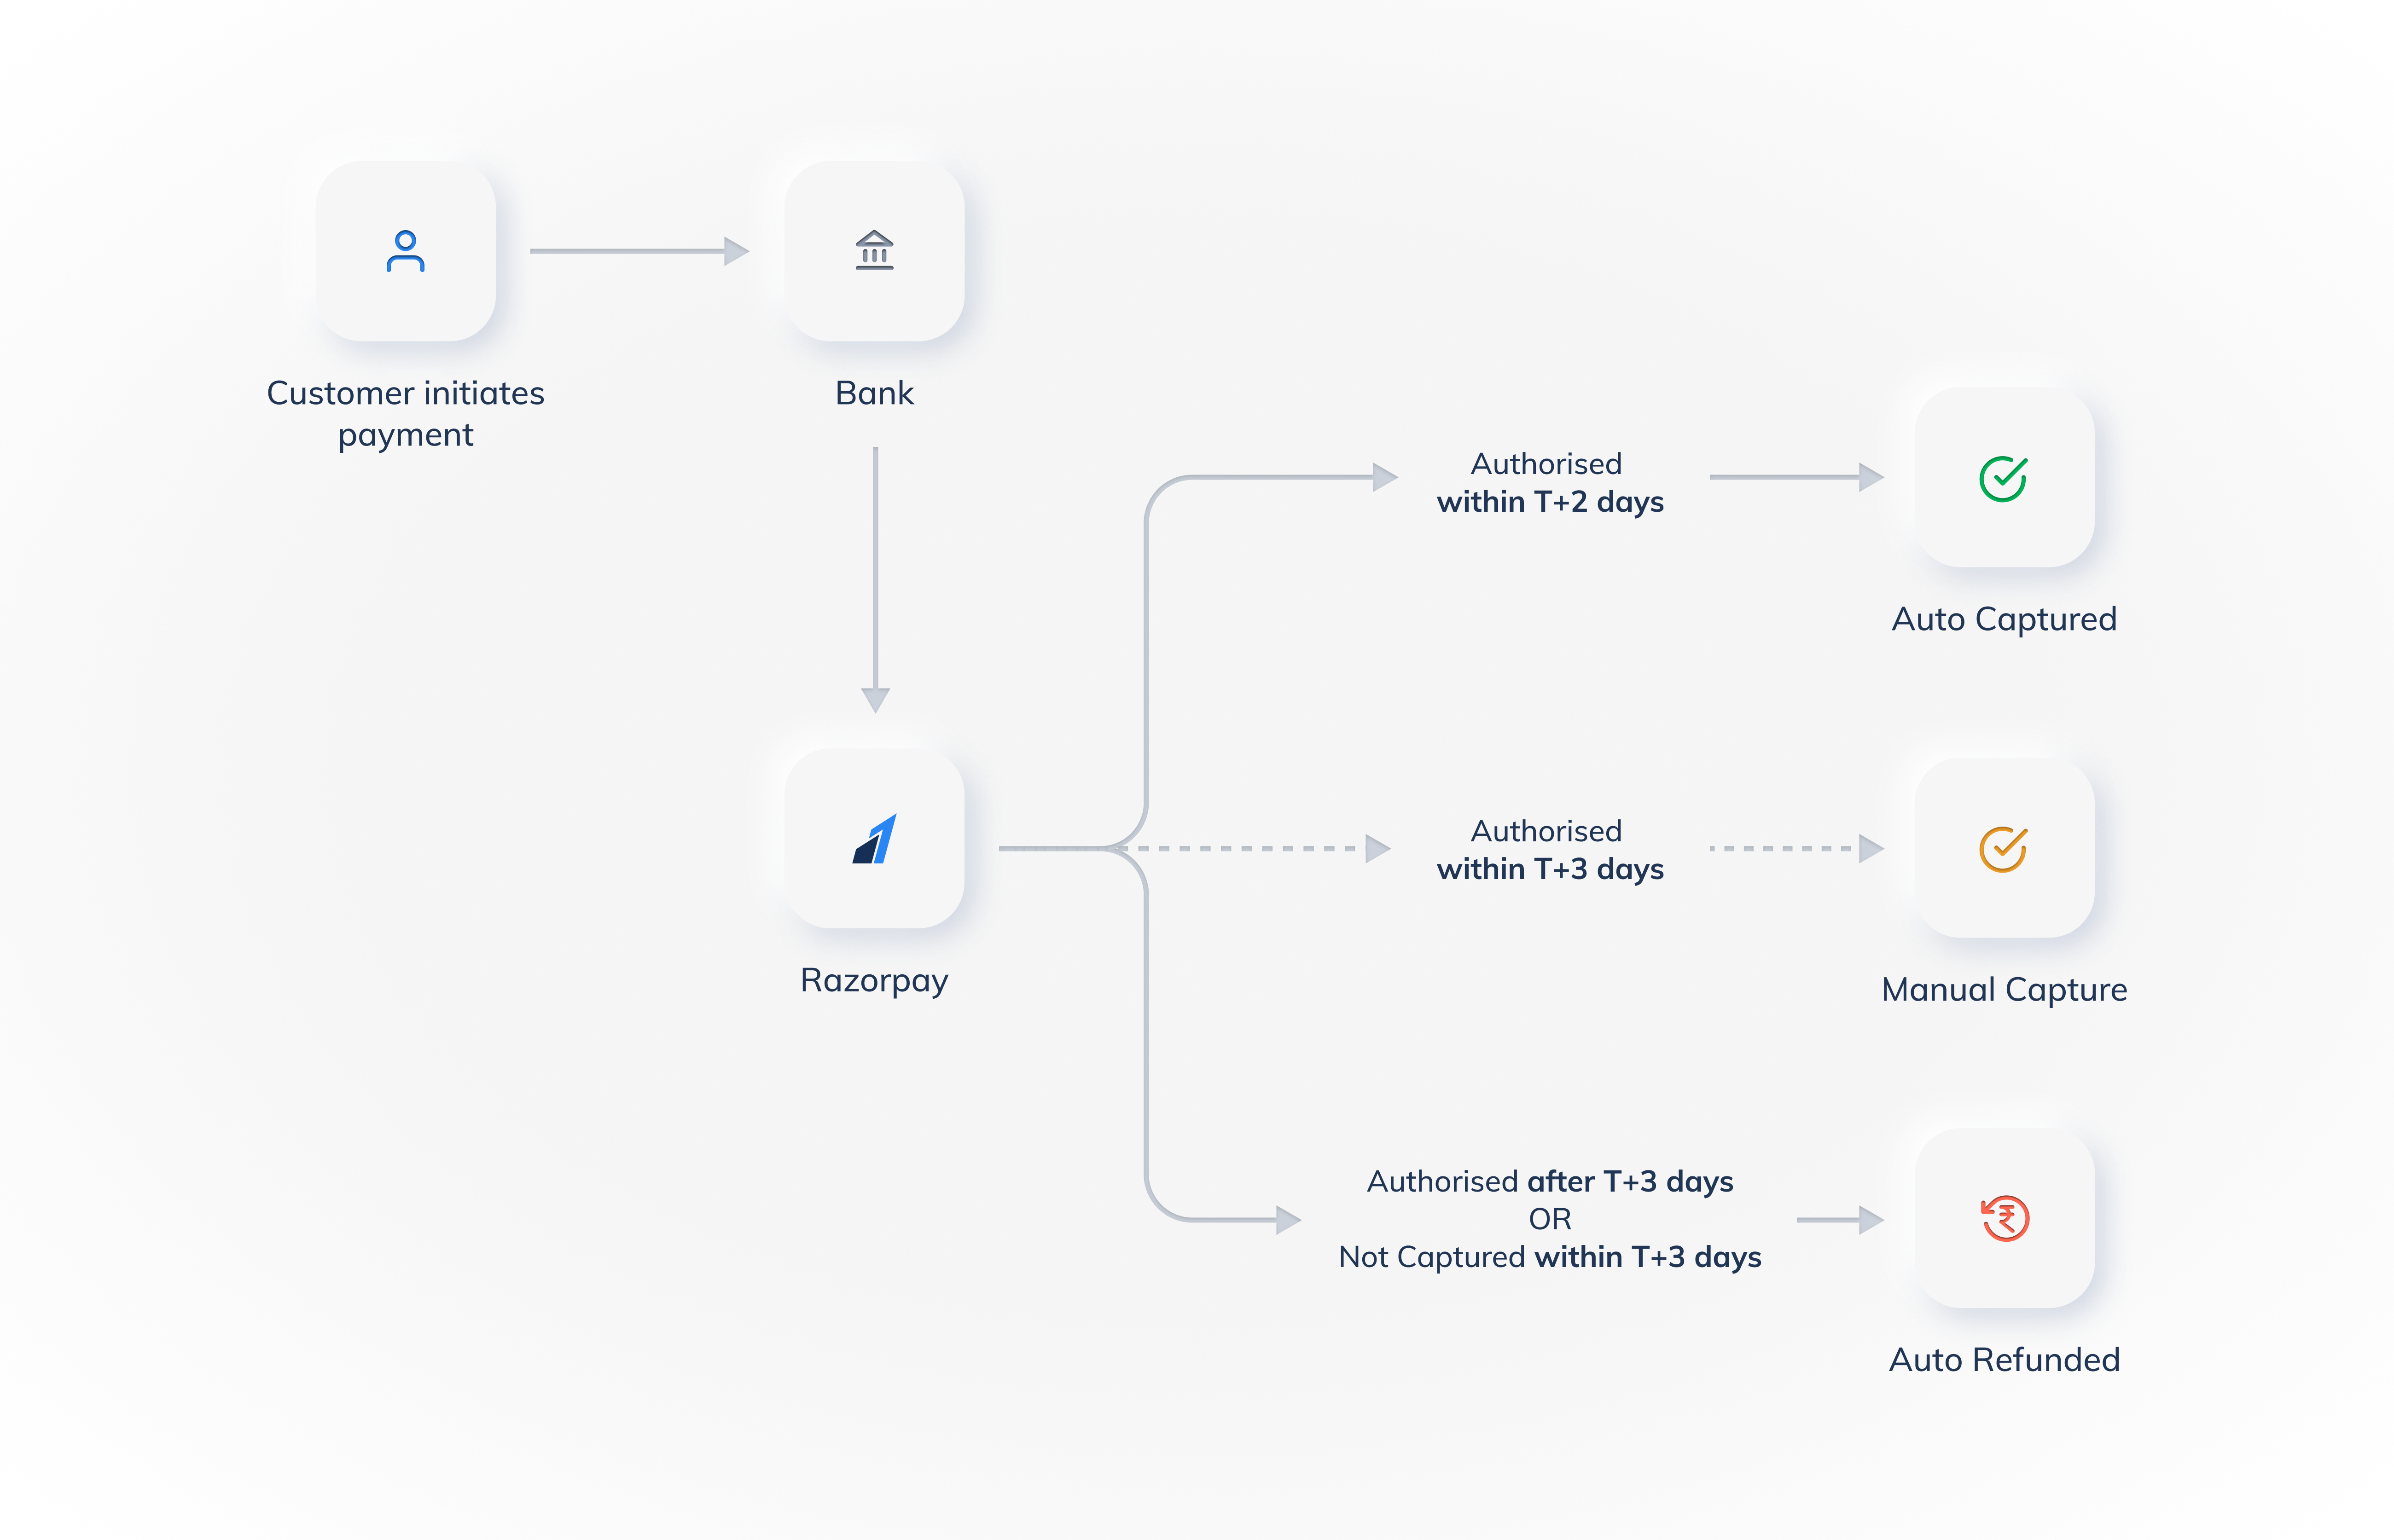
Let us say you only want to manually capture payments that are authorized within 3 days from creation. To do this, you should set the manual capture timeout as 3 days.
Capture Settings
Select Manual Capture
Manual capture timeout = 3 days.
Payments auto-refunded if
Payments not captured by you within 3 days.
Payments are authorized after 3 days.
Watch this video to set up the Manual Capture option.
Navigate to the Settings option and scroll to the Payments Capture option.
Click the Change button next to Automatic Capture.
Select the Manual Capture option.
Set the manual capture timeout to 3 days and click Next.
Select Normal Refund as the Refund Speed.
Click Save.
You can manually capture payments in the authorized state using our Capture API or from the Dashboard. All payments that are not captured within the manual timeout period will be auto-refunded.
Capture values passed in the Orders API take precedence over the Payment Capture settings configured on the Razorpay Dashboard. You can use this to change the capture settings for individual payments.