Authorization Transaction
1. Create Authorisation Transaction
Create authorisation transactions for customers using the Razorpay Standard Checkout or Registration Links.
Using an authorisation transaction, we can authenticate the customer's selected payment method and ensure that we can charge them recurring payments. The authorisation transaction can be created using the following:
Subsequent payments can be charged without the need of any intervention from the customer. However, subsequent payments need to be created manually by you. To do this, first fetch and check the status of a token and then charge the token.
Following is the authorisation transaction flow for Razorpay Standard Checkout:
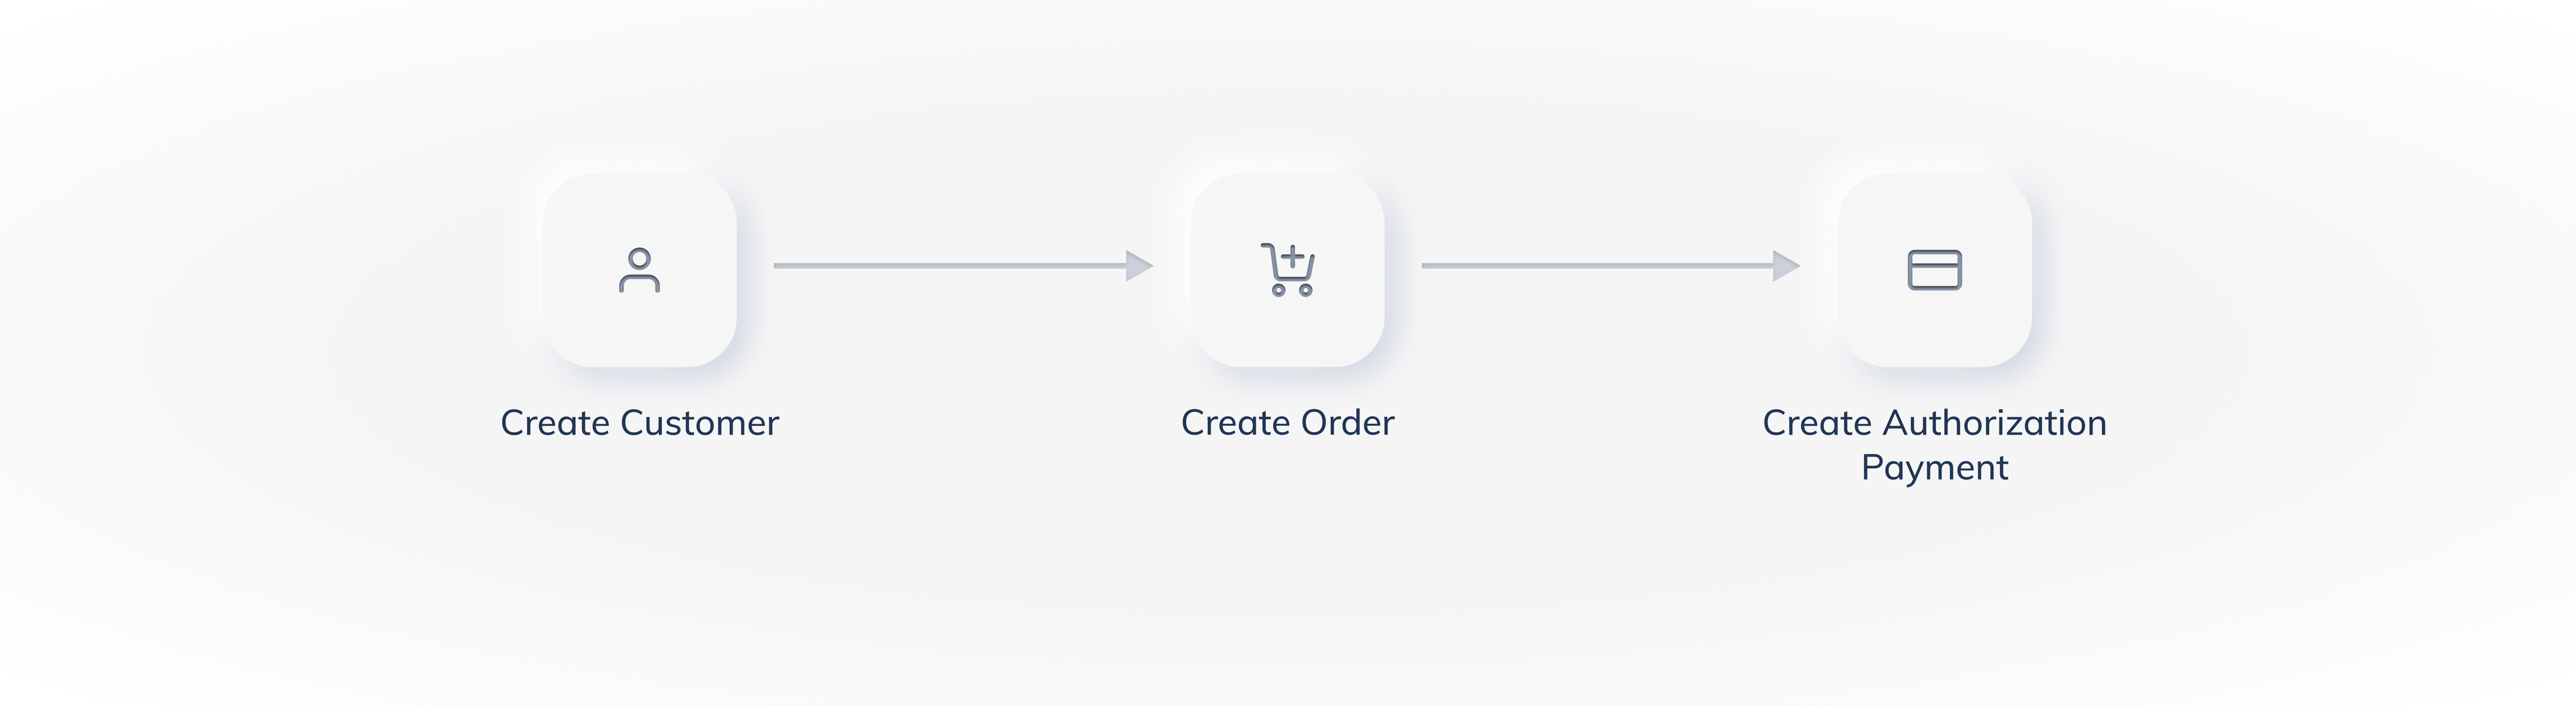
To allow customers to complete authorisation transaction using the Razorpay Standard Checkout:
Handy Tips
The authorization transaction using standard checkout can be created only using Razorpay APIs.
- Create a customer
This returns a customer_id.
- Create an order
This returns an order_id. The order must be created for:
- A minimum of ₹1 for cards and UPI.
- ₹0 for Emandate and paper NACH.
- Create authorisation transaction
Pass the customer_id, order_id and a few additional parameters in your checkout to create the authorization payment. The customer completes the authorization payment, which generates a token. Customers can complete the authorization payment using:
- Emandate
- Card
- Paper NACH. The following additional steps have to be completed for NACH:
- The customer either downloads a pre-filled NACH form or you can send it to the customer.
- The customer signs the pre-filled NACH form.
- The customer either uploads the signed form or sends it to you to upload for processing.
Know more about uploading Paper Nach Form.
- UPI.
Know more about Recurring Payments APIs.
Following is the authorisation transaction flow for Razorpay registration link method:
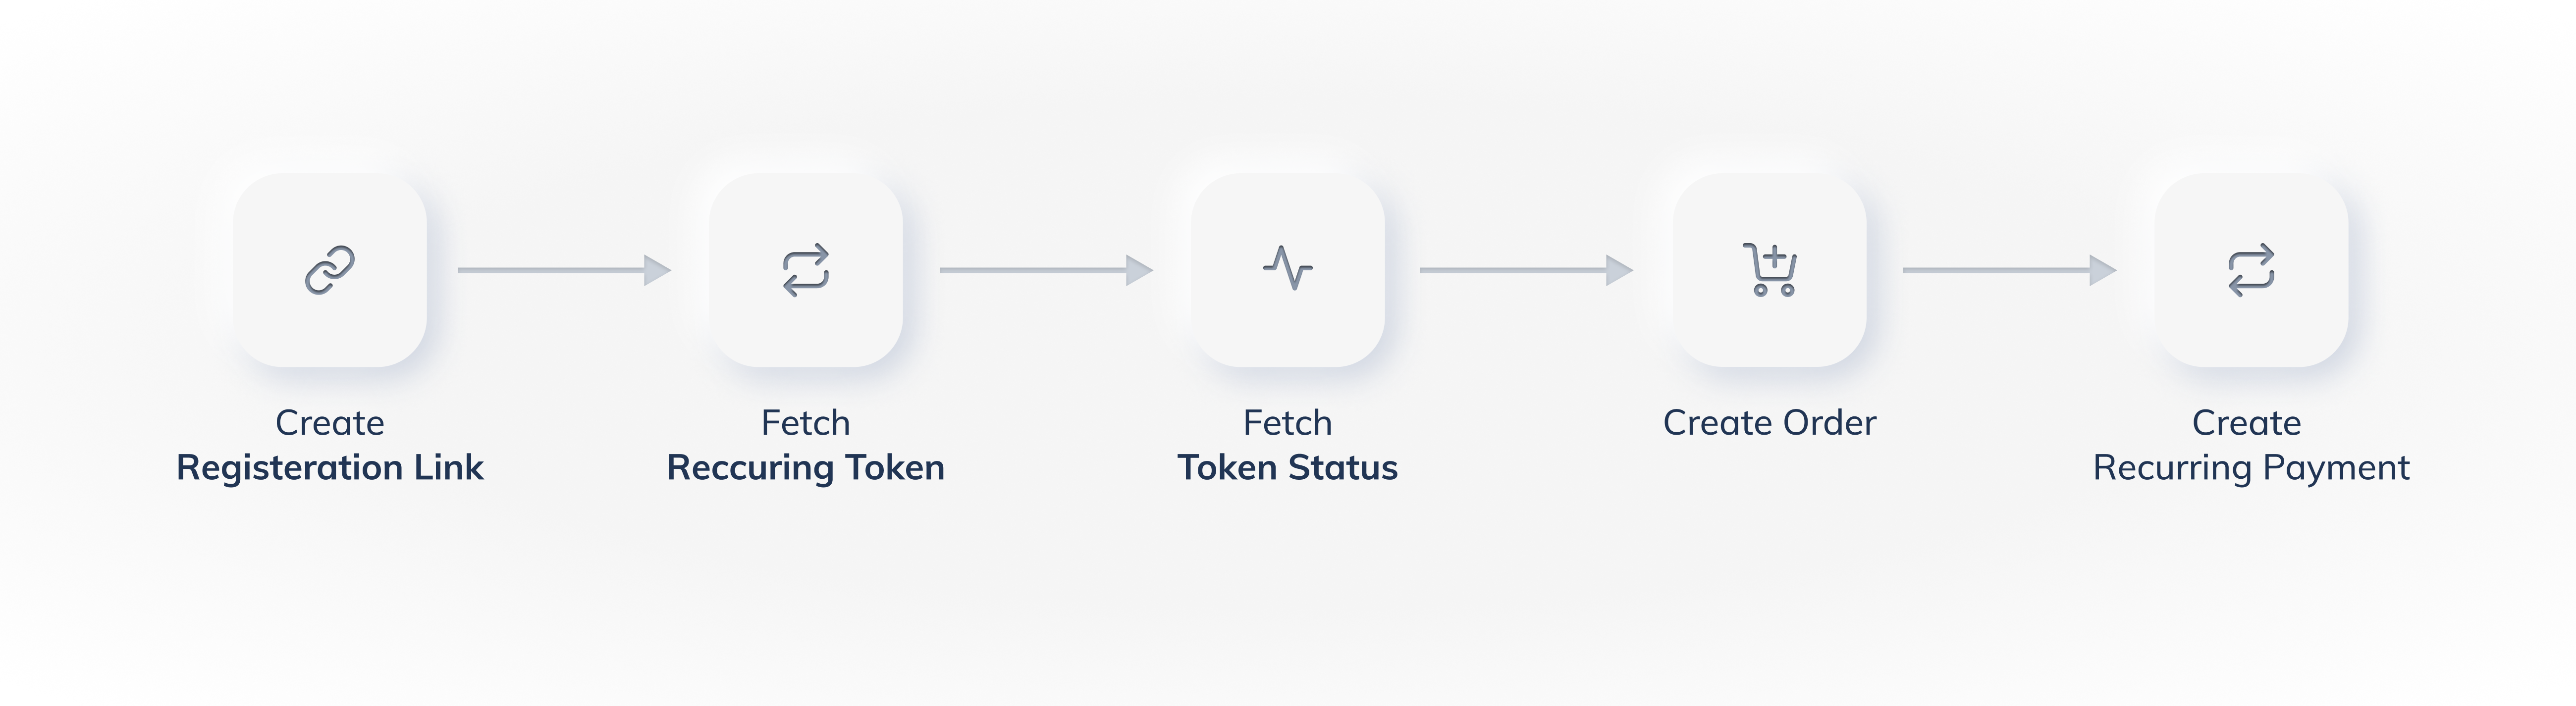
Registration Links are securely generated web addresses that allow your customers to complete the authorization transaction. Registration links can be sent via SMS or email and can be created from the Dashboard or API.
To allow customers to complete the authorization transaction via a registration link, you have to:
- Create a registration link and send it to your customer
The customer completes the authorisation payment, which generates a token. Customers can complete the authorisation payment via:
- Emandate
- Card
- Paper NACH. The following additional steps have to be completed for NACH:
- The customer either downloads a pre-filled NACH form or you can send it to the customer.
- The customer signs the pre-filled NACH form.
- The customer either uploads the signed form or sends it to you to upload for processing.
Know more about uploading Paper Nach Form.
- UPI
No Need to Create a Customer and Order Separately
If you use a registration link to create the authorization transaction, Razorpay automatically creates a customer and the order for you.
A registration link moves through the following states during its life cycle:
Status
| Description
| Webhook
|
|---|
Issued
| A registration Link is created and sent to the customer.
| NA
|
Paid
| Payment is made for the issued registration Link.
Once the registration Link is paid, search for Token corresponding to the payment.
| invoice.paid
|
Cancelled
| The registration link has been canceled. In such cases, you need to create a registration link again.
| NA
|
Expired
| The registration link has expired. You can set an expiry timestamp at the time of creation.
| invoice.expired
|
Once the customer has made the Authorization Payment, it moves through the following states as per the payment flow:
Fetch Token and Check its Status
A token will be generated once the customer makes the authentication payment using the checkout or the registration link. The next step is to fetch this token and check its status and then charge that token.