Integrate Recurring Payments Using UPI
Know how to integrate Recurring Payments using UPI as a payment method.
The Recurring Payment integration involves the following steps:
- Mandate Registration
- Fetch Mandate Registration Details
- Charge Customers
Mandate registration is a process of creating a payment checkout form for customers to make Authorization Transaction and register their UPI. A token will be generated once a customer makes this transaction.
Using this authorization transaction, we can authenticate the customer's UPI and ensure that we can charge them recurring payments. The authorization transaction can be created using the following methods:
Following is the authorisation transaction flow for Razorpay Standard Checkout method.
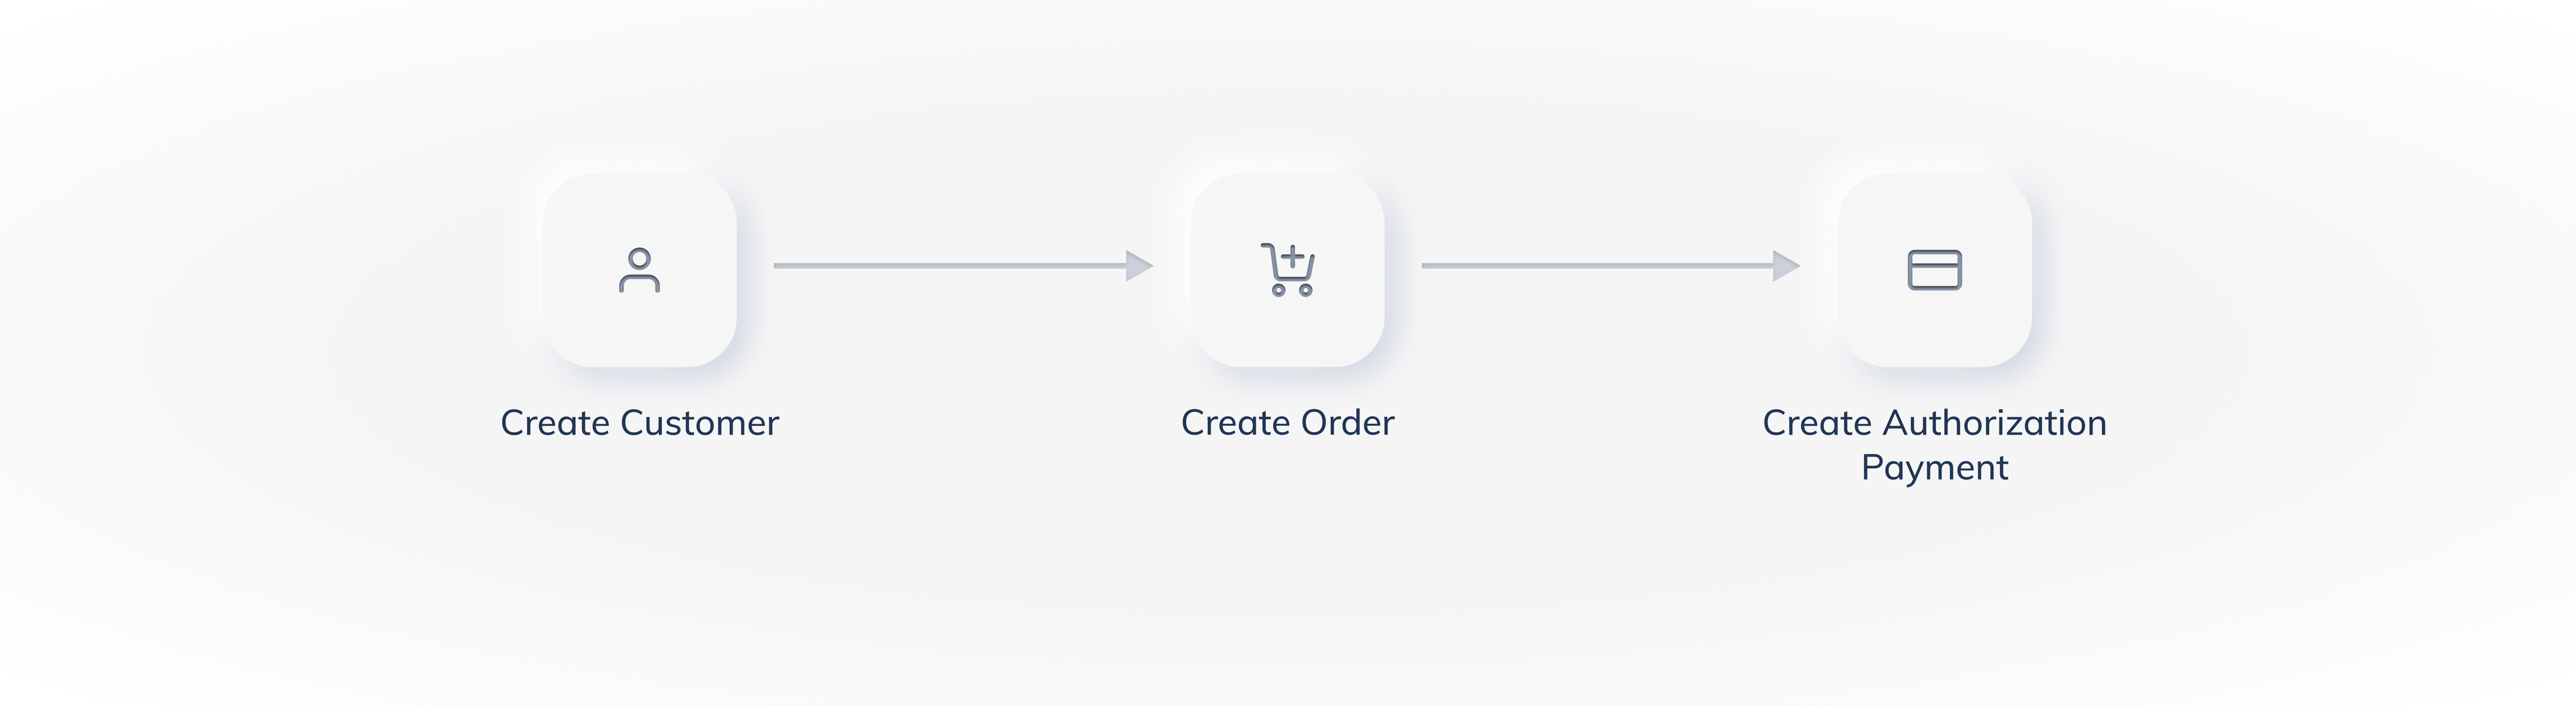
To create checkout form for customers to complete authorisation transaction using the Razorpay Standard Checkout method:
Watch Out!
The authorization transaction using standard checkout can be created only using Razorpay APIs.
- Create a customer
This returns a customer_id.
- Create an order
This returns an order_id. The order must be created for:
- Create authorisation transaction
Pass the customer_id, order_id and a few additional parameters in your checkout to create the authorization payment. The customer completes the authorization payment, which generates a token.
Registration Links are securely generated web addresses that allow your customers to complete the authorization transaction. Registration links can be sent via SMS or email.
Following is the authorisation transaction flow for Razorpay registration link method:
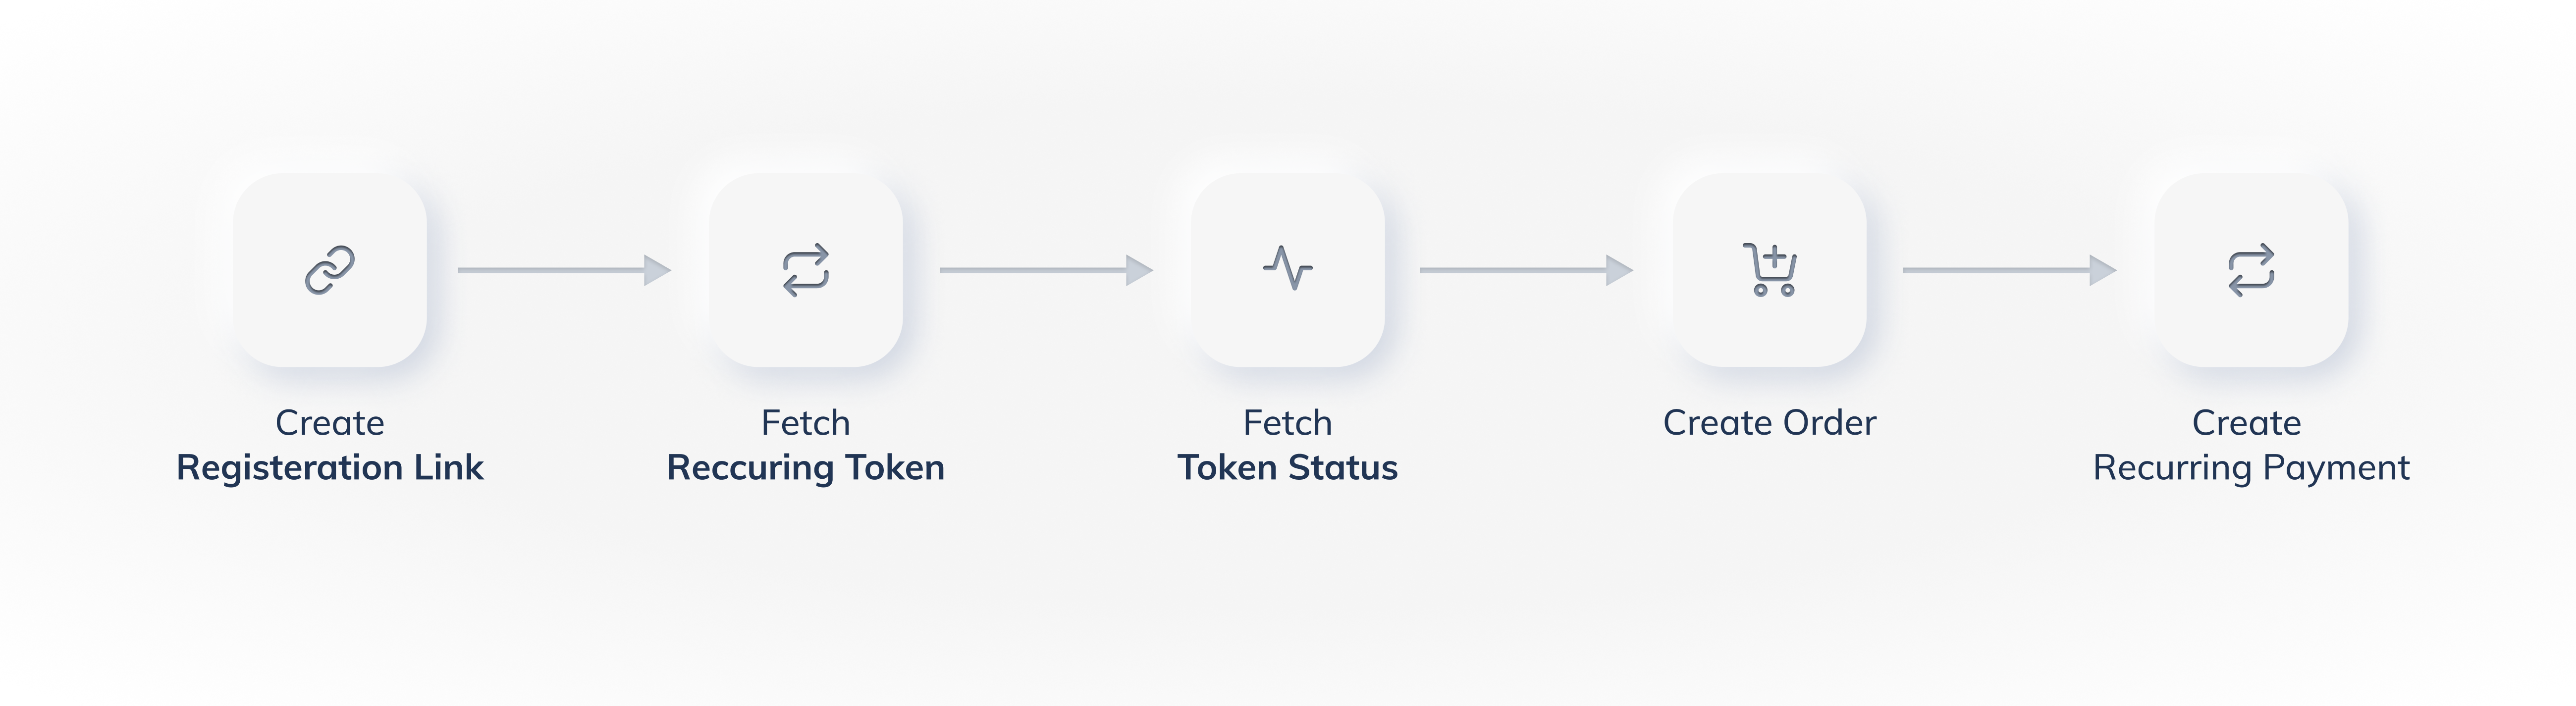
For customers to complete the authorization transaction via a registration link, you should Create a registration link and send it to your customer
You can create a Registration Link using:
The customer completes the authorisation payment, which generates a token.
No Need to Create a Customer and Order Separately
If you use a registration link to create the authorization transaction, Razorpay automatically creates a customer and the order for you.
A registration link moves through the following states during its life cycle:
Status
| Description
| Webhook
|
|---|
Issued
| A registration Link is created and sent to the customer.
| NA
|
Paid
| Payment is made for the issued registration Link.
Once the registration Link is paid, search for Token corresponding to the payment.
| invoice.paid
|
Cancelled
| The registration link has been canceled. In such cases, you need to create a registration link again.
| NA
|
Expired
| The registration link has expired. You can set an expiry timestamp at the time of creation.
| invoice.expired
|
Once the customer has made the Authorization Payment, it moves through the following states as per the payment flow:
This is a process of fetching the token that contains the registration details of the customer and checking its status.
A token represents a mandate registration and is generated after the authorisation transaction is successfully captured. A token contains customer's payment details stored by Razorpay and is used to create a recurring payment.
Handy Tips
For simplicity, tokens are considered to be mandates. Hence, the status of the token determines the status of the mandate registration.
You can search for the tokens using the following:
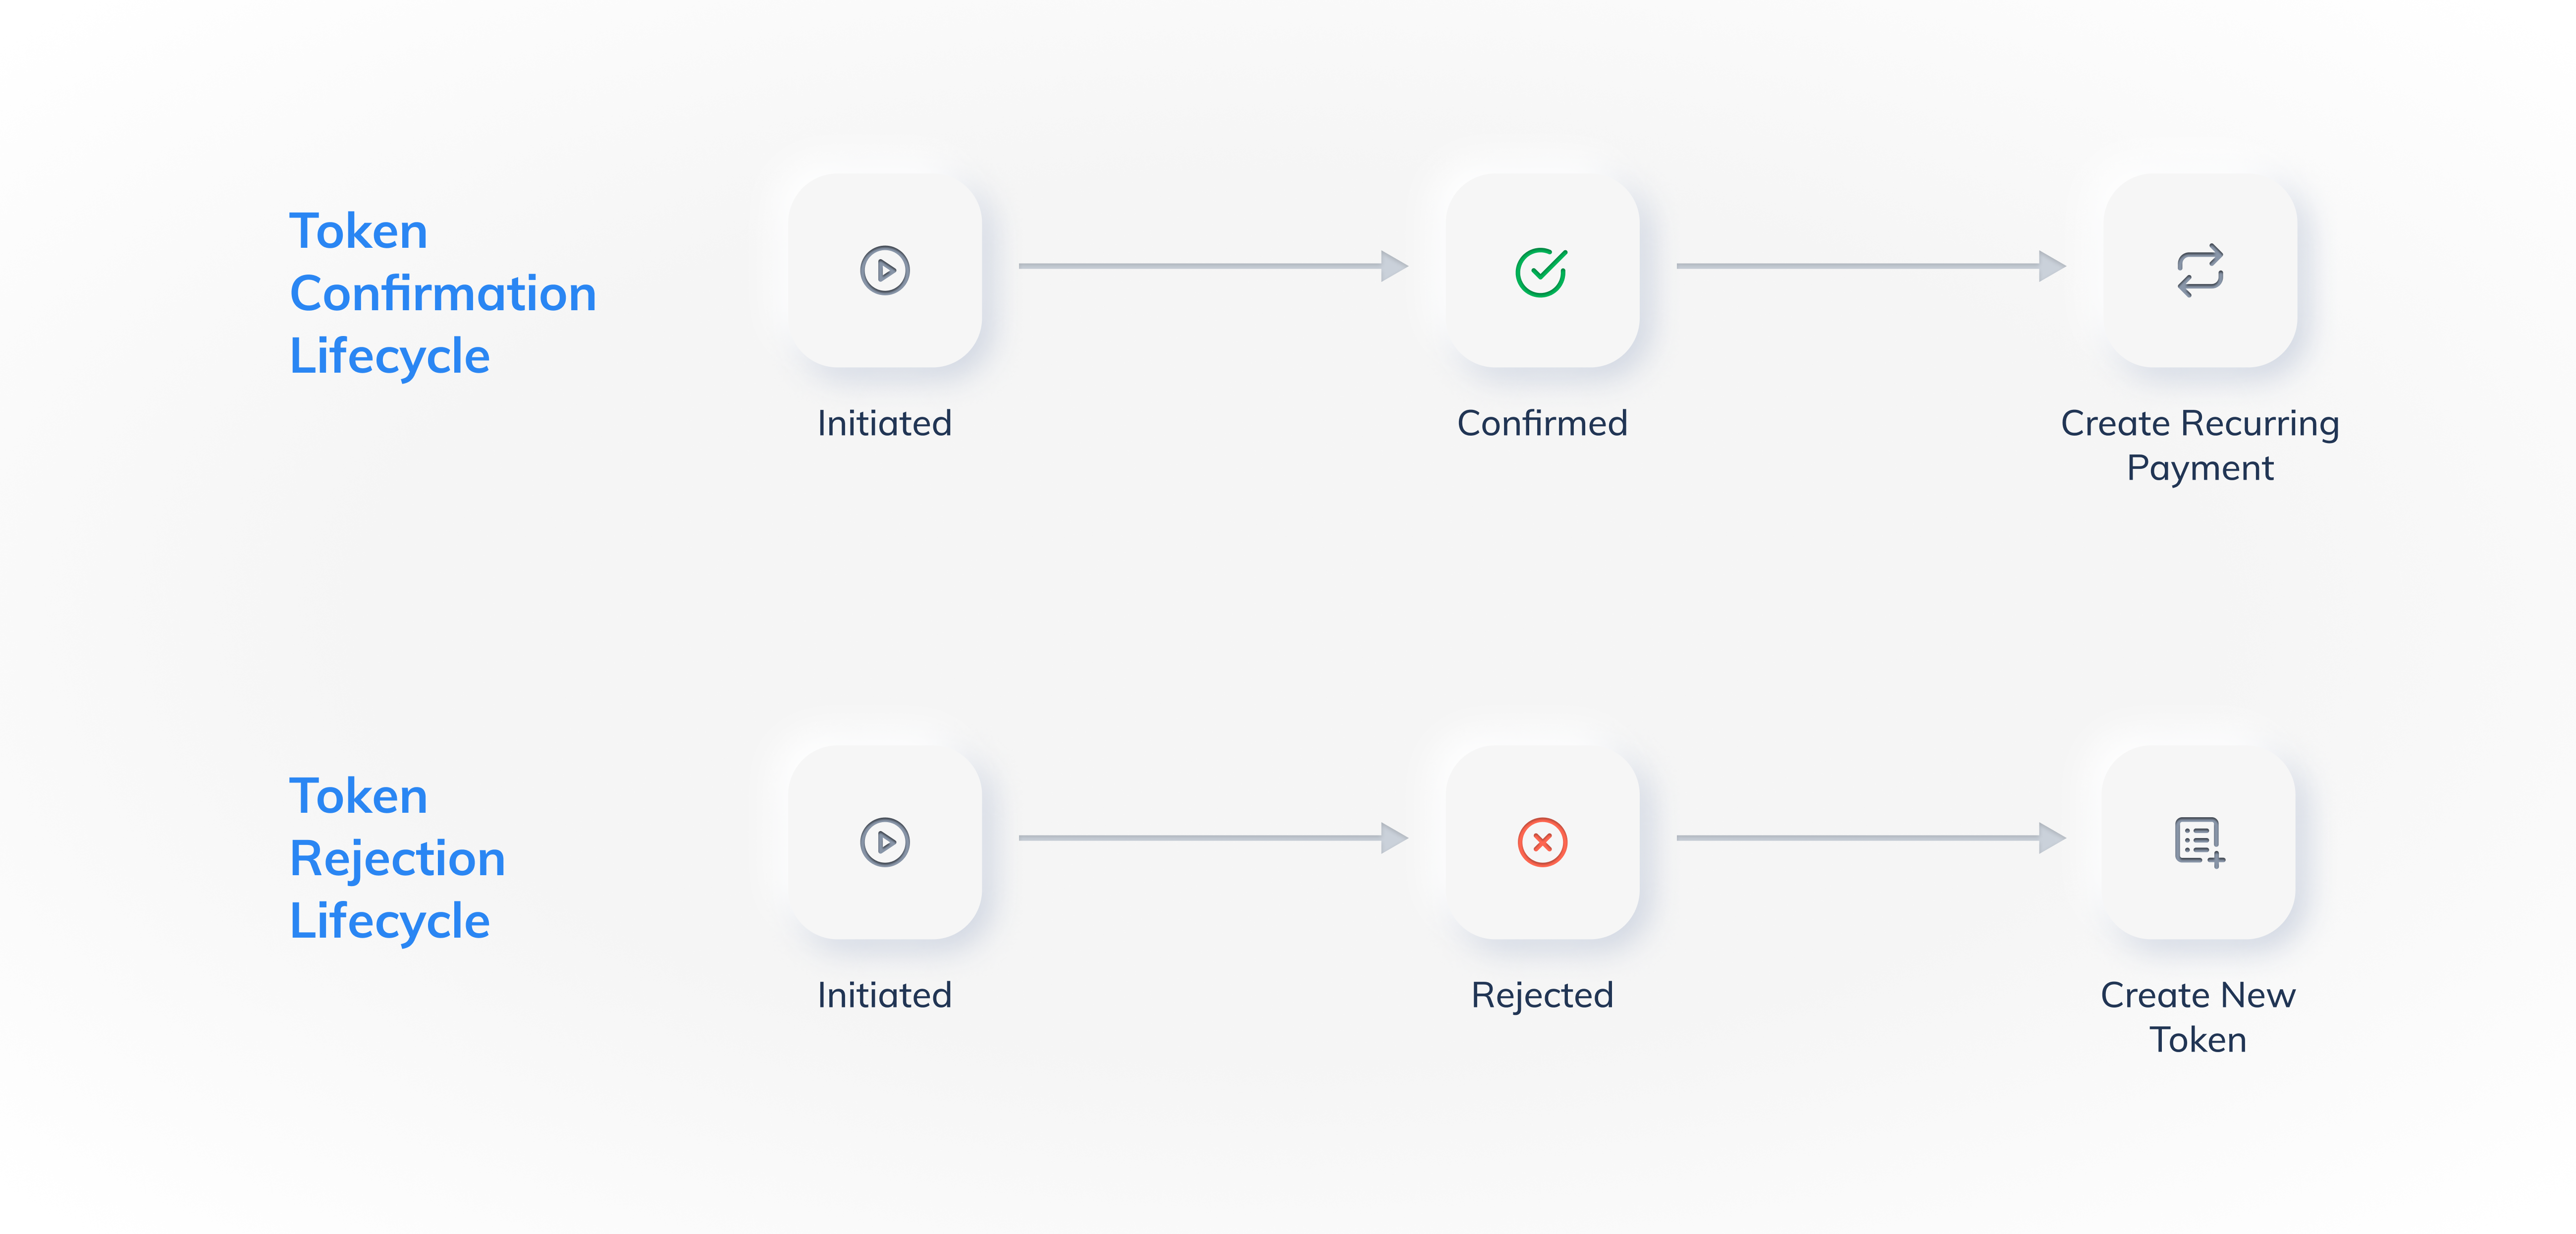
As the authorisation transaction moves through its different states, the token that is generated also undergoes state changes. Following is the life cycle of a token:
token_status
| Description
| Next Step
|
|---|
initiated
| Indicates that the bank is processing the mandate registration.
| Wait for the token.confirmed webhook
|
confirmed
| Indicates that the bank has completed the mandate registration.
| Create recurring payment
|
rejected
| Indicates that the mandate registration has failed.
| Create the authorization transaction again
|
cancelled
| Indicates that the token has been cancelled.
| Create the authorization transaction again if you want to charge the customer.
|
paused
| Indicates that the token has been paused by your customer.
| The token is inactive. Your customer has paused the token. Ask them to resume the token to charge them.
|
Know more about the turnaround time (TAT) for Emandate from the FAQs.
This is the process of charging customers the actual subsequent amount using the fetched token and customer details.
Watch Out!
- It may take 24-36 hours for the subsequent payment to reflect on your Razorpay Dashboard. This is because of the failure of pre-debit notification and/or any retries that we attempt for the payment.
- Do not create subsequent payments on the last day of the cycle. This will cause the payment to fail.
Handy Tips
Subsequent payments can be charged without the need of any intervention from the customer. However, subsequent payments need to be created manually by you.
Once a Token goes to the confirmed state, you can start creating recurring payments for the customer as per your business requirements.
You can create subsequent payments using:
To create subsequent payments using the Razorpay Dashboard:
- Search for the token and check its status
After the authorisation transaction is complete, a token is generated. You can use the search feature on the Razorpay Dashboard to find the required token and check its status.
- Charge the token
After you have found the required confirmed token, you can create a subsequent payment by charging the token according to your business needs.
Order is Created Automatically
While creating a subsequent charge using the Razorpay Dashboard, Razorpay automatically creates an order for you when you charge a token. There is no need to create an order separately.

To create subsequent payments using APIs:
- Create a new Order
Like any other payment, each subsequent payment is tied to a unique order id. Associating a payment with an order id makes it easier to query Razorpay systems and handle multiple payment attempts and, allows automatic capturing of payments.
- Create a Payment
Once the order is created, you can create a payment for it.
After our system validates the payment along with token_id, a razorpay_payment_id is returned. In some cases, the payment entity returned is in the created state and may take 1 working day for confirmation.