View Reports Generate Razorpay Route reports for transfers, reversals and a combined report for all transactions for linked accounts.
You can export reports related to all movements of funds between your account and your linked accounts through Razorpay Dashboard and also using APIs.
The settlement recon API generates a detailed report of all the settlement made towards your account. You can use this report to verify transactions and reconcile payments, if necessary. These reports can be exported for each linked account. You can also generate a consolidated report containing transactions for all the linked accounts.
Know more about generating settlement reports using APIs.
You can fetch reports of all transfer and reversal operations that occurred on your account.
Watch this video to see how to generate the Transfers report.
VIDEO
To view the transfers report:
Log into the Razorpay Dashboard and click the Reports menu.
Select Transfers from the Select Report Type drop-down list.
Select the relevant Period from the Select Period drop-down list. The following options are available:
Today Yesterday Last 7 Days Last Month Daily - Select a date.Monthly - Select a month.Custom - Select the start and end date. You can also select a time.
Select the file format from the Select Format drop-down list. You can choose CSV, XLSX or XLS formats.
Click Generate Report or get it emailed to your registered email address by selecting the Email Report To check box.
Following is a report sample:
Watch this video to see how to generate the Reversals report.
VIDEO
To view the reversals report:
Log into the Razorpay Dashboard and click the Reports menu.
Select Reversals from the Select Report Type drop-down list.
Select the relevant Period from the Select Period drop-down list. The following options are available:
Today Yesterday Last 7 Days Last Month Daily - Select a date.Monthly - Select a month.Custom - Select a start and end date. You can also select a time.
Select the file format from Select Format drop-down list. You can choose CSV, XLSX or XLS formats.
Click Generate Report or get it emailed to your registered email address by selecting the Email Report To check box.
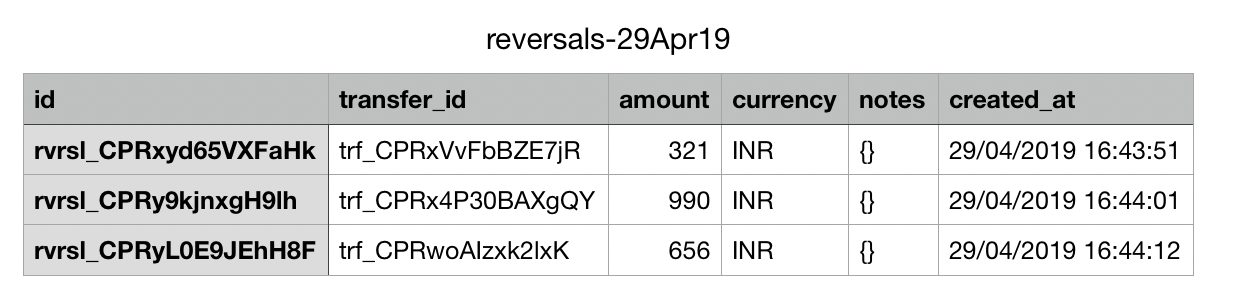
Following is a report sample: