Accept payments by creating Payment Links using Razorpay Payments Mobile App.
You can use the Razorpay Payments Mobile app to quickly create and share Payment Links with your customers. The customers can open the Payment Links to make payments using any of the payment methods, such as, UPI, Debit/Credit Card, Netbanking or Wallets.
Watch this video to see how to create a Payment Link.
Follow these steps to create a Payment Link:
Log in with your Razorpay Dashboard credentials.
Navigate to Products → Payment Link or tap Payment Link under Accept Payments section.
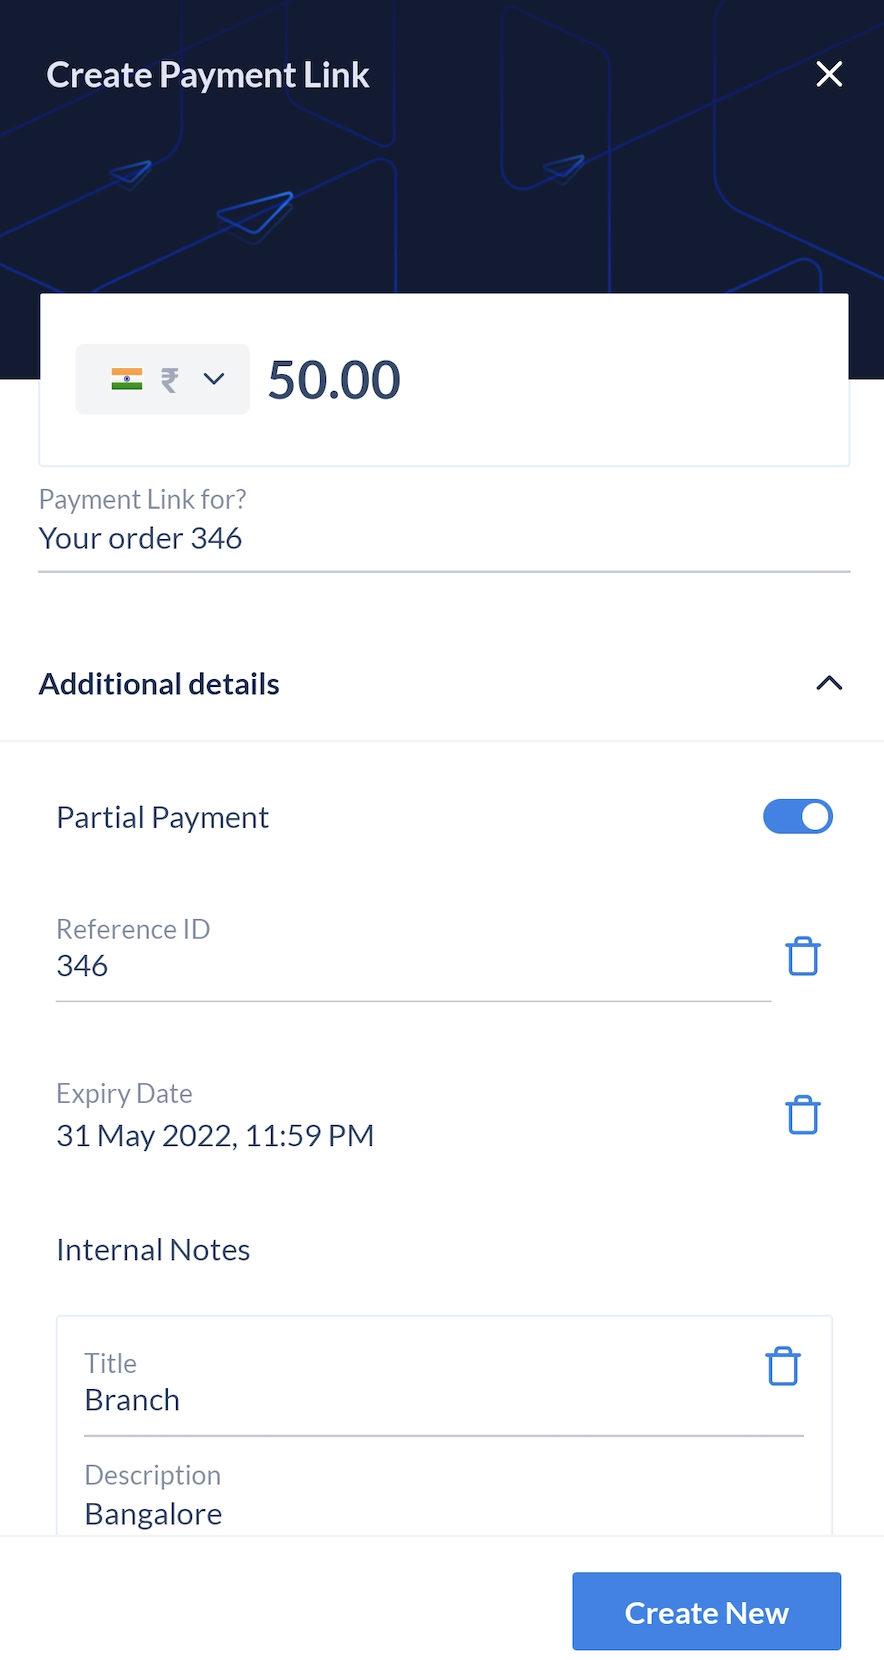
Provide the following details:
Select a currency.
Enter the amount to be received from the customer.
Add a description in the Payment Description field.
Configure the following optional fields as per your requirements:
Enable the Partial Payment feature.
Add a Reference ID for internal reference.
Enter Expiry Date and Time.
Provide additional details using Internal Notes. For example, Branch: Bangalore.
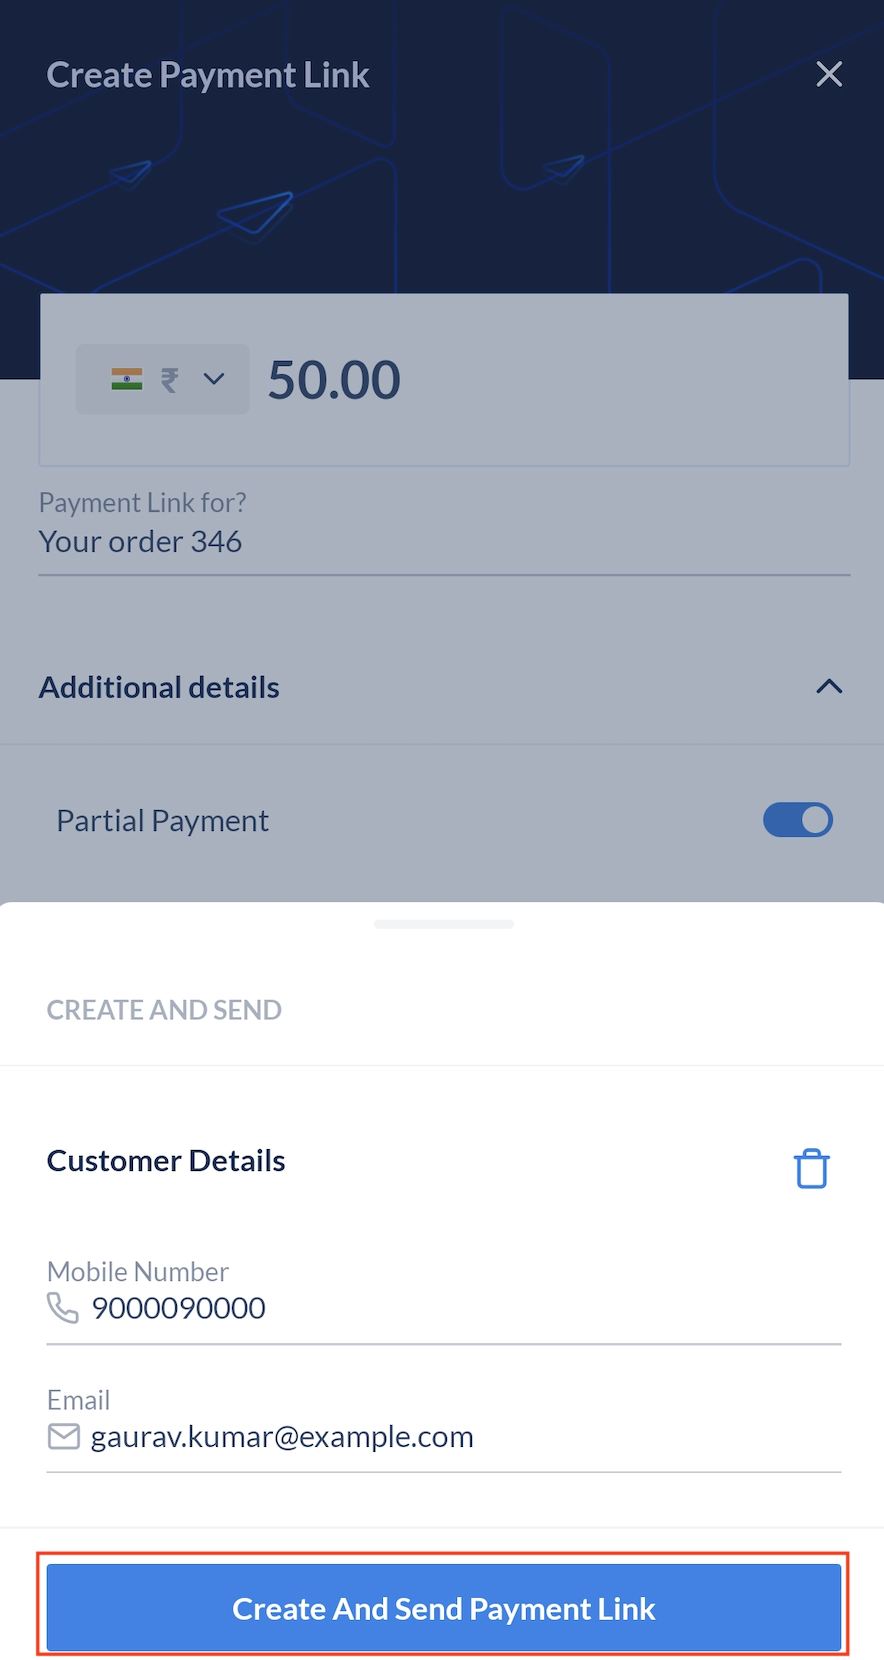
Tap Create.
Enter the customer's phone and email address to immediately send the Payment Link.
Alternatively, you can create the link without providing these details and share later.
Tap Create And Send Payment Link.
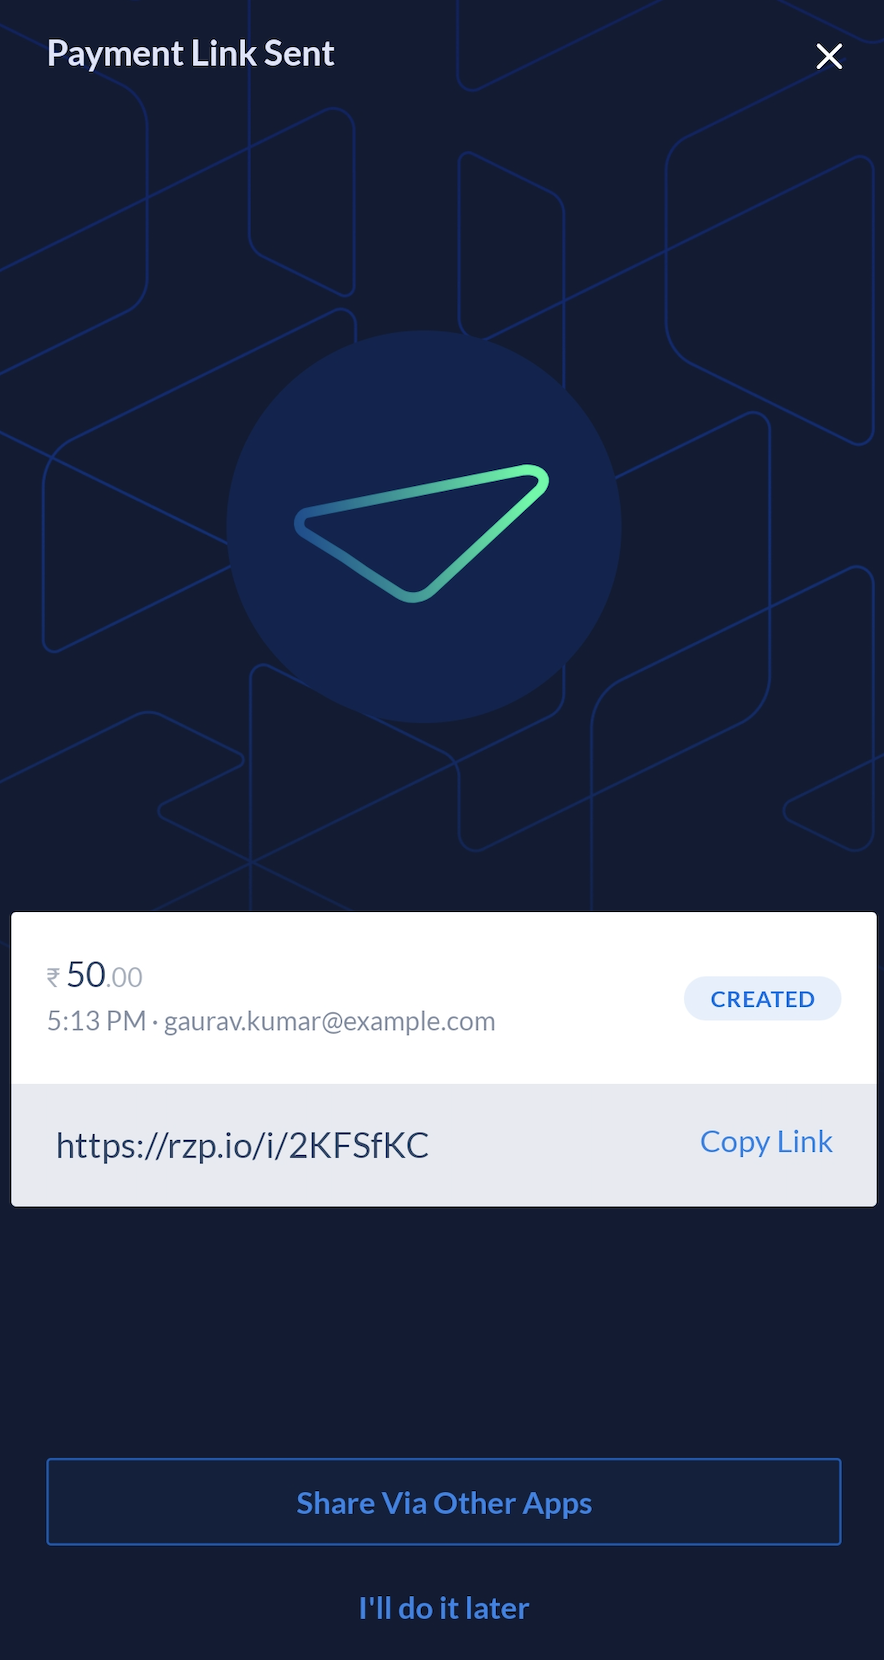
You can either share the link with your customer immediately via Facebook, Instagram, WhatsApp and more, or share it later.
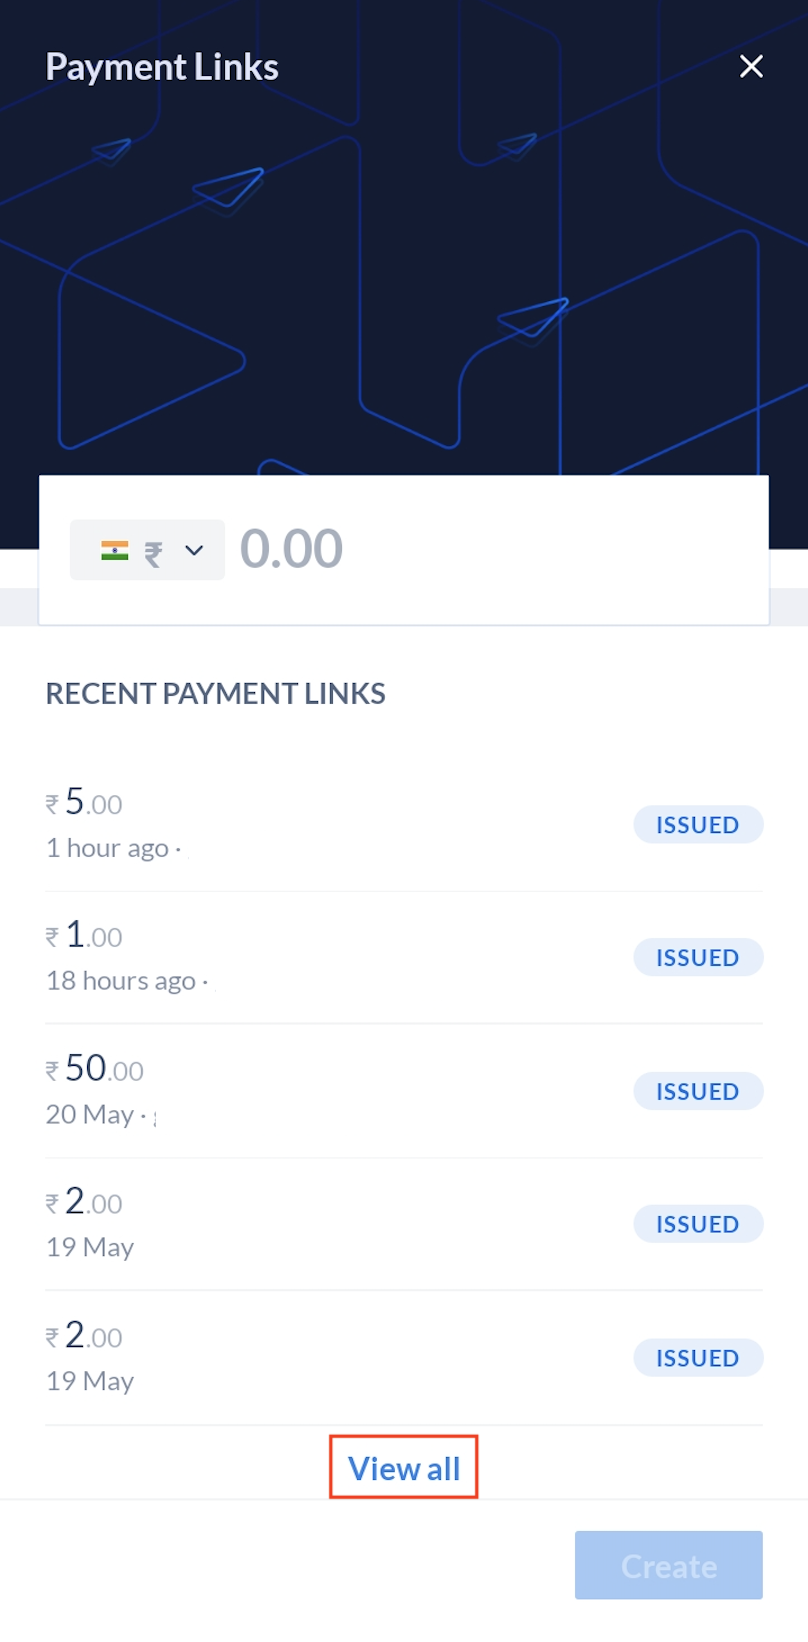
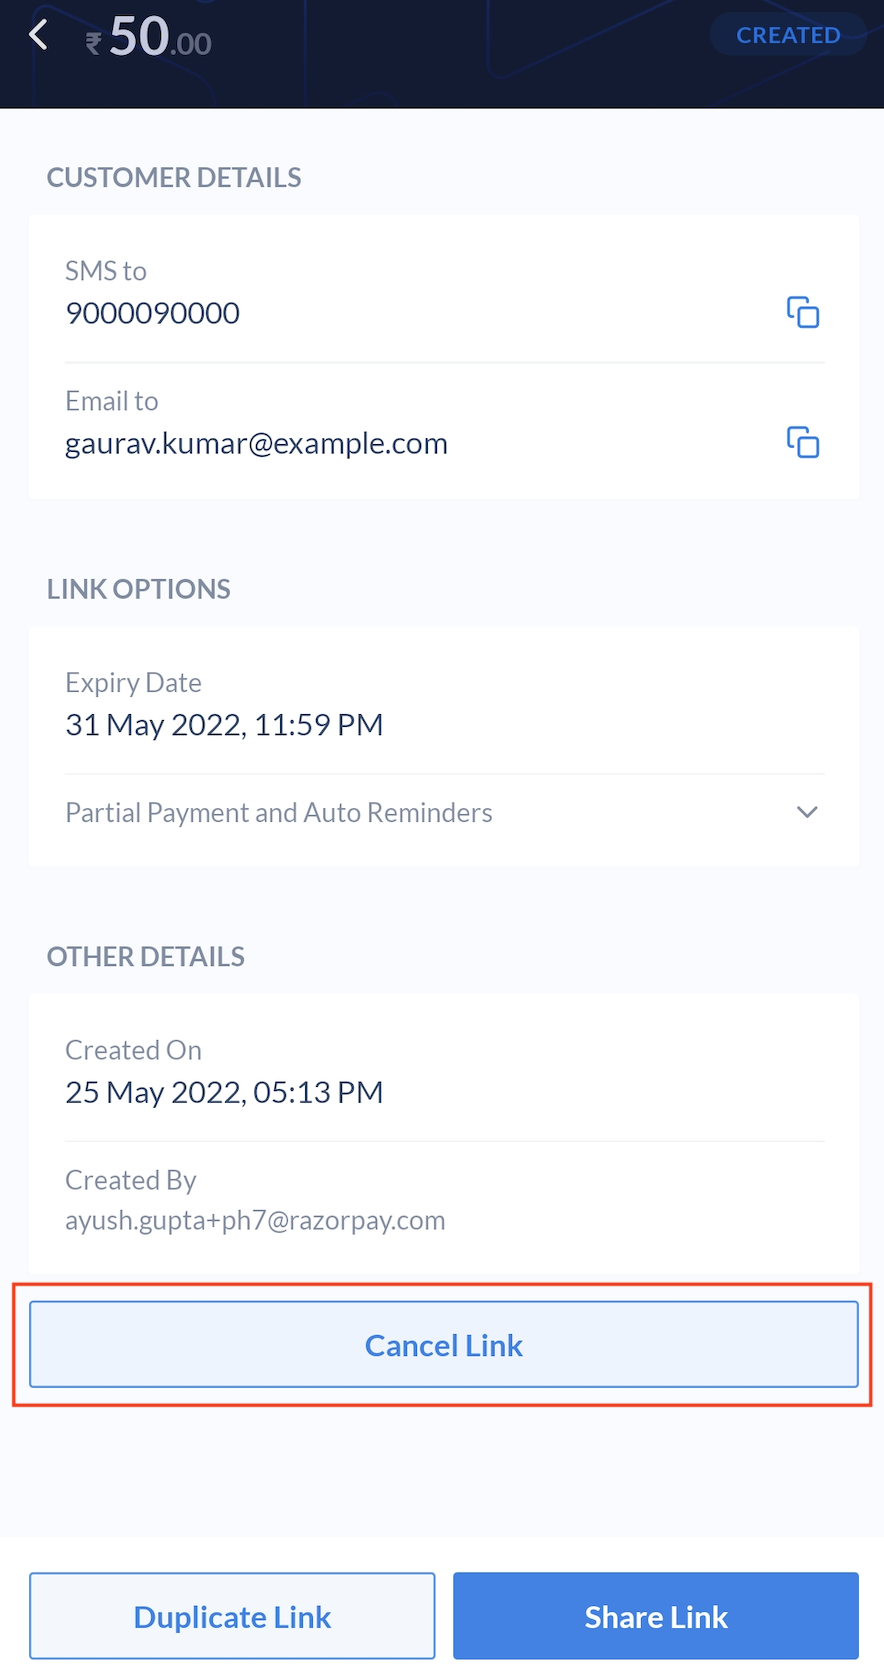
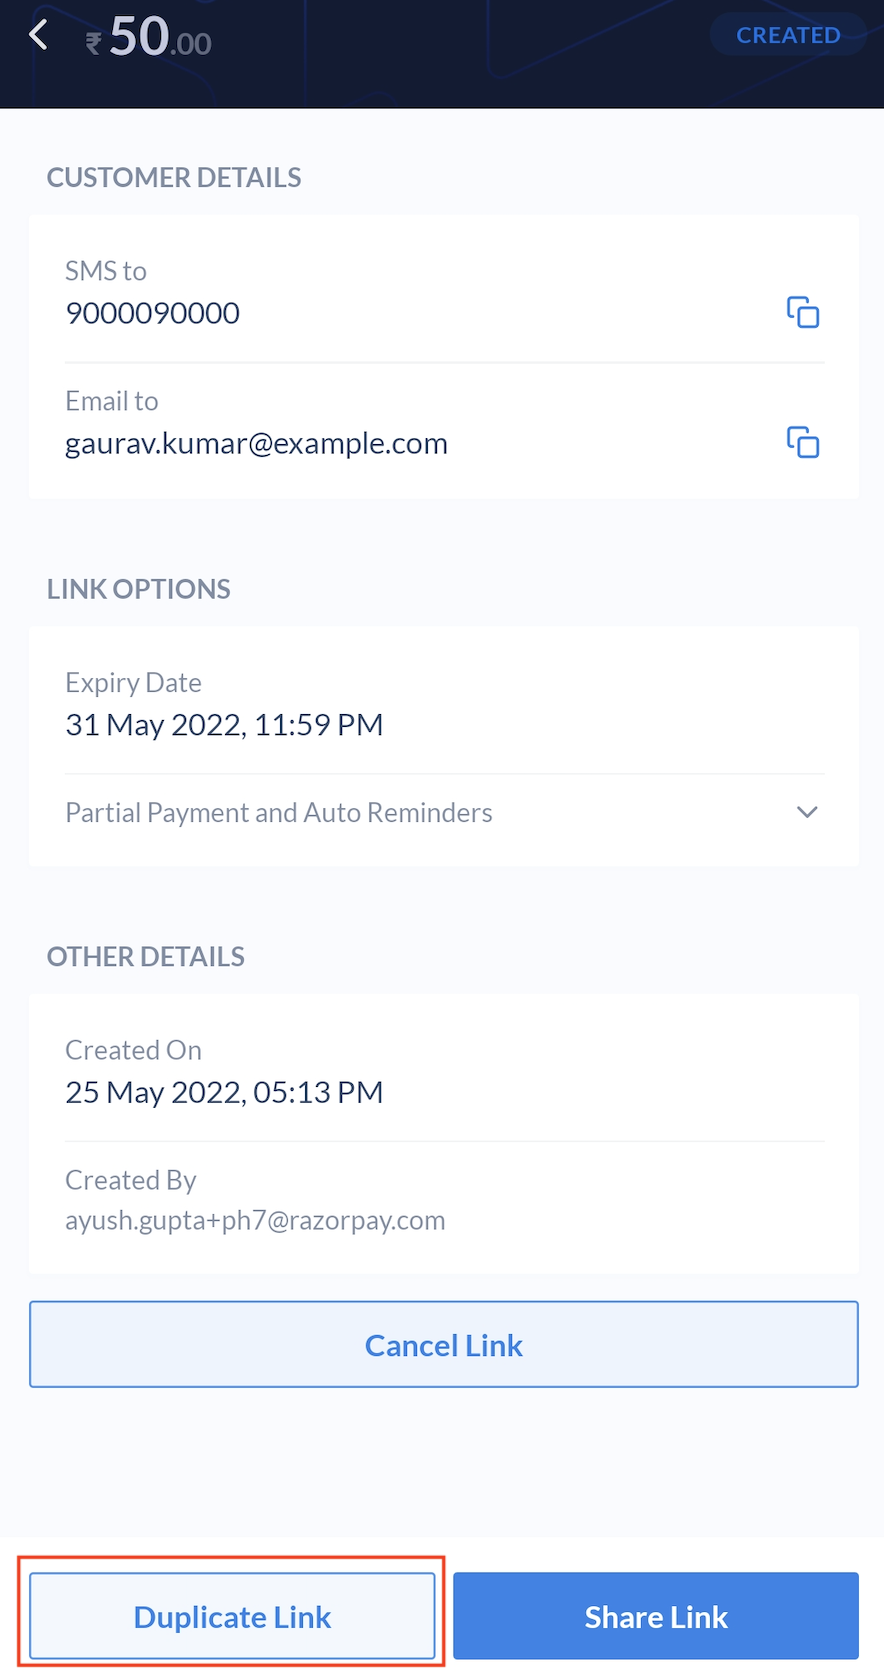
Under the Accept Payments section, tap Payment Link and scroll down to the Recent Payment Links section. The link appears on the list. Tap on the link to view more details. You can also choose to share the link or duplicate it.