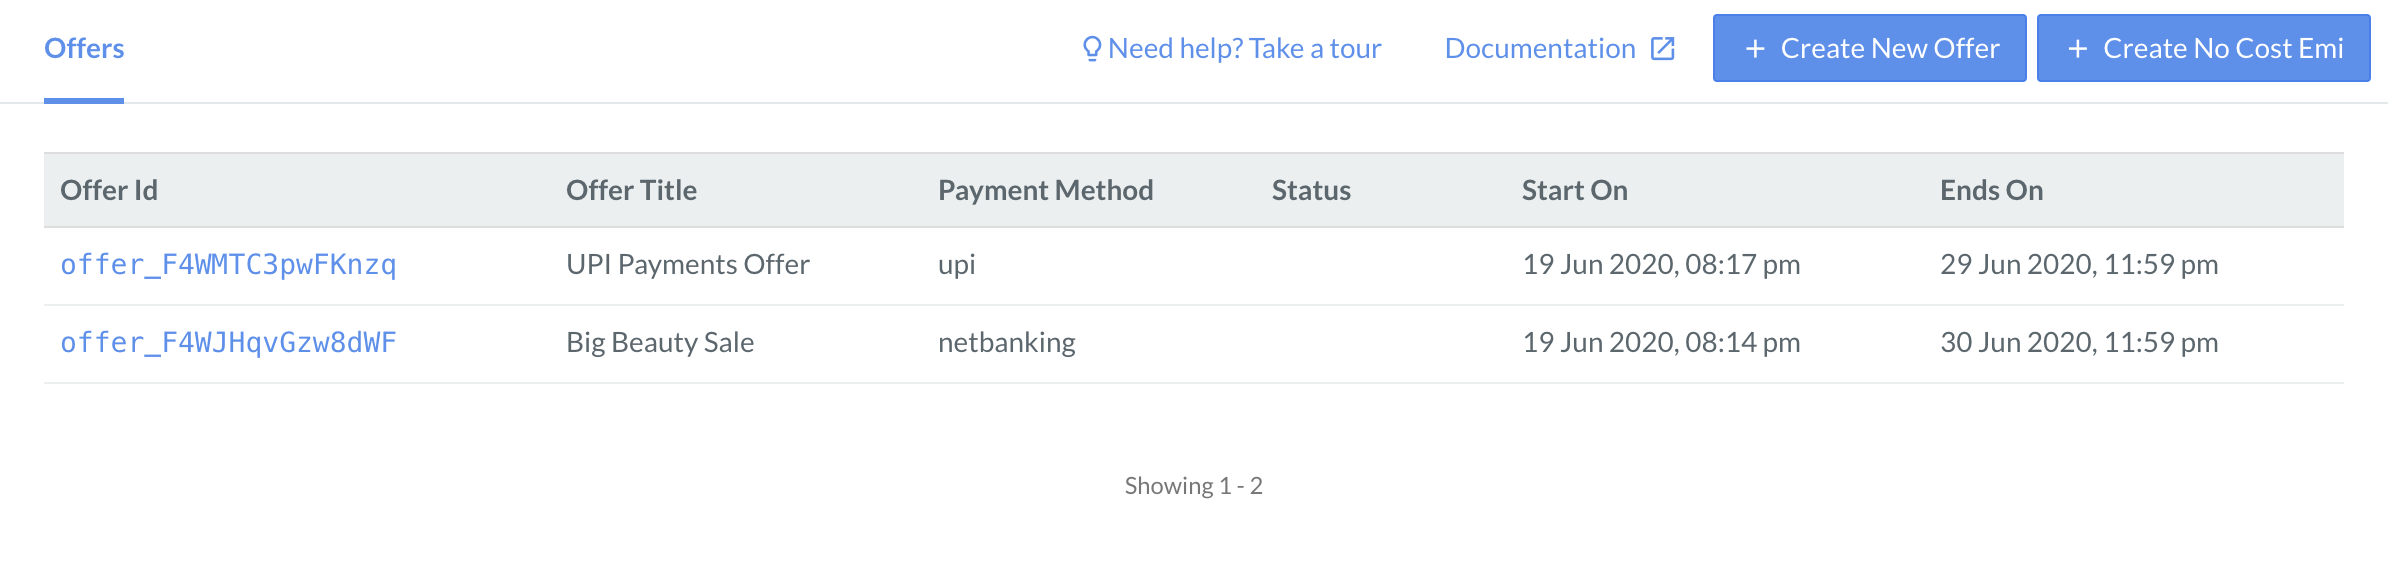
Create and manage Offers for customers from the Razorpay Dashboard.
You can create offers from the Razorpay Dashboard to promote your business. You can control offers at a granular level by configuring the payment methods permitted for the Offer, limiting the number of times the Offer can be availed and so on.
Handy Tips
Once you create an offer, you cannot edit the offer. To make changes, disable the previous offer and create a new one.
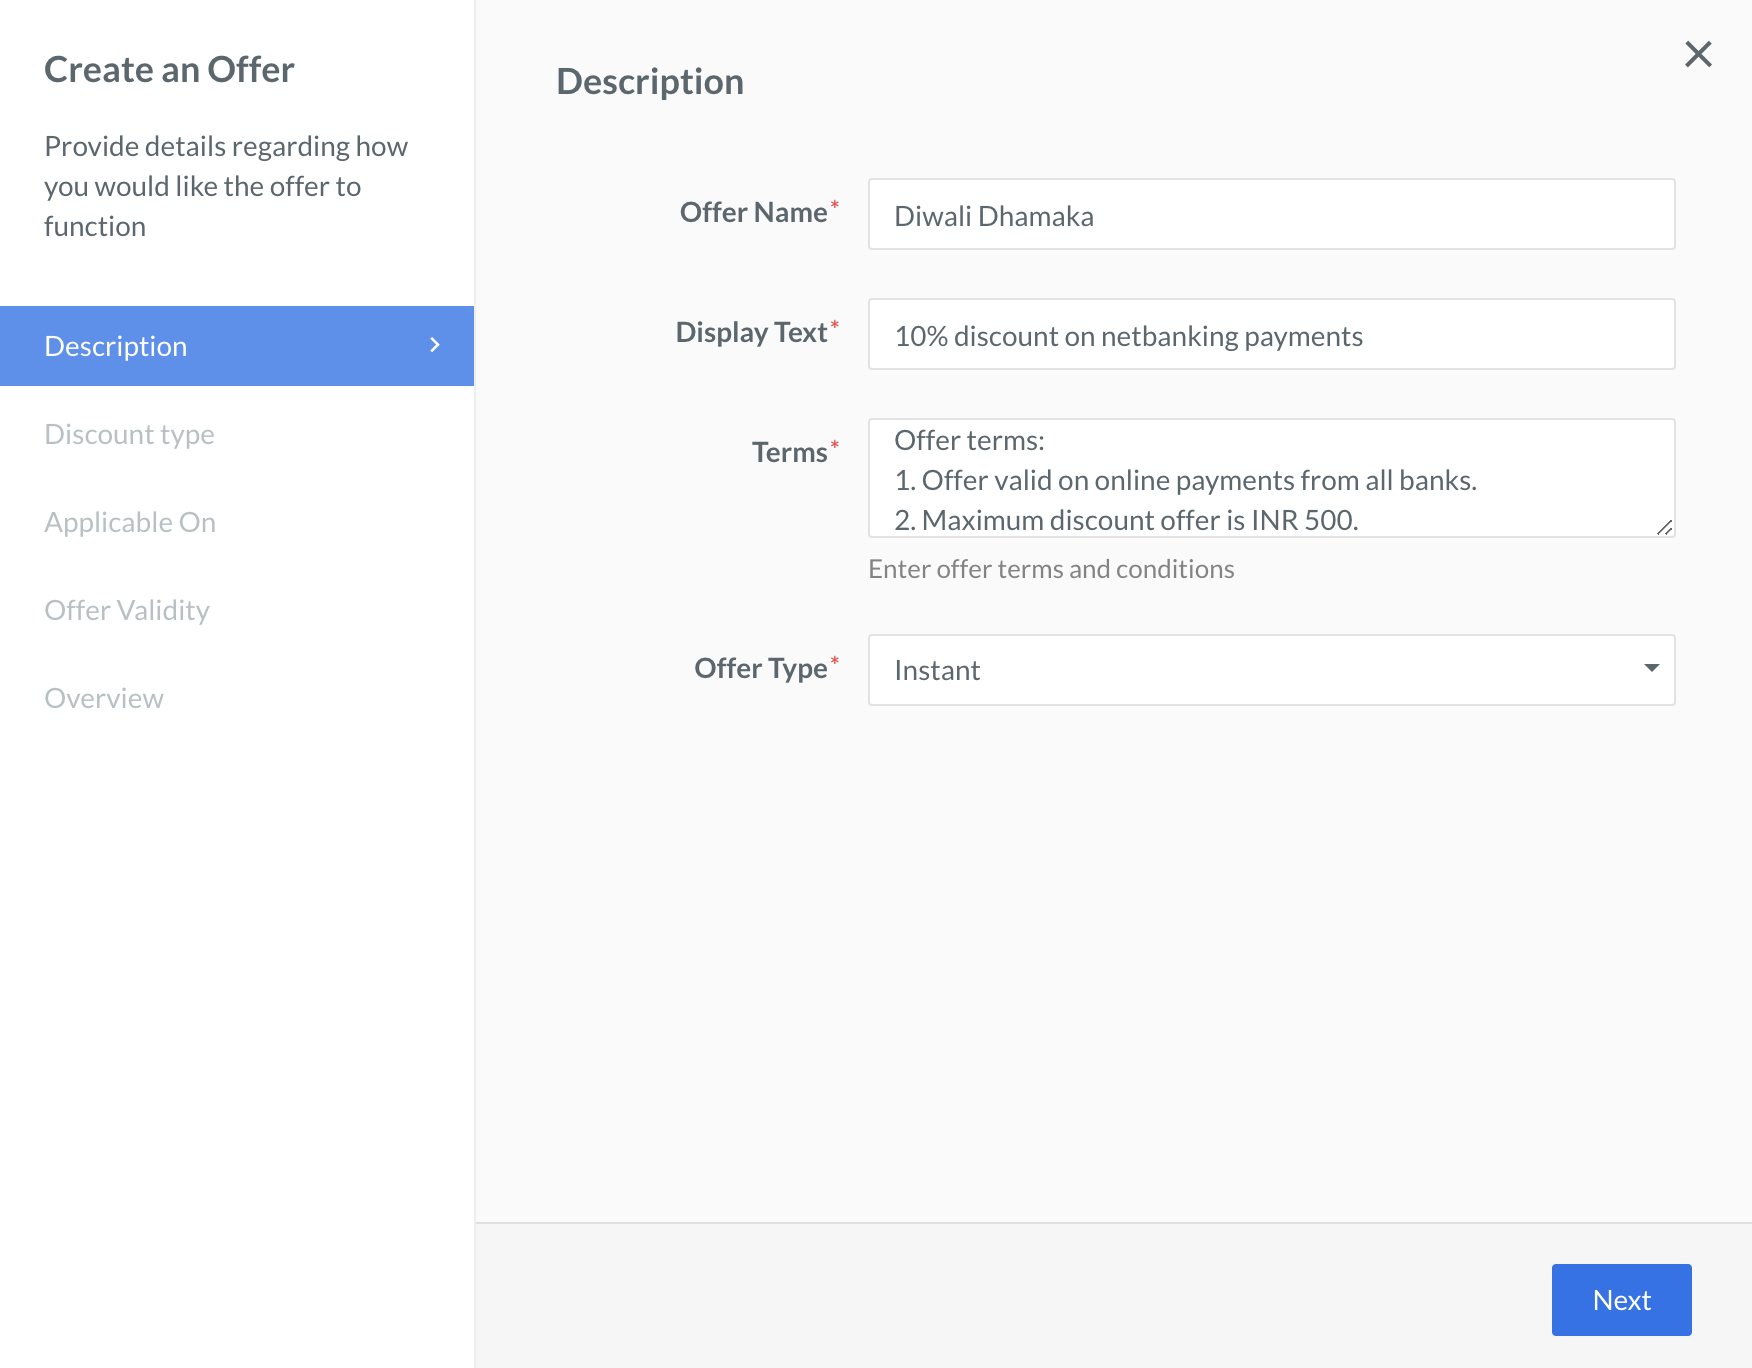
In the Description section, enter the following details. All the fields are mandatory.
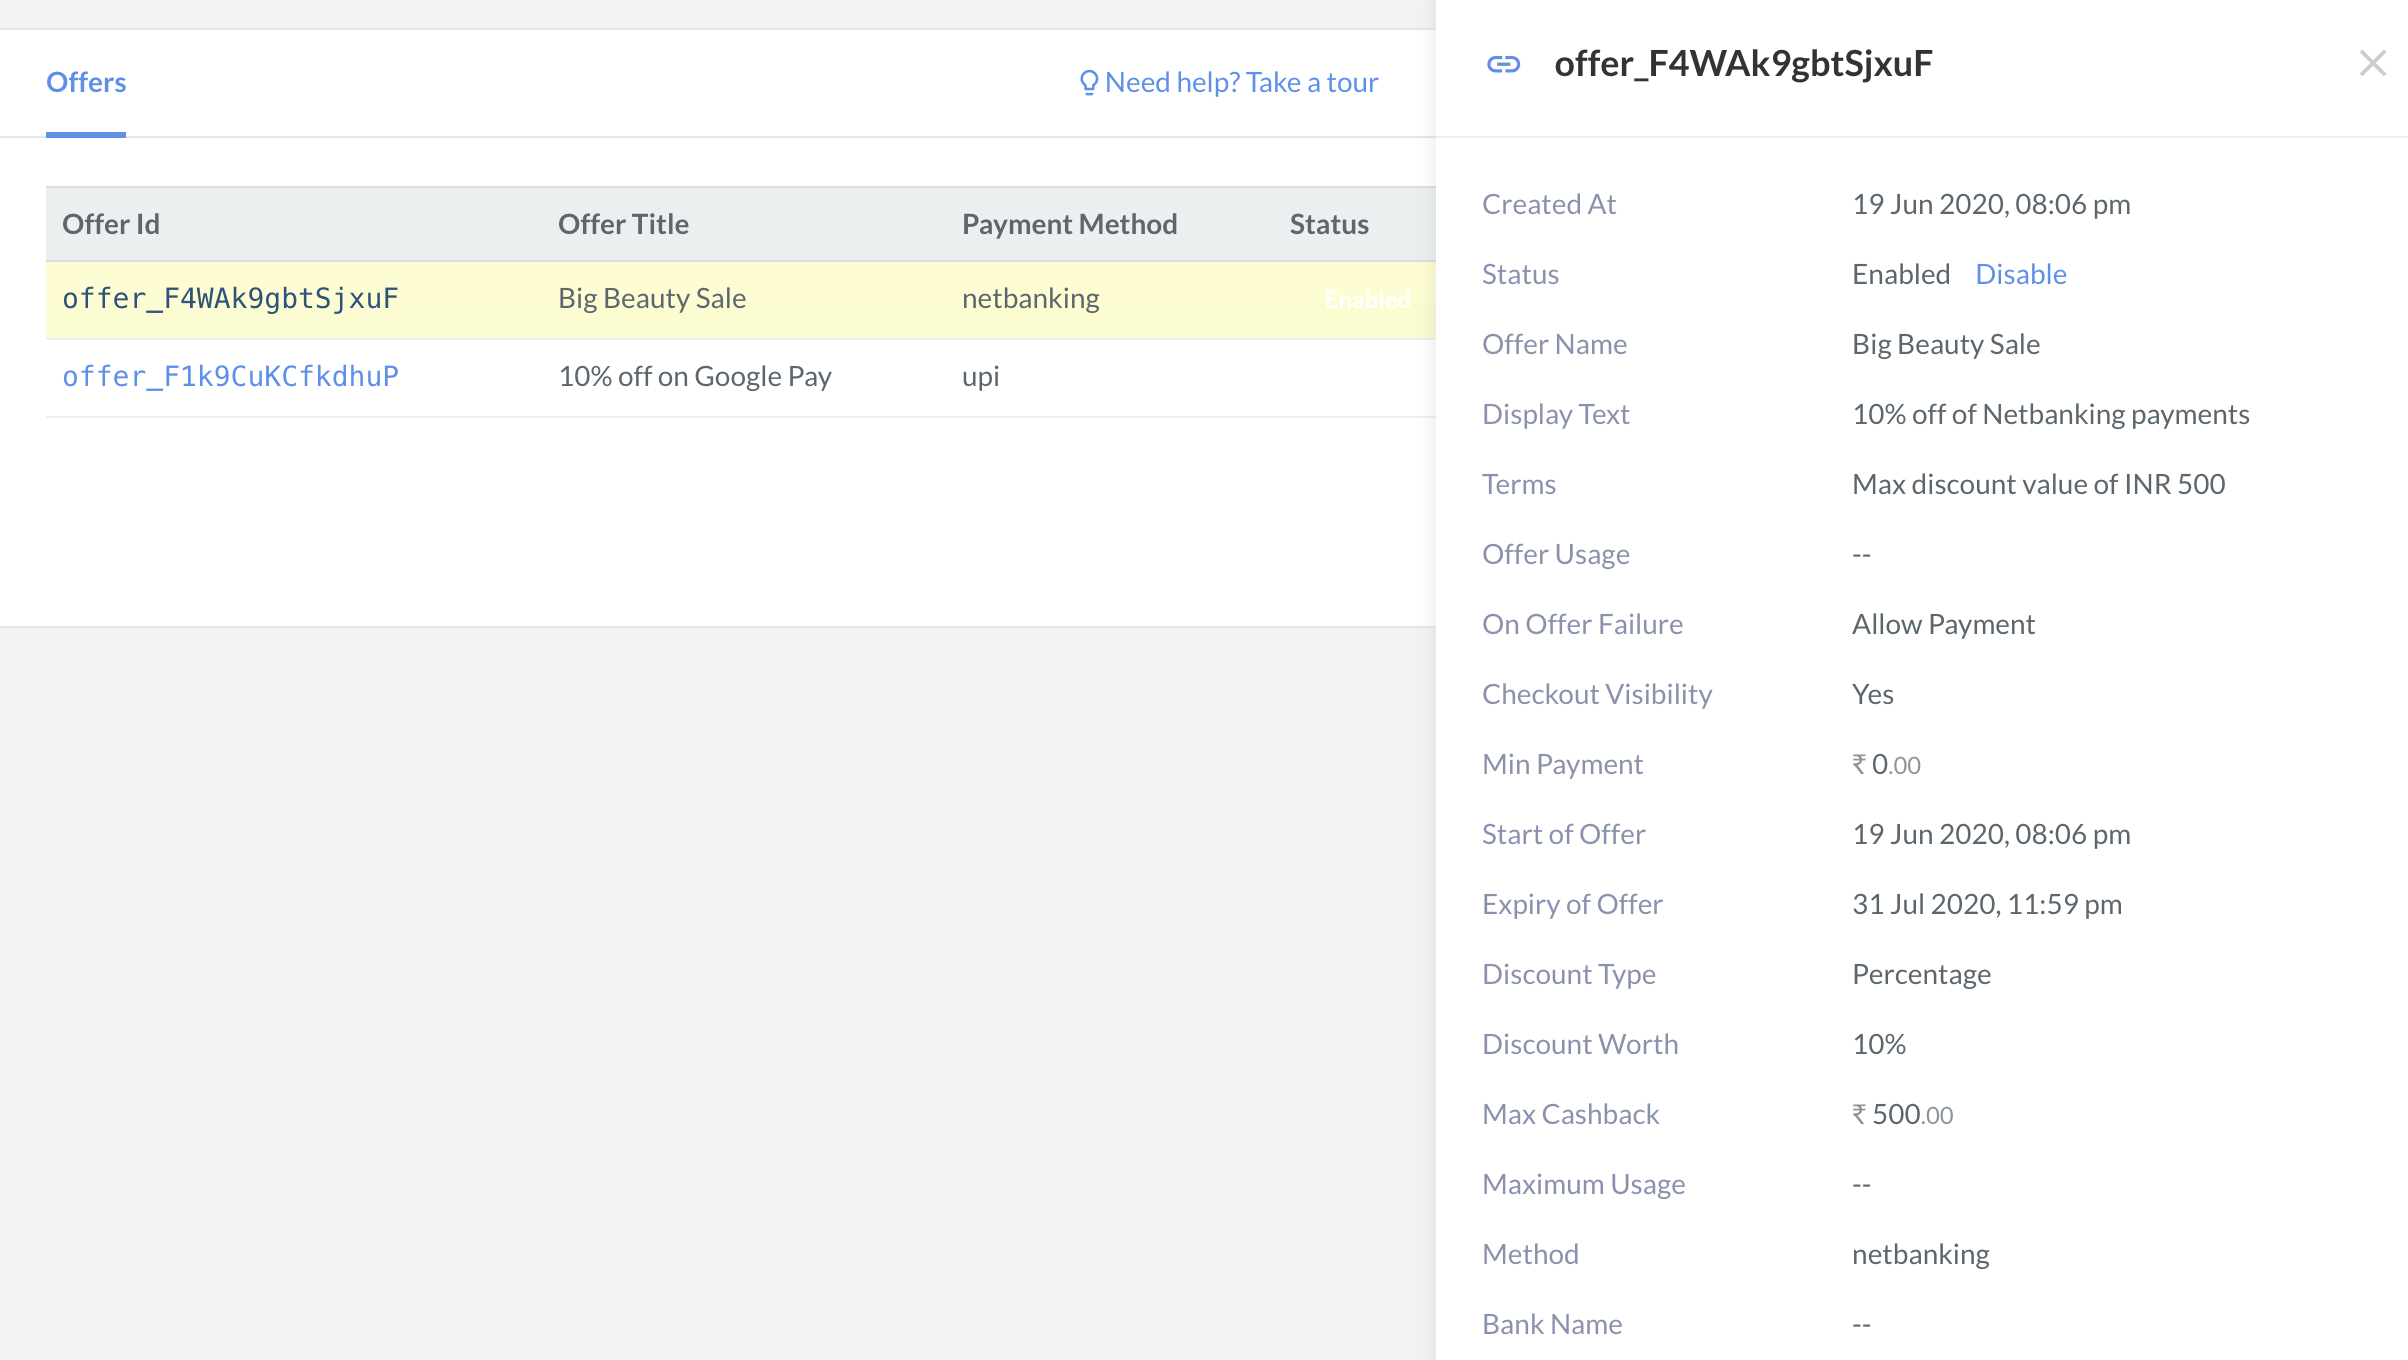
Offer Name - Enter the name of the offer. For example, Monsoon Offer. This appears at Checkout.
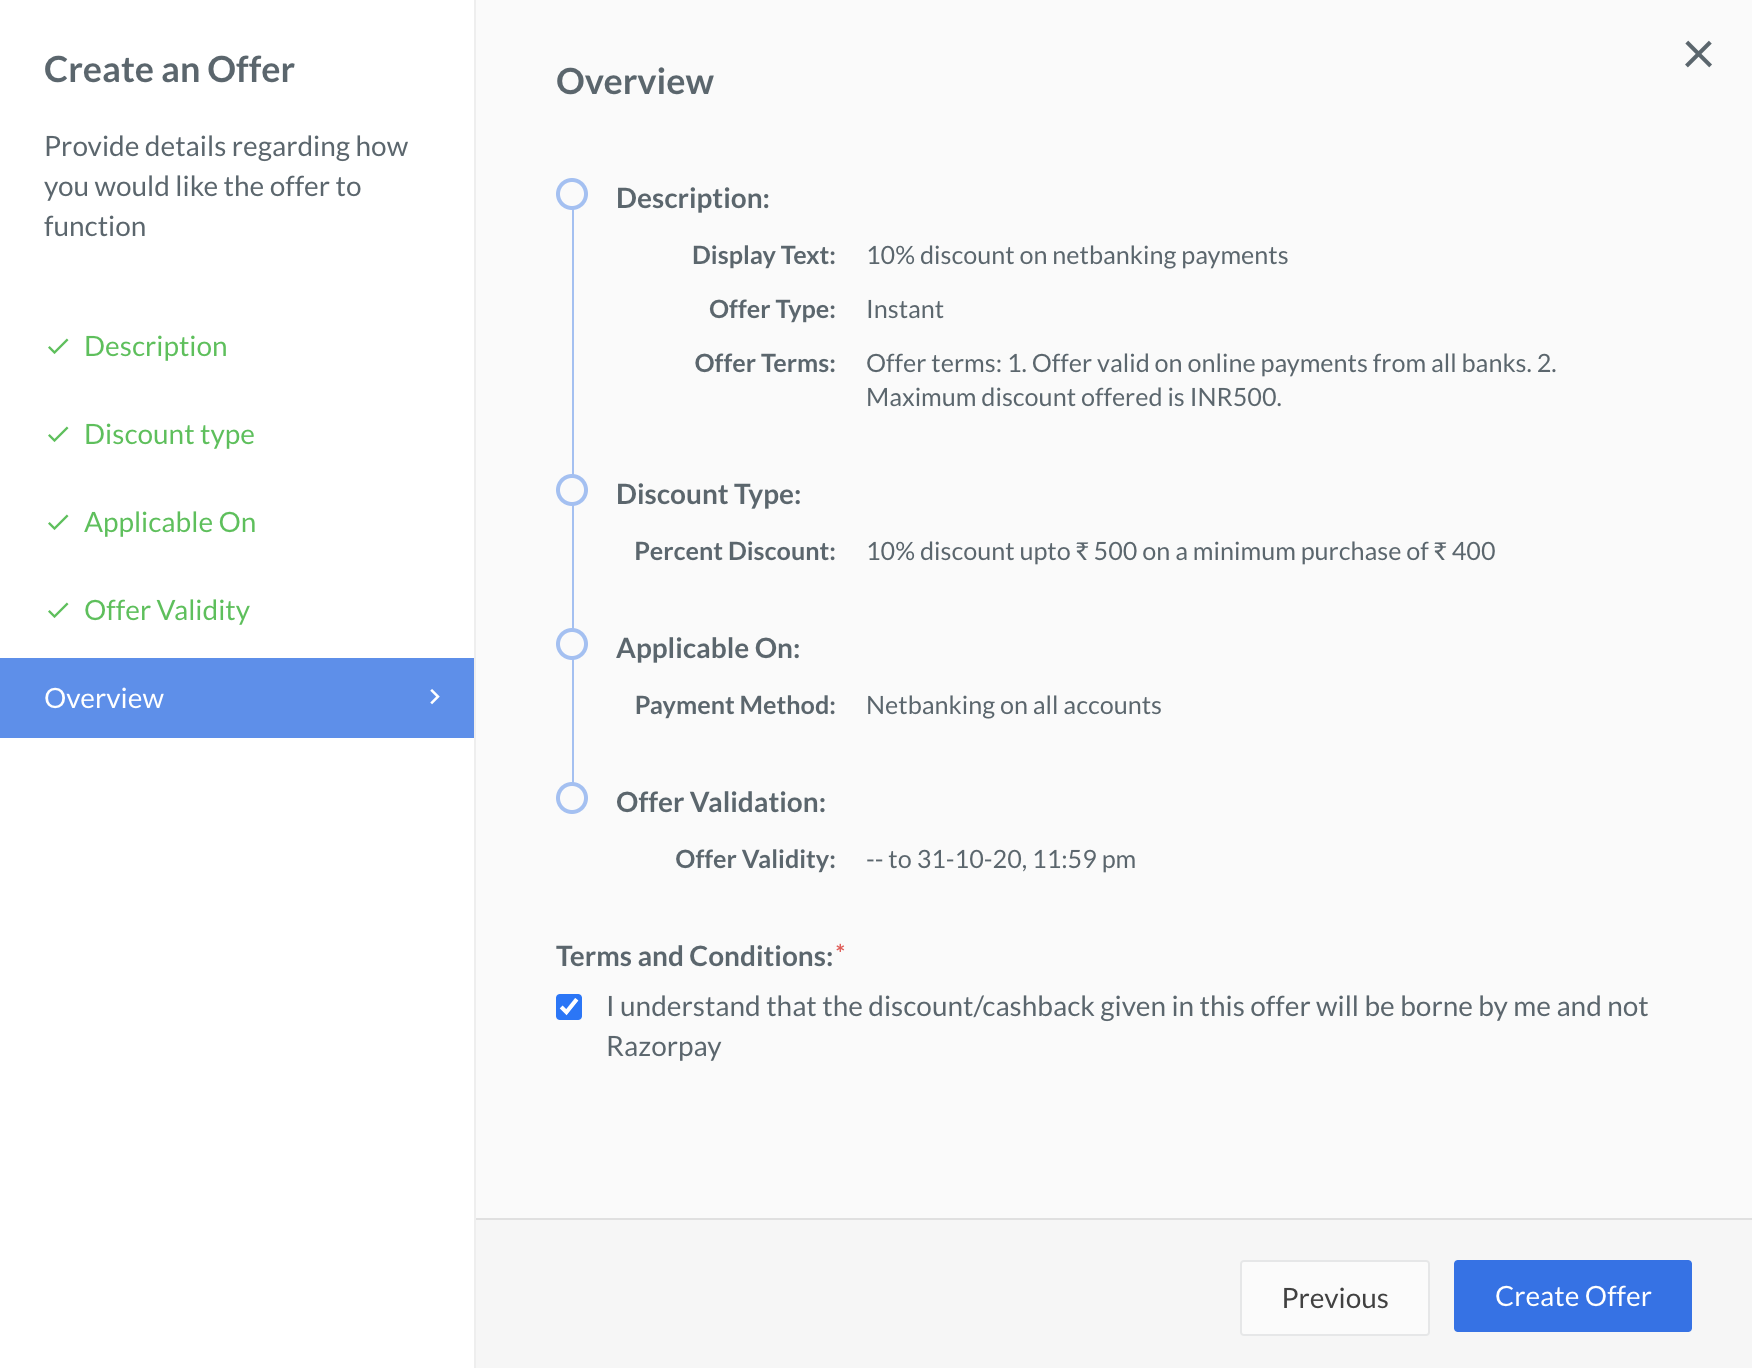
Display Text - Enter a meaningful description for the offer. For example, 10% discount on netbanking payments. This appears at Checkout.
Terms - Enter terms and conditions for the offer.
Offer Type - Select the type of offer that you want to create. The possible values are:
Instant - The offer is applied instantly. That is, the customer pays only the discounted amount while making the payment.
Cashback - The customer pays the entire bill amount and receives the cashback to their account from the bank or the wallet provider later. Cashbacks need to be processed by the provider. Create Cashback Offers only if you have an agreement with them.
Already Discounted - You can enforce discounts on customers. This is a one-time offer applied to all the customers by default before Checkout. Since the offer is already applied, there will be no change in the amount at Checkout. For example, if you provide a 10% discount to all customers on the website, the discounted value will appear on the website and the amount will not change further at Checkout.
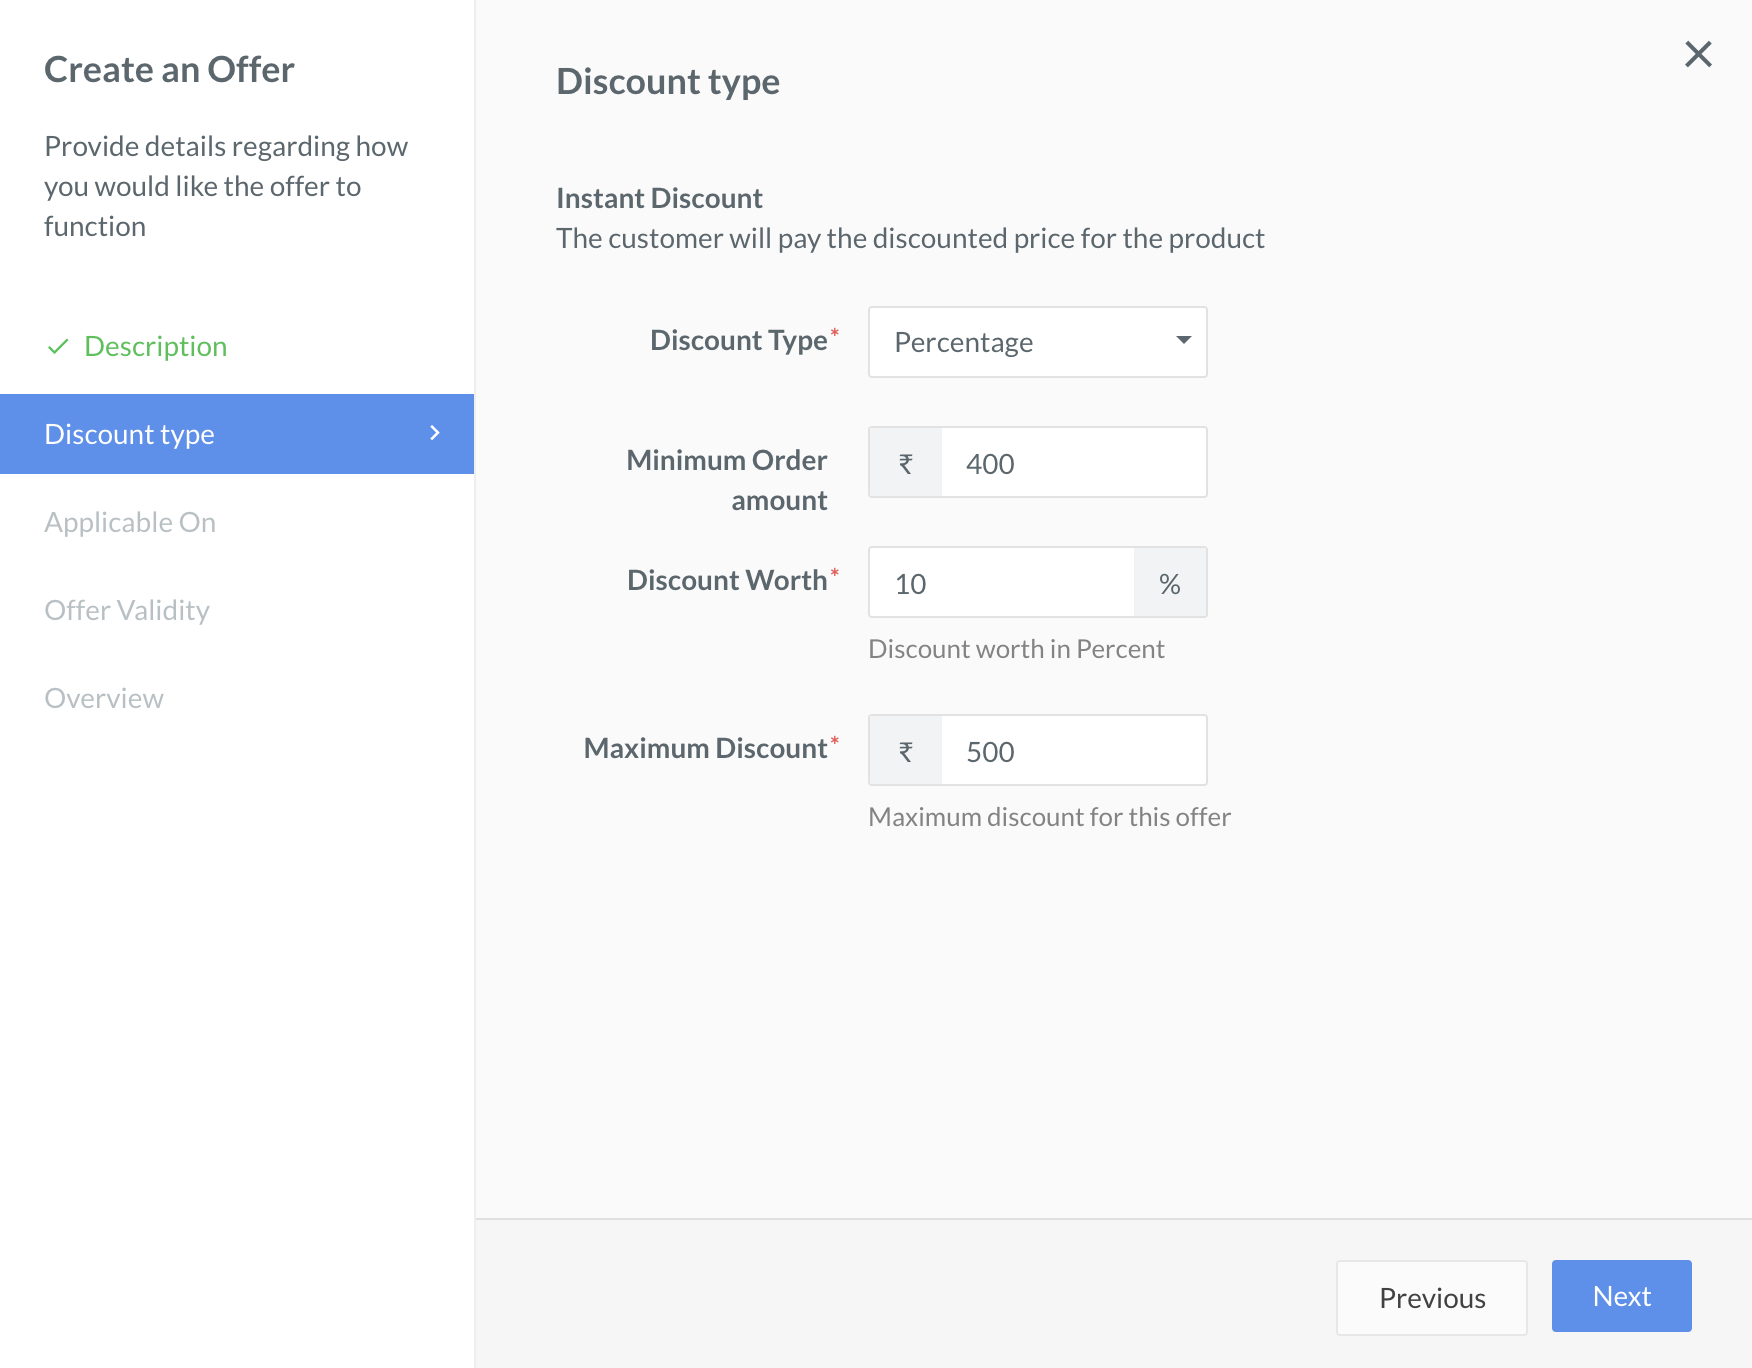
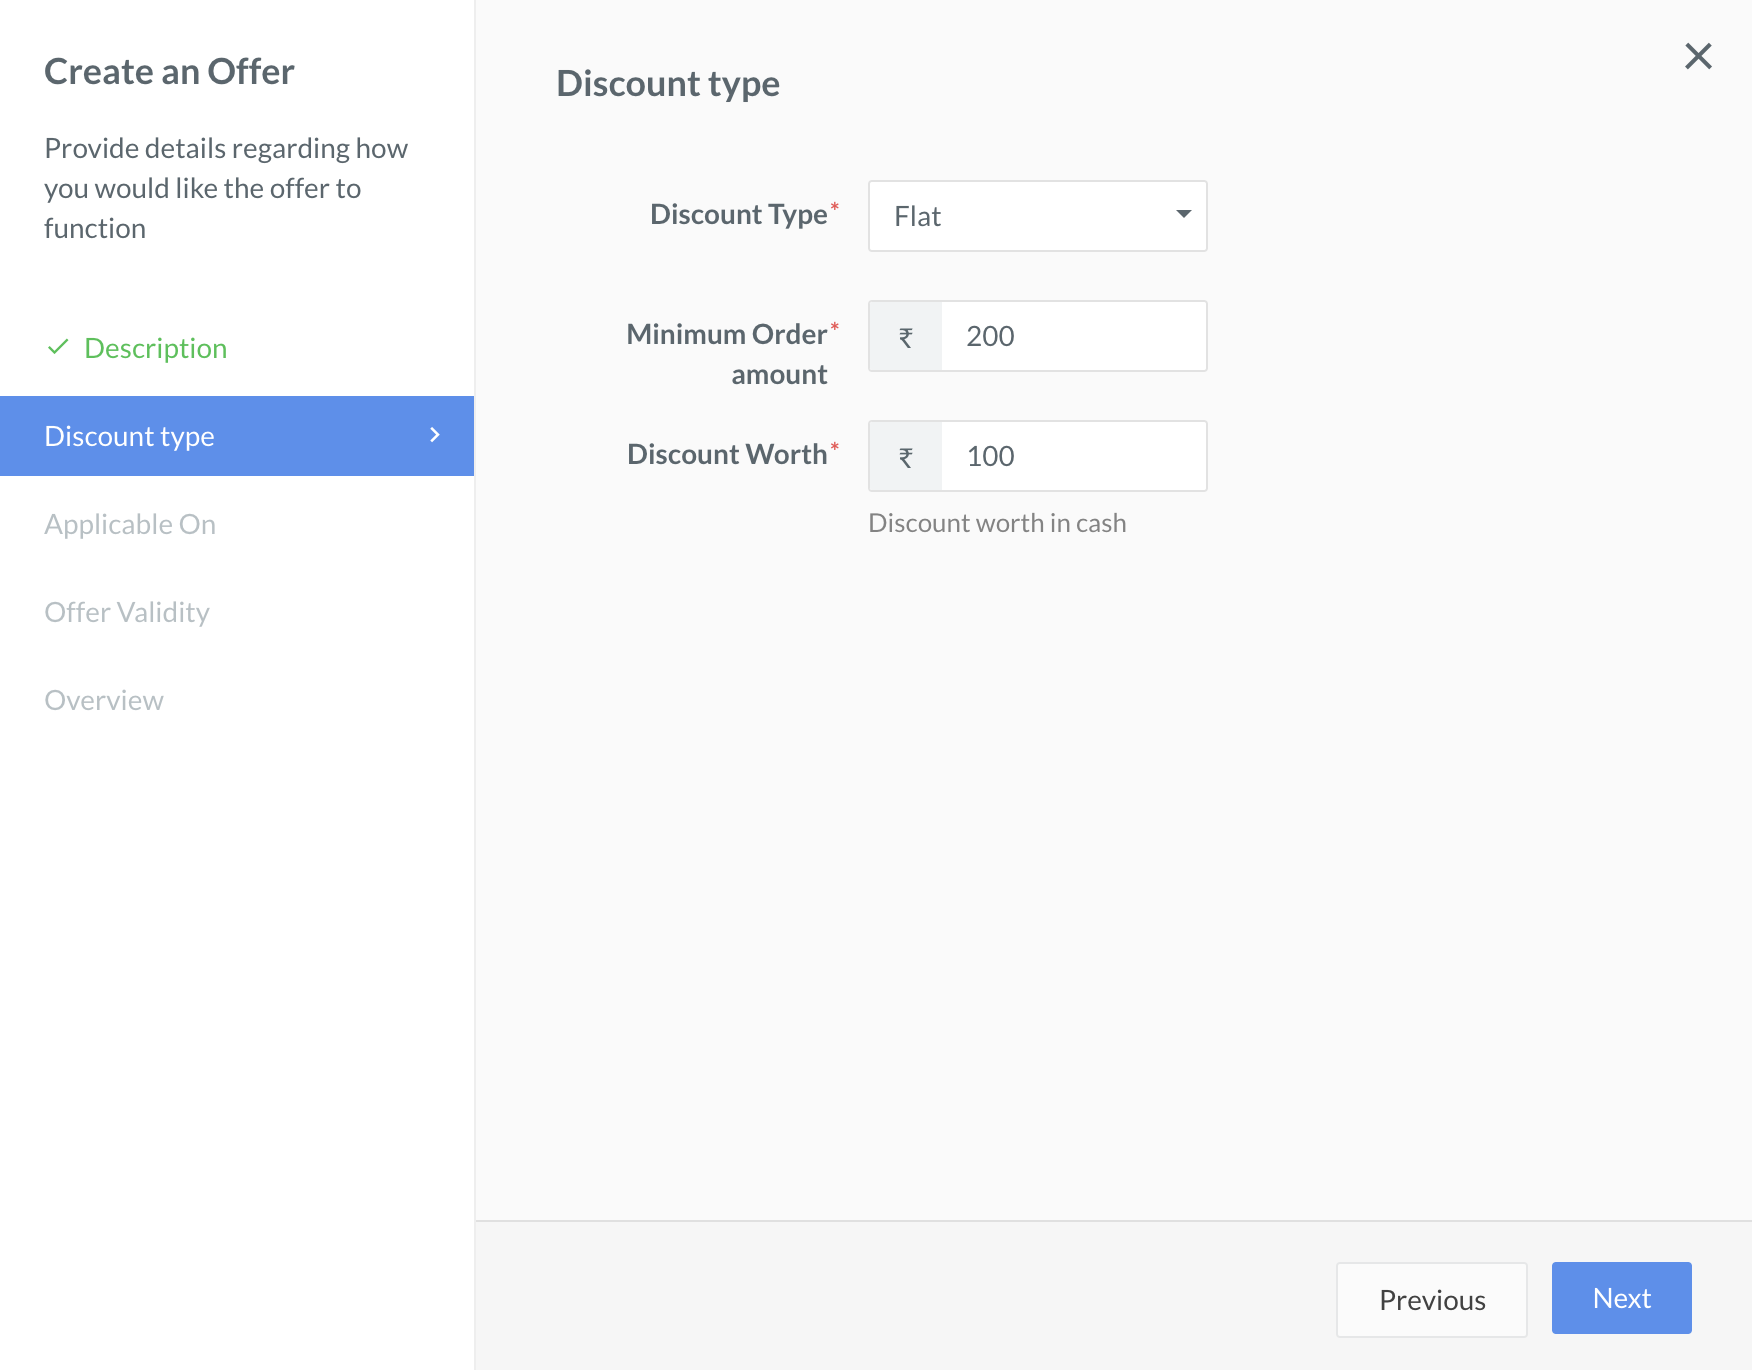
In the Discount Type section, enter the discount details that should be applied to the offer.
In the Discount Type field, select the type of discount that should be applied to the offer: Percentage or Flat
Flat: In this type, a fixed amount is deducted from the original amount.
Minimum Order amount - Enter the minimum bill amount for which the offer can be applied.
Discount worth - Enter an amount by which the original price should be reduced. For example, if ₹30 is the Flat discount applied, then an amount of 30 is deducted from the original price.
Percentage: In this type, the offer is calculated in terms of percentage.
Minimum Order amount - Enter the minimum bill amount for which the offer can be applied.
Discount Worth - The percentage by which the original price should be reduced. For example, if 10 is the Percentage discount to be applied, on an order amount of 300, 30 will be deducted.
Maximum Discount - The maximum amount that can be deducted from the bill amount. For example, you can ensure that the customer cannot avail a discount higher than 500, irrespective of the order amount.
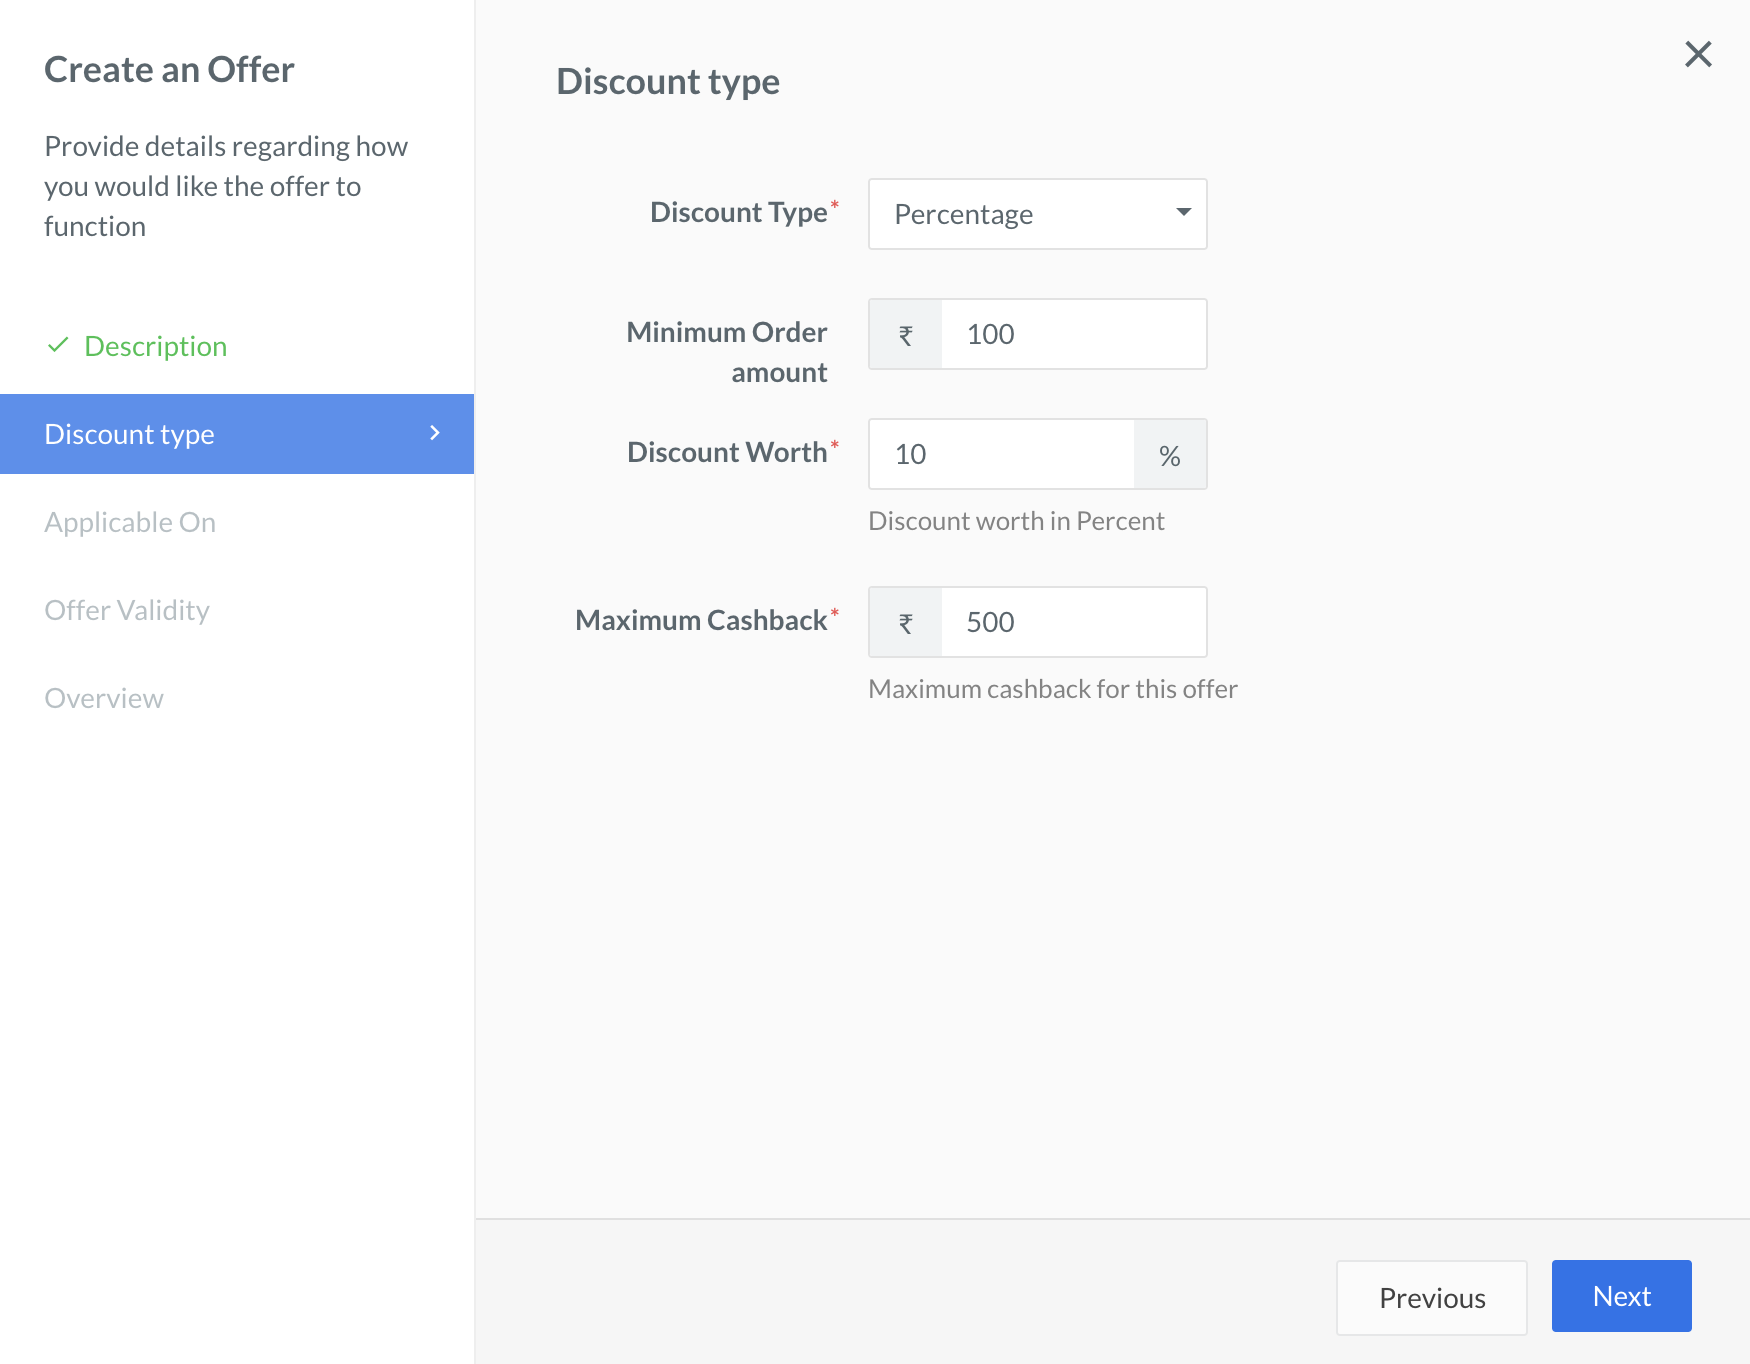
In the Discount Type section, enter the details of the cashback that should be applied.
Cashback Offers
Cashbacks need to be processed by the provider (wallet providers, banks and so on). Create Cashback Offers only if you have an agreement with them.
In the Discount Type field, select the type of cashback that should be applied to the offer: Percentage or Flat
Flat: In this type, a fixed amount is paid out to the customer.
Minimum Order amount - Enter the minimum bill amount for which the offer can be applied.
Discount worth - Enter the amount to be paid out to the customer.
Percentage: In this type, the offer is calculated in terms of percentage.
Minimum Order amount - Enter the minimum bill amount for which the offer can be applied.
Discount Worth - The percentage of order amount that must be paid out as cashback to the customer. For example, if 10% of the order amount is to be paid out to the customer, and the amount is 100, the cashback amount will be ₹10.
Maximum Discount - The maximum amount that can be offered as cashback. For example, you can ensure that the customer will not be paid more than 100, irrespective of the order amount.
This is a one-time offer applied to all the customers by default before Checkout. Since the offer is already applied, there will be no change in the amount at Checkout. For example, if you provide a 10% discount to all customers on the website, the discounted value will appear on the website and the amount will not change further at Checkout.
In the Discount Type section, enter the details of the discount:
In the Discount Type field, select the type of discount that should be applied to the offer: Percentage or Flat
Flat: In this type, a fixed amount is deducted from the original amount.
Minimum Order amount - Enter the minimum bill amount for which the offer can be applied.
Discount worth - Enter an amount by which the original price should be reduced. For example, if ₹30 is the Flat discount applied, an amount of 30 is deducted from the original price.
Percentage: In this type, the offer is calculated in terms of percentage.
Minimum Order amount - Enter the minimum bill amount for which the offer can be applied.
Discount Worth - The percentage by which the original price should be reduced. For example, if 10 is the Percentage discount to be applied, on an order amount of 300, 30 will be deducted.
Maximum Discount - The maximum amount that can be deducted from the bill amount. For example, you can ensure that the customer cannot avail a discount higher than 500, irrespective of the order amount.
Click Next.
Display Already Discounted Offer at Checkout
If you create an offer with the Already Discounted discount type, you must pass the Offer_id parameter while creating the order. This is mandatory for the offer to be available at Checkout.
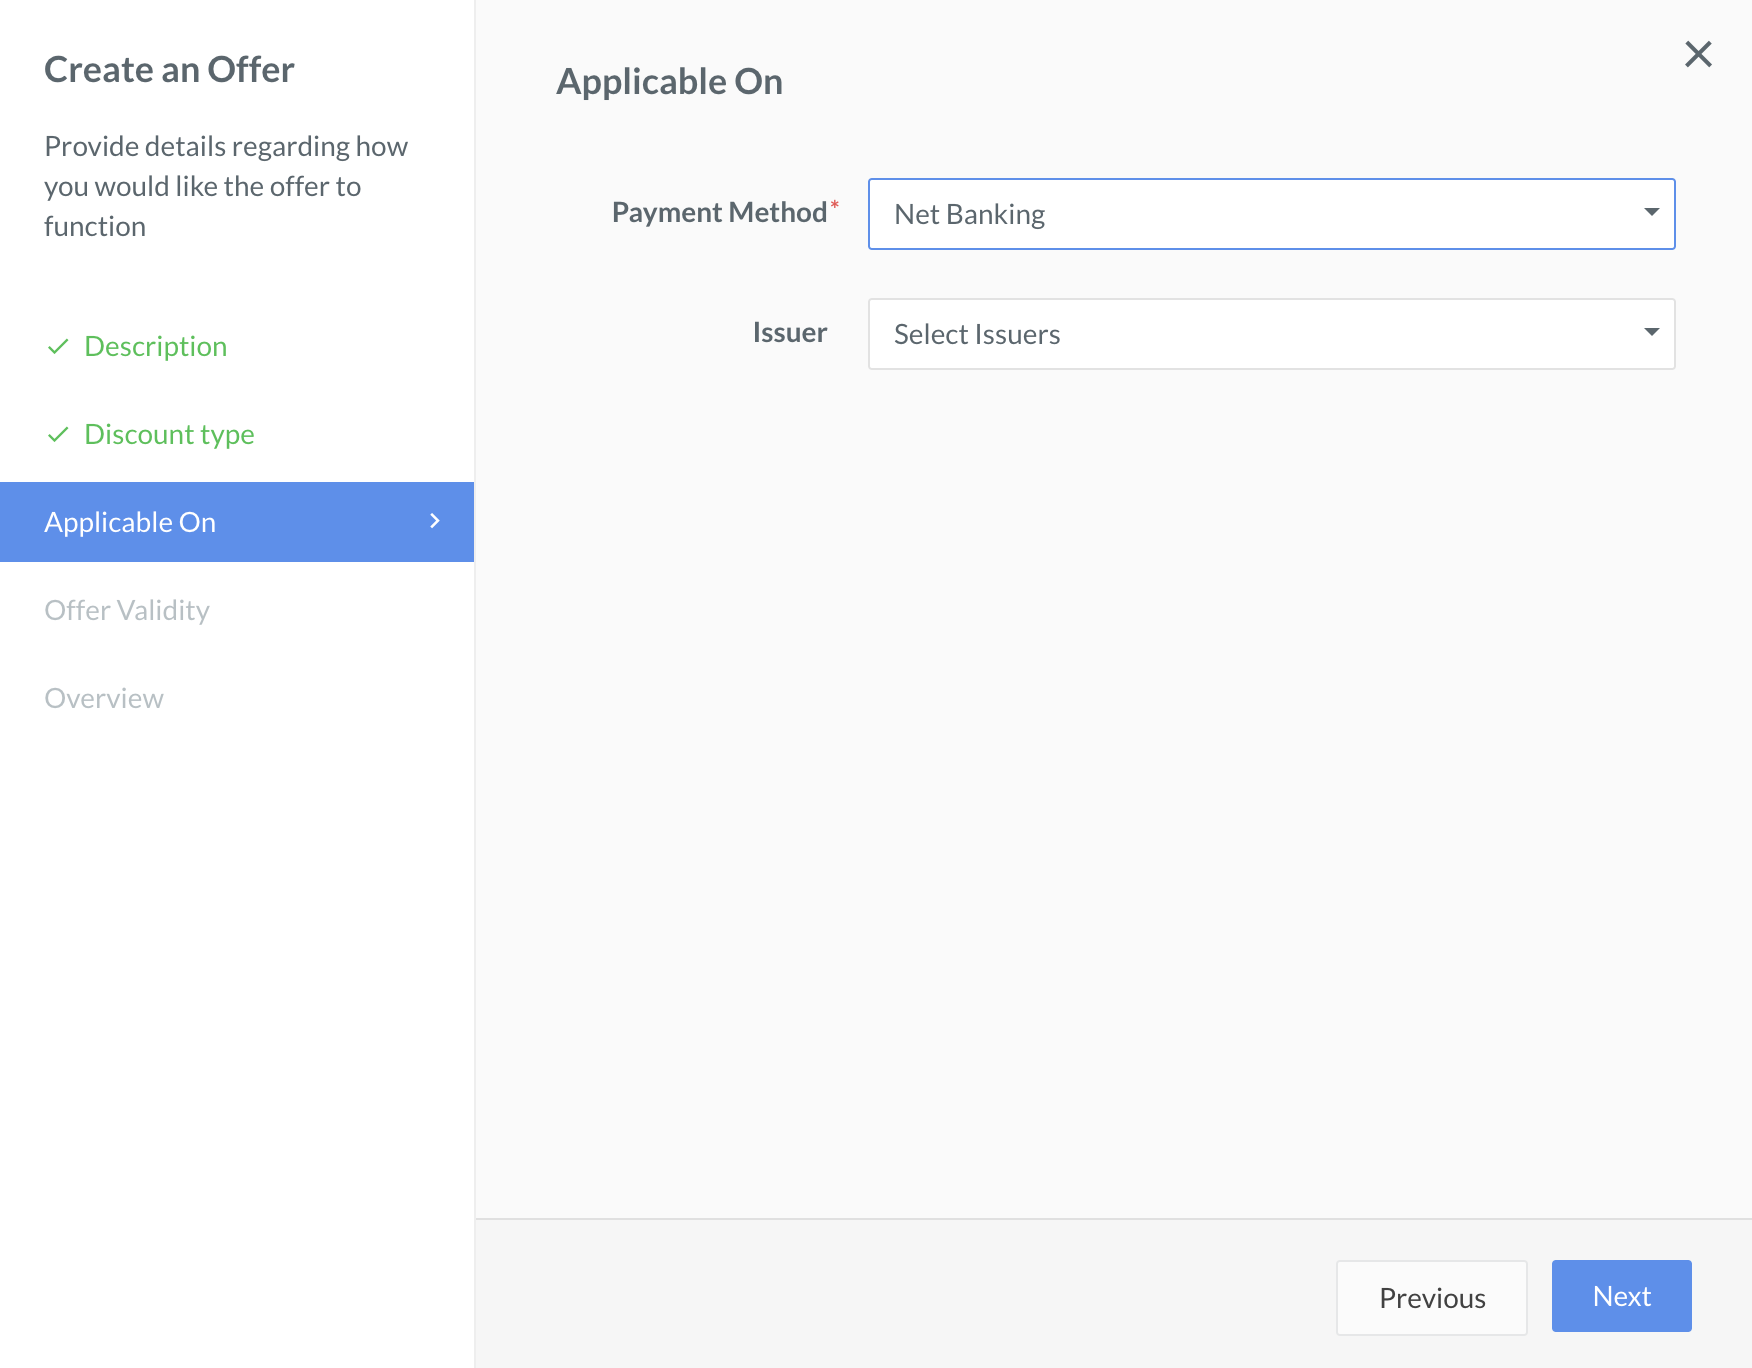
Under the Applicable On tab, enter details of the payment method you want to enable the offers. The fields depend upon the selected payment method.
Payment Method - The payment method for which the created offer can be applied. Select from the available options, which are configured for your account:
Card
Netbanking
Wallet
UPI
EMI
Pay Later
Card or EMI - If you choose the payment method as Card or EMI, enter the card-related details as described below:
Card Type - Select the type of the card. The possible values are:
Debit Card
Credit Card
Both Debit and Credit Cards (tThis is applicable only if you choose Card as the payment method)
Bank - Select the bank that issued the card.
Network - Select the network of the card.
Maximum Usage Per Card - Enter the number of times the selected card can be used to avail the offer.
IINs - Enter the first six digits of the card (that is printed on the front of the card) or the tokenised IIN. In the case of Rupay cards, enter the tokenised IIN only.
Netbanking - The bank for which the offer is applicable.
Issuer - Select the required bank.
Wallet - Select the wallet provider that supports the offer.
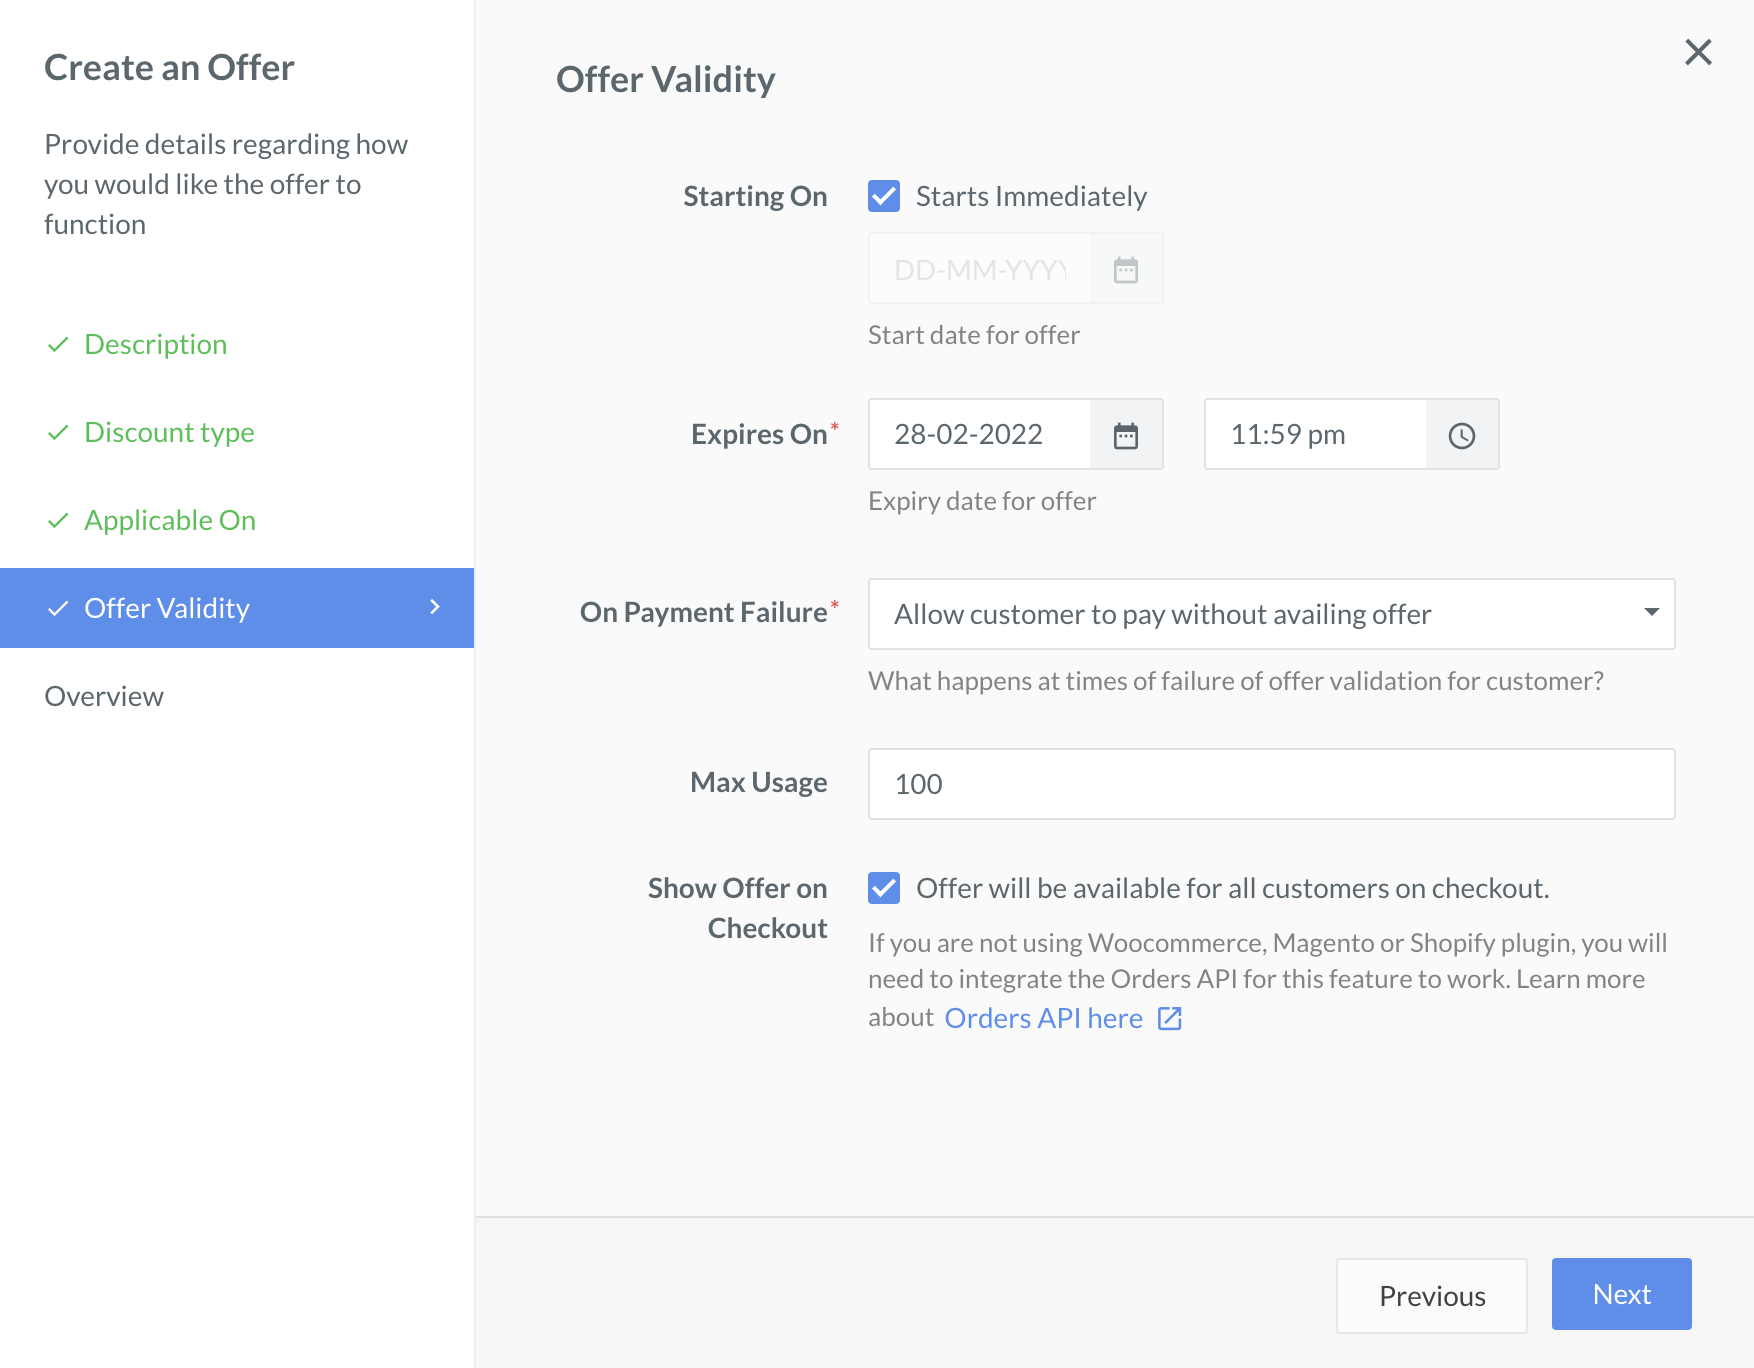
Under the Offer Validity tab, set how long the offer should be valid and how you want to handle the payment failure situations:
Starting On - Select the Starts Immediately check box for the offer to come into effect immediately. Alternatively, you can select the date and the time from which the created offer should become active.
Expires On - Select the date and time at which the offer should end. For example, 31 Oct 2020 at 11:59pm.
On Payment Failure - Define how to handle payment failure.
Do not allow payment to go through: The payment is failed.
Allow customer to pay without availing offer: The payment is allowed even though the set validations are not met. However, the offer is not applied to the bill amount. The customer will be charged the entire order amount.
For this example, we will allow payments to go through.
Max Usage - Set the number of times the offer should be applied across all transactions. For example, 100.
Show Offer on Checkout - Select this check box for the created offer to be displayed for all Standard Checkout payments including the Payment Links.
After you create an offer, it needs to be integrated with Checkout for the customers to view and avail the offers while making payments. Know more aboout integrating offers with Standard Checkout.