Ecommerce Plugins
Build Integration
1. Build Integration
Steps to integrate your WHMCS website with Razorpay Payment Gateway.
Follow the steps given below to integrate Razorpay Payment Gateway with your WHMCS website.
- Ensure you have the latest version of WHMCS installed.
- Download the Source code zip file of the required version of the plugin from the Releases section in GitHub.
- If you are using WHMCS 5, download the release tagged version 1.0.3.
- If you are using WHMCS 6, 7 or 8, download the release tagged version 2.0.1.
- Unzip and upload the contents of the repository to your WHMCS Installation directory. That is, the contents of the module folder from the repository goes into the module folder of your WHMCS Installation directory.
- Log into your site as the WHMCS administrator. This is done by adding
/admin to the URL where you have installed WHMCS, for example, www.example.com/whmcs/admin.
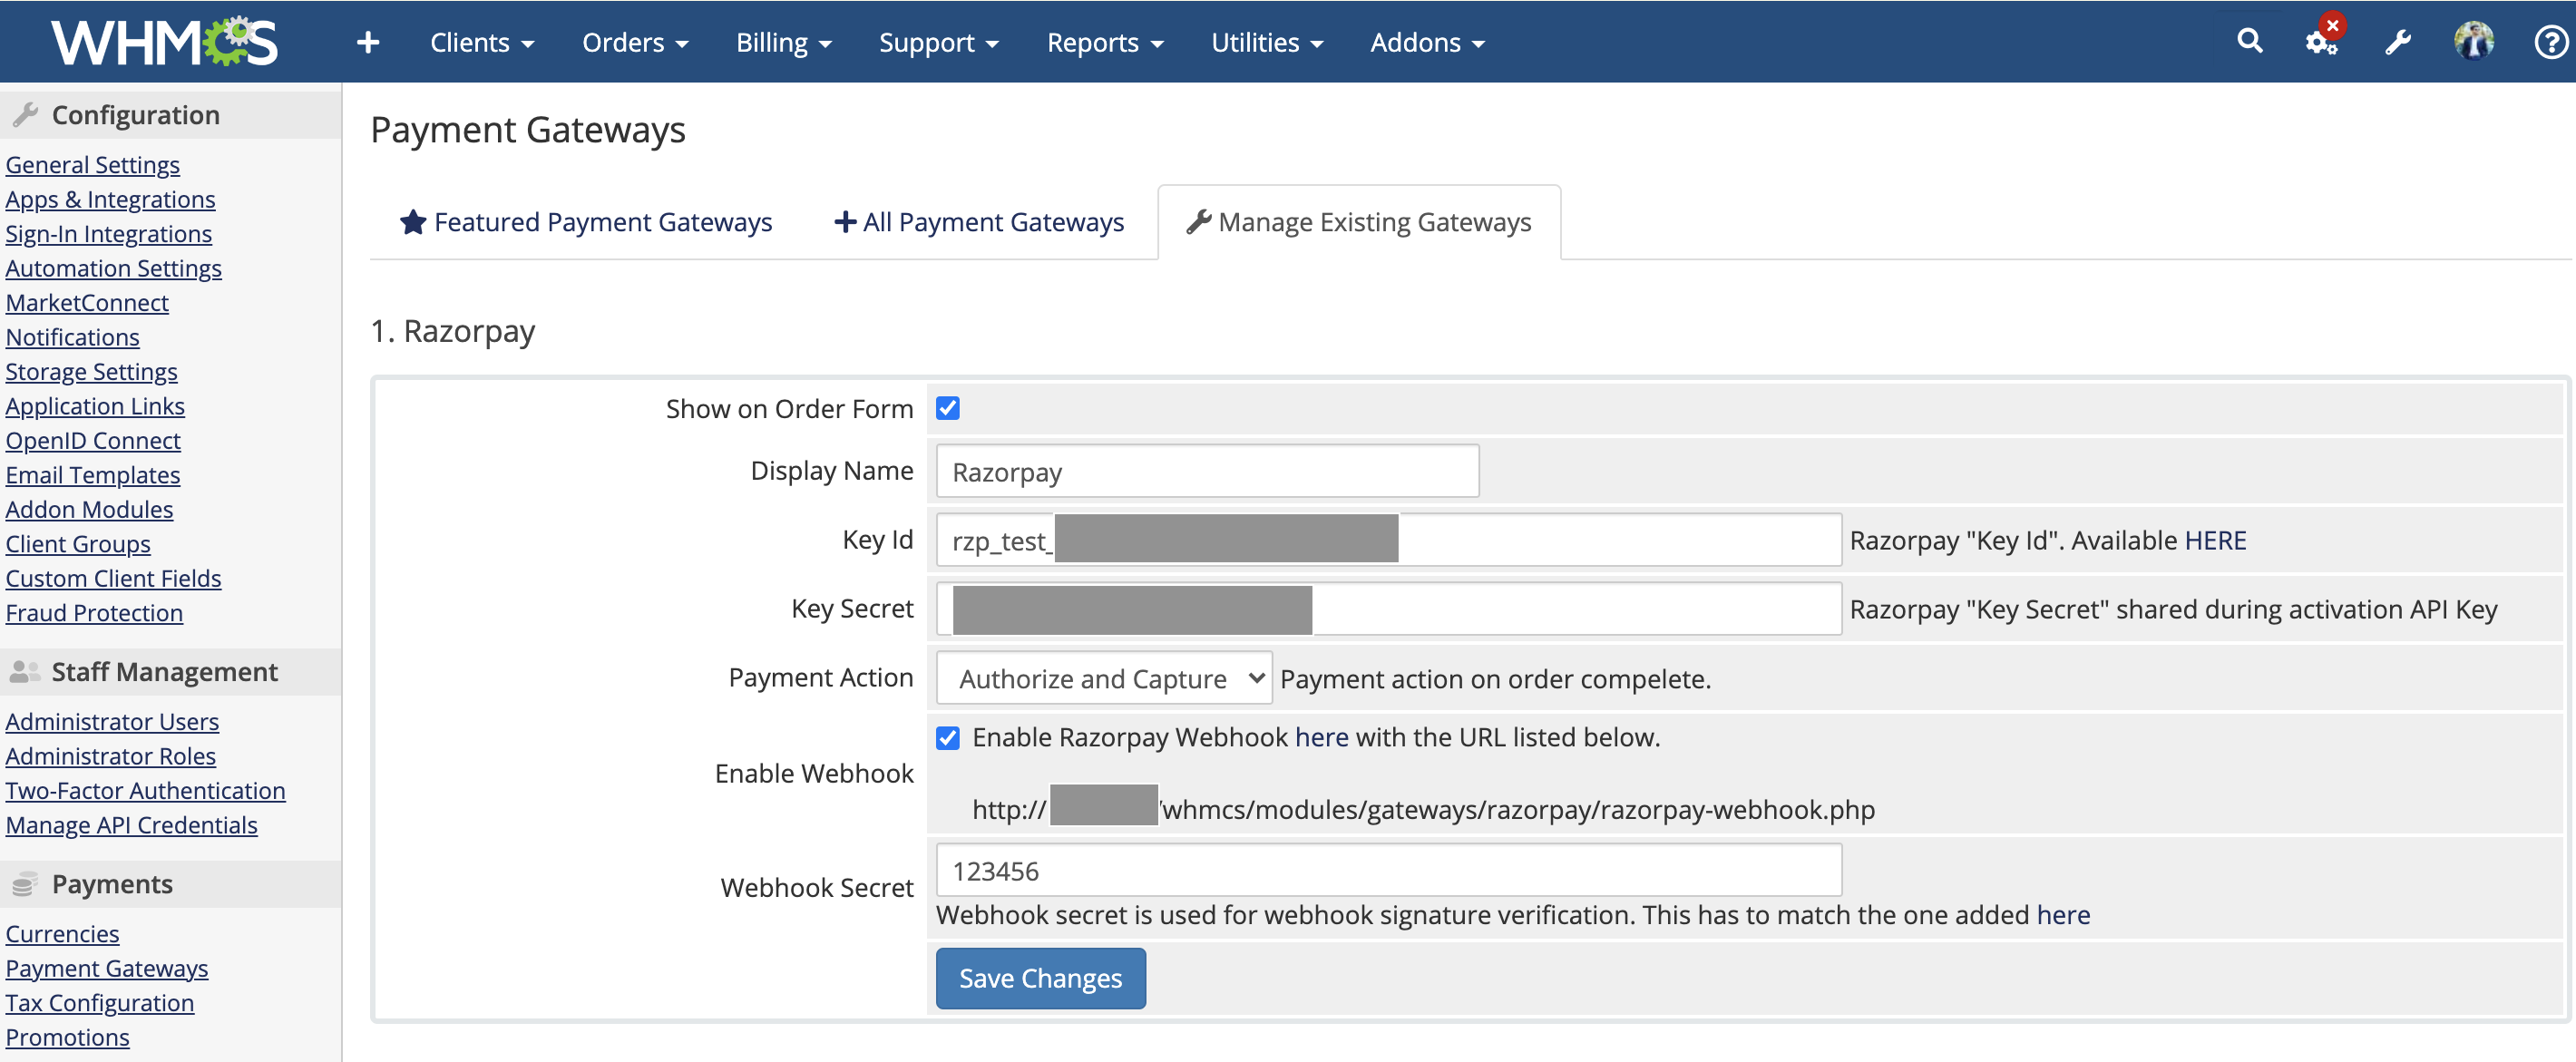
- Navigate to Setup → Payments → Payment Gateways.
- Select Razorpay from the drop-down list and Activate it.
- Enter the [KEY_ID] and [KEY_SECRET]. You can generate these from your Dashboard.
- Set Convert for Processing to INR if your store has a different default currency. In this case, ensure that you update the Exchange Rate in your currency management settings.
- Click Save Changes.
To receive webhook notifications, you should configure webhooks on your WHMCS site and the Razorpay Dashboard.
To set up webhooks in the WHMCS site:
- Log into your site as the WHMCS administrator.
- Navigate to System Settings → Payment Gateways.
- Click Manage Existing Gateways.
- Select the Enable Webhook option.
- Copy the URL that appears on screen. In the Razorpay Dashboard, configure this URL in Settings → Webhooks. Know more about how to setup webhooks.
- Enter the secret.
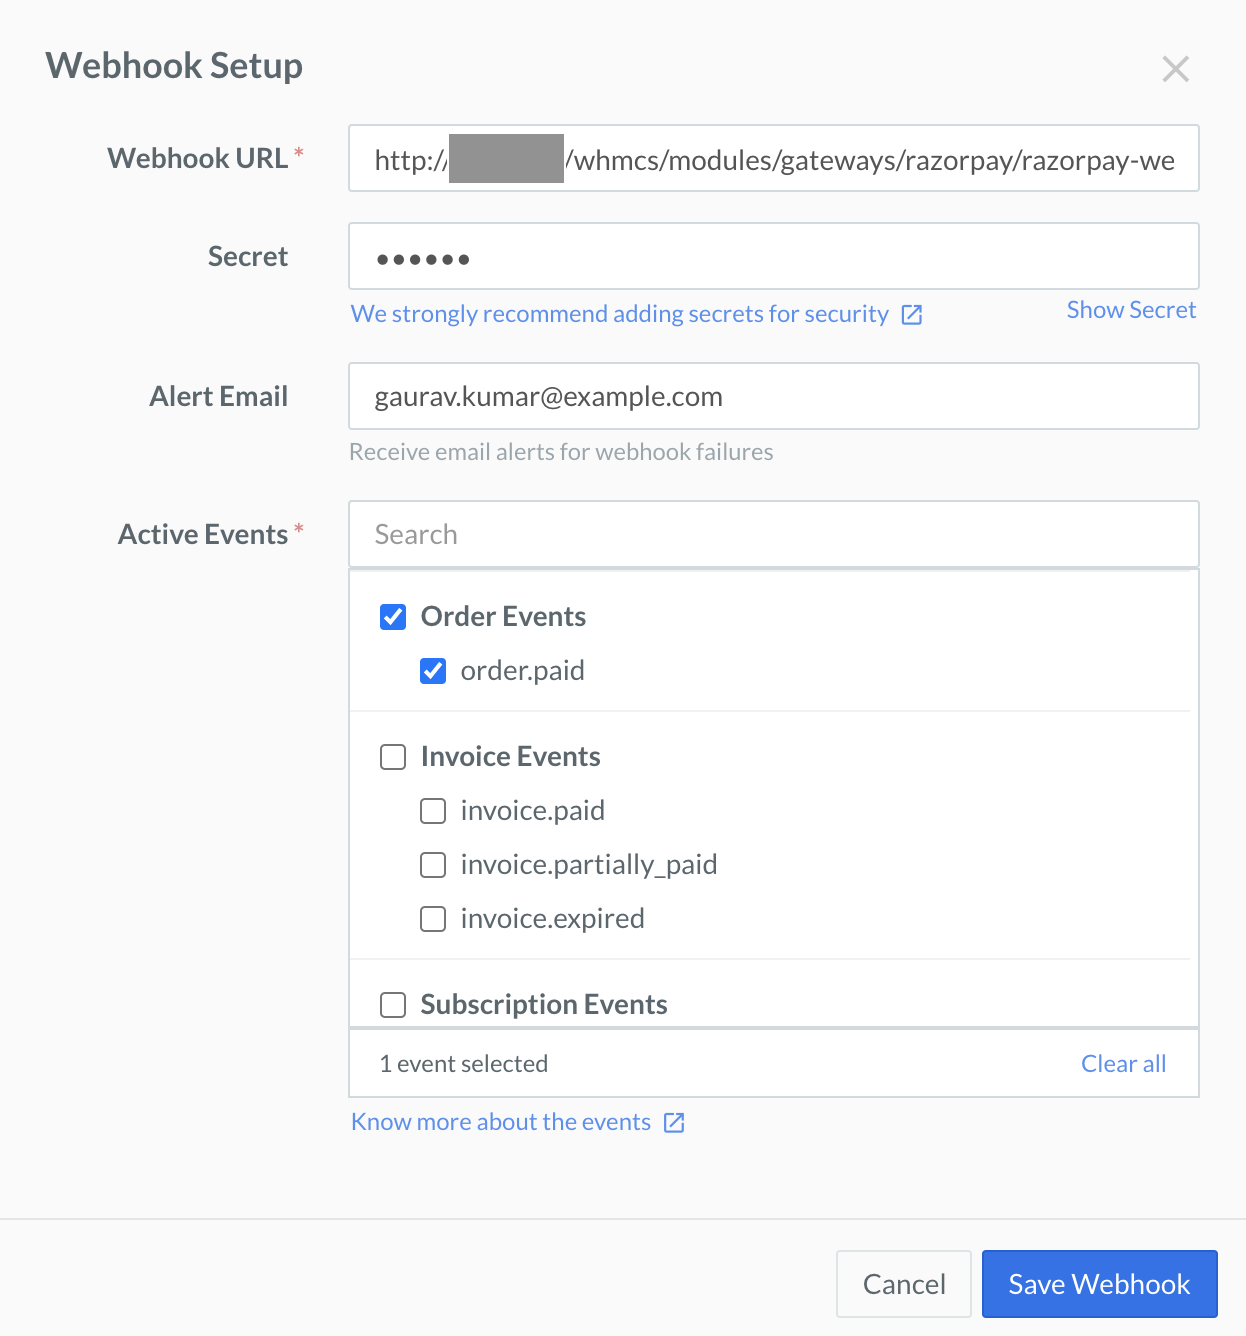
To set up webhooks in the Razorpay Dashboard:
- Log into the Razorpay Dashboard.
- Navigate to Settings → Webhooks.
- Click + Add New Webhook.
- In the Webhook Setup modal:
- Paste the URL copied from the WHMCS site.
Handy Tips
Webhooks can only be delivered to public URLs. If you attempt to save a localhost endpoint as part of a webhook setup, you will notice an error. Know about validating and testing webhooks for alternatives to localhost.
- Enter the Secret you had provided on the WHMCS site. The secret is used to validate that the webhook is from Razorpay. Do not expose the secret publicly. Know about how to validate webhooks.
- In the Alert Email field, enter the email address to which notifications must be sent in case of webhook failure.
- Select the
order.paid event from the list of Active Events.
- Click Create Webhook.
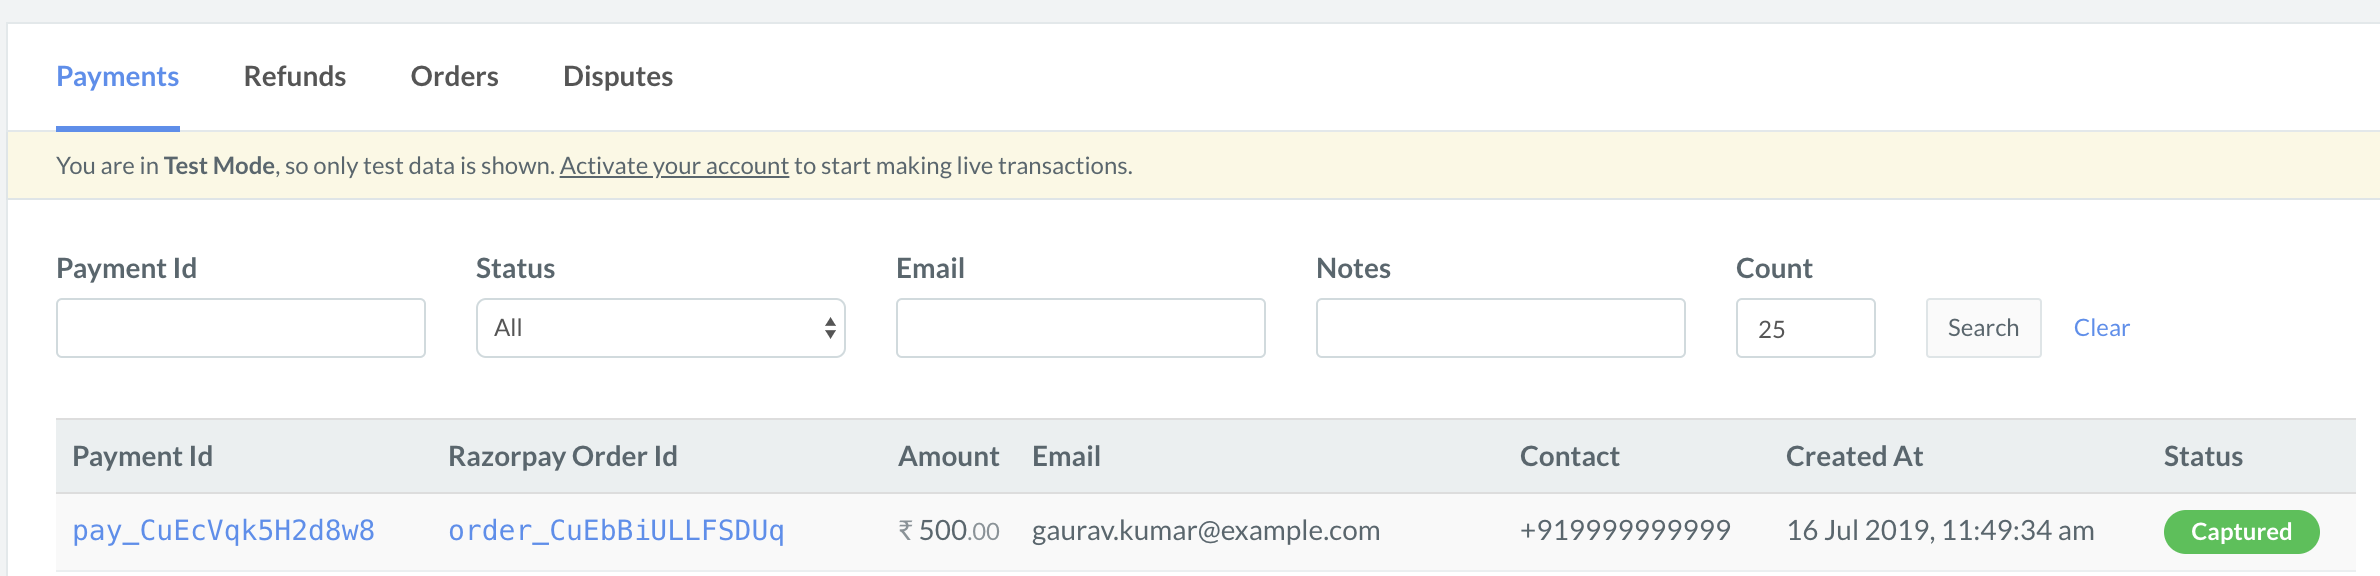
You can track the payment status from the Razorpay Dashboard, subscribe to the Webhook event or poll our APIs.
- Log into the Dashboard and navigate to Transactions → Payments.
- Check if a
payment_ID has been generated and note the status. In case of a successful payment, the status is marked as captured.
You can use Razorpay Webhooks to configure and receive notifications when a specific event occurs. When one of these events is triggered, we send an HTTP POST payload in JSON to the webhook's configured URL. Know how to set up Webhooks.
If you have subscribed to the order.paid webhook event, you will receive a notification every time a customer pays you for an order.
Step 2: Test Integration