How QR Codes Work
Create QR Codes, display them to customers to receive payments and perform other actions.
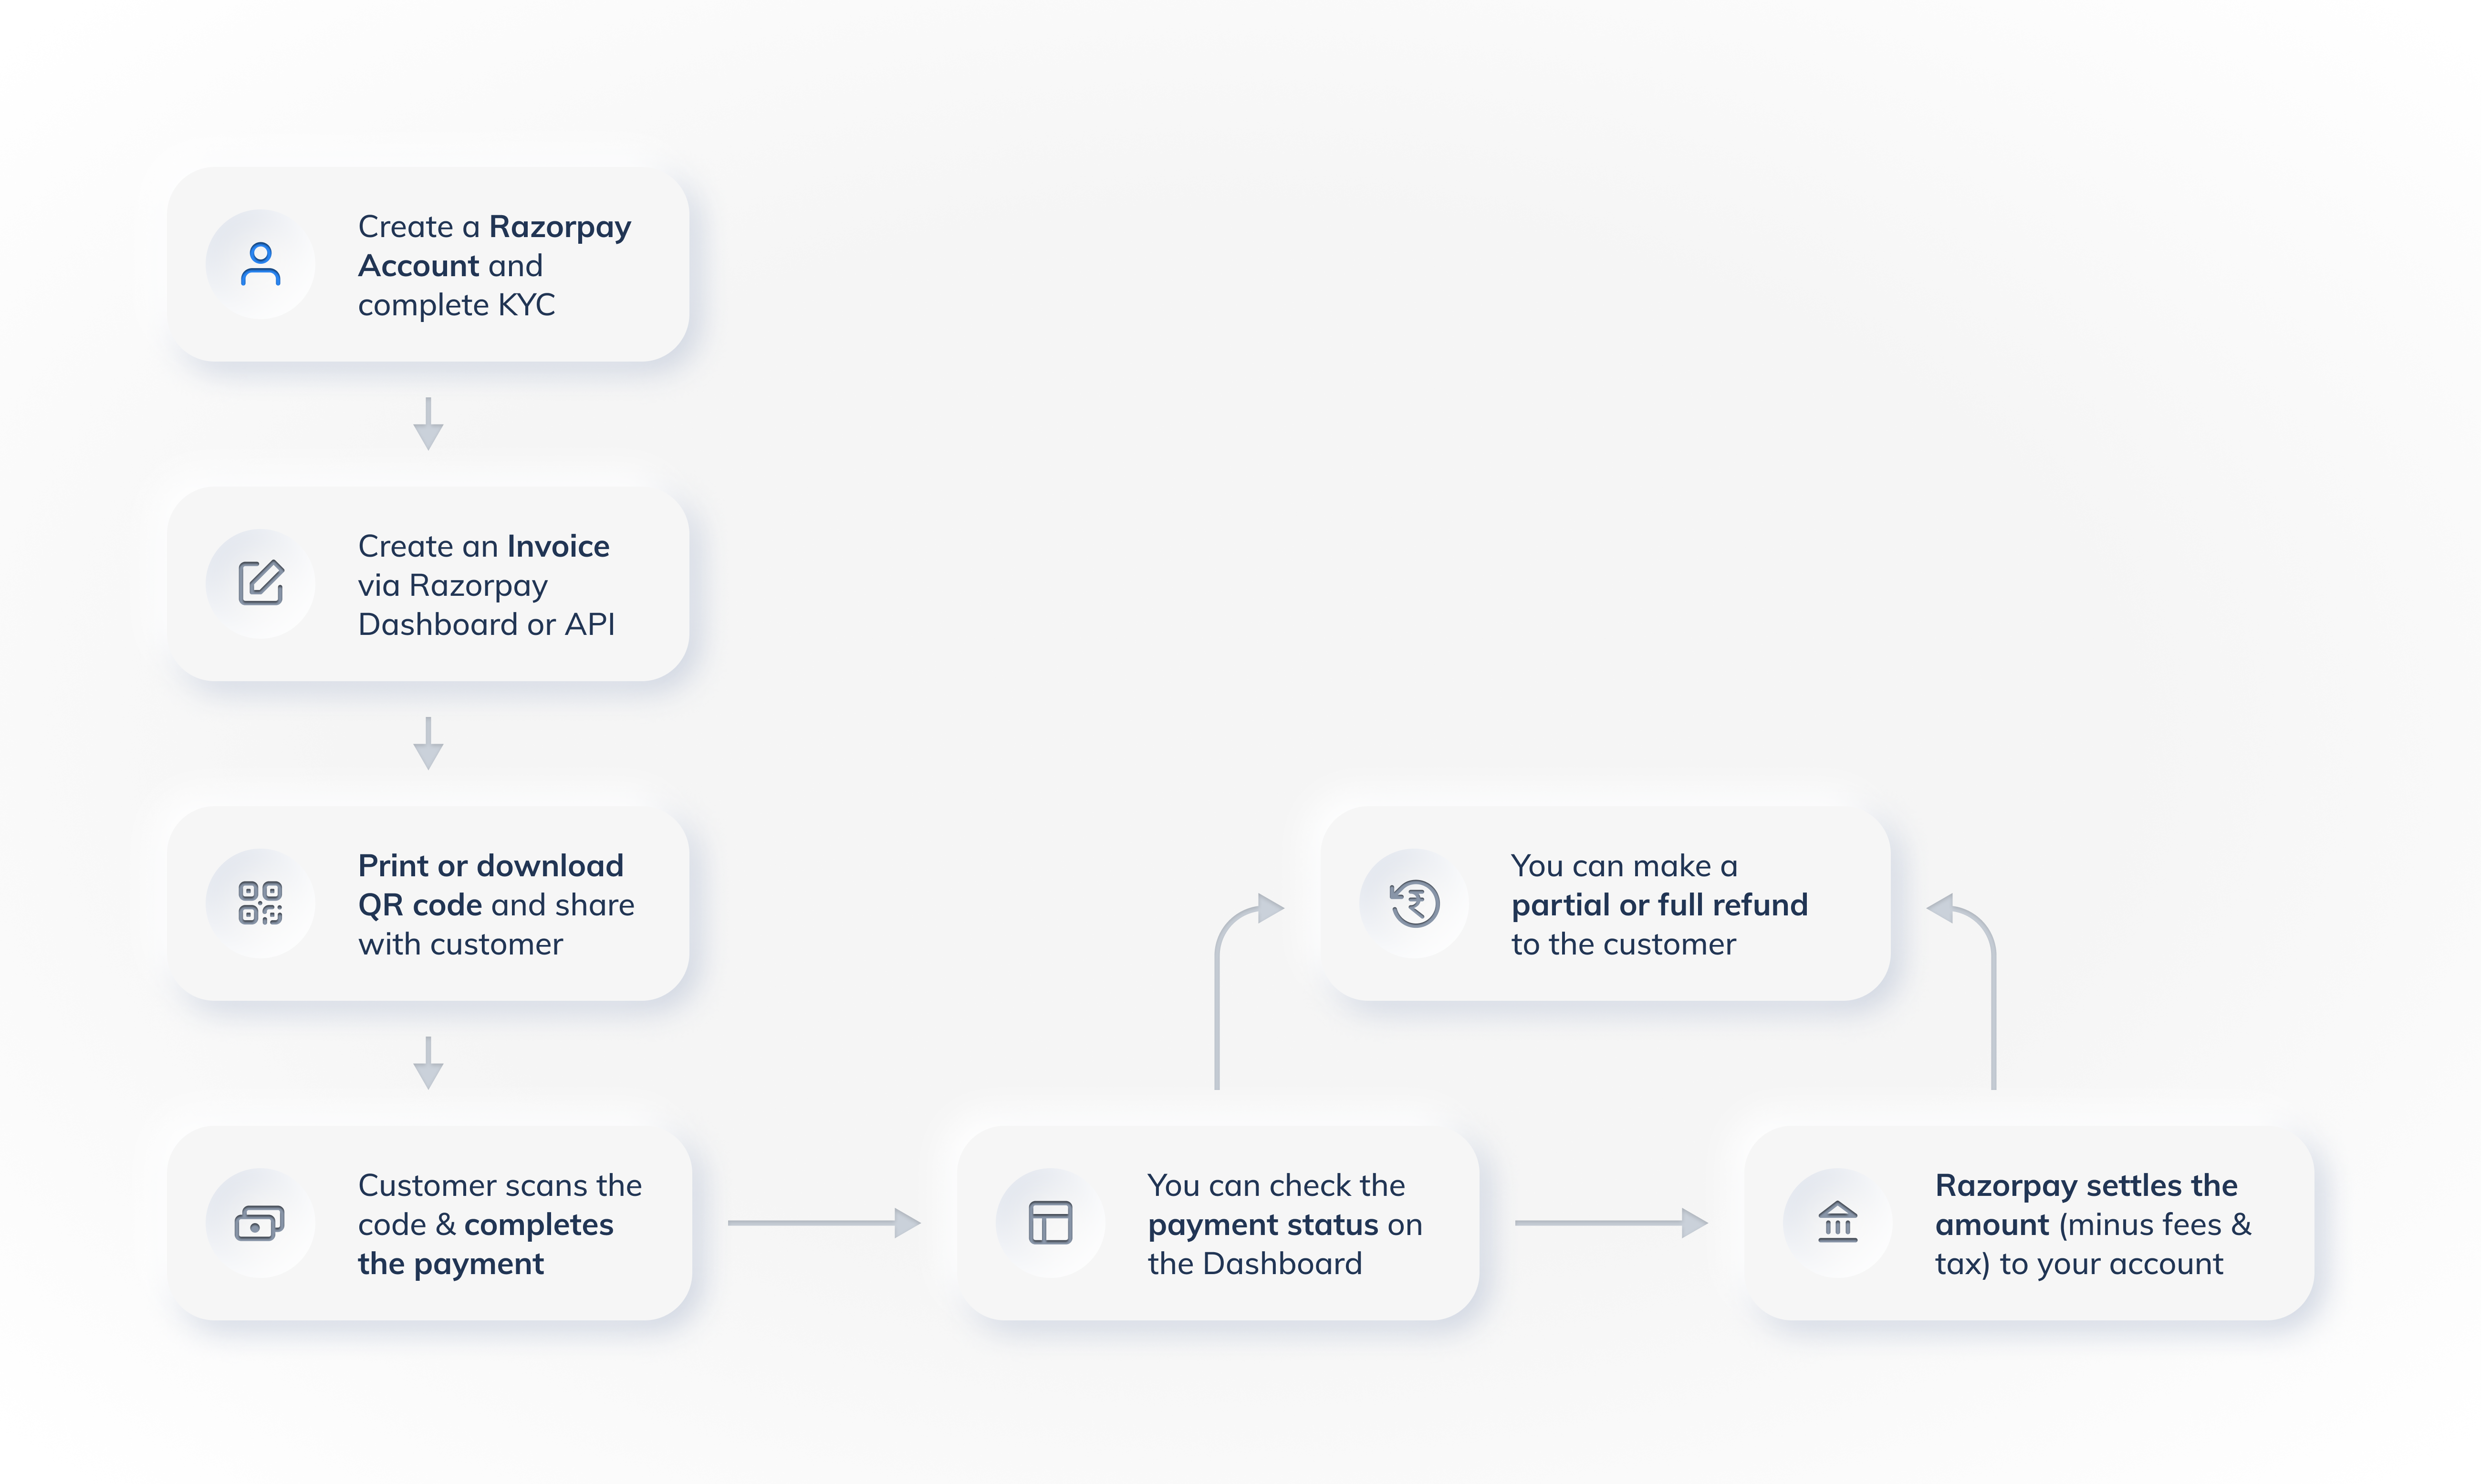
Given below is a complete end-to-end flow about how you can use Razorpay QR Codes to accept payments.
Step 1: Create a QR Code🔗
Create a QR code by providing all the required details. You can set a close by date and enable multiple payments.
The QR code is in active status. Know more about QR code states.
Handy Tips
You can close the QR code. Know more about QR code states.
QR Code APIs
Step 2: Share the QR Code🔗
You can print and download the QR code to share it with the customers. Customers can then scan the code and complete the payment using their preferred UPI PSP apps.
Step 3: Receive Payments🔗
Customer scans the QR Code with their UPI PSP app and completes the payment. They can make multiple payments if the option was enabled at the time of QR creation.
You receive a notification about the payment.
Handy Tips
After the payment is captured, the amount is settled to your account as per the settlement schedule. Know more about payments, settlements, refunds and disputes.
Step 4: Track QR Code Payments and Reports🔗
- Notifications
Receive notifications regarding activity on QR code via SMS, emails and webhook. Know more about subscribing to webhooks. - Track Payments
Track payments made using the QR code on Razorpay Dashboard. Click QR Codes from the left menu and select Payments. All the payments received on your QR codes are listed with their status. - Reports
Gain detailed insights using reports and real-time data on the Dashboard. These reports can then be used for accounting and reconciliation purposes. Know more about reports.
×![]()