Create Registration Links🔗
You can create registration links in bulk using the Batch Upload feature.
Handy Tips
- You can upload batch files in either in the
.xlsxor the.csvformat. - The upload can have a maximum size of 55 MB and 5,00,000 rows.
- You should enter the amount in paise. For example, if the amount is ₹1,000, you should enter the value as
100000. - The links are processed in the same sequence as listed in the file.
- Do not modify the column headers. Modifying the column headers will cause the upload to fail.
To create a registration link:
- Log into the Dashboard.
- Navigate to Subscriptions → Batch Upload → Upload New Batch → Batch Registration Links.
- Download the sample file.
- Add the required data. Know more about the Batch Fields from the below table.
- Upload the file to the Dashboard.
- Select the relevant notification options, SMS and/or Email.
- Click Create.
Watch this video to learn how to create registration links using the batch feature from the Razorpay Dashboard.
Batch Fields🔗
The following table lists the fields required to create a registration link:
nameoptional- The customer's name. For example,
Gaurav Kumar. emailmandatory- The customer's email address. For example,
gaurav.kumar@example.com. phonemandatory- The customer's contact number. For example,
9876543210. amountmandatory if method = card/upi- The registration amount you want to charge the customer in paise.
- For Card, the minimum value is 100 (that is ₹1).
- For Emandate and NACH, the authorization value is 0.
Auto-charge First Payment
You can choose to auto-charge the customer an initial payment immediately after authorisation by entering any value greater than 0. For example, if you enter 100000, the customer is auto-charged ₹1,000 as soon as the token is confirmed. - For UPI, the minimum value is 100 (that is ₹1).
currencymandatory if amount is provided- The 3-letter ISO currency code for the payment. Currently, only
INRis allowed. methodmandatory- The payment method to be authorized. This can be:
emandatecardnachupi
token_expiry_byoptional- The date and time of expiry for a mandate.
Minimum value is 1 day. Defaults tountil_cancelledfor Emandate, Paper NACH and UPI.
Maximum value is31/12/2099.
Supported formats:- DD/MM/YYYY HH:mm:ss (For example, 31/12/2019 00:59:59)
- DD/MM/YYYY HH:mm
- DD/MM/YYYY
token_max_amountoptionalEmandate, NACH and UPI only. Maximum amount for the token (in paise).- For emandate:
- Default value is is
9999900(₹99,999). - Minimum value is
500(₹5). - Maximum value is is
100000000(₹10,00,000).
- Default value is is
- For Paper NACH:
- Default value is
10000000(₹1 lac). - Minimum value is
500(₹5). - Maximum value is
1000000000(₹1 cr).
- Default value is
- For UPI:
- Default value is
500000(₹5,000). - Minimum value is
100(₹1). - Maximum value is
500000(₹5,000).
- Default value is
- For emandate:
auth_typemandatory if mehtod =emandate and nachEmandate and NACH only. The payment authorisation type. Possible values:netbankingordebitcardfor emandate. Leave this blank if you want to allow the customer to select their preferred option when making the payment.physicalfor NACH.
bankmandatory if method = nachEmandate and NACH only. Bank code to preselect a bank. For example,HDFC.
You can fetch bank codes by firing the following API as a GET request:https://<YOUR_KEY_ID>@api.razorpay.com/v1/methods.account_holder_namemandatory if method = nachEmandate and NACH only. Name of the account holder. For example,Gaurav Kumar.ifscmandatory if method = emandate, nach and upiEmandate and NACH only. The bank's IFSC. For example,HDFC0001234.account_numbermandatory if method = emandate, nach and upiEmandate and NACH only. Customer's bank account number. For example,11214311215411.account_typemandatory if method = emandate, nach and upiEmandate and NACH only. Bank account type. Possible values:savingscurrent
receiptoptional- A user-entered unique identifier for the order. For example,
Receipt No. 1. This parameter should be mapped to theorder_idsent by Razorpay. descriptionmandatory- A user-entered description for the registration link. For example,
12 p.m. Meals. link_expiry_byoptional- Date and time of expiry for the registration link. Supported format DD/MM/YYYY. For example,
17/12/2020. notes[custom 1]optional- Key-value pair that can be used to store additional information about the entity. You can add up to 5 custom notes in the following format:
- notes[portfolio id]
- notes[transaction id]
Bank Details
For Emandate, you should provide all the required bank details or leave all the fields blank. Following are the required bank details:
bankaccount_holder_nameifscaccount_numberaccount_type
If you enter details for a few fields and leave the other blank, will lead to failure.
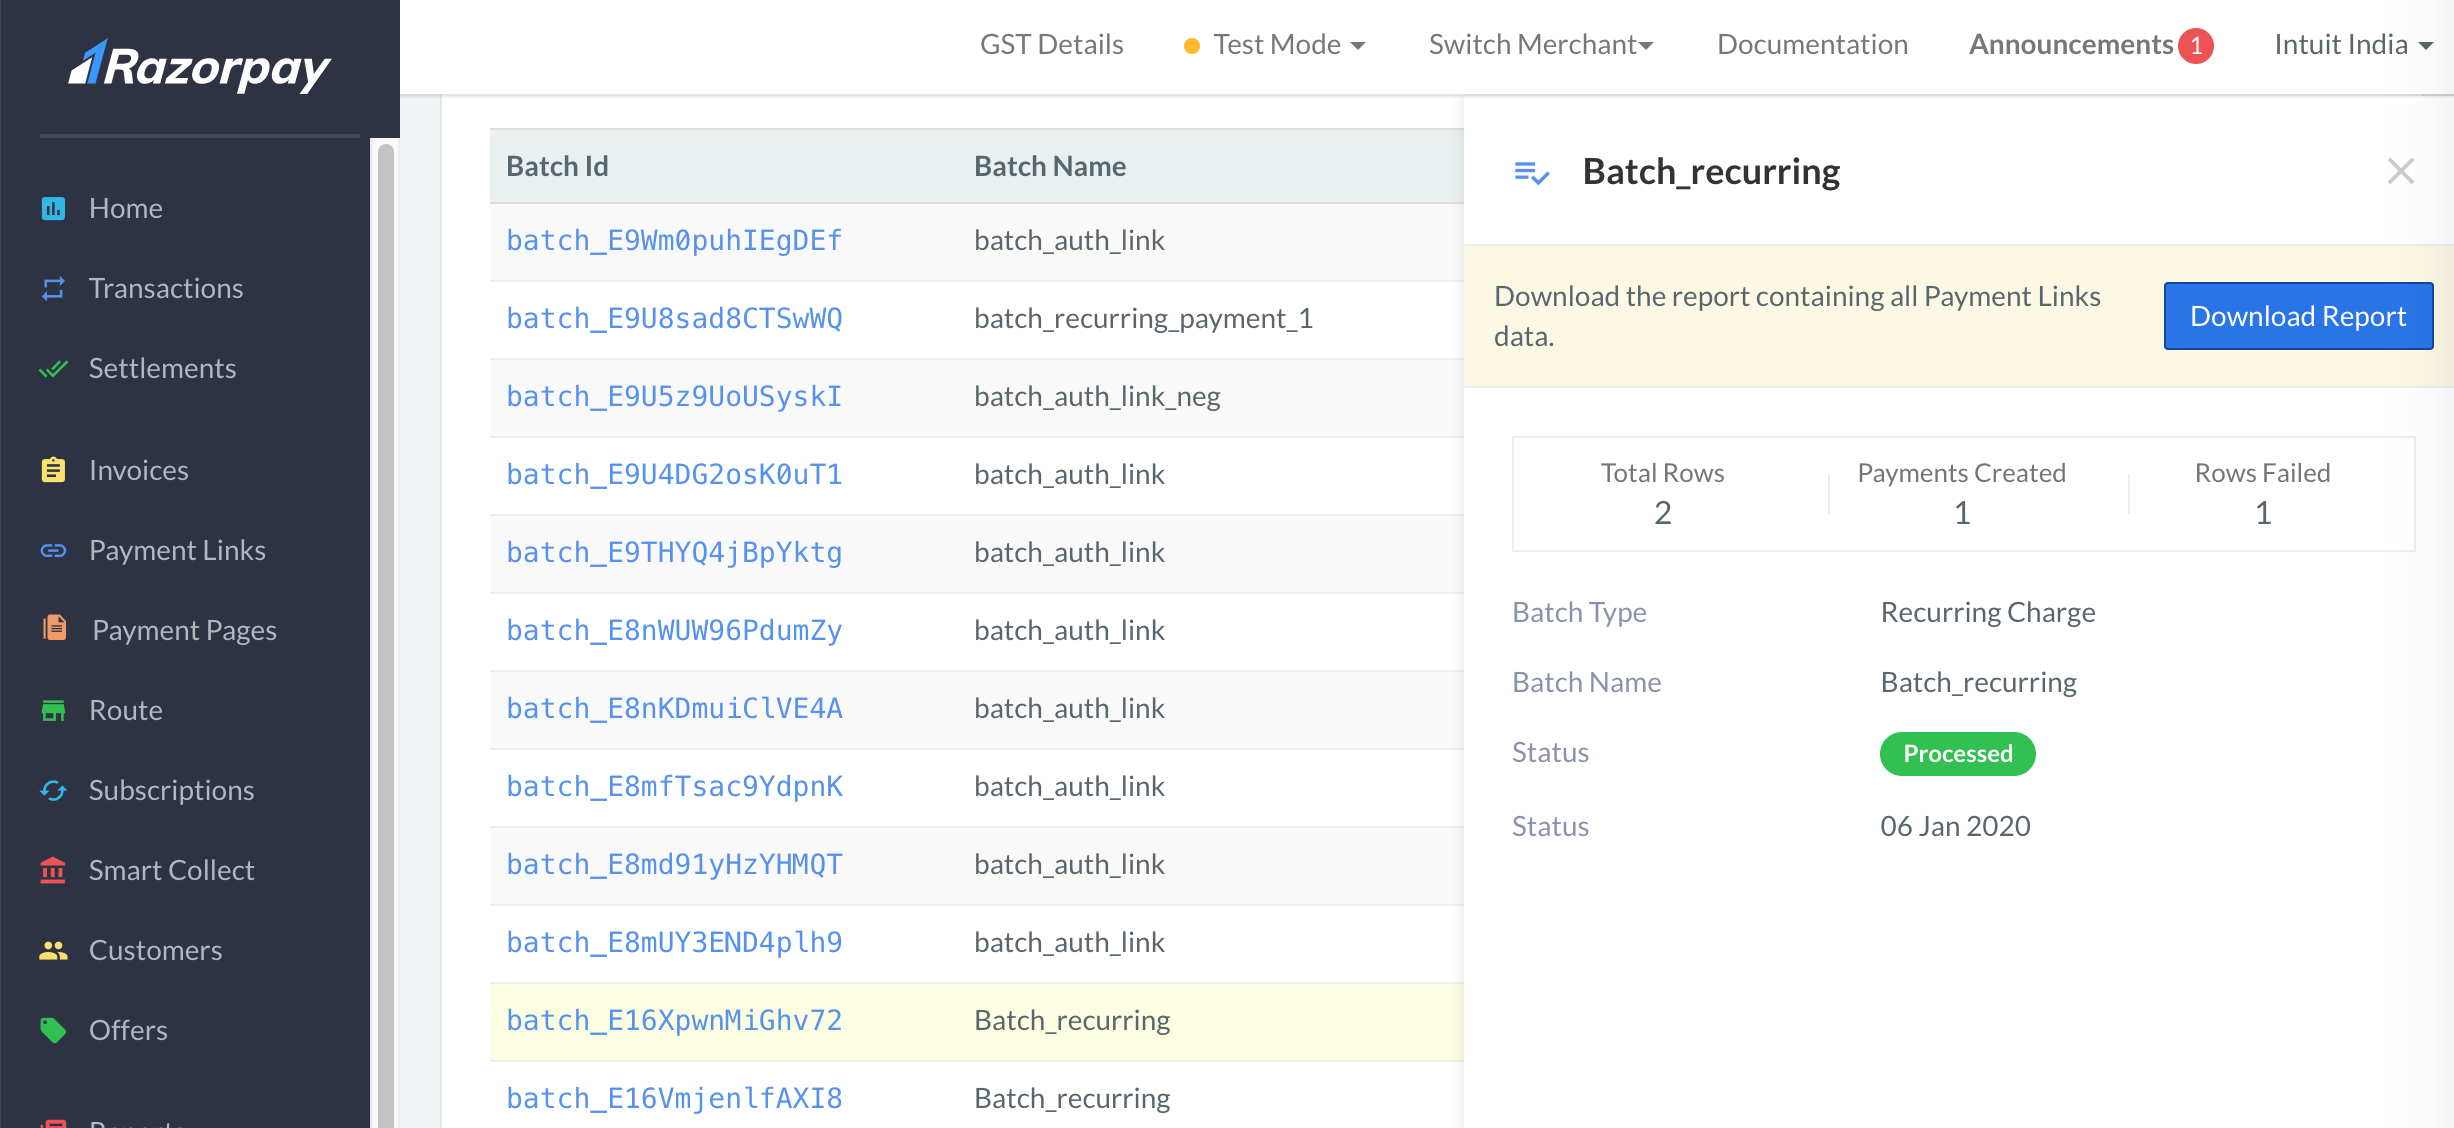
Batch Report🔗
After a batch file is processed, you can download the batch report from the Razorpay Dashboard. Click the batch_id to view details of how many rows were uploaded, how many rows were processed successfully and how many rows failed.
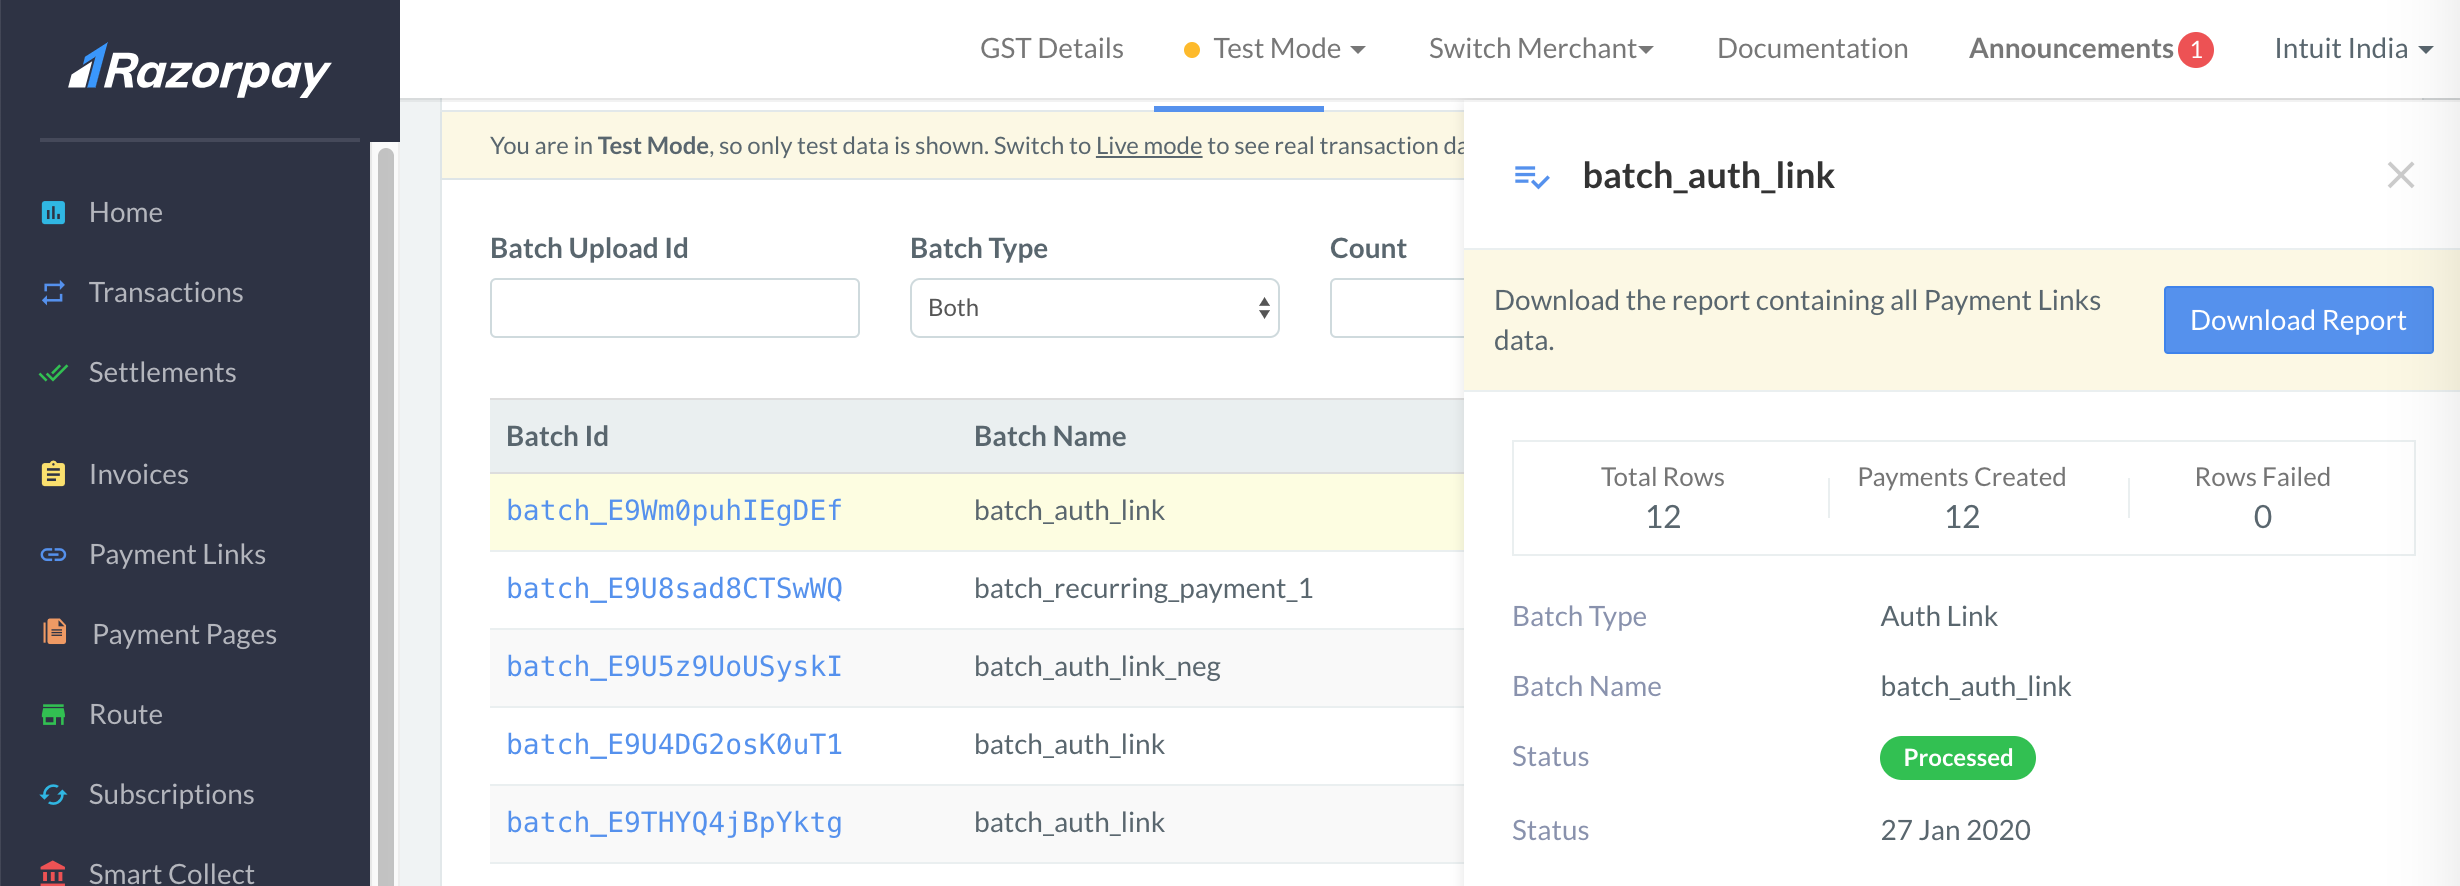
Click Download Report to download the report. This report has the following additional fields that give you information about the authorisation link or the reason for failure.
Status- The status of the authorisation link. Possible values:
successfailed
authorization_link_id- The unique identifier for the authorisation link. For example,
inv_E7vb0PqKa4VpBc. authorization_link- The short URL for the authorisation link. For example,
https://rzp.io/i/Abcd5. link_status- The status of the authorisation link. For example,
issued. created_at- Timestamp, in Unix format, when the authorisation link was created. For example,
1580134092. Error Code- The error code for the failure. For example,
BAD_REQUEST_ERROR. Error Description- The reason for the error. For example:
Bank code provided is invalid.expire_by should be at least 15 minutes after current timeThe ifsc code field is required.