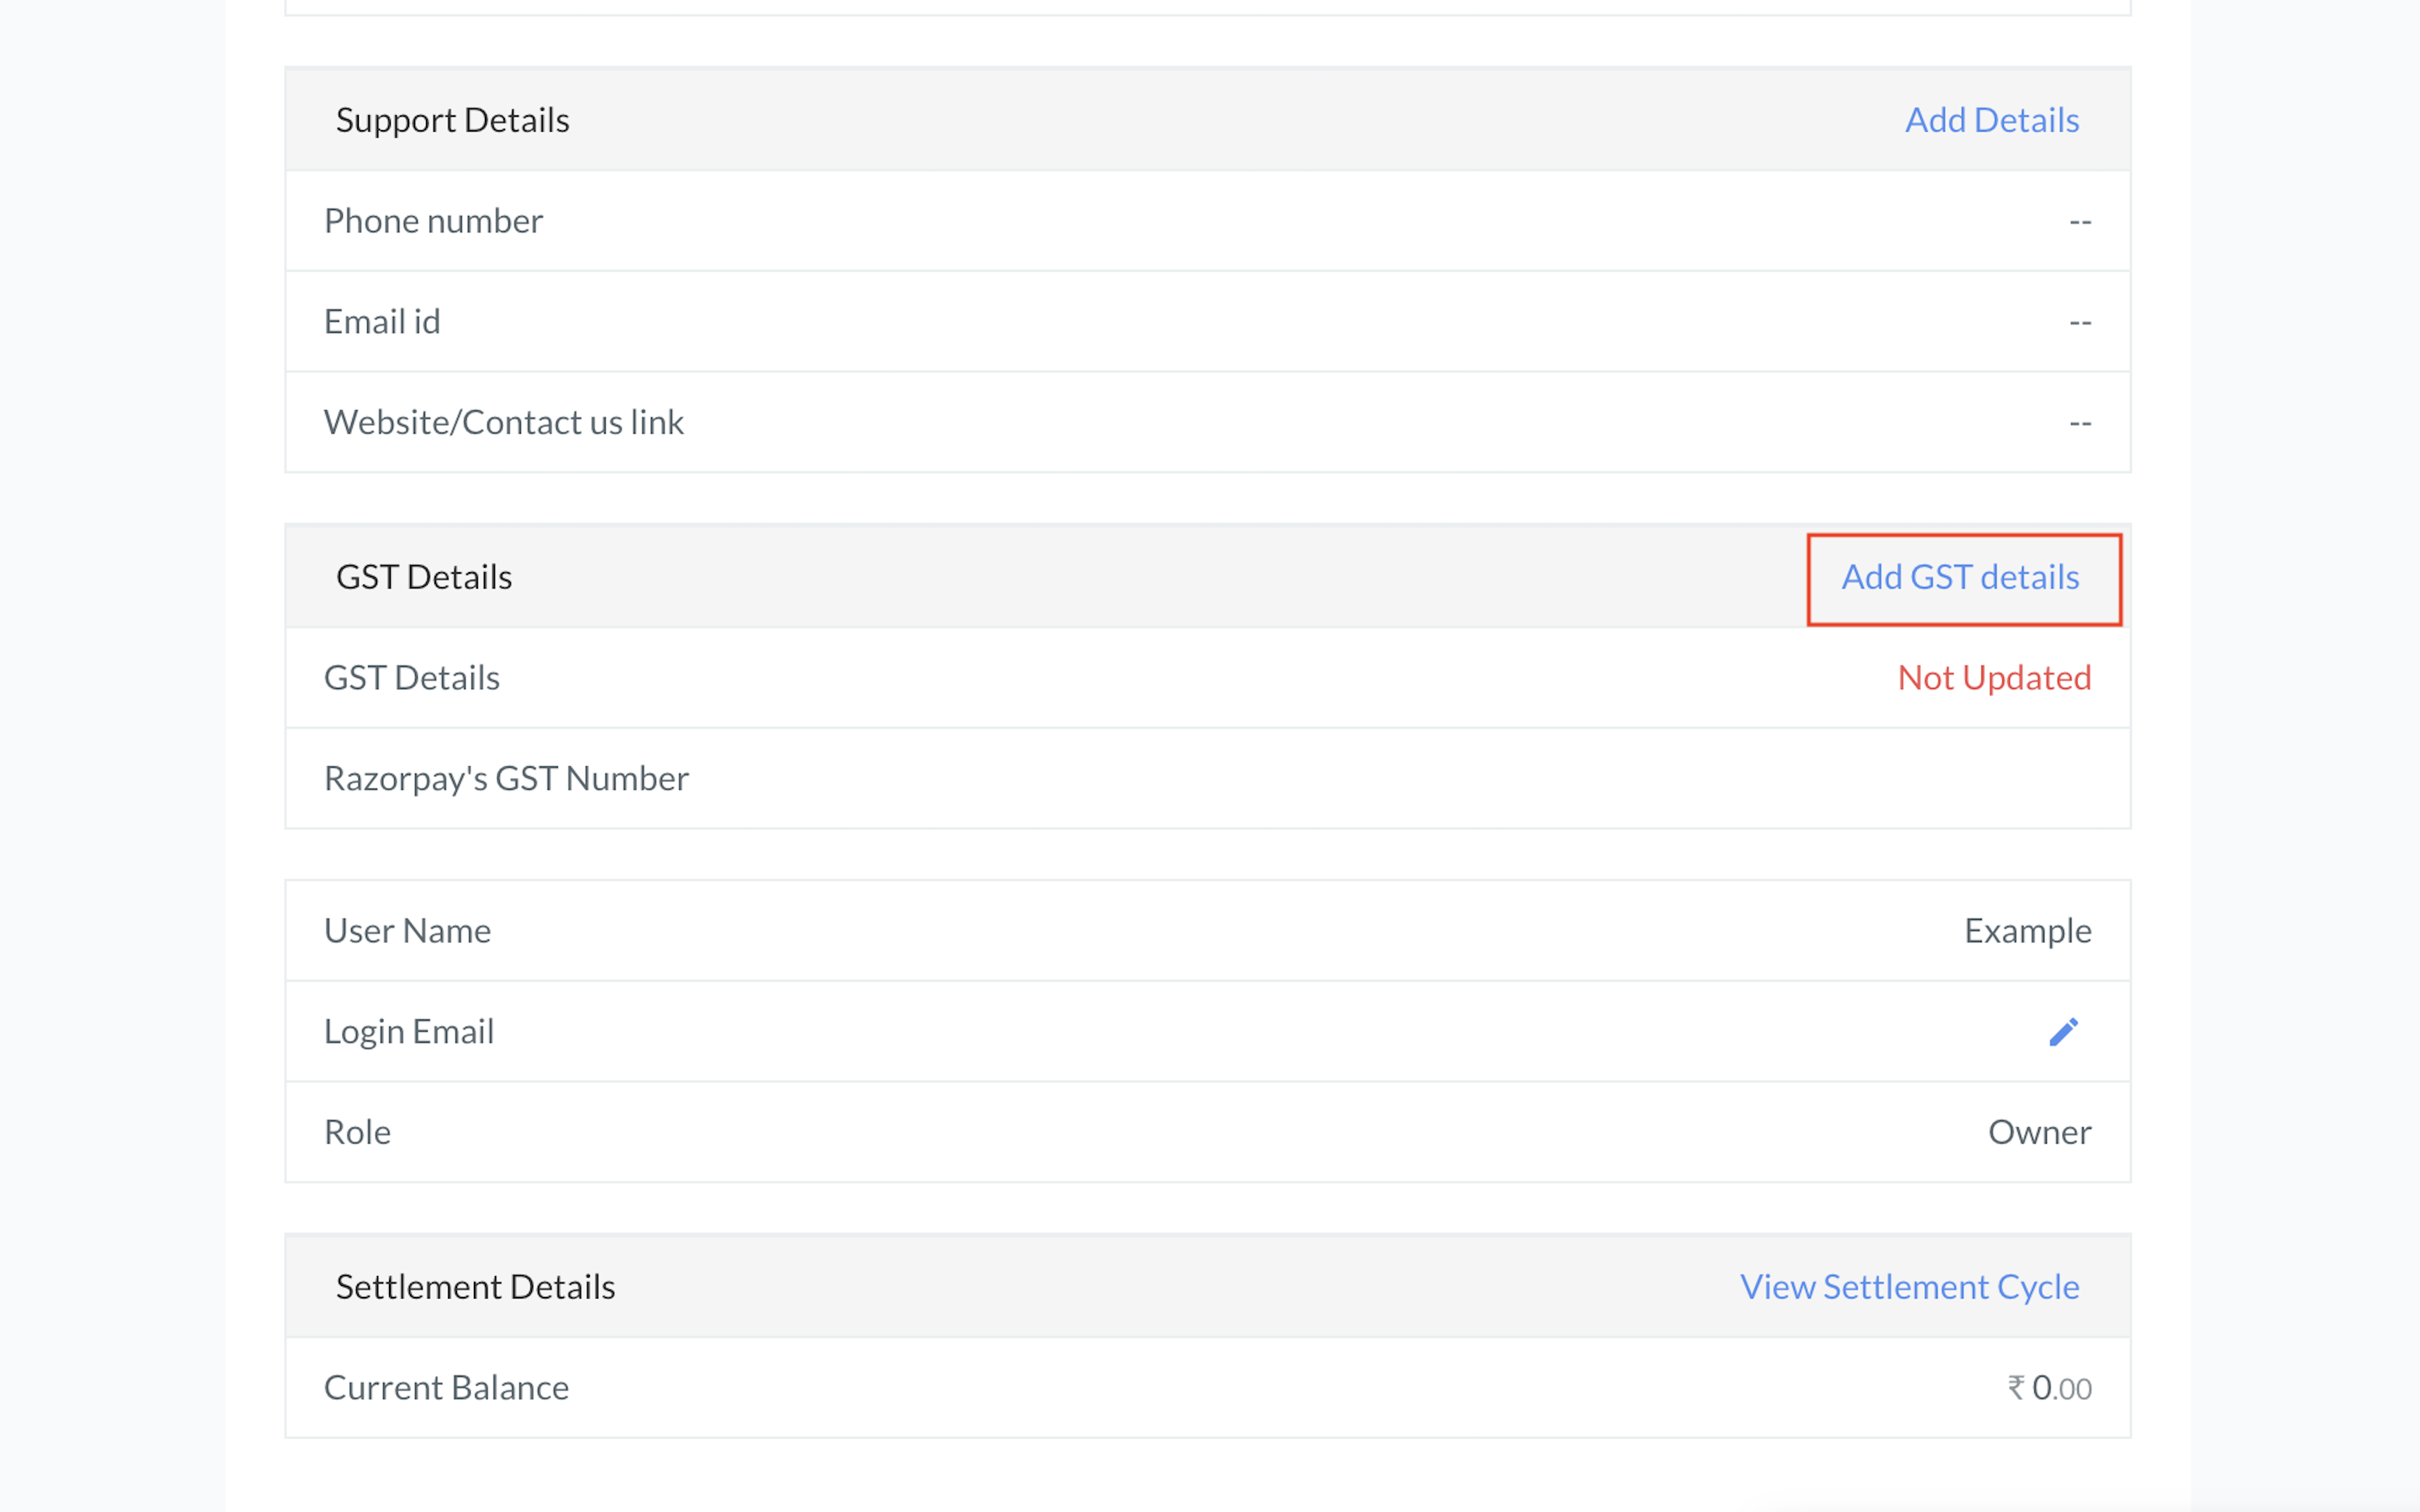
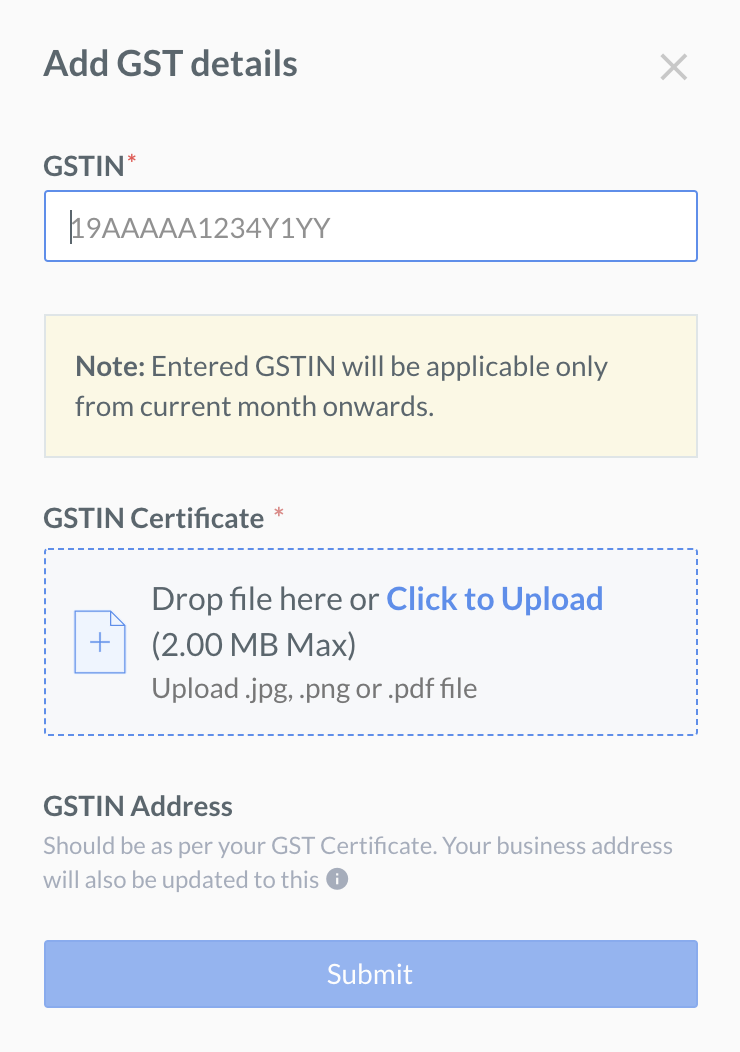
View your account details, add GST number, and request a change to your settlement account under the Profile tab on the Razorpay Dashboard.
You can view your account details under the Profile tab, such as Merchant Name, Email, GST details, Business Name and Type, Settlement Account details, Razorpay Account Registration and Activation dates and KYC Form Status.
To log in to the Razorpay Dashboard, users enter their email address and password. If the 2-step verification is enabled on an account, the user should enter a One Time Password (OTP) after the email id and password is provided. The OTP is sent to the user's registered mobile number.
You can set this additional level of security to ensure that only the intended user has access to your Razorpay Dashboard, thus preventing malicious attacks or misuse of your sensitive business data.
Team 2-Step Verification
To enable 2-step verification for your entire team, see Manage Team.
Watch this video to see how to enable 2FA for your account.
If a user enters the wrong OTP 9 times, the user account gets locked for security reasons. In such scenarios, the user should contact their respective account owner. The account owner can unlock the user's account. Know more about various roles.
If a user loses the mobile device, the user should reach out to the respective account owner. The account owner can Invalidate 2FA for the user, which resets 2FA for the user. The user needs to enter the mobile number the next time he/she logs into the Razorpay Dashboard.
Watch this video to see how the account owner can reset 2FA for a team member.
If you are an account owner and enter the wrong OTP 9 times, your account gets locked for security reasons. In such scenarios, contact our Support Team to Reset 2FA for your account.
You can request a change to your settlement (bank) account linked to your account. After you provide the necessary details and documents, we will verify the account and update the information. We will contact you if further clarifications are required.
Handy Tips
You need to send us a copy of the new account's account statement that you want to link to your Razorpay account. The account statement should include details such as account number, IFSC and beneficiary. It should contain transaction details for the last three months or since the account was opened, whichever is later.
Watch this video to see how you can change your settlement account details from the Razorpay Dashboard.
Scroll to the Bank Account section and click Request Change.
Enter the OTP sent to your registered mobile device on the 2-Step Verification pop-up page.
Enter the details of the new bank account you want to link with your Razorpay account. The new bank account will be your new settlement account.
Upload a copy of your account statement and click Save.
Handy Tips
Razorpay sends you email notifications for the following:
When you initiate a request for updating the settlement bank account details.
When the bank account details are successfully updated.
Handy Tips
We may reach out to you for clarifications on email, WhatsApp, SMS, and Razorpay Dashboard during the verification process.
Navigate to My Account → Profile and submit the necessary information in the appropriate section. Our team will go through the information you provide and help you resolve the issue.
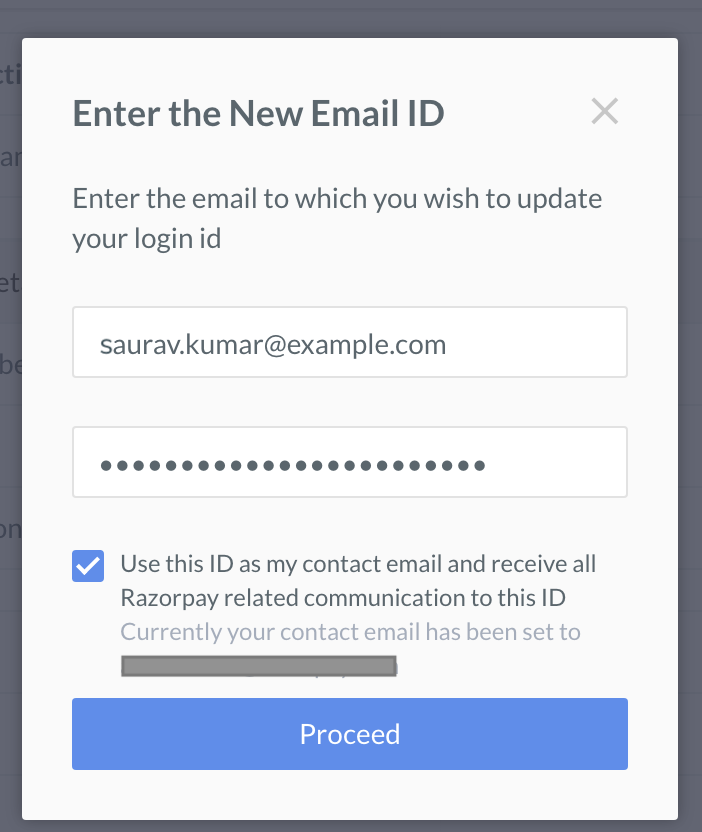
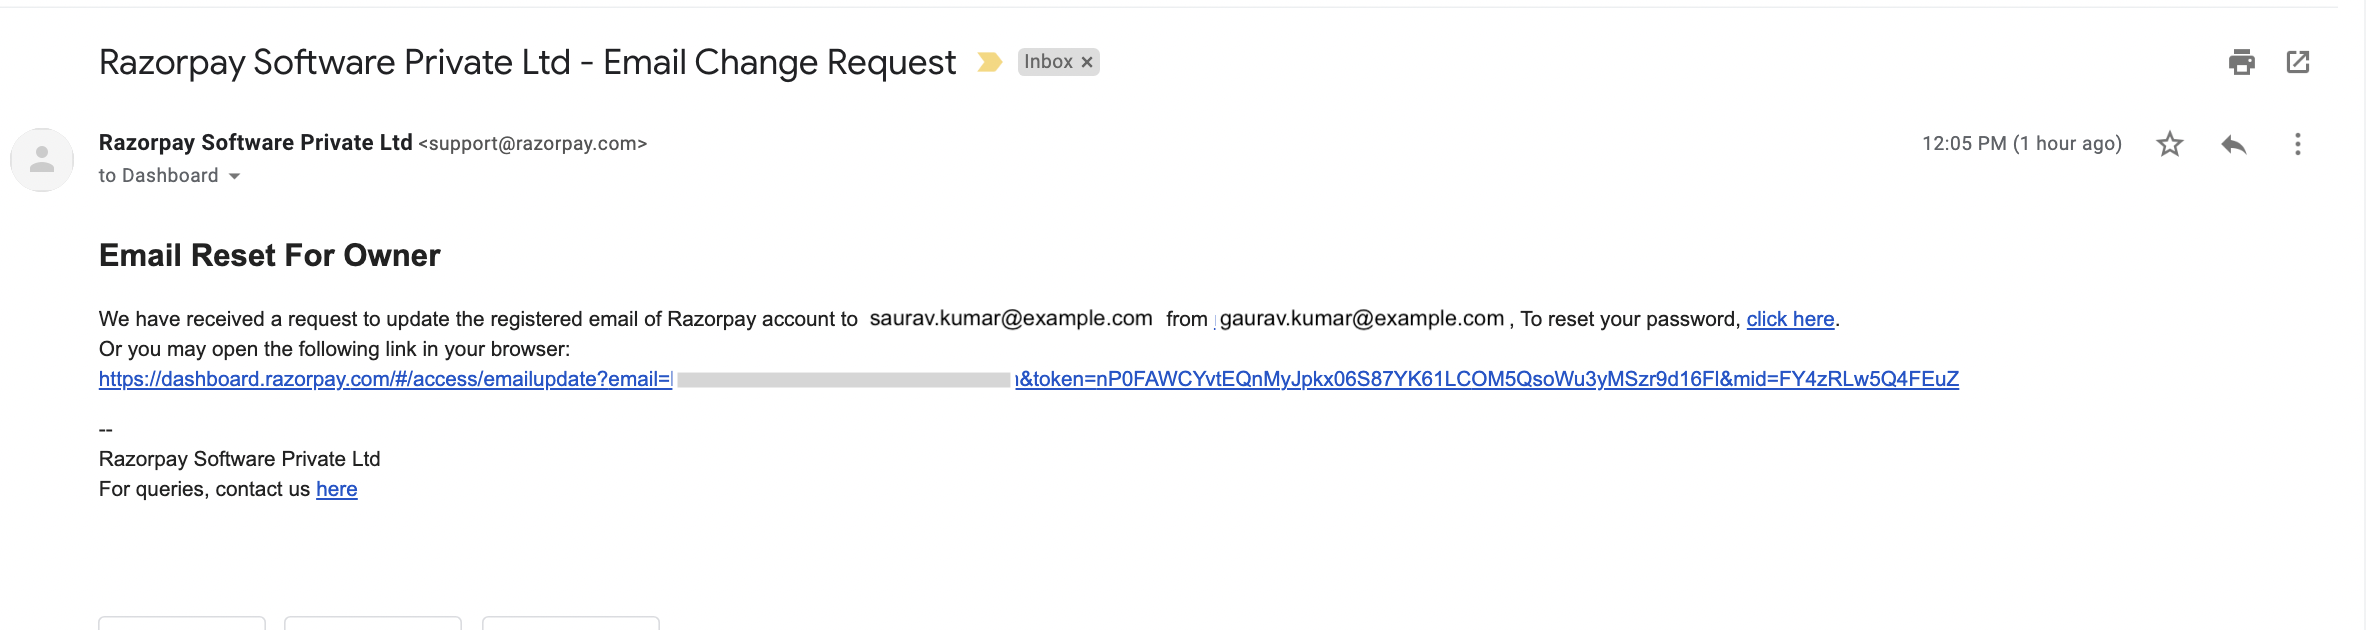
You can update the Razorpay login email from the Razorpay Dashboard. You can:
Update your own email id.
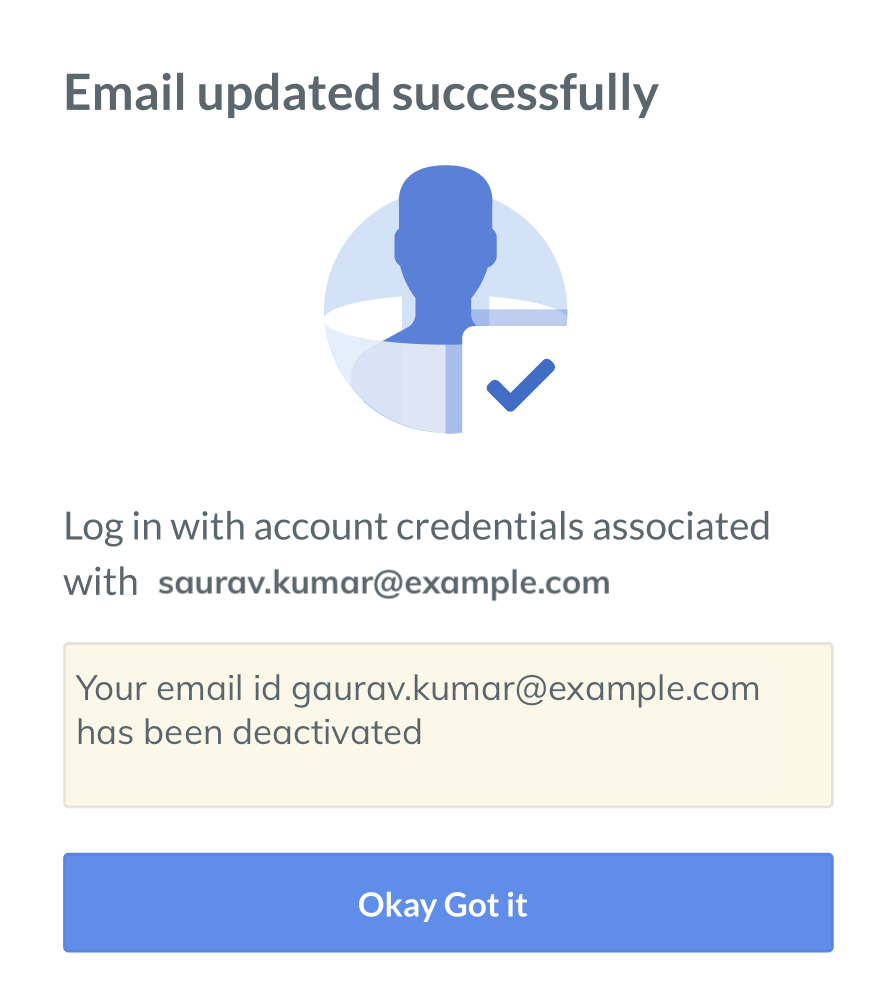
Replace your current email id with another email. For example, if you earlier had signed up with the email id info@acmecorp.in, you can now update it as gaurav.kumar@acmecorp.in.
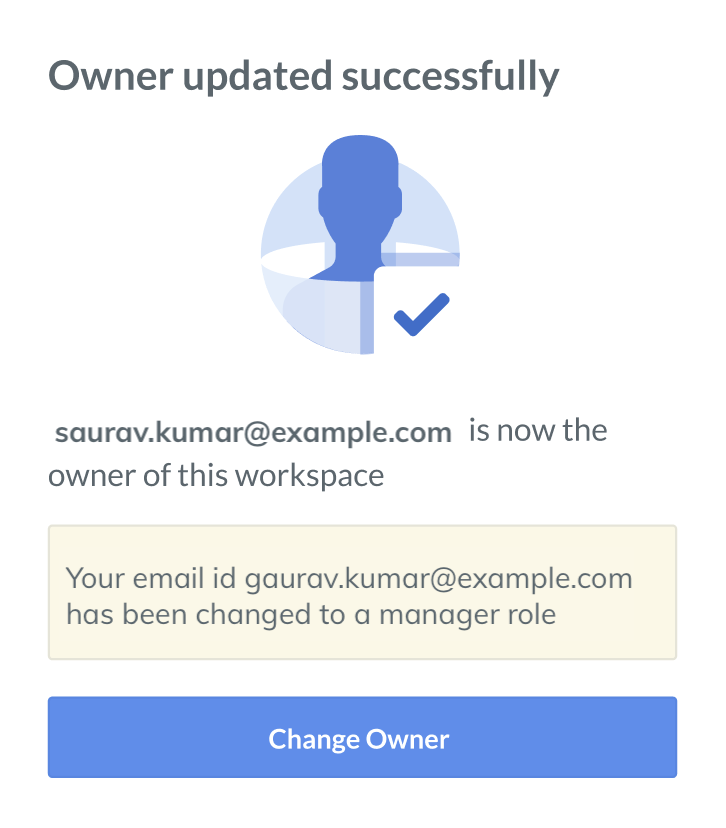
You can add another team member's email id. You will need to change the user role of the team member to owner. For example, you can provide your manager's email id and upgrade them to the owner role.
You can add the email id of a Razorpay user who is not a member of your team. For example, Gauri Kumari is the manager of a Razorpay account, ABC Co. You want to add her as the owner of your Razorpay account, Acme Corp. Once you update her email address on the Dashboard, Gauri Kumari will become the owner of the Acme Corp account. However, she will still be the manager of the ABC Co Razorpay account.
Handy Tips
If you add a non-Razorpay user's email id, they will have to sign up for a Razorpay account.
Scroll to the Login Email field, click the edit icon.
Complete the 2-factor authentication process.
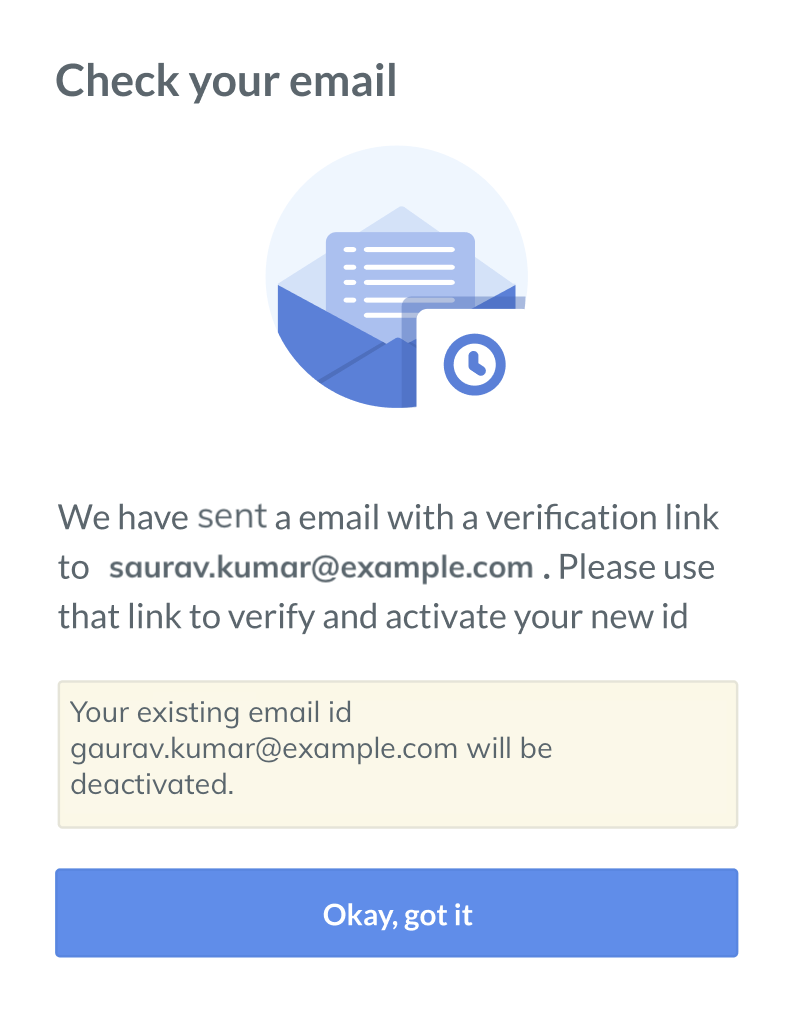
On the pop-up page, enter the new email id. Re-enter the email id. Select the check box if you want Razorpay to send all communication details to this email id.
A verification email is sent to your new email id. Open the email and complete the verification process.
You can add your support details to the transaction emails sent to your customers. This will help your customers know how to reach you for any queries.
Watch this video to see how to add support details.
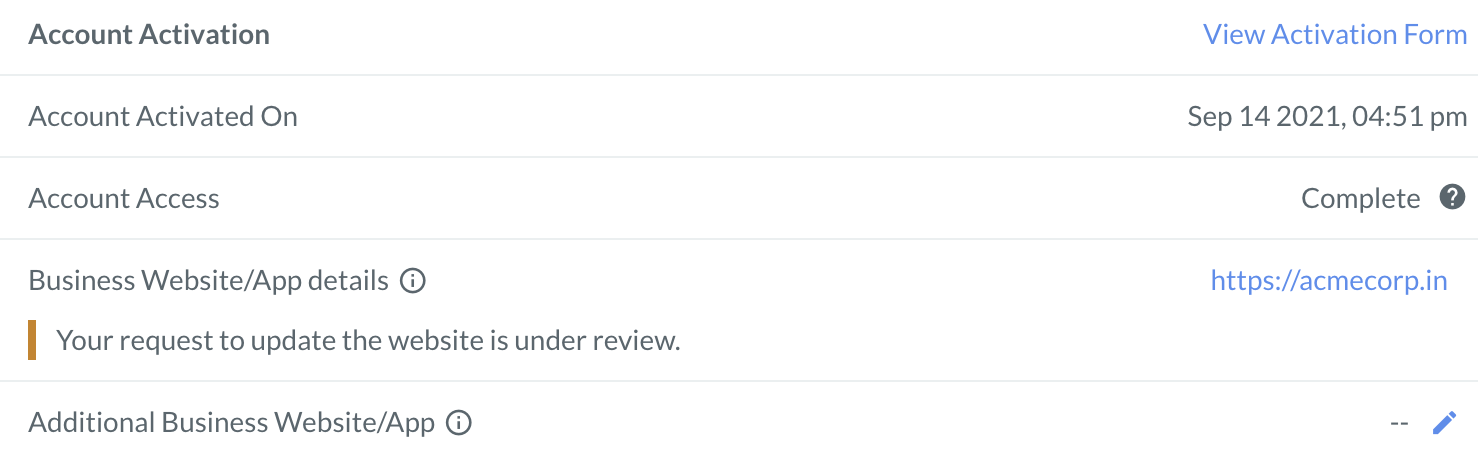
You must provide your live website or mobile app details during account activation. Without these details, you will not be able to access live mode API keys and hence cannot accept payments from your website or app. However, you can still accept payments from customers using Invoices and Payment Links generated via the Dashboard.
Handy Tips
Payments are enabled on the above-mentioned website or mobile app only after KYC approval.
Click the edit icon next to the Business Website/App details field.
In the pop-up page that is displayed, click Proceed to update website/app.
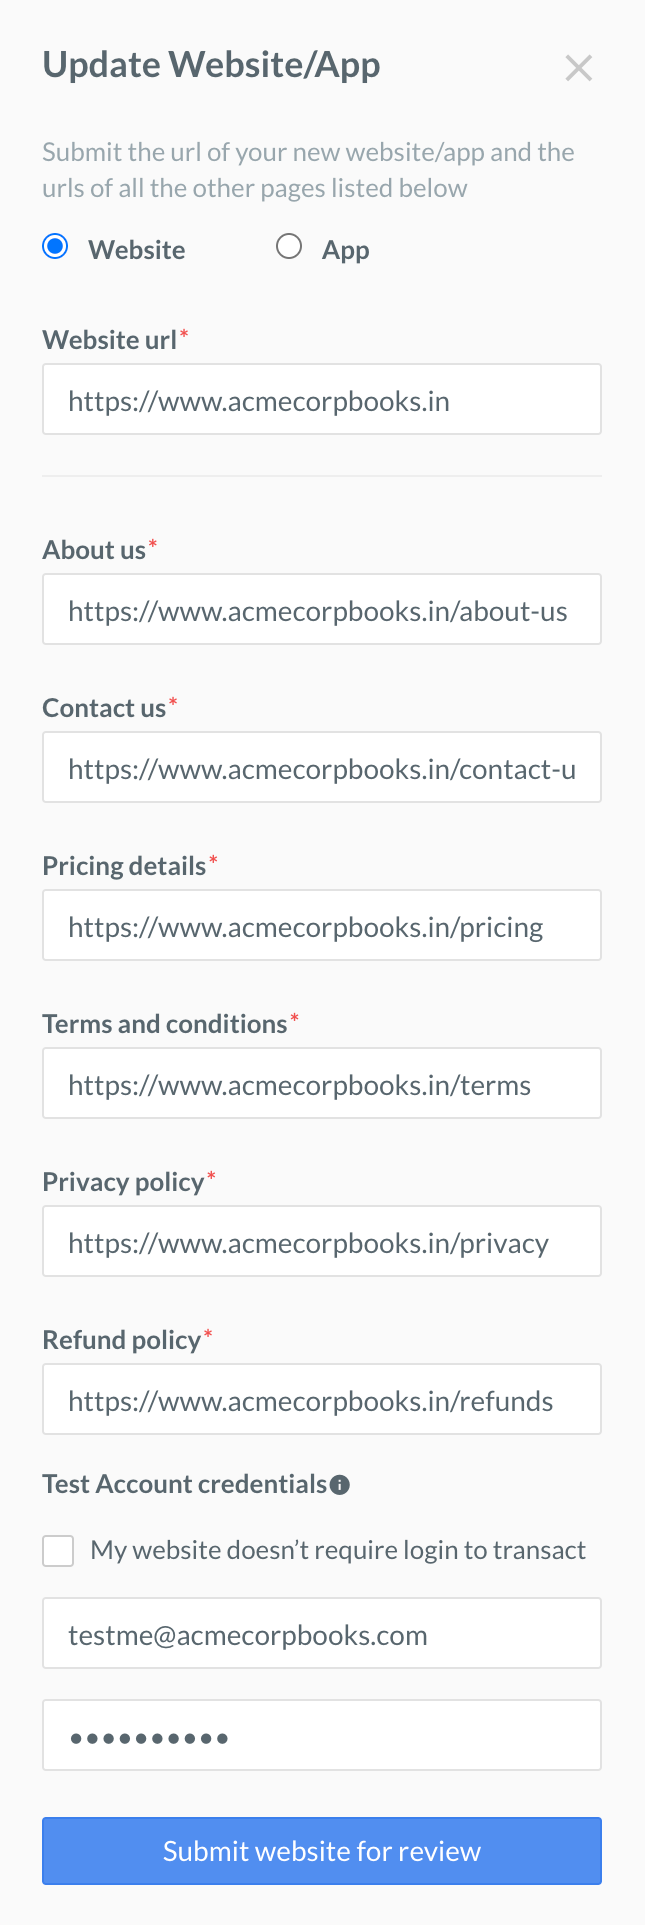
Provide the website or app details:
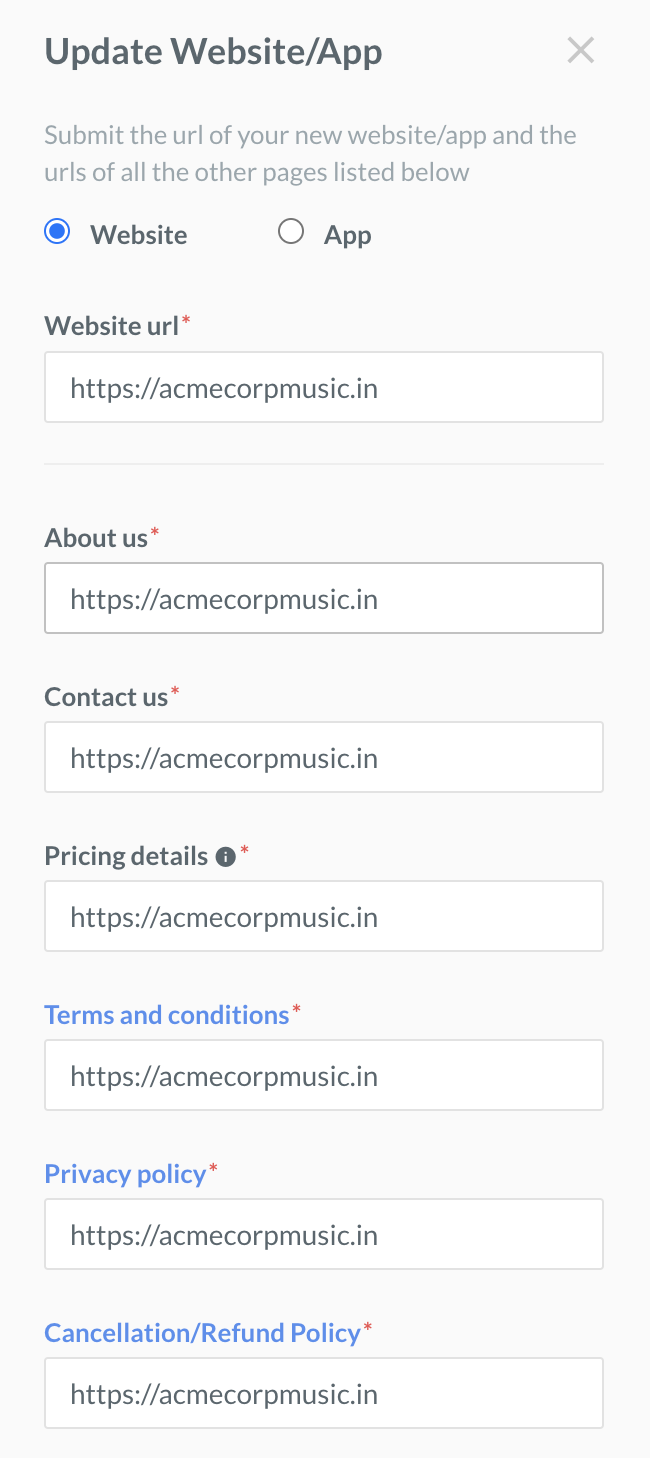
Follow these steps if you own a website:
Select Website.
Enter the Website URL.
Provide the links for these pages: About us, Contact us, Pricing details, Terms and conditions, Privacy policy and Refunds policy.
Provide your website's Test Account credentials. If the customer does not need to Log in to your website, select My website doesn’t require login to transact.
Click Submit website for review.
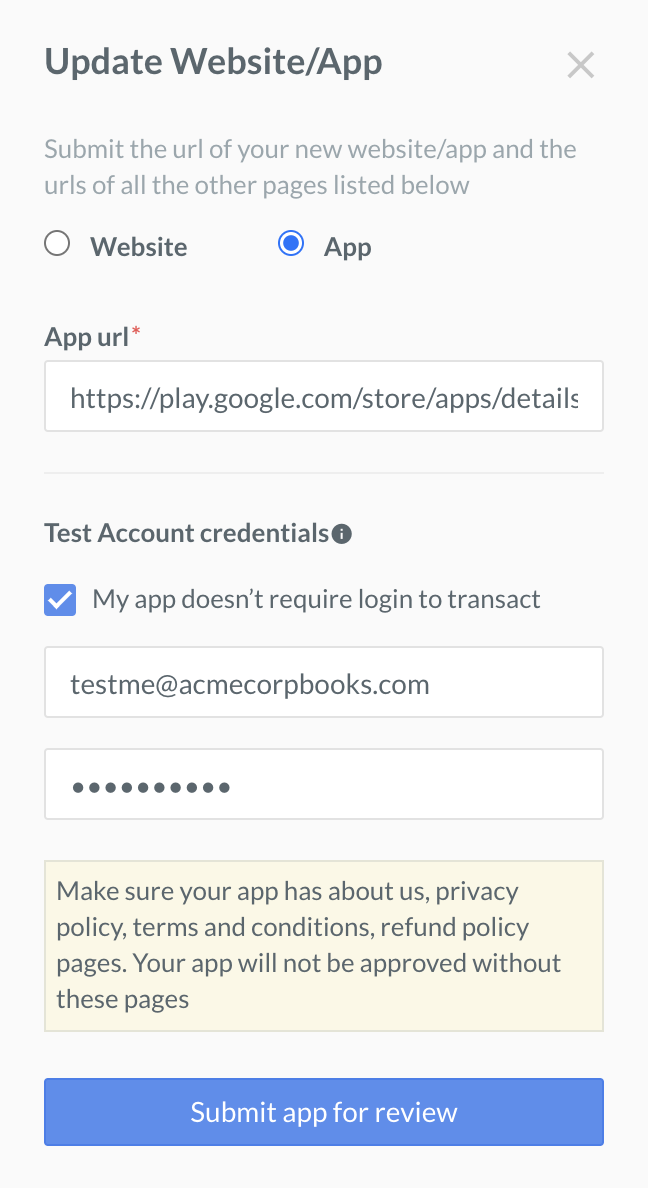
Follow these steps if you own an app:
Select App.
Enter the App URL.
Provide your app's Test Account credentials. If the customer does not need to Log in to your app, select My app doesn’t require login to transact.
Click Submit app for review.
After the details are provided, our team will review the request. We will update the details on the Dashboard.
Handy Tips
We may reach out to you for clarifications on email, WhatsApp, SMS, and Razorpay Dashboard during the verification process.
Navigate to My Account → Profile and submit the necessary information in the appropriate section. Our team will go through the information you provide and help you resolve the issue.
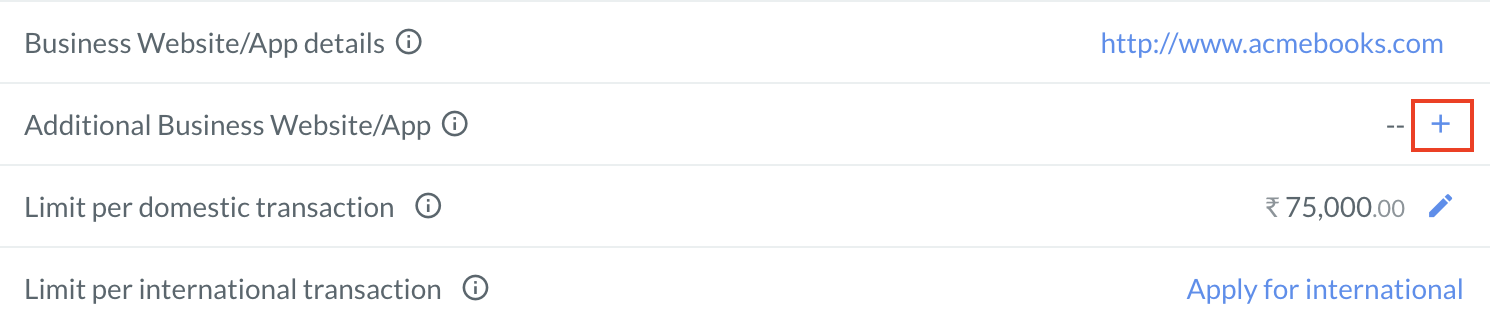
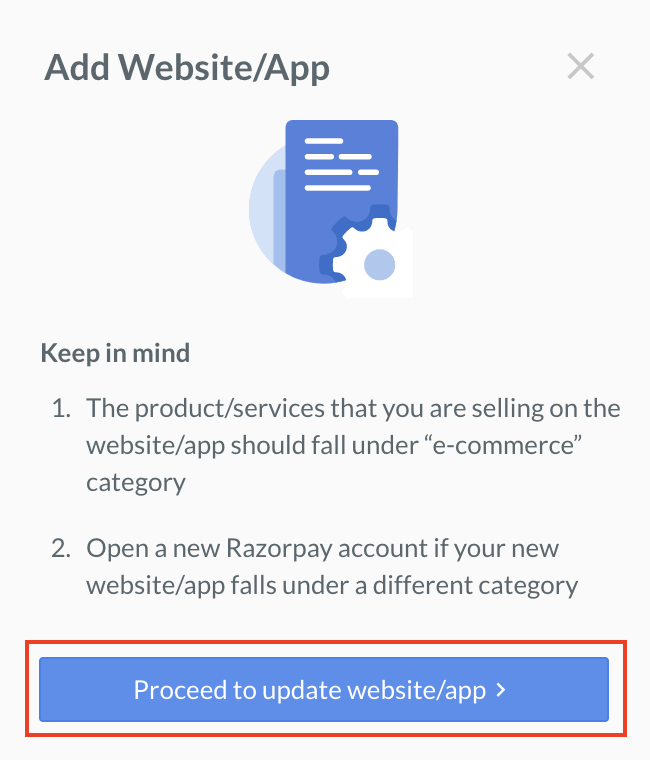
You can accept payments using your Razorpay account on more than one website. To do this, you need to share with us the details of the additional web pages.
Handy Tips
This feature is available only if your services/products fall under the e-commerce business category.
Click the icon next to the Additional Business Website/App field.
In the pop-up page that is displayed, click Proceed to update website/app.
Provide the website or app details:
Follow these steps if you own a website:
Select Website.
Enter the Website URL.
Provide the links for these pages: About us, Contact us, Pricing details, Terms and conditions, Privacy policy and Cancellation/Refund policy.
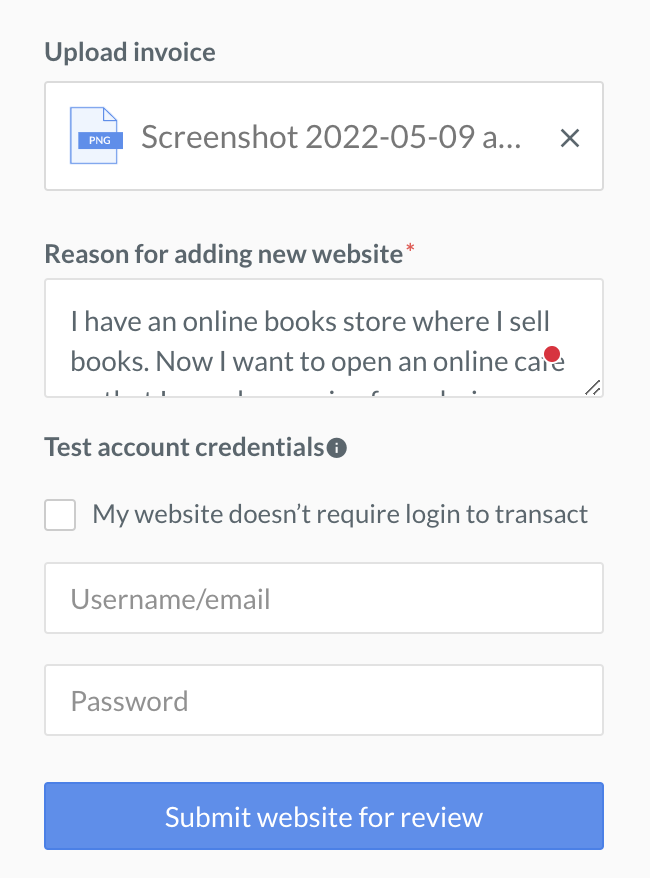
Upload invoice: Upload a sample invoice. The accepted file formats are PNG, JPG and PDF.
Reason for adding new website: Enter the reason for adding a new website. Enter a minimum of 50 words.
Provide your website's Test Account credentials if required or select My website doesn’t require login to transact check box if logging in is not required.
Click Submit website for review.
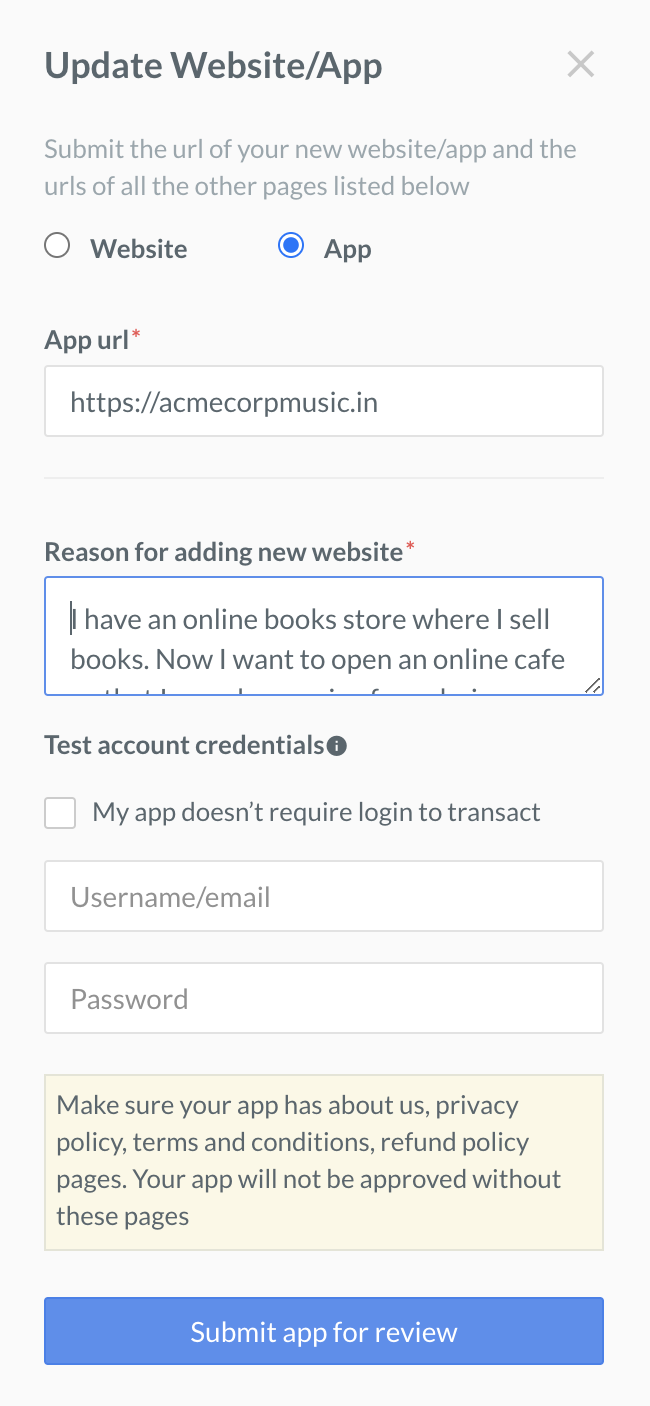
Follow these steps if you own an app:
Select App.
Enter the App URL.
Reason for adding new website: EEnter the reason for adding a new website. Enter a minimum of 50 words.
Provide your app's Test Account credentials if required or select My app doesn’t require login to transact check box if logging in is not required.
Click Submit app for review.
After you provide the details, our team will review the request. We will update the details on the Dashboard.
You can update the domestic transaction limit for your Razorpay account. For example, if you could accept only ₹50,000 per transaction, you can update it to a higher amount, such as ₹1,00,000.
Watch Out
The ceiling amount differs on the basis of your business category.
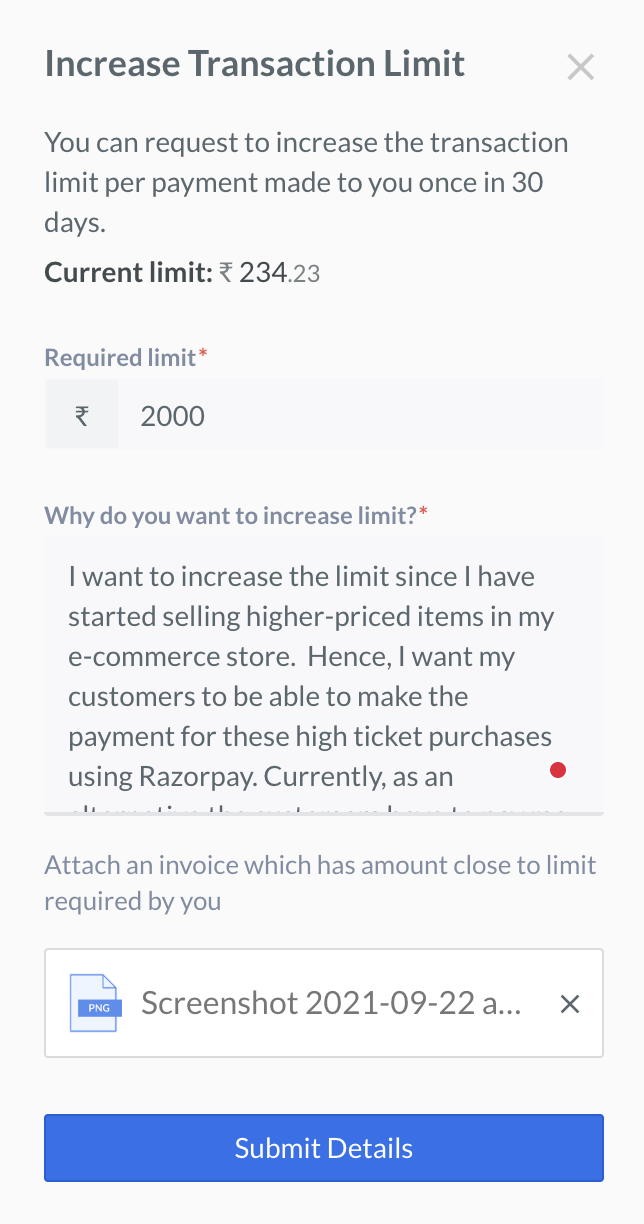
Click the edit icon next to the Limit per domestic transaction field.
In the pop-up page that is displayed, provide the following information:
Required Limit: Enter the desired per transaction limit amount.
Why do you want to increase limit?: Enter the reason you want to increase the per domestic transaction limit. You should enter a minimum of 100 words.
Upload invoice: Upload a sample invoice. The accepted file formats are PNG, JPG and PDF.
Click Submit Details.
After the details are provided, our team will review the request. We will update the details on the Dashboard.
Handy Tips
We may reach out to you for clarifications on email, WhatsApp, SMS, and Razorpay Dashboard during the verification process.
Navigate to My Account → Profile and submit the necessary information in the appropriate section. Our team will go through the information you provide and help you resolve the issue.
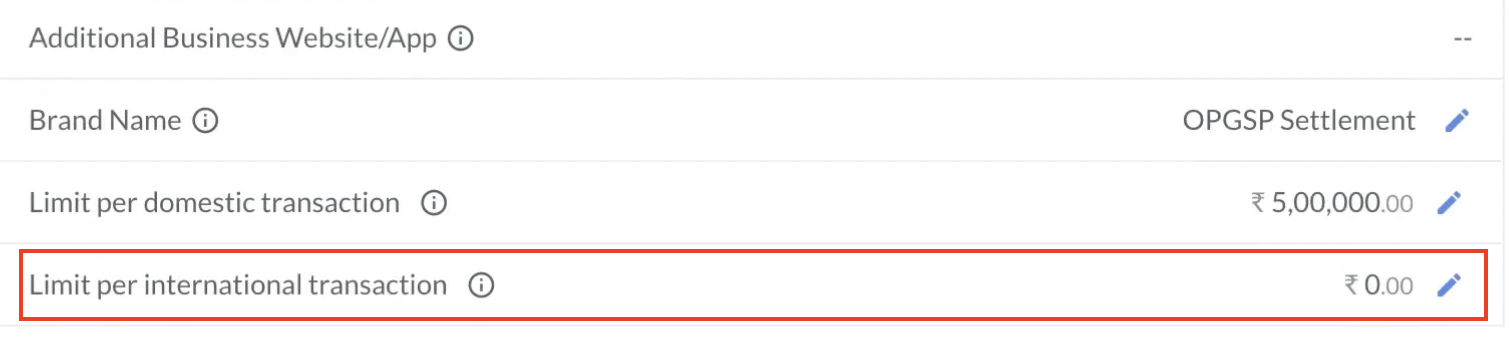
You can update the international transaction limit for your Razorpay account. For example, if you could accept only ₹50,000 per transaction, you can update it to a higher amount, such as ₹1,00,000.
Watch Out
The ceiling amount differs on the basis of your business category.
To update your per international transaction limit:
Click the edit icon next to the Limit per international transaction field.
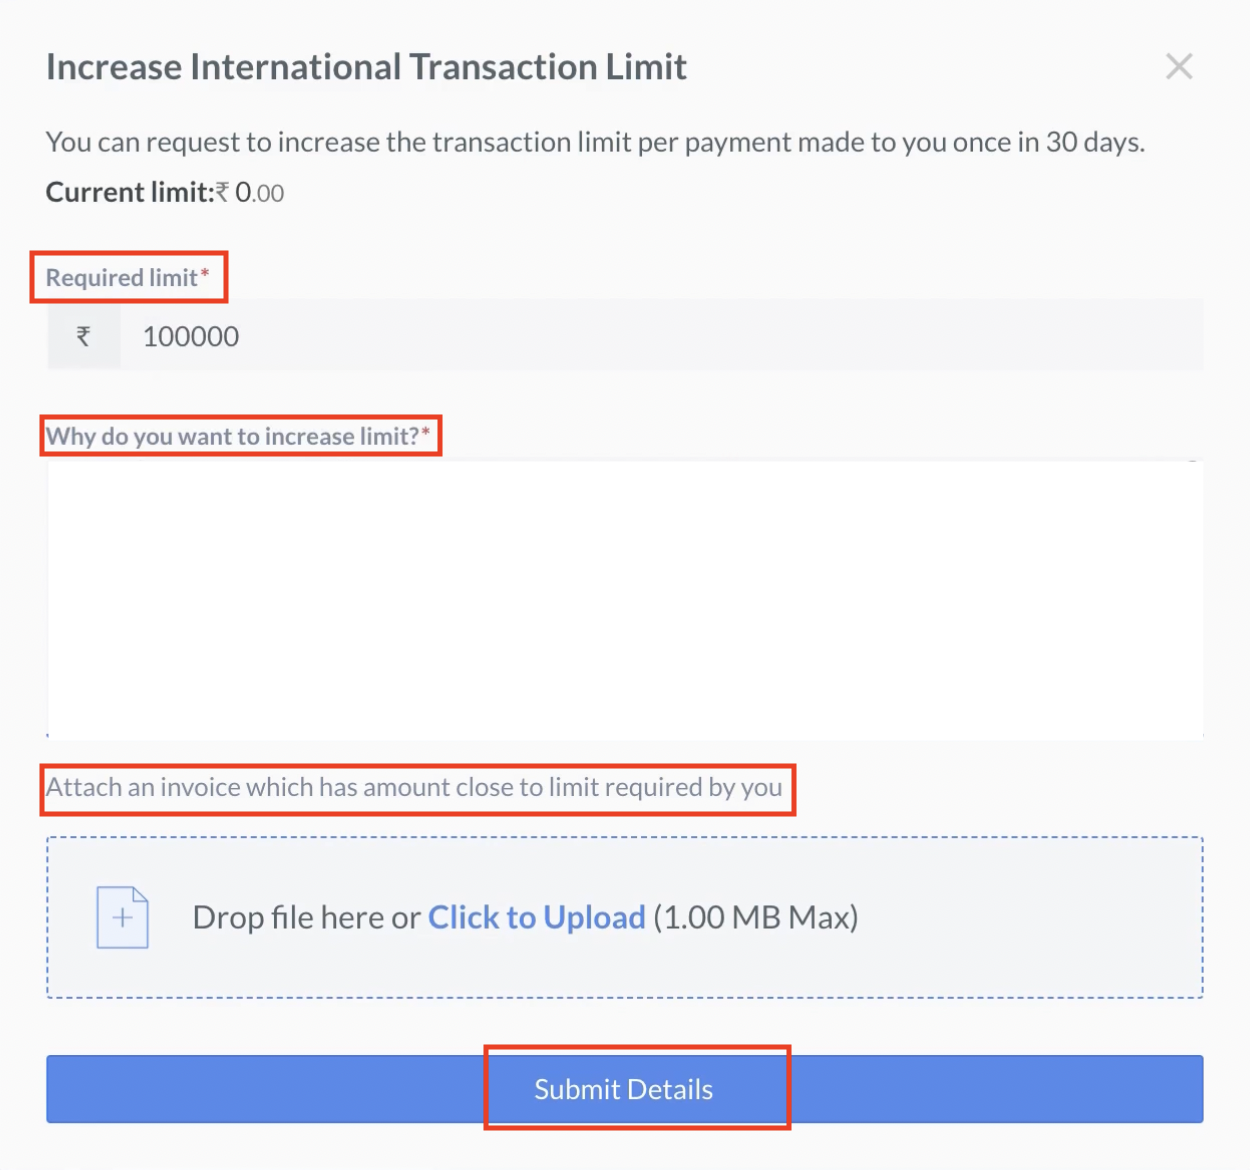
In the pop-up page that is displayed, provide the following information:
Required Limit: Enter the desired per transaction limit amount.
Why do you want to increase limit?: Enter the reason you want to increase the per international transaction limit. You should enter a minimum of 100 words.
Upload invoice: Upload a sample invoice. The accepted file formats are PNG, JPG and PDF.
Click Submit Details.
After the details are provided, our team will review the request. We will update the details on the Dashboard.
Handy Tips
We may reach out to you for clarifications on email, WhatsApp, SMS, and Razorpay Dashboard during the verification process.
Navigate to My Account → Profile and submit the necessary information in the appropriate section. Our team will go through the information you provide and help you resolve the issue.
While creating the Razorpay account, you provided the name as Acme Corp; now, you want to change it to Acme Co.
Handy Tips
This feature is available only for the registered Razorpay users.
Only users with 'Owner' or 'Admin' roles can update the brand name.
Bank-related SMS or credit card statements sent to customers will not have the brand name since these are managed by the banks and not Razorpay. Such communication will display the billing name provided by you during account creation and activation process.
Watch this video to see how to update your brand name.
You can update the Importer-Exporter Code on the Razorpay Dashboard.
The IEC is a code issued by the Indian Director General of Foreign Trade (DGFT) to Indian companies to export goods from India. You can apply for an IEC from the DGFT website.
Submit your IEC if you have one, sell physical goods, or sell services and utilise certain benefits under India’s Foreign Trade Policy.
Handy Tips
This feature is available only for Razorpay users who accept international payments and export goods.