Prerequisites🔗
- You can use ePOS only on Android devices.
- Download the Razorpay ePOS App from the Google Play store.
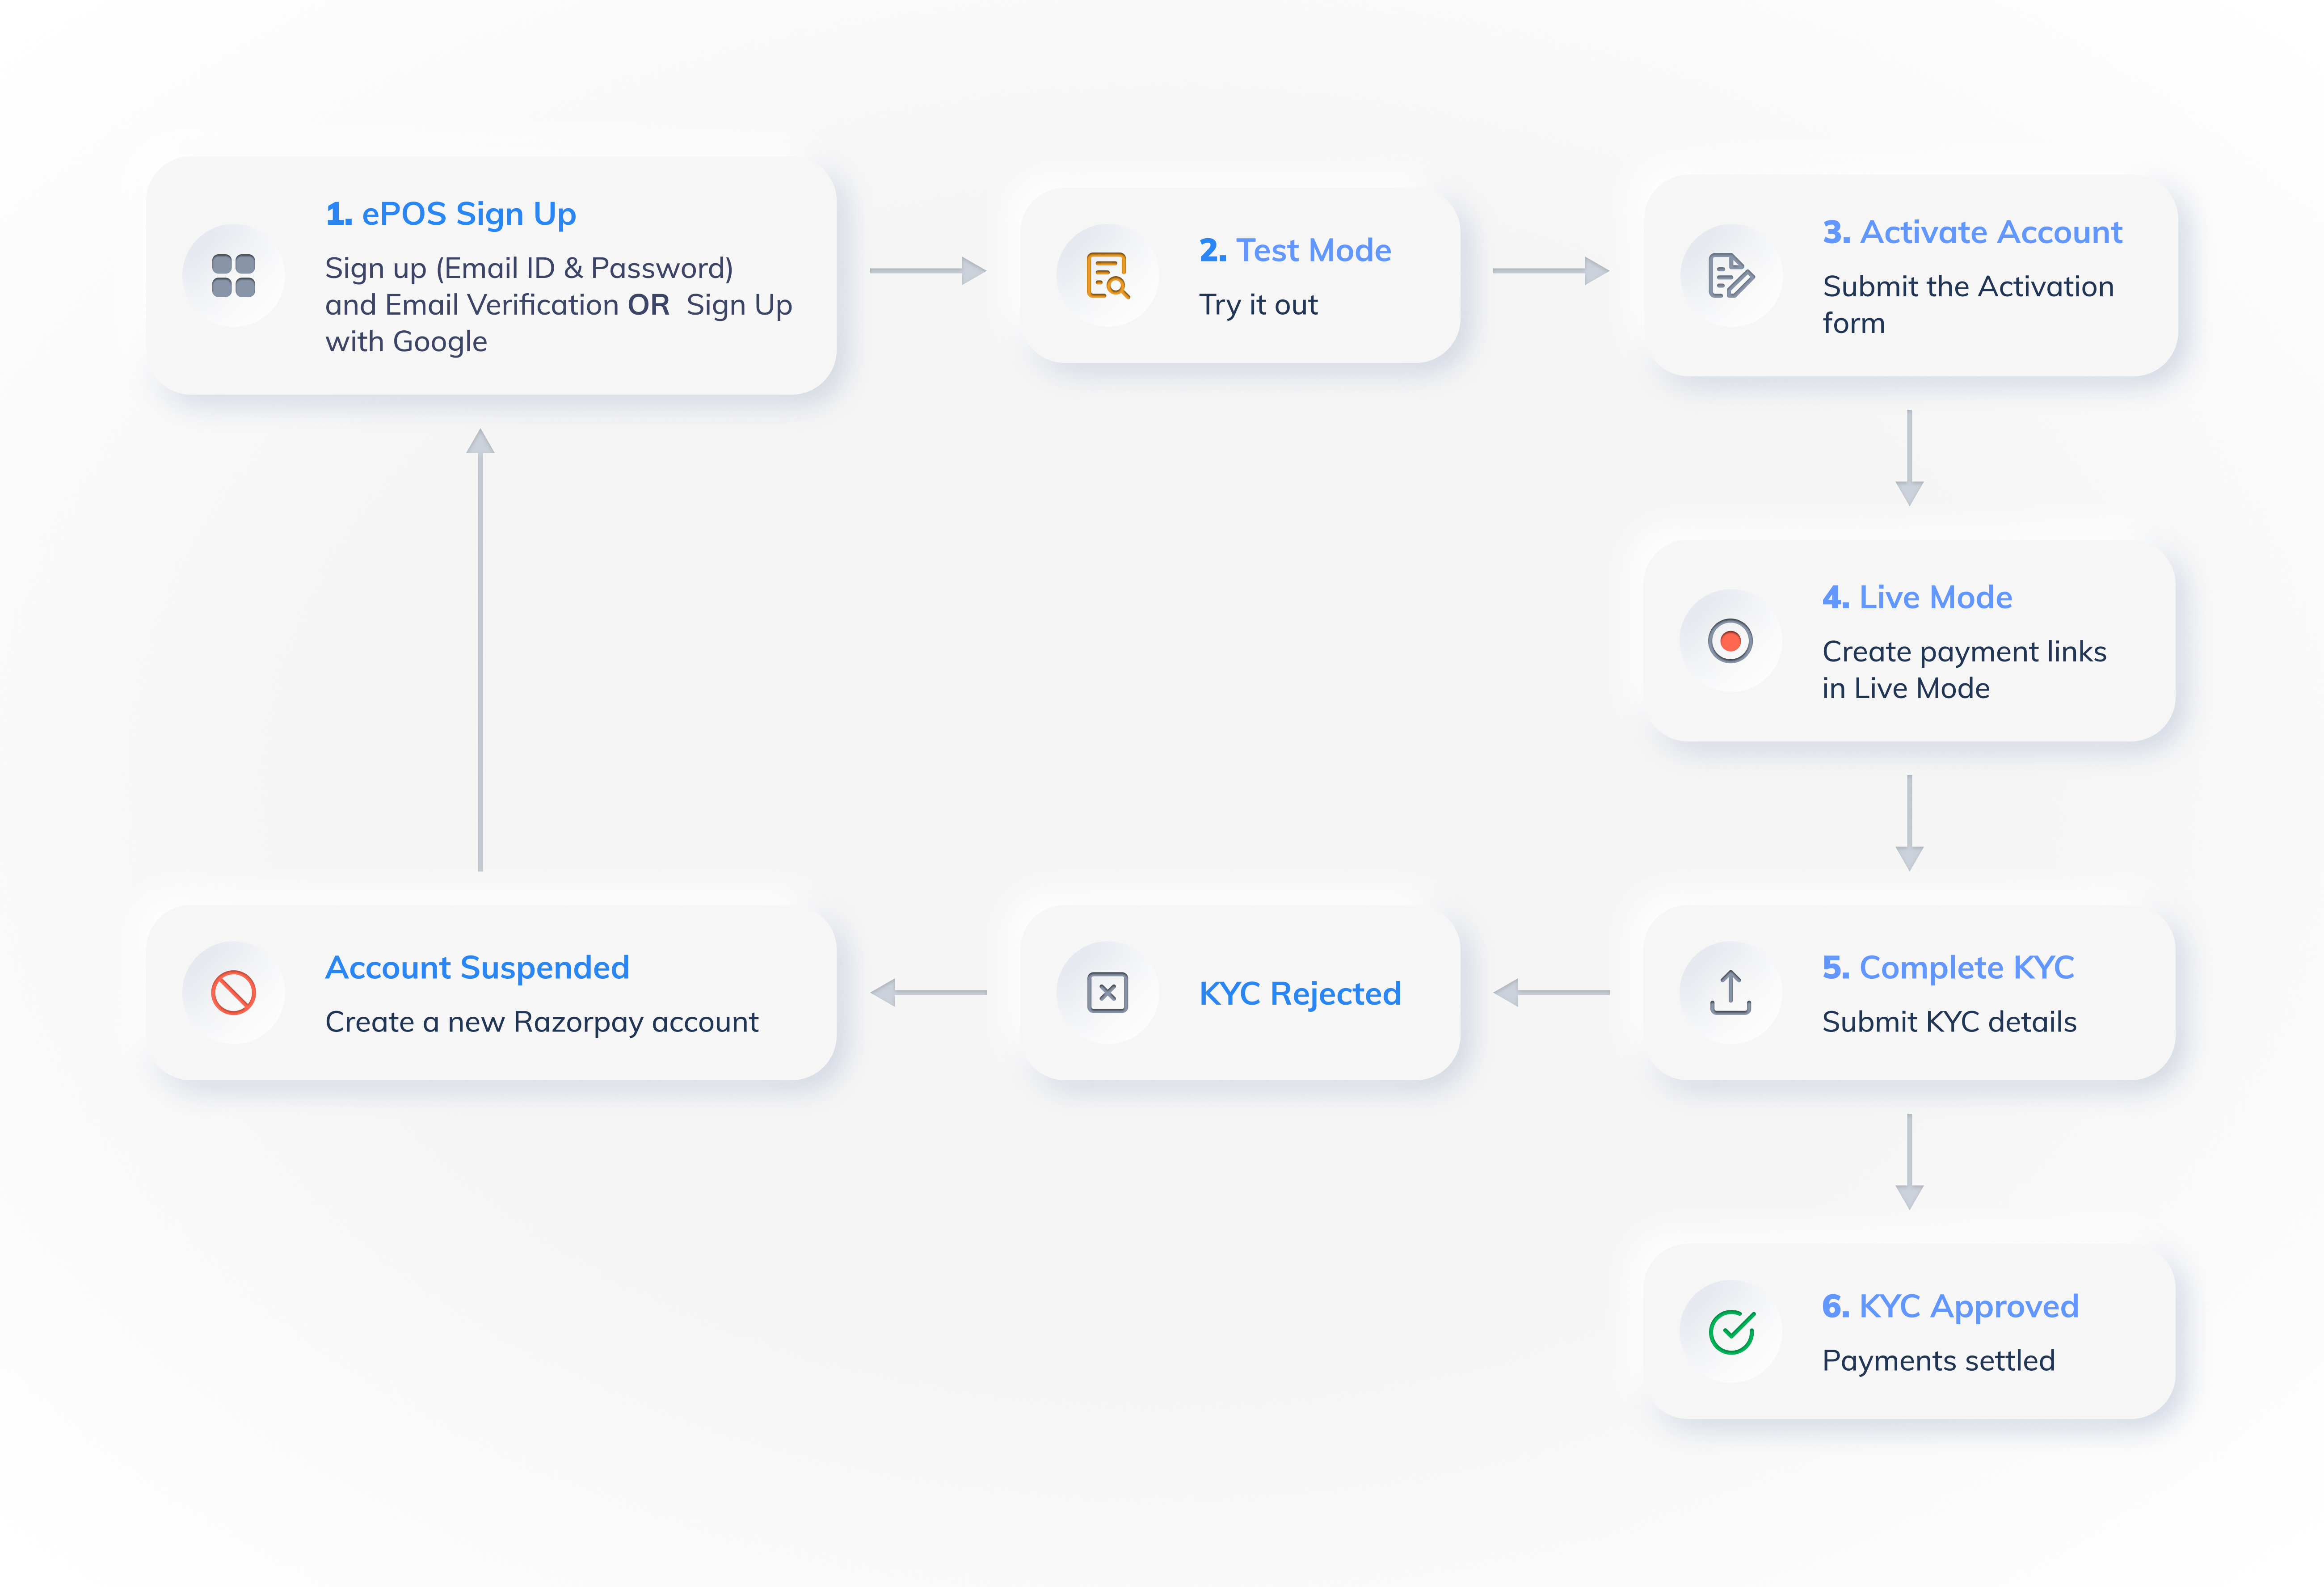
Create a Razorpay account or log in as an exisiting merchant and accept payment using Razorpay ePOS App.
To start accepting payments using ePOS, you should have an active Razorpay account.
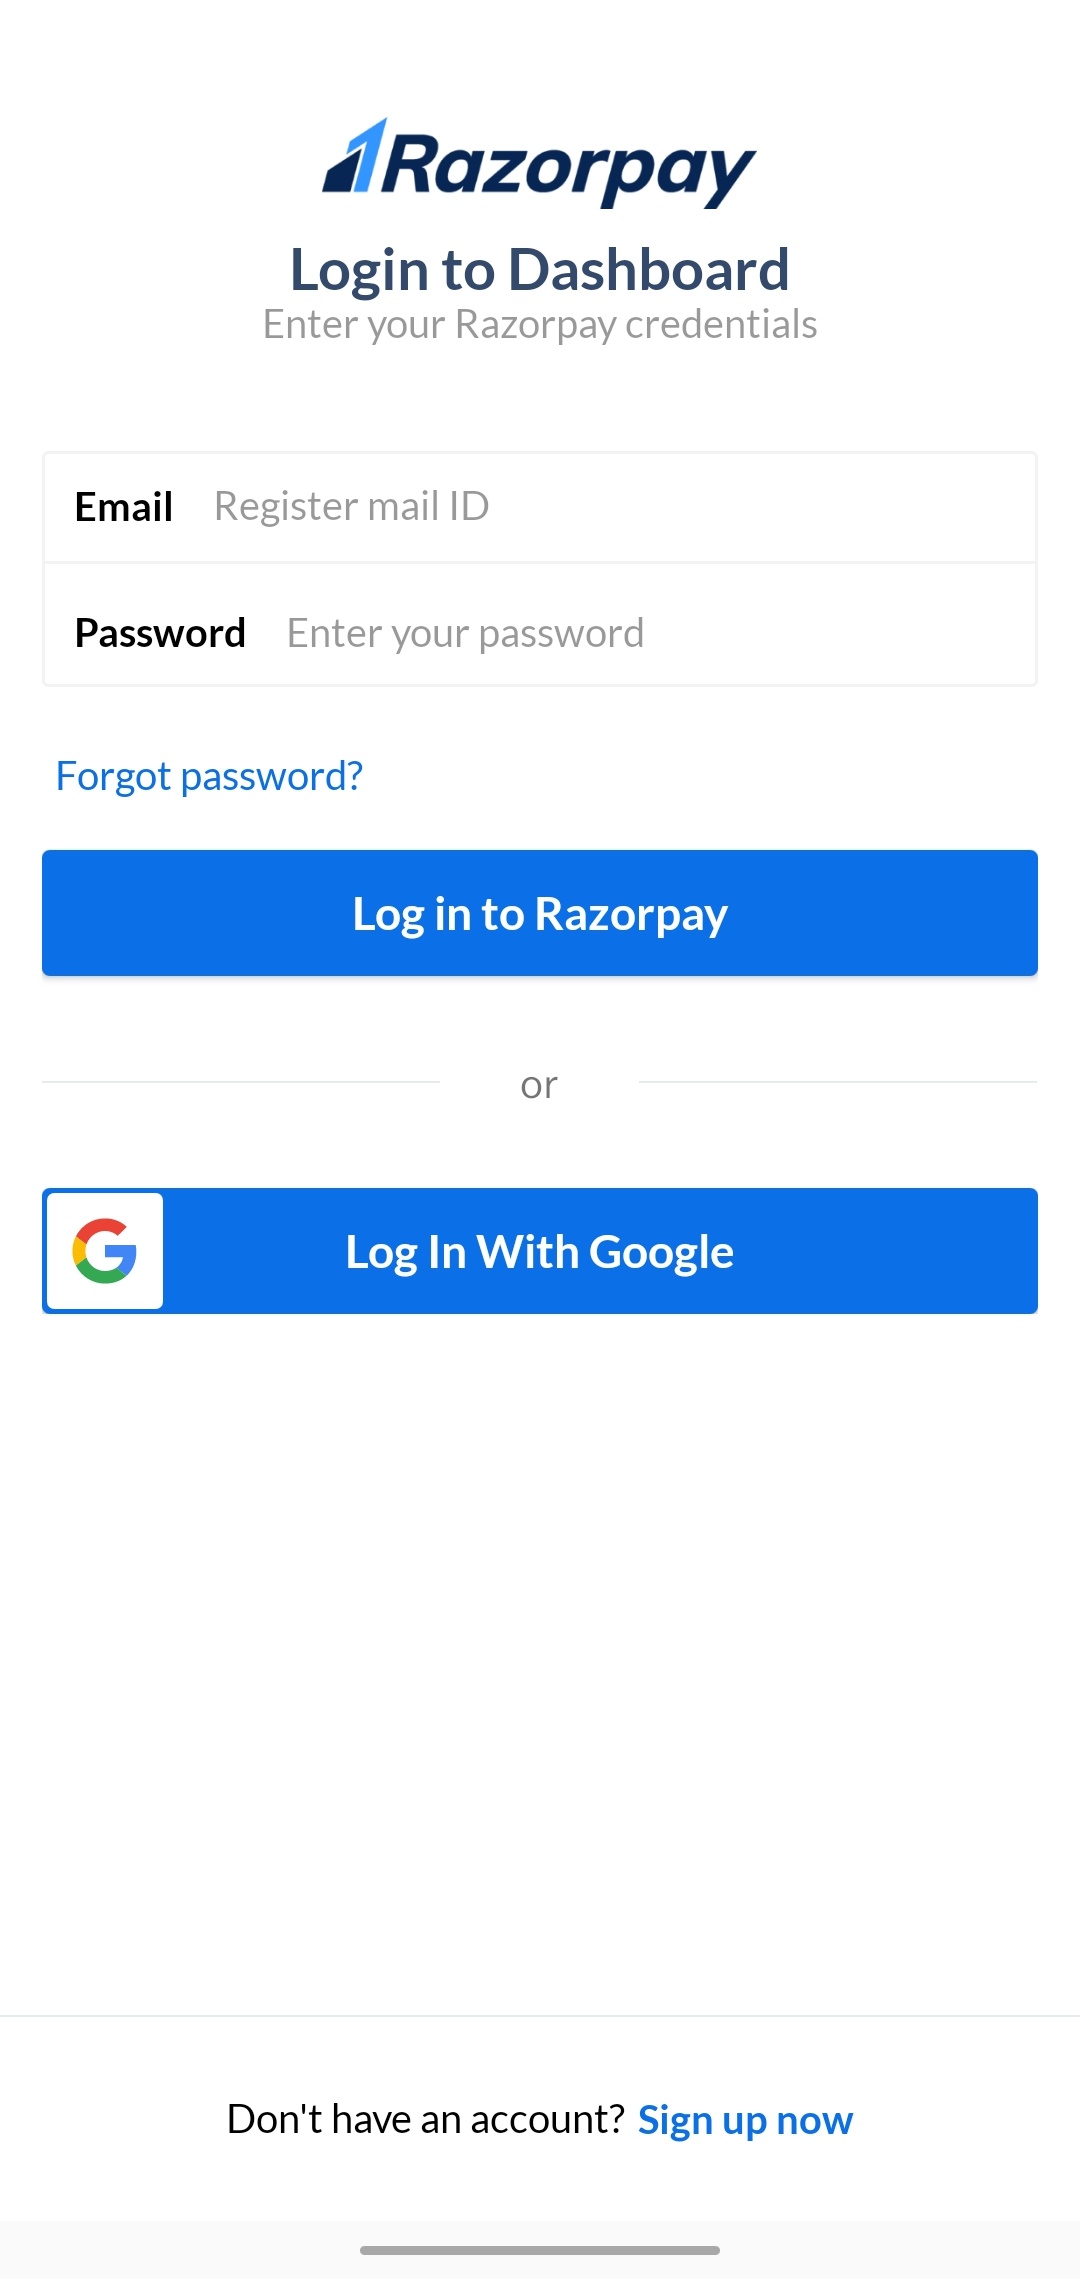
Tap the Sign up now to start using the ePOS app.
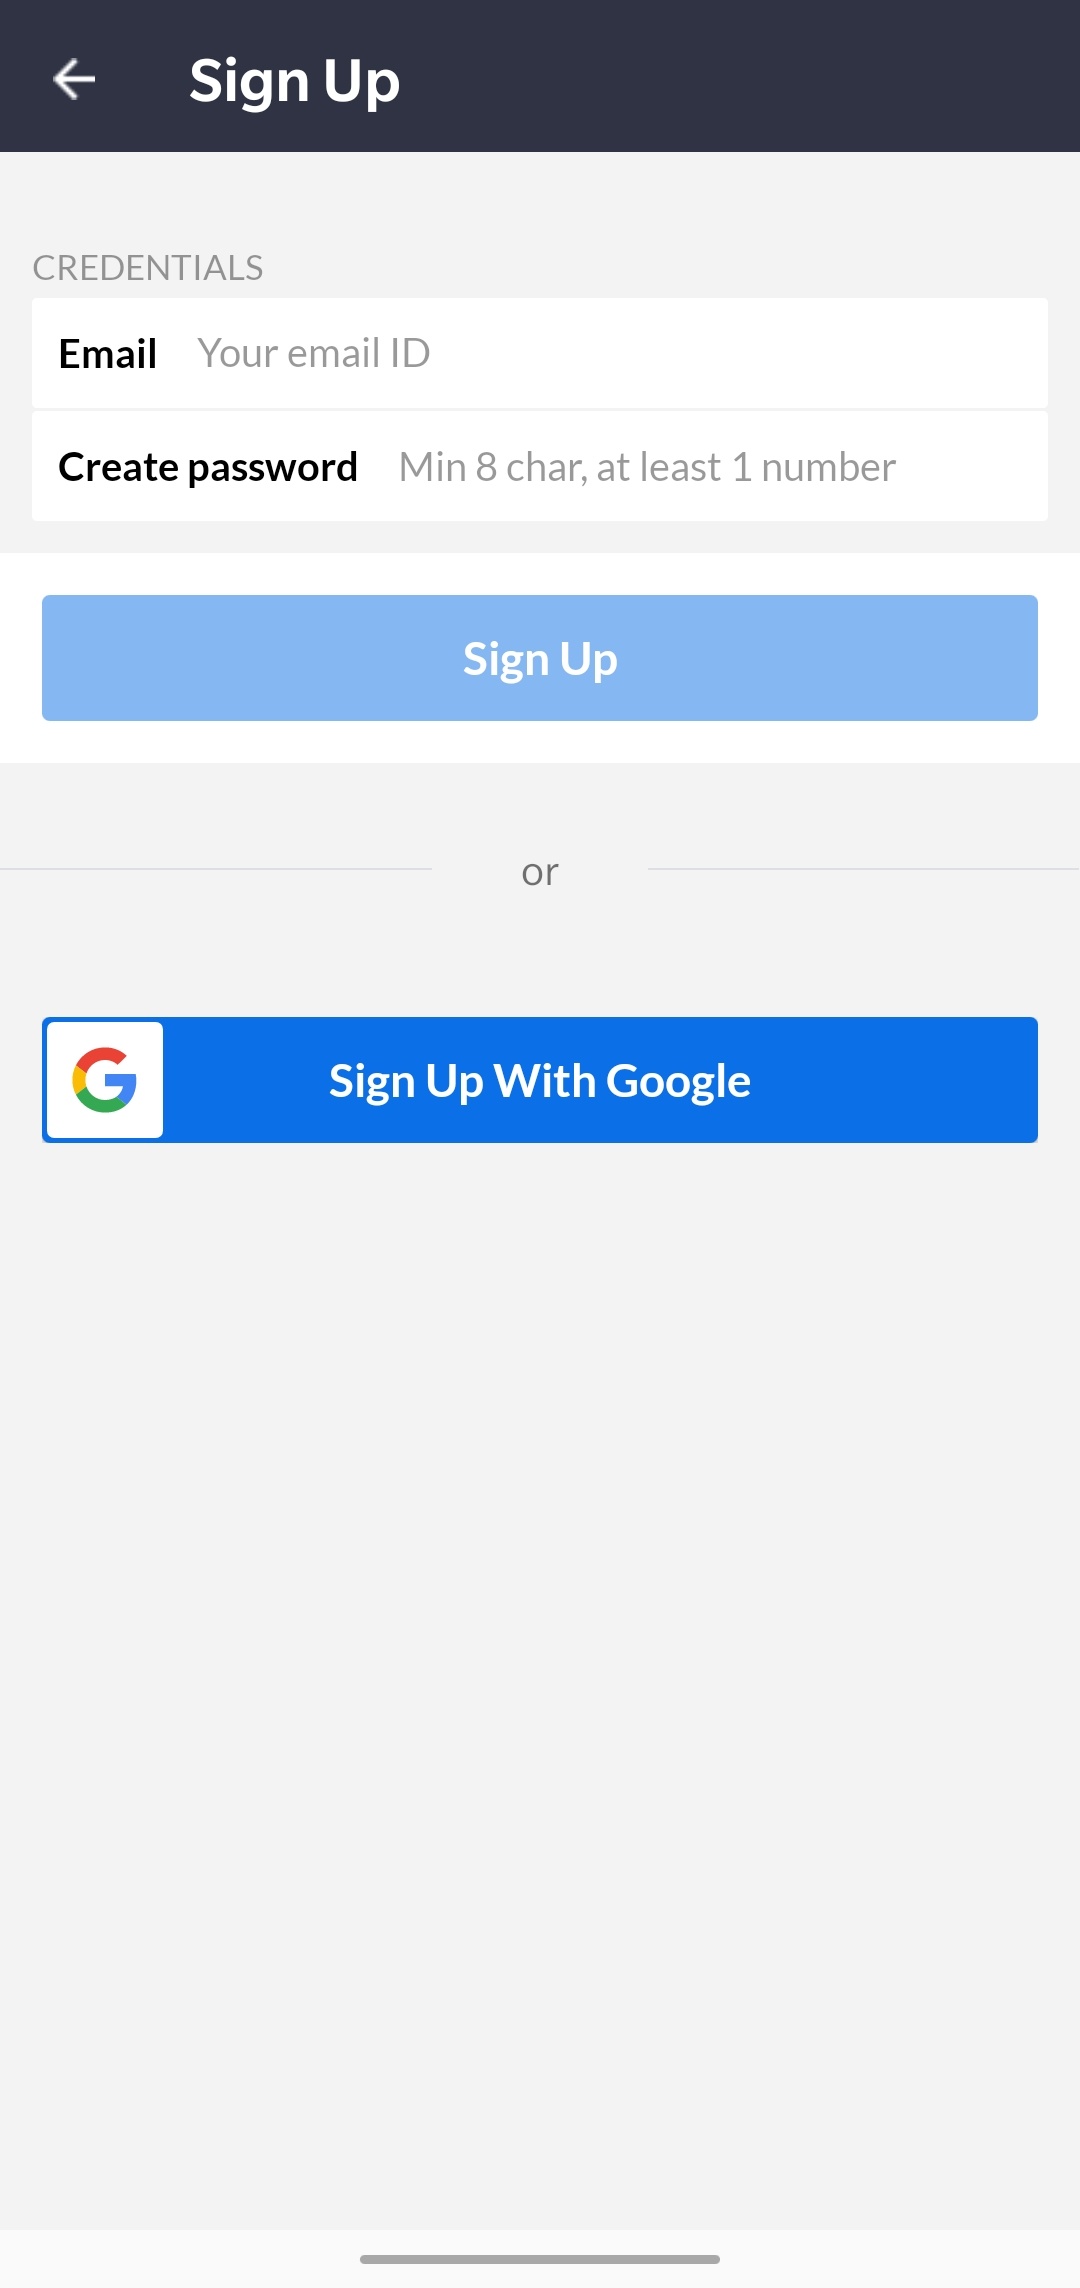
You can sign up using any of the following options:
Enter your email id and create a password.
Tap Sign Up.
After you sign up, you will receive a verification email at the provided email address.
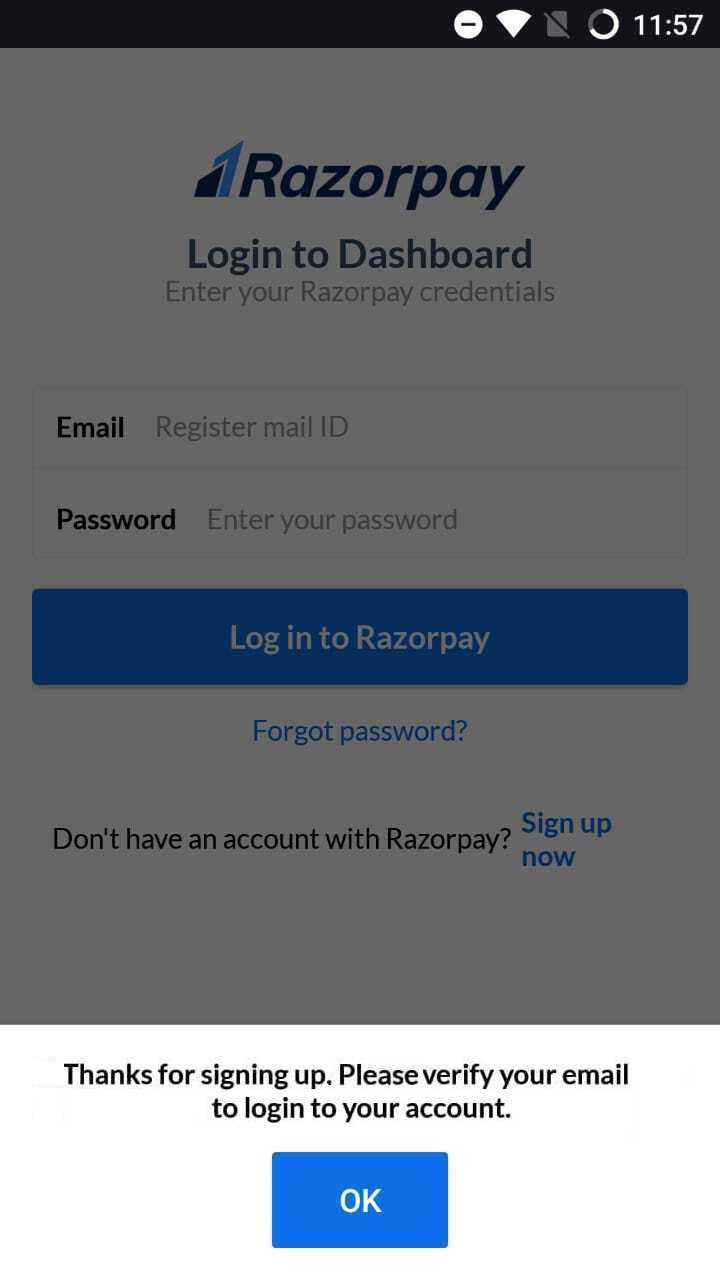
Follow the instructions in the email to verify your email and proceed to log into your Razorpay ePOS app.
Tap Sign Up With Google.
Tap the Google account or add another account in the Choose an account pop-up that appears.
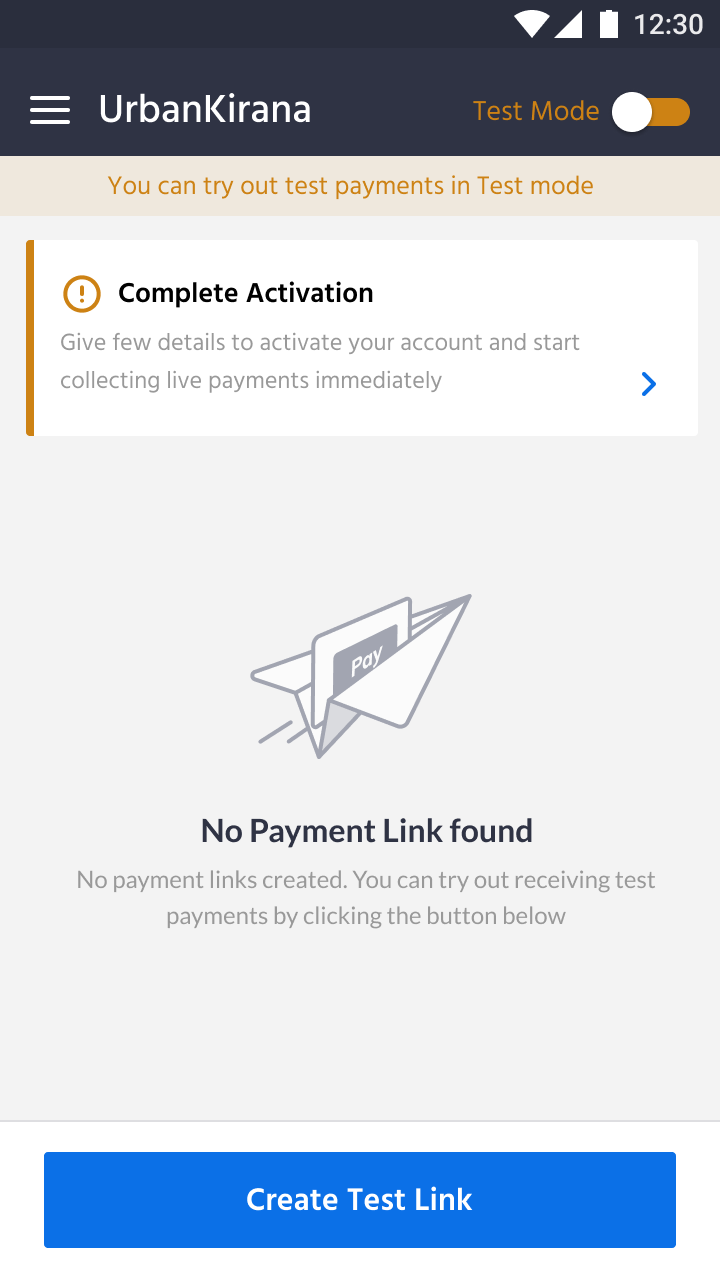
You need to activate your account and submit your KYC to start receiving payments. However, you can use the Test Mode to try ePOS before you receive real payments.
Tap the Create Test Link and try out test payments in test mode.
Handy Tips:
Test Mode is used for testing and you can use it as long as you like. It does not involve actual money transactions. You must activate your account to accept real payments.
To access live mode and accept payments from customers, you must activate your account.
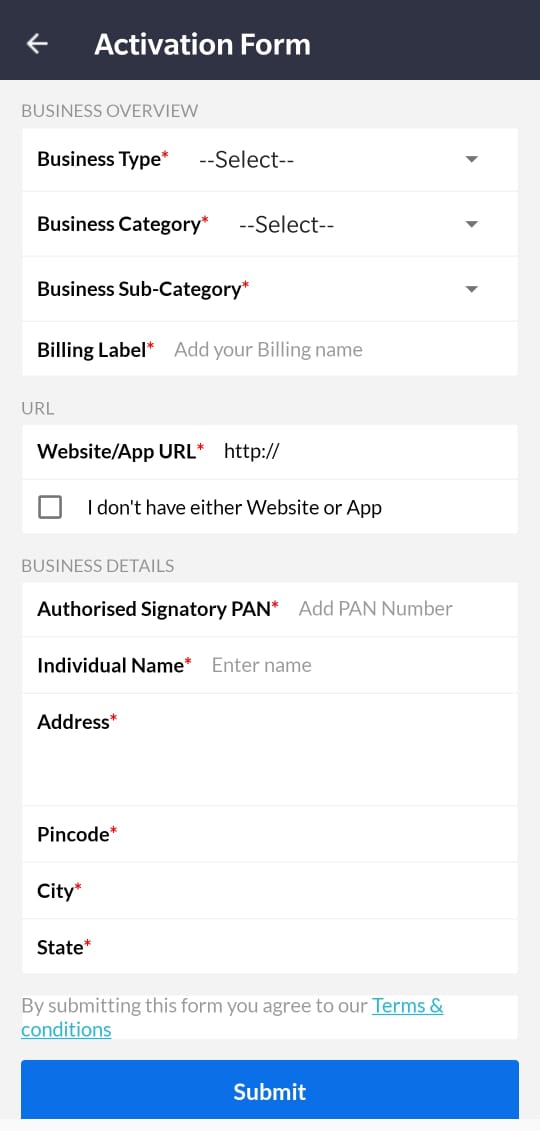
Enter the required business details in the Activation Form page. As part of the account activation process, you are required to submit business details to Razorpay. For example, for Business Type - Private Limited, you need to provide Registered Address (Pincode as in 6 digits) and specific Business PAN number and Authorized Signatory PAN number format, which is validated.
After entering all the required details and reading and accepting the Terms and Conditions, tap Save & Next.
Your account is instantly activated and you can start accepting domestic payments using the Live mode. The Live mode can be used after the activation form is updated. After fulfilling the KYC requirements, the amount received from the live transactions are settled to your bank account.
After your account is active, you can start accepting domestic payments. However, the payments are deposited to your bank account only after your KYC is verified. Based on your business model, you need to provide details, such as contact details, business details, account details and business documents to Razorpay.
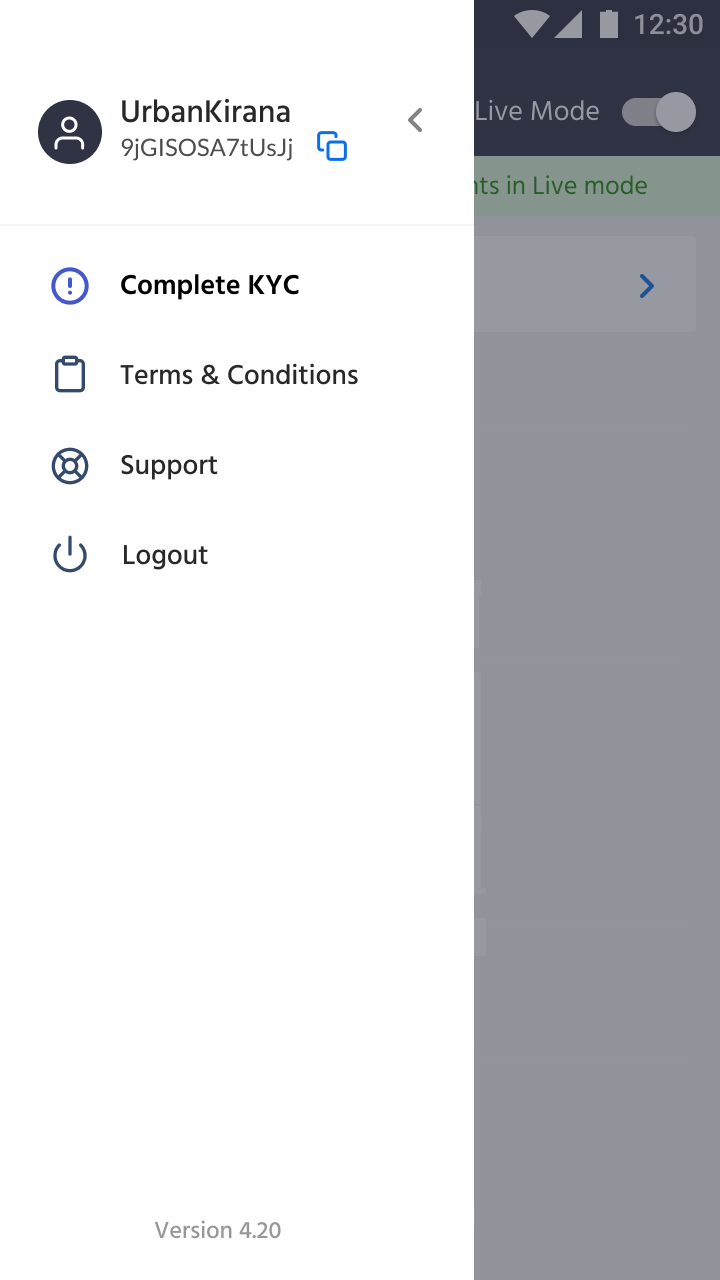
Tap on Complete KYC in the left menu panel of the ePOS app, which redirects you to the Sign In page. Or, go to the Razorpay website and tap Log In. Enter your Razorpay user ID and password.
To submit your KYC, navigate to My Account and tap View KYC Form on the Dashboard. The first page on the form is pre-filled and displays the contact information submitted during the sign-up process.
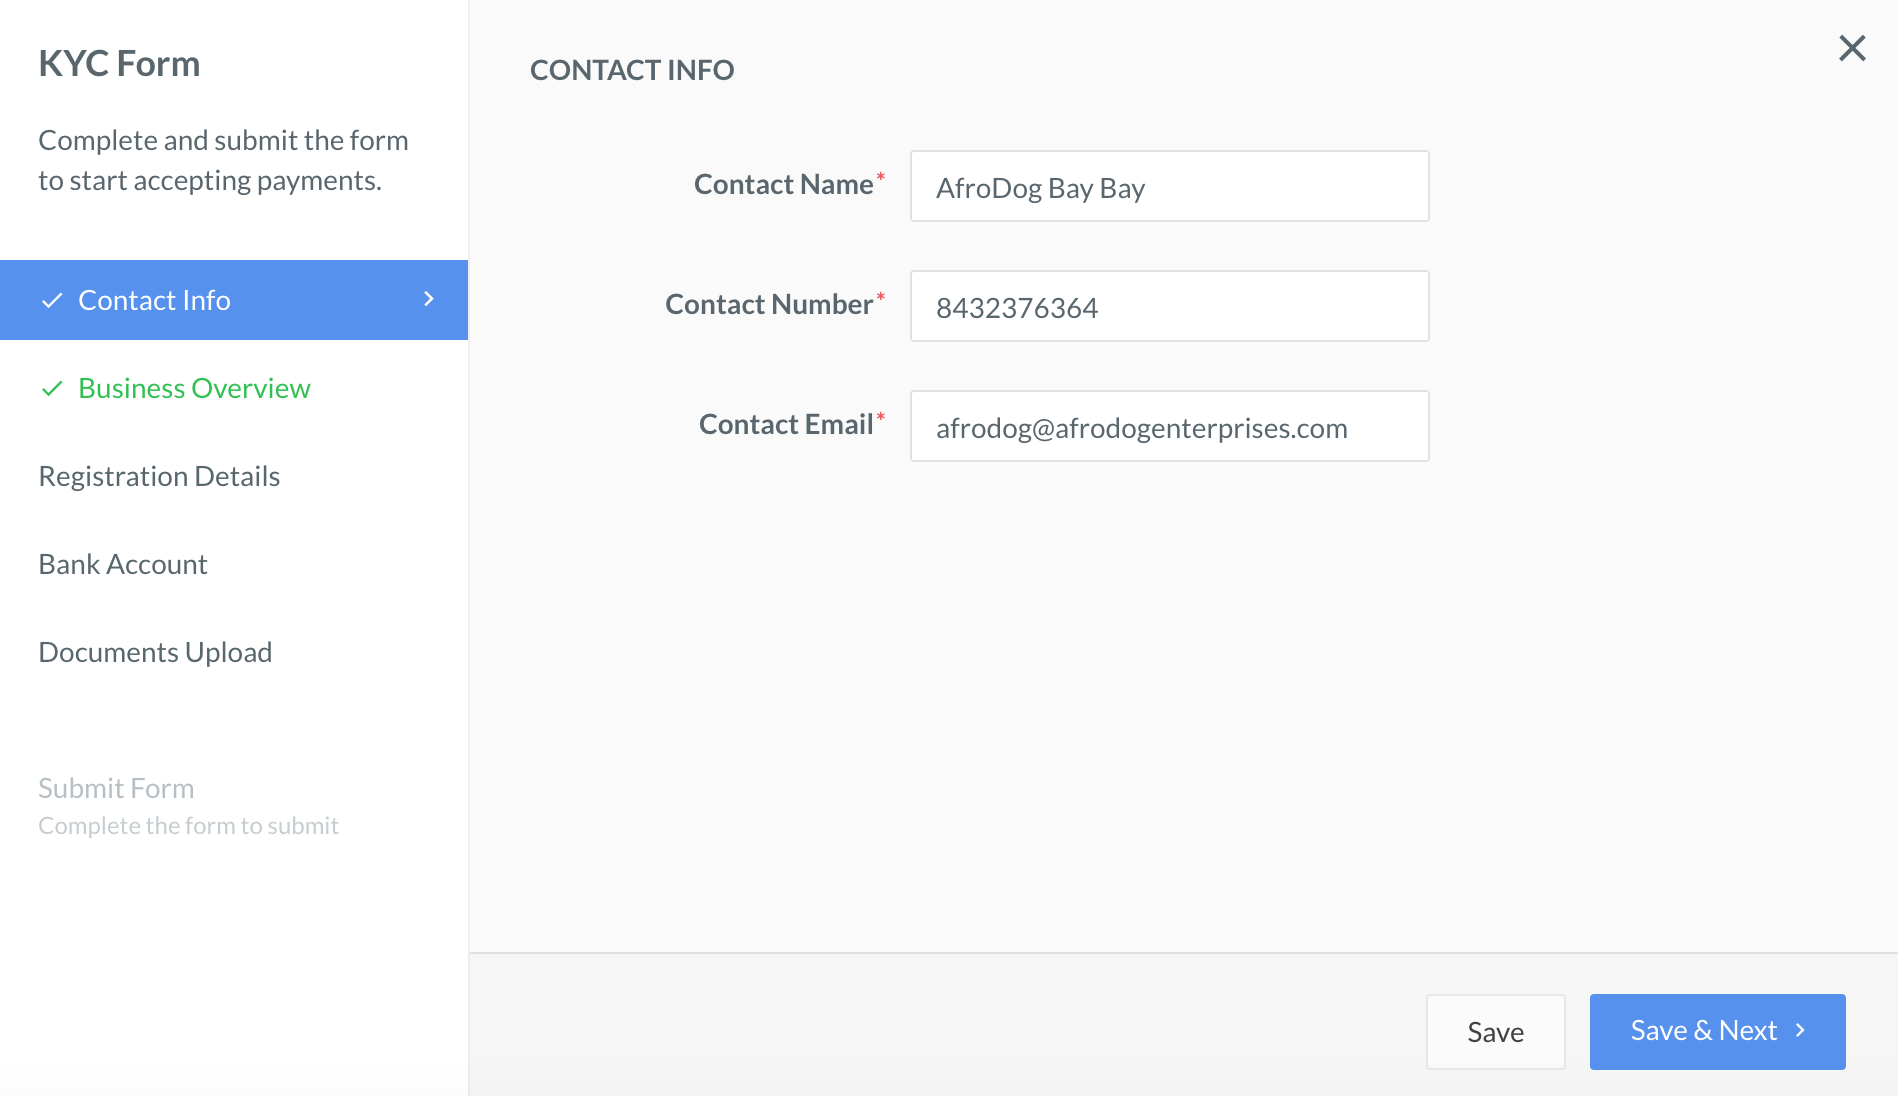
The second page requires details about the business.

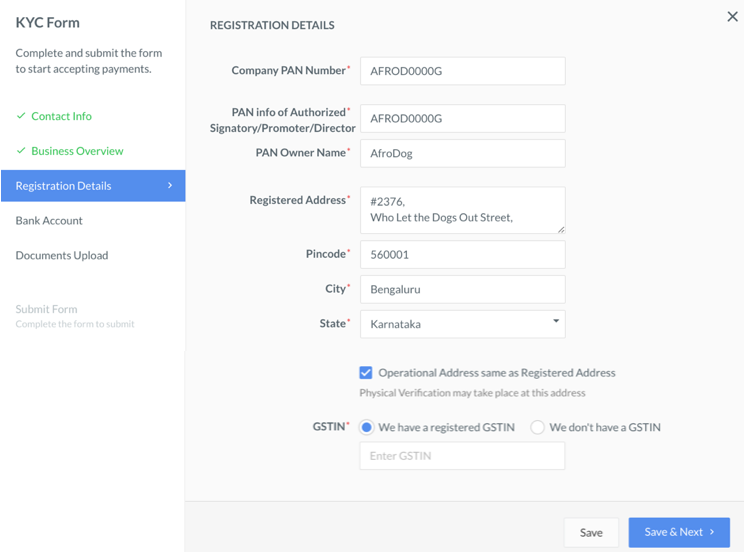
The third page requires business registration details. These include details like Company PAN, PAN of the Director, Registered Address and GSTIN.
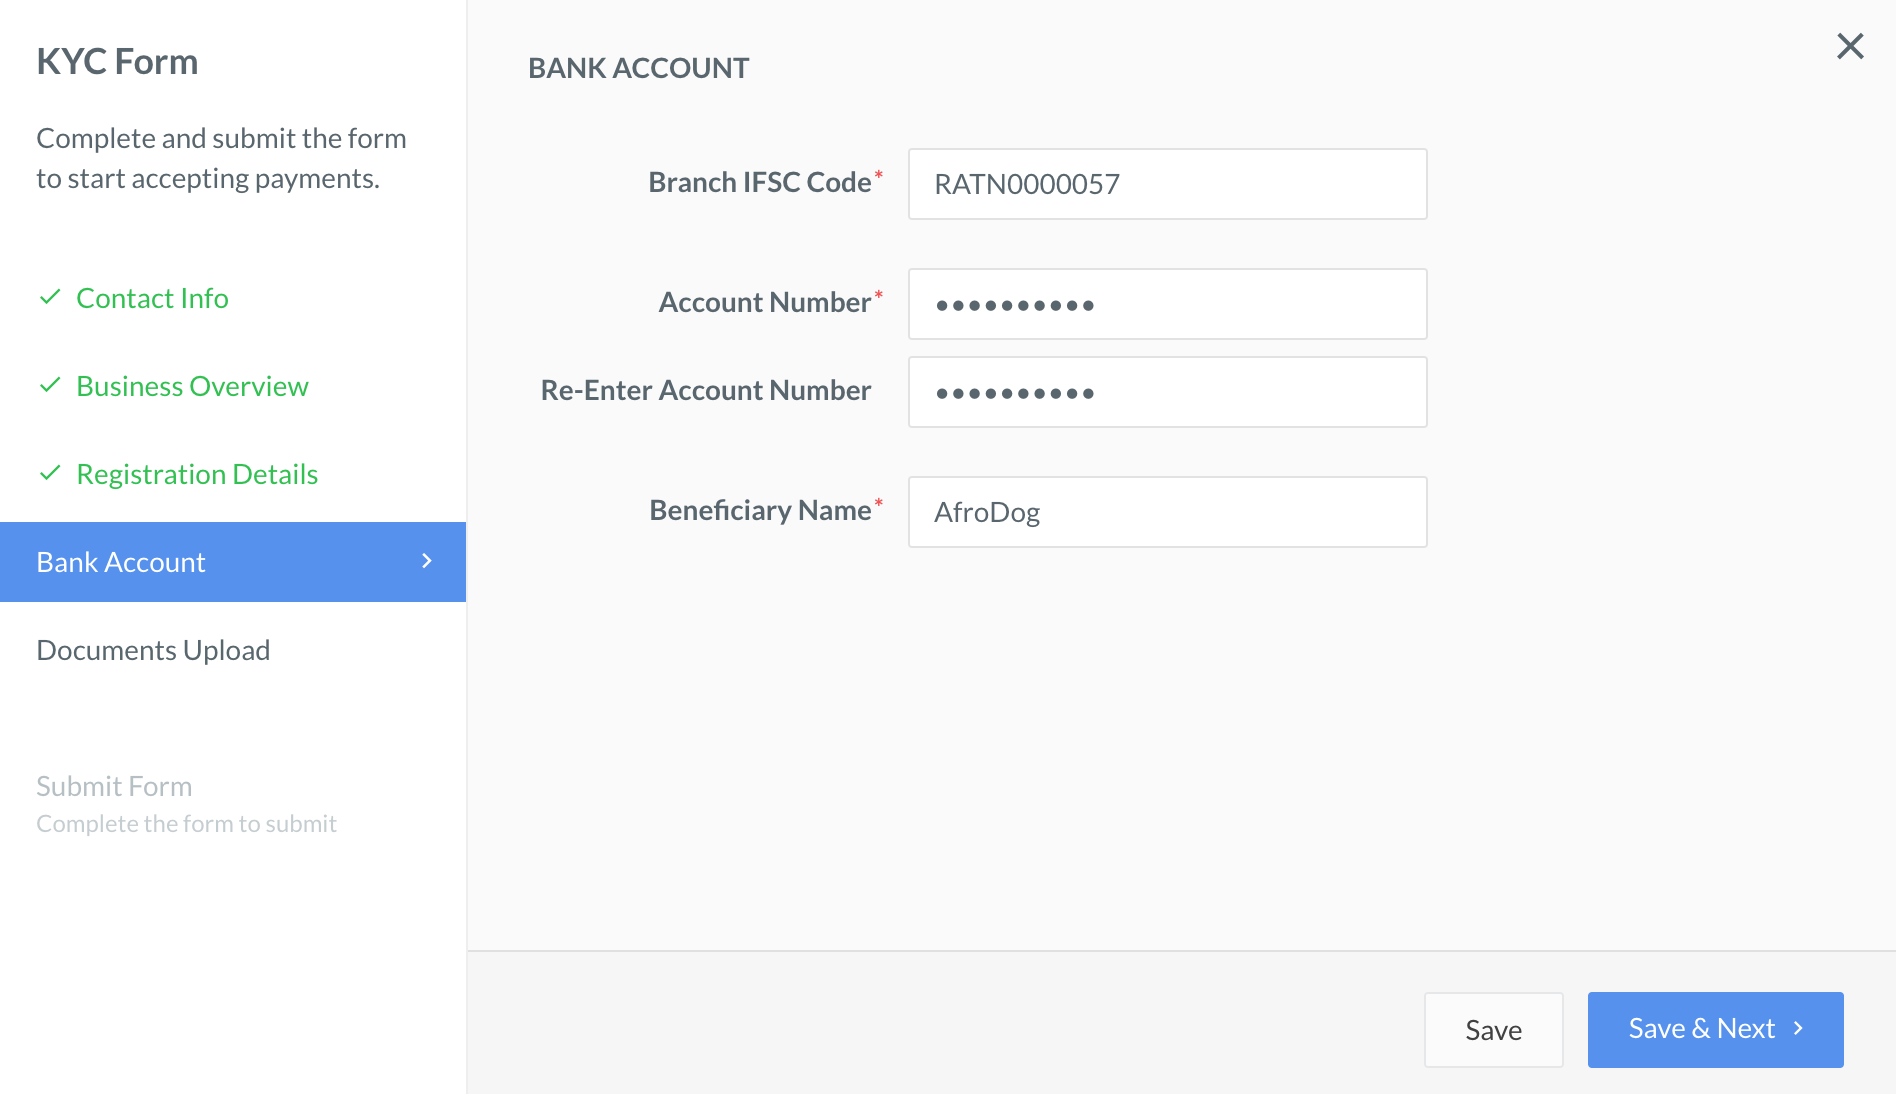
The bank account section is the fourth page on your KYC form. Fill in your bank account details, such as Bank account number, Beneficiary name and IFSC. This is the account number to which Razorpay will settle your payments.
The fifth page requires you to upload PDF copies of business documents related to your business model.
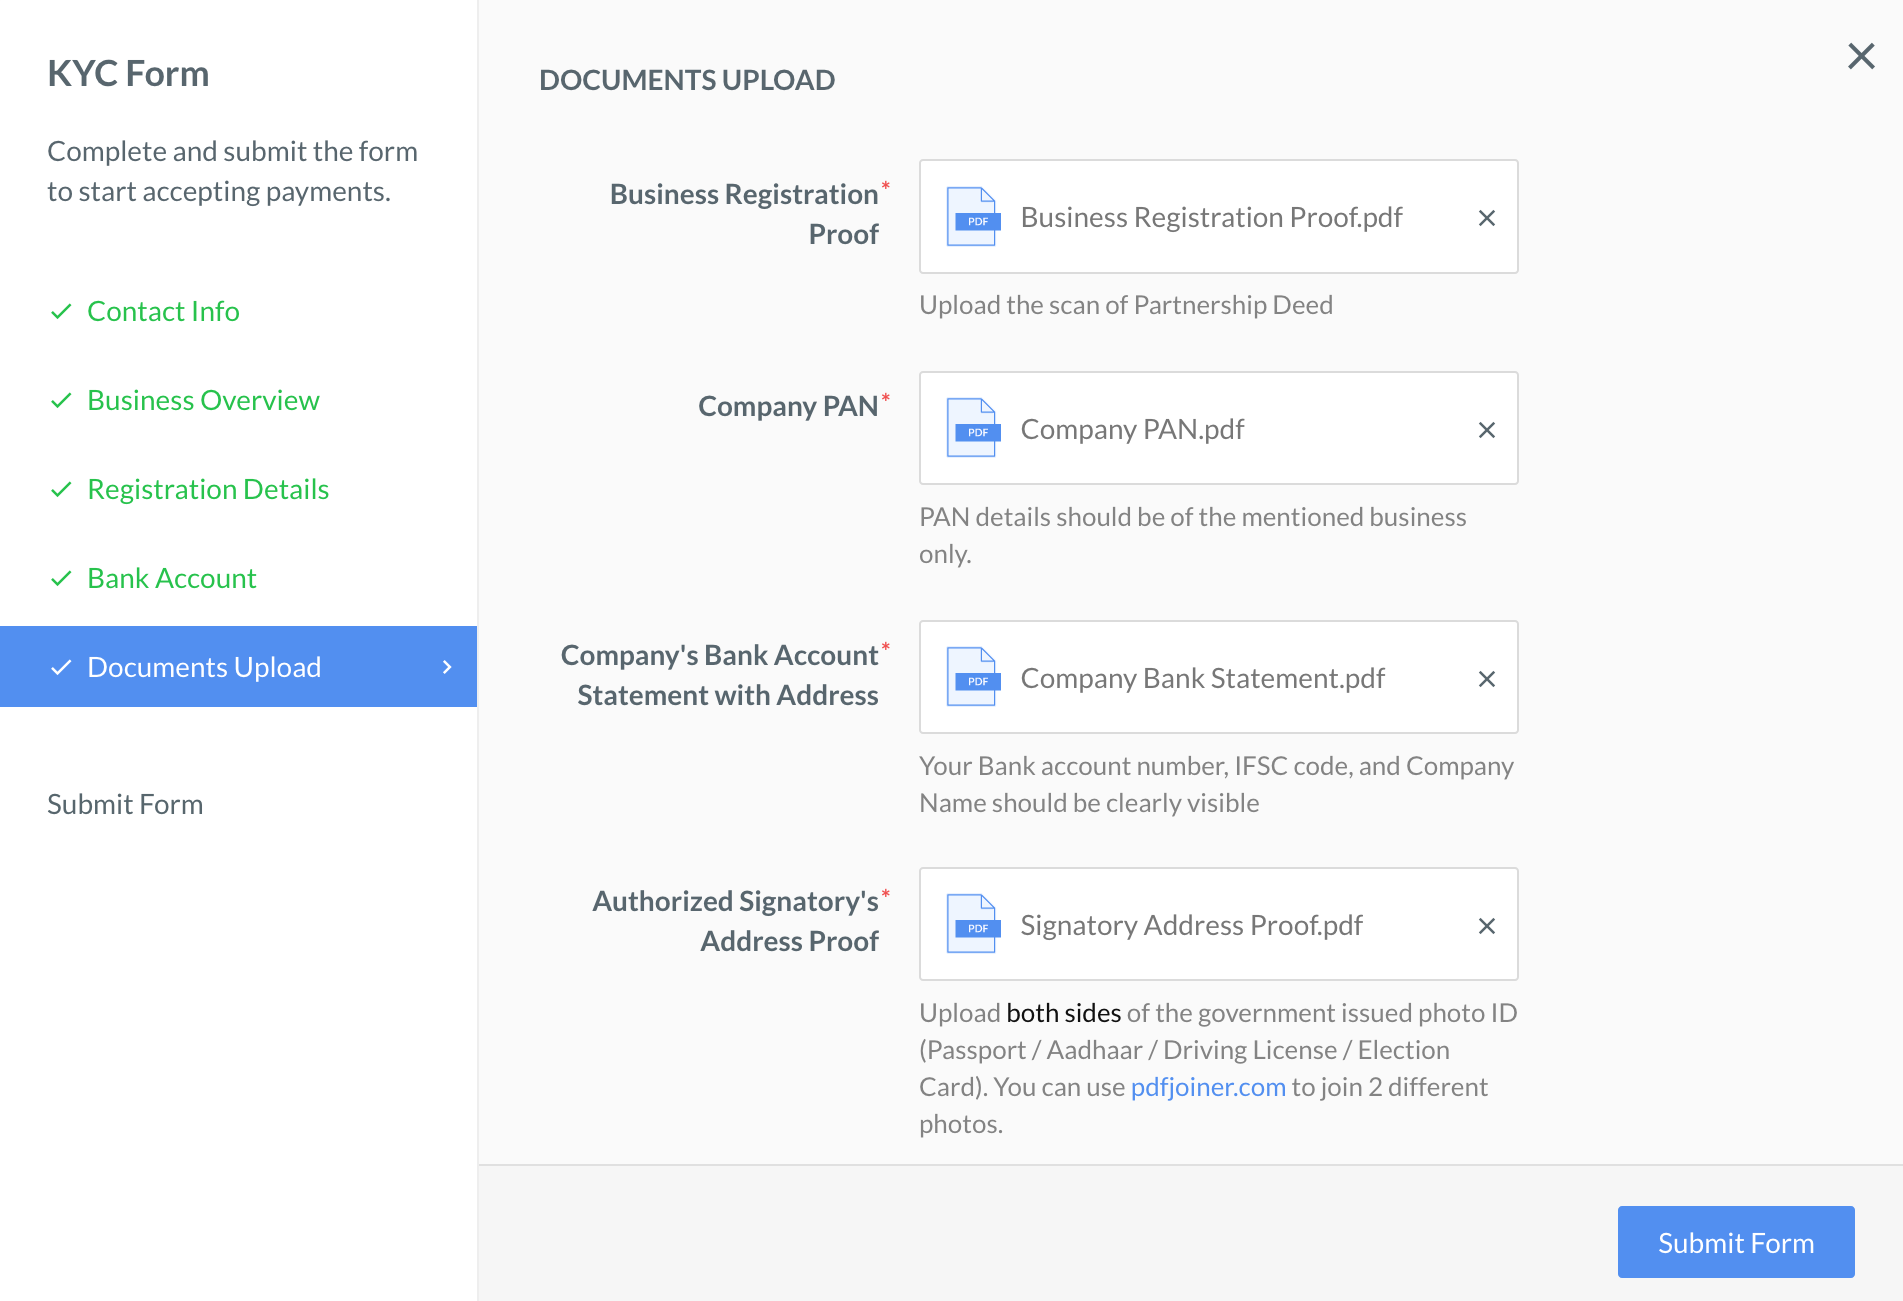
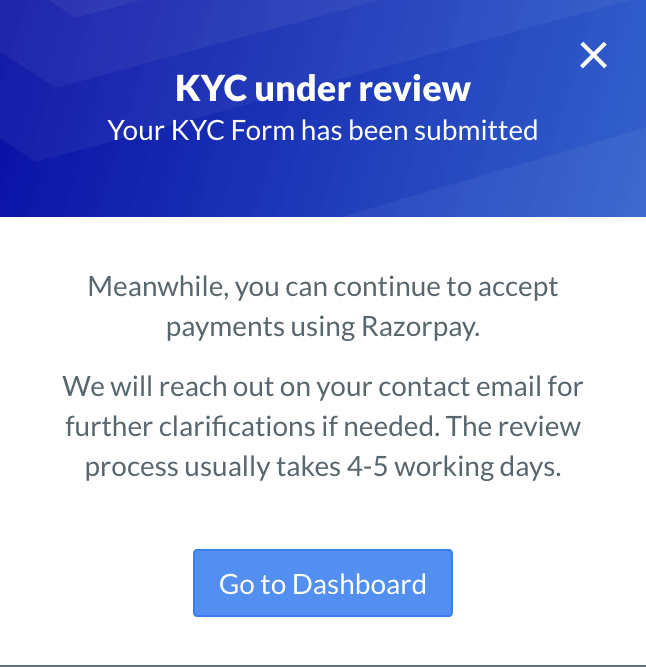
Complete filling in the KYC form and upload the required documents. Read through the Terms and Conditions and select the check box to accept them. Tap Submit.
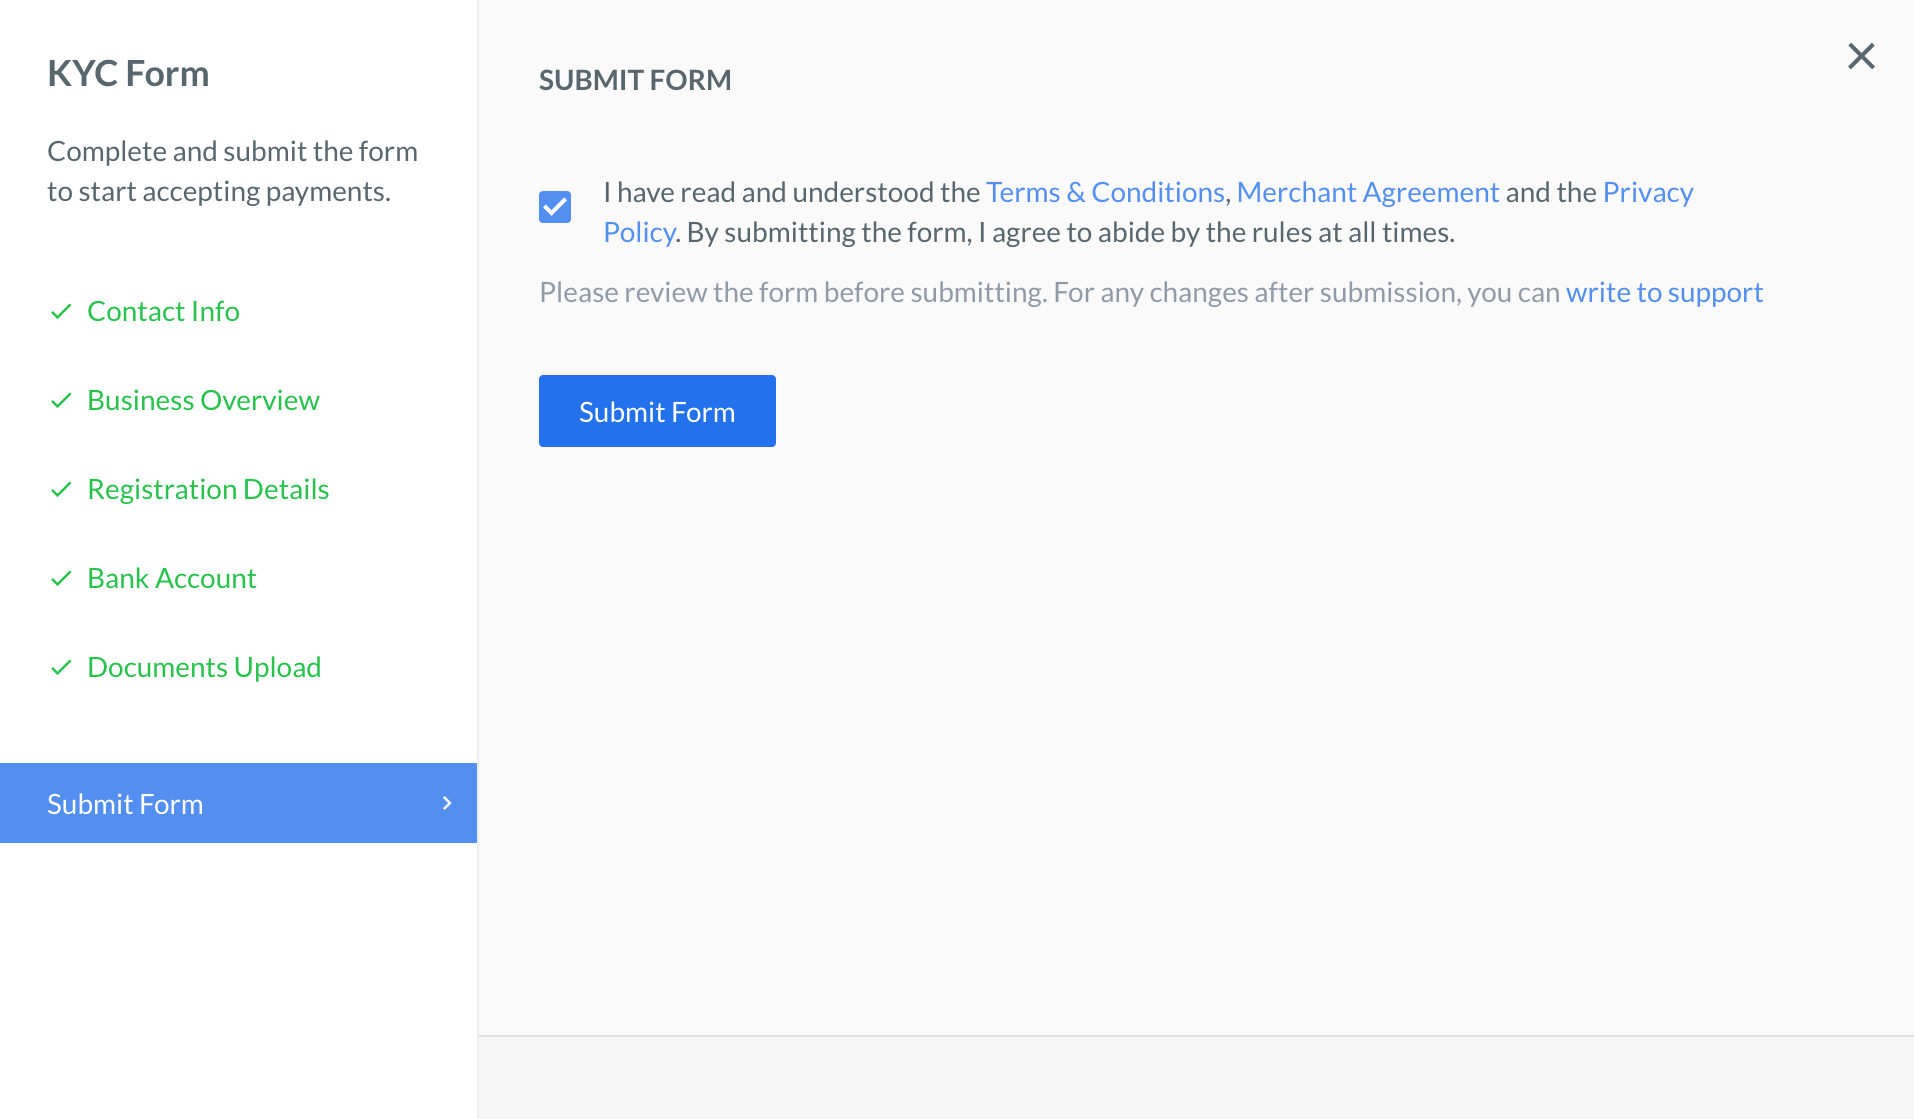
After submitting the KYC form, Razorpay usually takes 4-5 working days to complete the KYC review process. Once the review is done, all the payments received before you submitted the KYC form and documents, are settled to your account.
Watch Out!
If any irregularities are found in the documents you submitted for KYC, your account is suspended and you cannot perform any live transactions using Razorpay. You need to create a new Razorpay account.
After creating an account, you can start accepting payments from your customers using Razorpay ePOS app. However, the money is settled to your account only after your KYC details are approved.
As an existing merchant, you can log into the ePOS app, create Payment Links, share the links via other apps and start accepting payments from your customers.