Steps to Create No-Cost EMI🔗
Watch this video to see how to create a No-Cost EMI offer.
To create No-Cost EMI offers:
-
Log into the Razorpay Dashboard.
-
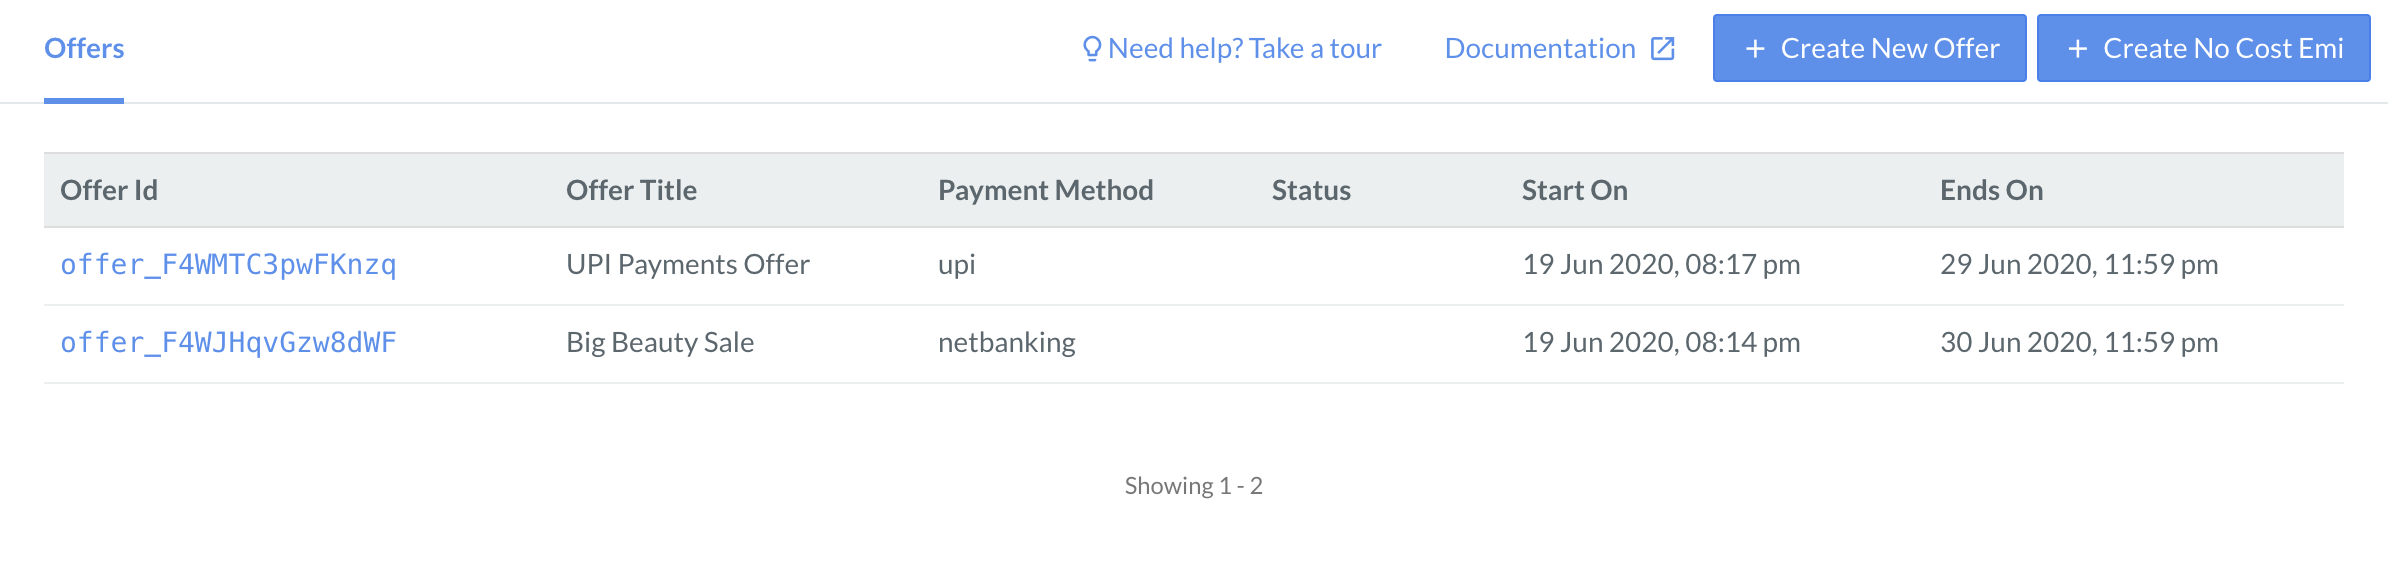
Navigate to Offers and click Create No Cost Emi.
-
The Create an Offer wizard appears with the following four sections. Enter details in all these sections to create the offer.
You can review the offer configurations at the end under the Overview tab.
Description🔗
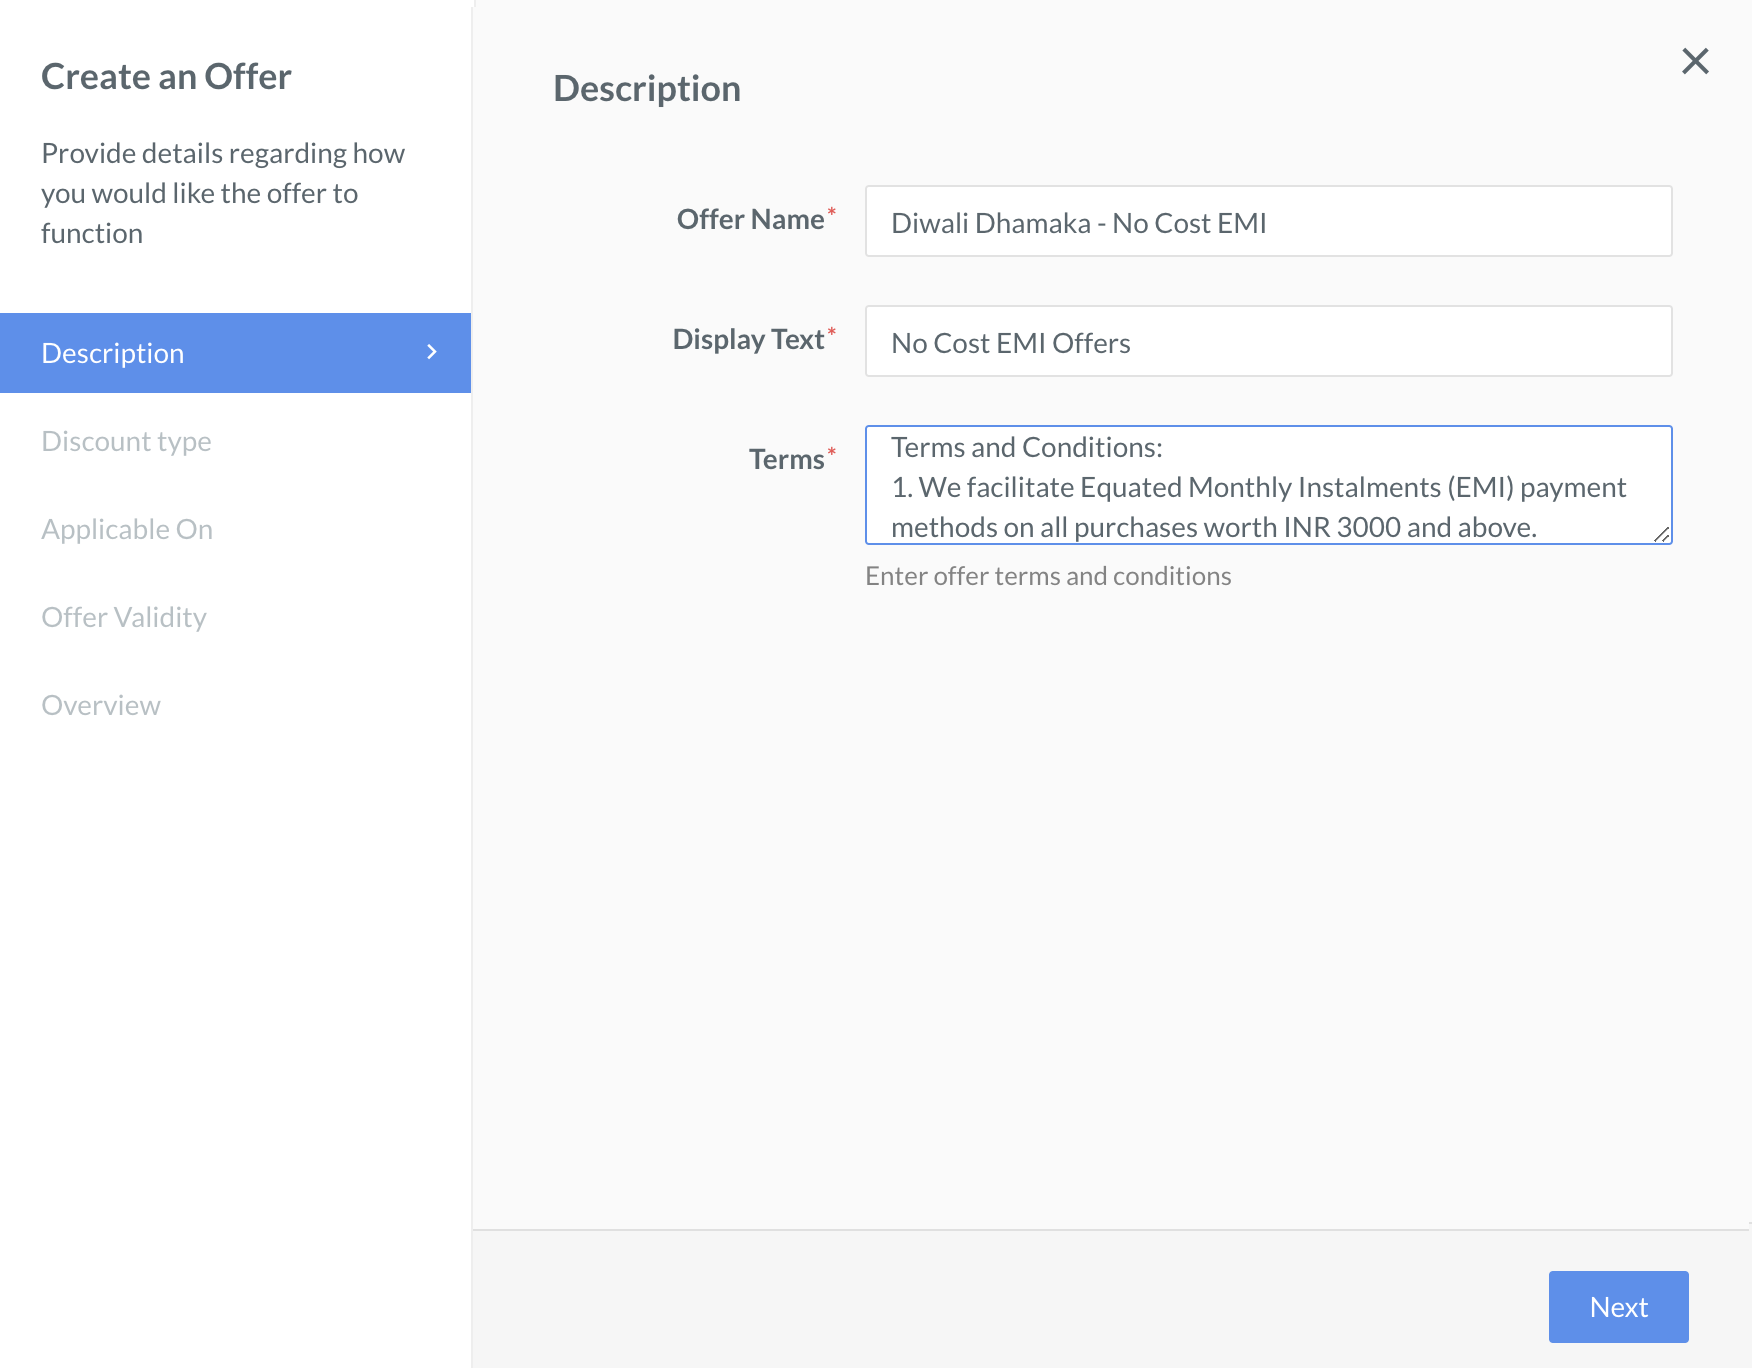
In the Description section, enter the following details. All the fields are mandatory.
- Offer Name - Enter the name of the offer. For example, Diwali Dhamaka. This appears at the Checkout.
- Display Text - Enter a meaningful description for the offer. For example, No Cost EMI Offer. This appears at the Checkout.
- Terms - Enter the terms and conditions for this offer.
- Click Next.
Discount Type🔗
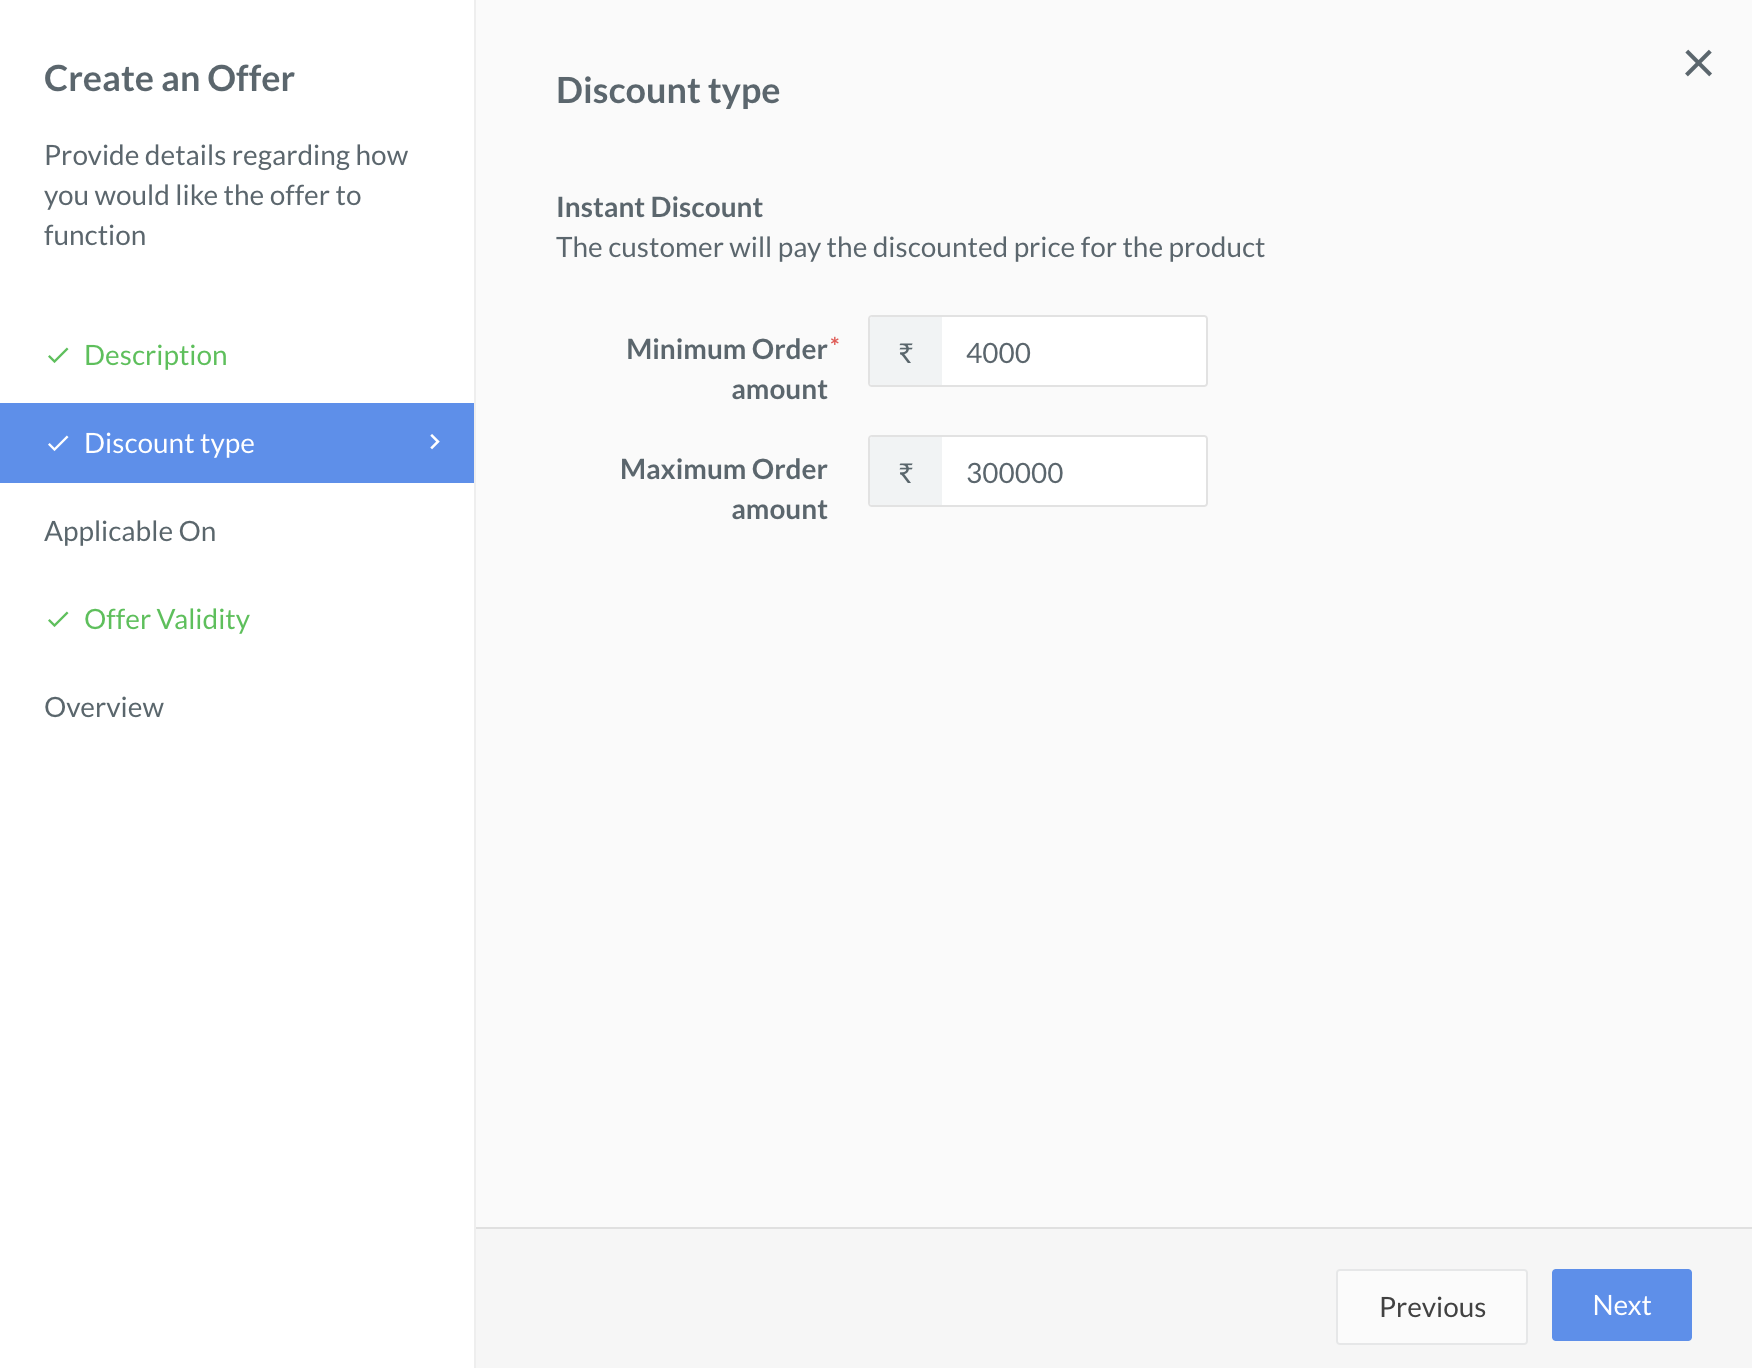
In the Discount Type section, enter the discount details that should be applied for the offer.
- Minimum Order amount - Enter the minimum bill amount for which the No-Cost EMI Offer can be applied. For example, the offer can be applied to a minimum amount of ₹4000. This is a mandatory field.
- Maximum Order amount - Enter the maximum bill amount for which the No-Cost EMI Offer can be applied. For example, the offer can be applied to a maximum amount of ₹300000.
- Click Next.
Applicable On🔗
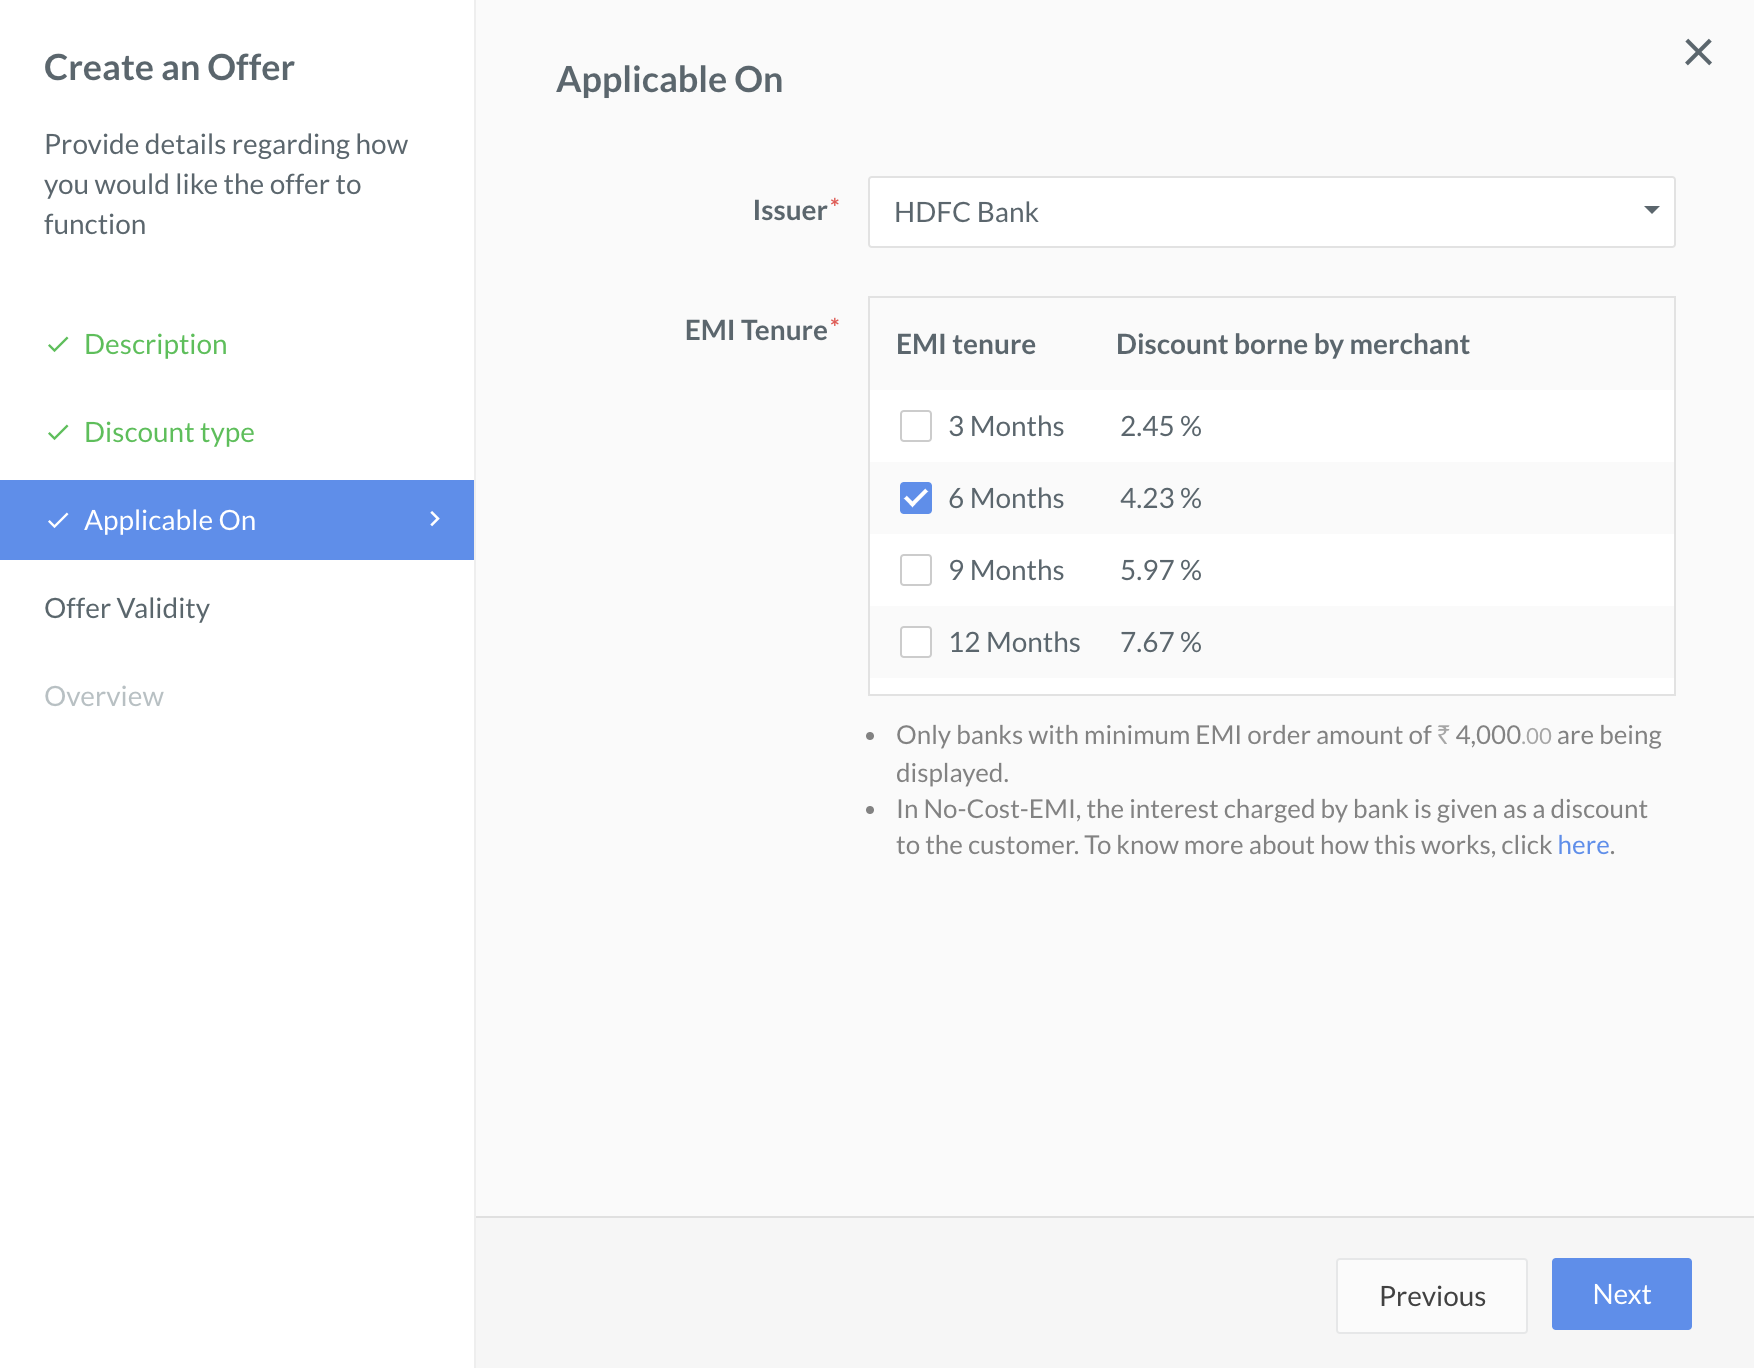
Under the Applicable On tab, fill in the following details:
- Issuer - Select the bank issuing the No-Cost EMI and click Next.
- EMI Tenure - Select the tenures to be listed at the Checkout. This also displays the discount that you will bear.
- Click Next.
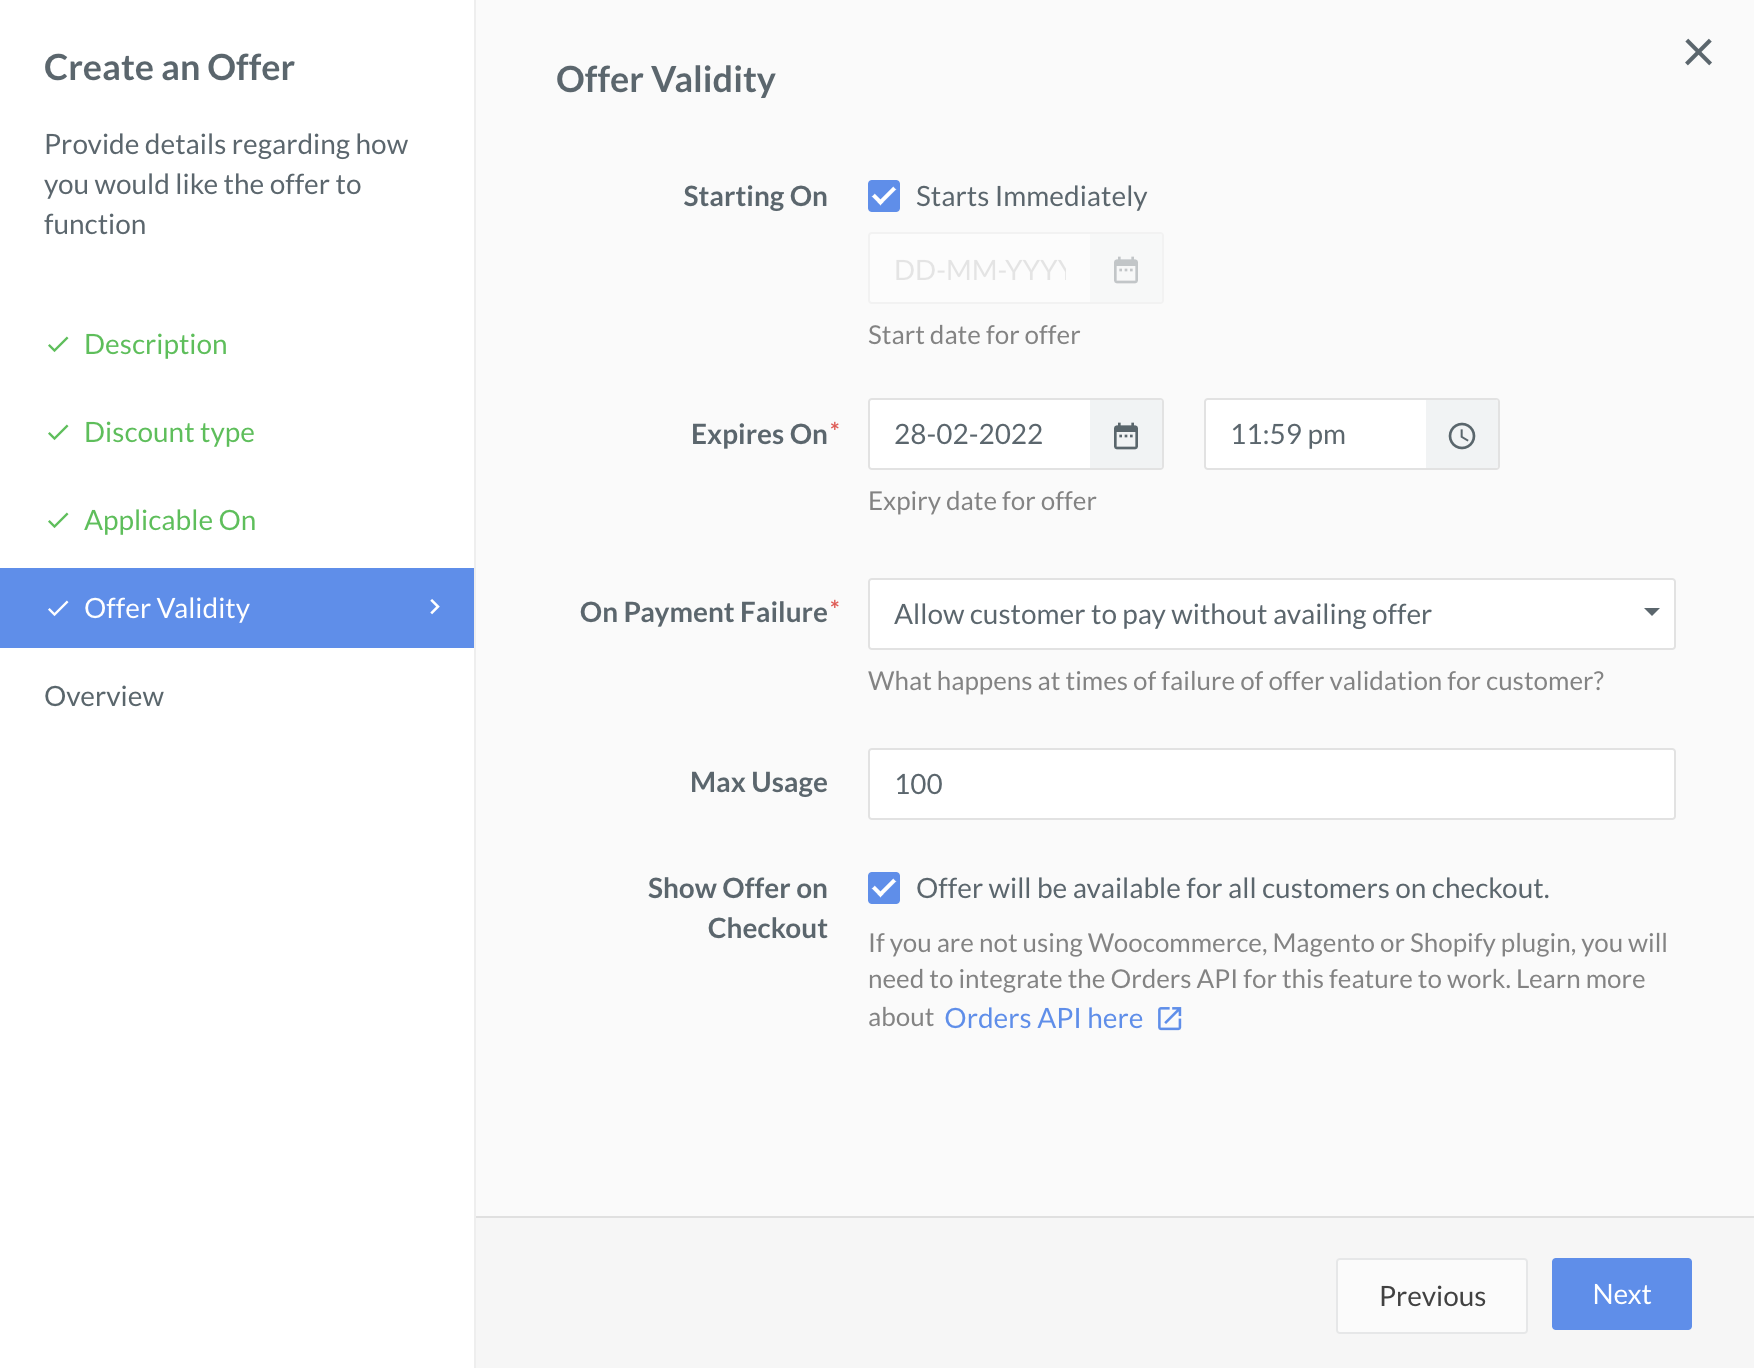
Offer Validity🔗
In the Offer Validity tab, set how long the offer should be valid and how you want to handle the payment failure situations:
- Starting On - Select the Starts Immediately check box for the offer to come into effect immediately. Alternatively, you can select the date and the time from which the created Offer should become active.
- Expires On - Select the date and time at which the offer should end. For example, 31 Oct 2020 at 11:59pm.
- On Payment Failure - Define how to handle payment failure.
- Do not allow payment to go through: The payment is failed.
- Allow customer to pay without availing offer: The payment is allowed even though the set validations are not met. However, the offer is not applied to the bill amount. The customer will be charged the entire order amount.
- Max Usage - Set the number of times the offer should be applied across all transactions. For example, 100.
- Show Offer on Checkout - Select this check box for the created offer to be displayed for all Standard Checkout payments including Payment Links.
- Click Next.
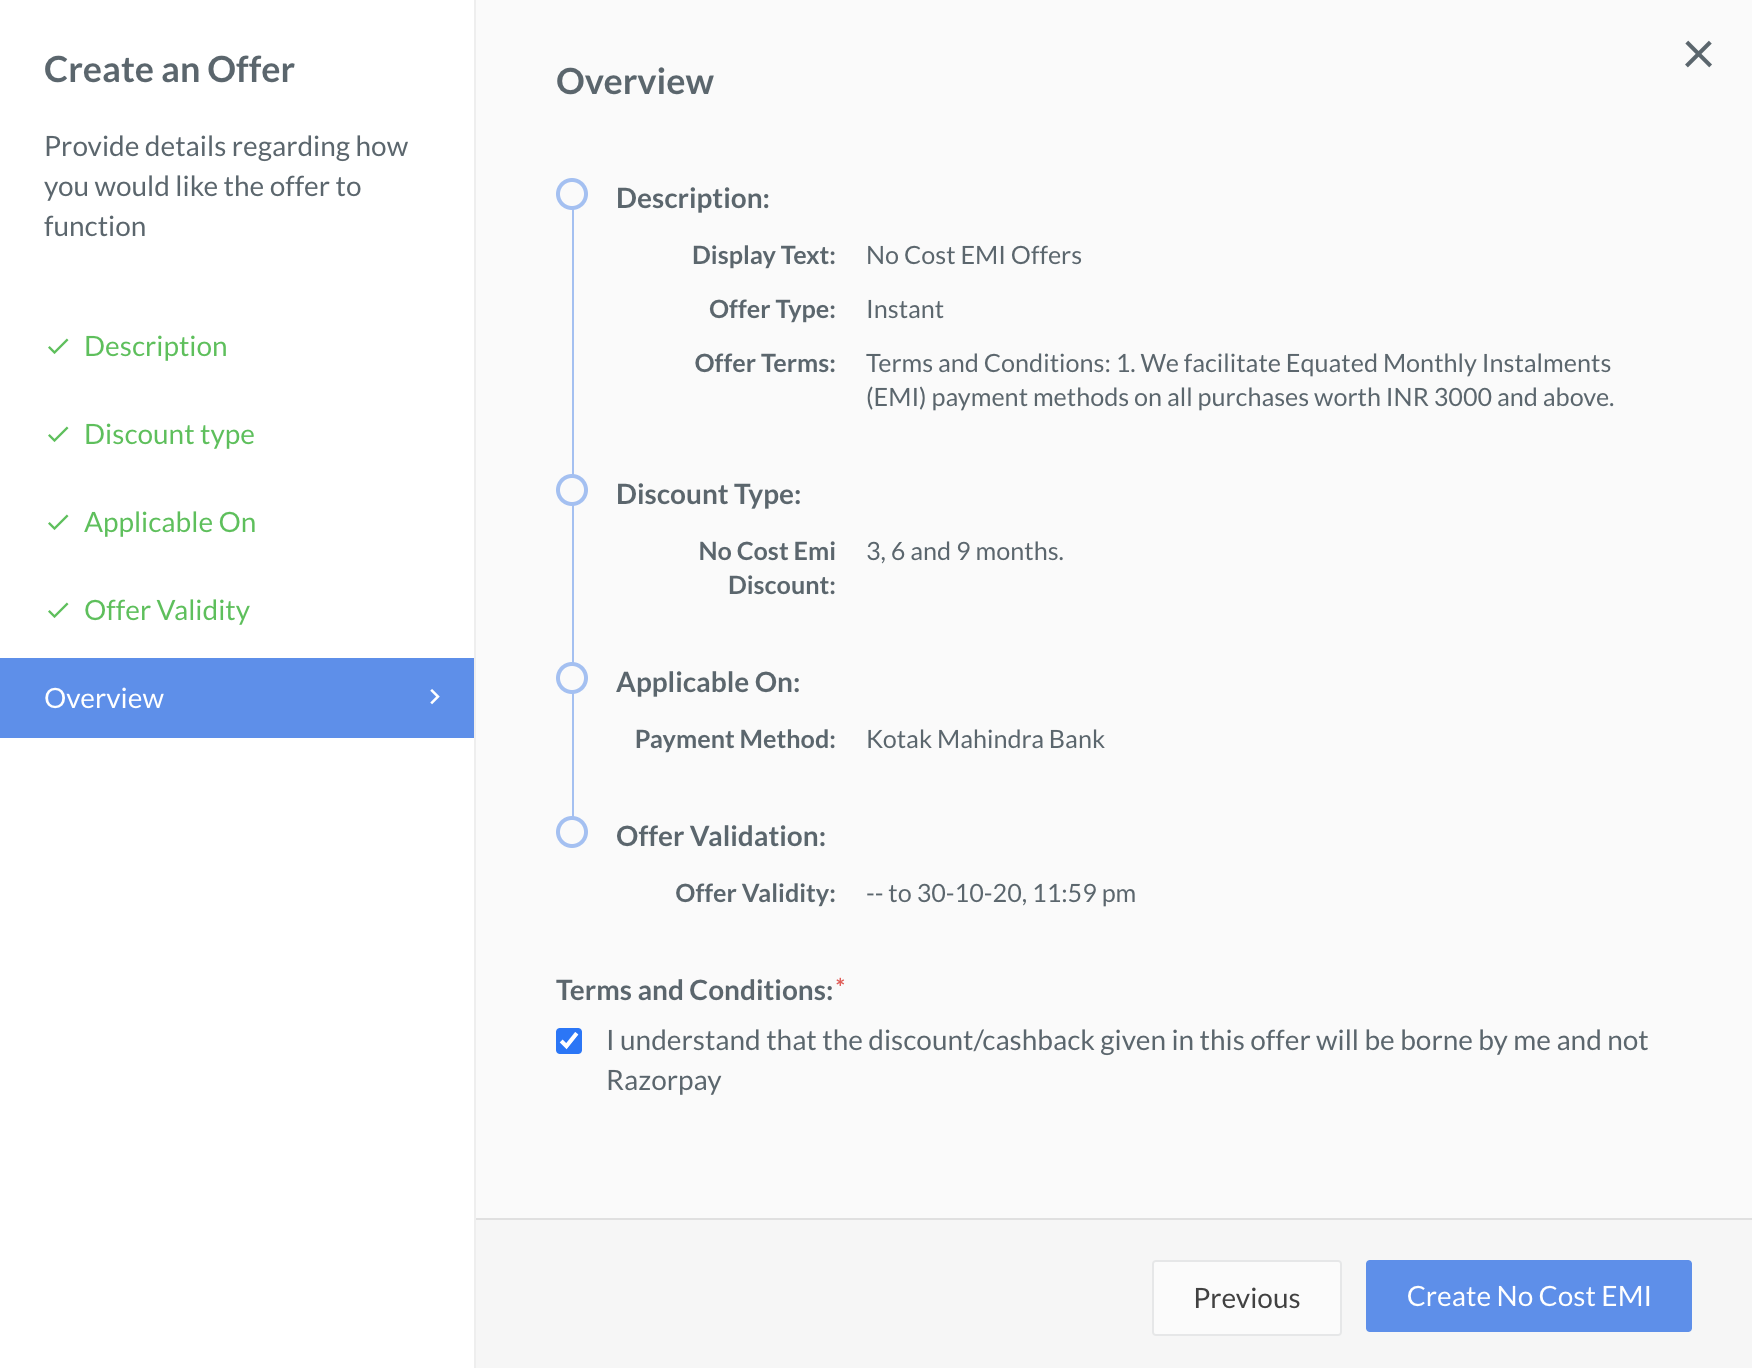
Overview🔗
Click the Overview tab to view the summary of the offer that you just created.
-
Terms and Conditions- Select the check box after you have read the disclaimer. -
Click Create Offer.
By default, all the created offers are in the enabled state.