Display No-Cost EMI Offers at Checkout🔗
There are two ways in which you can display offers at the Razorpay Checkout:
When Should I Integrate Offers with Orders API?
If you use Razorpay Magento, Shopify or WooCommerce plugins to integrate with Razorpay Payment Gateway, you need not integrate offers with Orders API. This is because orders are automatically created when customers initiate payment at the Checkout. However, if you are using our JS, SDK files or other ecommerce plugins, you must integrate offers with the Orders API.
Method 1: Display Offers with No Integration🔗
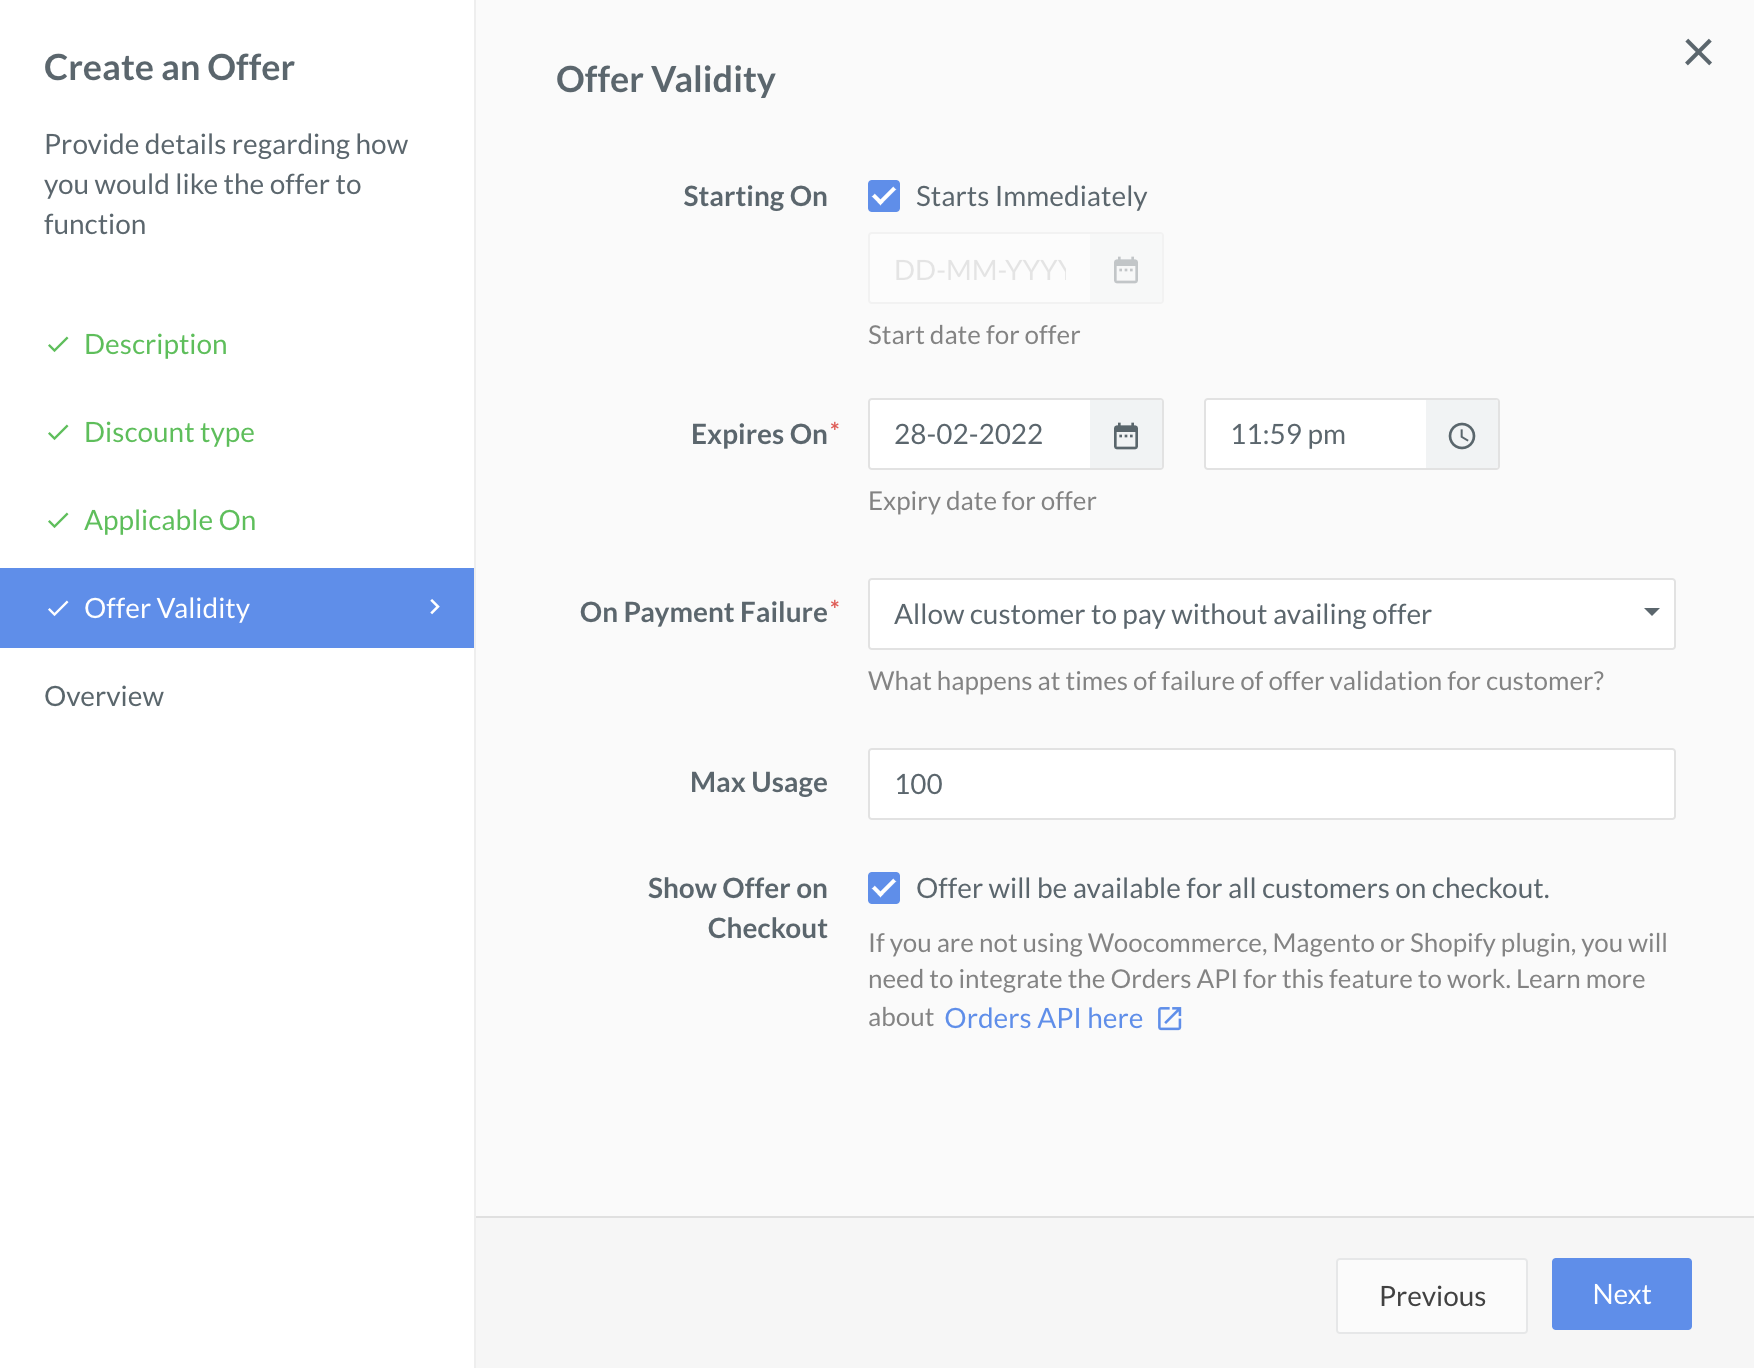
This is the easiest way to display offers at the Checkout. While creating the offer from the Razorpay Dashboard, enable the Show Offer on Checkout option. The offer automatically appears at the Checkout.
Handy Tips
Ensure you have integrated with the Orders API if you are using our JS, SDK files or ecommerce plugins other than Magento, Shopify and Woocommerce.
Method 2: Display by Integrating Offers in Orders API🔗
If you want a specific Offer to be displayed at the Checkout, you can choose to associate that offer with an Order. This must be done by passing the offers array as a request attribute in the Create Orders API.
This is useful if you have multiple product lines running on the same account and have certain business logic on your side for displaying offers. Also, beneficial in cases where the discount has already been applied, and you want to restrict the payment method that should be used to avail the Offer.
To display offers:
Step 1: Create an Offer from Razorpay Dashboard🔗
You can create offers from the Razorpay Dashboard.
Let us say you have created an offer offer_ANZoaxsOww2X53, such that a discount of ₹200 is applicable on all transactions done through AXIS netbanking only.
Step 2: Pass offer_id in Orders API🔗
Create an order using the Orders API and pass the offer_id as a request parameter.
Sample Code:
Copycurl -u [YOUR_KEY_ID]:[YOUR_KEY_SECRET] \
-X POST https://api.razorpay.com/v1/orders \
-H "Content-Type: application/json" \
-d '{
"amount": 1000000,
"currency": "INR",
"offers": [
"offer_ANZoaxsOww2X53"
]
}'
CopyRazorpayClient razorpay = new RazorpayClient("[YOUR_KEY_ID]", "[YOUR_KEY_SECRET]");
ArrayList Offer = new ArrayList<String>();
Offer.add("offer_JTUADI4ZWBGWur");
JSONObject orderRequest = new JSONObject();
orderRequest.put("amount", 1000000); // amount in the smallest currency unit
orderRequest.put("currency", "INR");
orderRequest.put("offers", Offer);
Order order = razorpayclient.orders.create(orderRequest);
System.out.print(order);
Copyimport razorpay
client = razorpay.Client(auth=("YOUR_ID", "YOUR_SECRET"))
client.order.create({
"amount": 1000000,
"currency": "INR",
"receipt": "receipt#1",
"offers": [
"offer_ANZoaxsOww2X53"
]
})
Copy$api = new Api($key_id, $secret);
$api->order->create(array('amount' => 1000000, 'currency' => 'INR', 'offers'=> array('offer_JTUADI4ZWBGWur')));
Copyrequire "razorpay"
Razorpay.setup('YOUR_KEY_ID', 'YOUR_SECRET')
order = Razorpay::Order.create amount: 50000, currency: 'INR', receipt: 'receipt#1', offers: [
'offer_ANZoaxsOww2X53"'
]
Copyvar instance = new Razorpay({ key_id: 'YOUR_KEY_ID', key_secret: 'YOUR_SECRET' })
instance.orders.create({
amount: 1000000,
currency: "INR",
receipt: "receipt#1",
offers: [
"offer_ANZoaxsOww2X53"
]
})
Copyimport ( razorpay "github.com/razorpay/razorpay-go" )
client := razorpay.NewClient("YOUR_KEY_ID", "YOUR_SECRET")
data := map[string]interface{}{
"amount": 50000,
"currency": "INR",
"receipt": "receipt#1",
"offers": []interface{}{
"offer_JTUADI4ZWBGWur",
},
}
body, err := client.Order.Create(data, nil)
Copy{
"id": "order_CjyoZFRpB8r0AH",
"entity": "order",
"amount": 1000000,
"amount_paid": 0,
"amount_due": 1000000,
"currency": "INR",
"receipt": null,
"offer_id": "offer_ANZoaxsOww2X53",
"offers": [
"offer_ANZoaxsOww2X53"
],
"status": "created",
"attempts": 0,
"notes": [],
"created_at": 1561018912
}
Request Parameters:
amountmandatoryintegerEnter the amount for which the order is to be created in currency subunits. For example, for an amount of ₹10000, enter1000000.currencymandatorystringISO code of the currency associated with the order amount. Here, it isINR.offersmandatoryarrayUnique identifier of the offer. Pass theoffer_idobtained from the response of the previous step.
Step 3: Pass Order_id and Trigger the Checkout🔗
The order_id obtained in the previous step can be passed to the Checkout form as follows:
Copy<button id="rzp-button1">Pay</button>
<script src="https://checkout.razorpay.com/v1/checkout.js"></script>
<script>
var options = {
"key": "[YOUR_KEY_ID]",
"amount": "1000000",
"currency": "INR",
"order_id":"order_FIL1vBOsWFllnO",
"name": "Acme Corp",
"description": "Test Transaction",
"image": "https://cdn.razorpay.com/logos/F9Yhfb7ZXjXmIQ_medium.png",
"handler": function (response){
alert(response.razorpay_payment_id);
alert(response.razorpay_order_id);
alert(response.razorpay_signature)
},
"prefill": {
"name": "Gaurav Kumar",
"email": "gaurav.kumar@example.com",
"contact": "9999988999"
},
"notes": {
"address": "Razorpay Corporate Office"
},
"theme": {
"color": "#3399cc"
}
};
var rzp1 = new Razorpay(options);
document.getElementById('rzp-button1').onclick = function(e){
rzp1.open();
e.preventDefault();
}
</script>
Know more about Standard Checkout.