Video Tutorial🔗
Watch this video to know how to migrate from existing Razorpay plugin to Razorpay Secure plugin on your shopify store.
Follow the step-by-step guide on how to migrate from existing Razorpay plugin to Razorpay Secure plugin on your shopify store.
Watch this video to know how to migrate from existing Razorpay plugin to Razorpay Secure plugin on your shopify store.
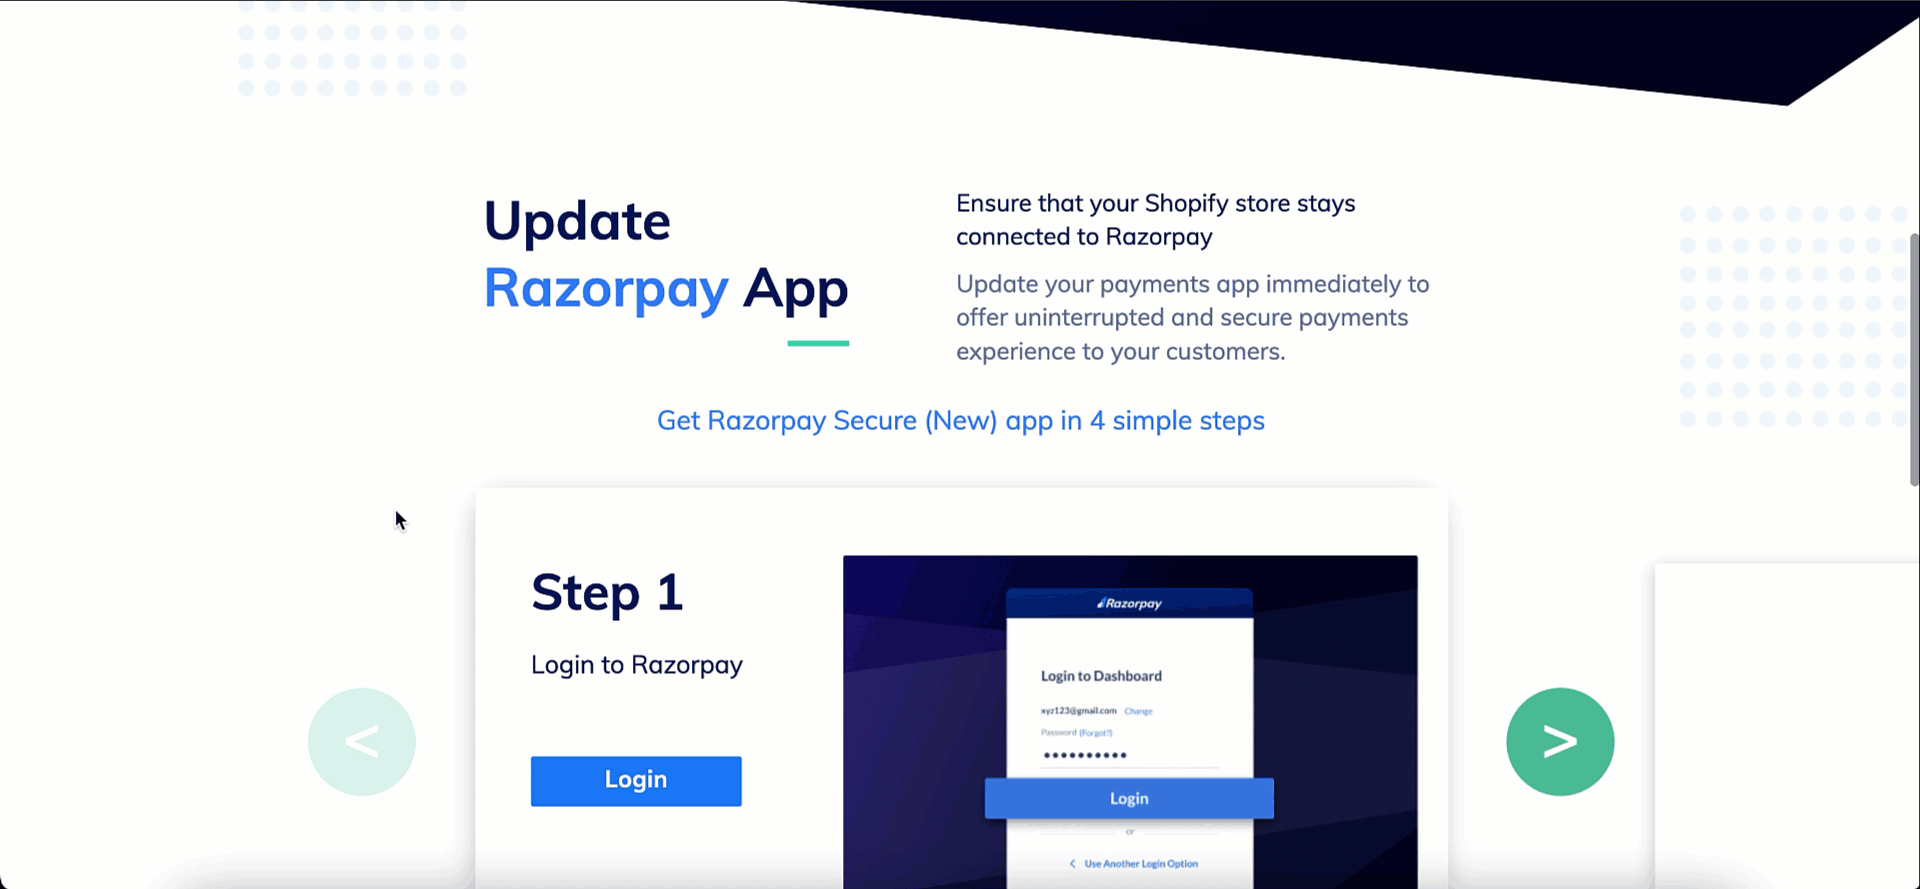
Follow the steps below to migrate from the existing Razorpay plugin to Razorpay Secure plugin.
Click on this link to access the Razorpay Secure plugin on your Shopify store.
Click Connect.

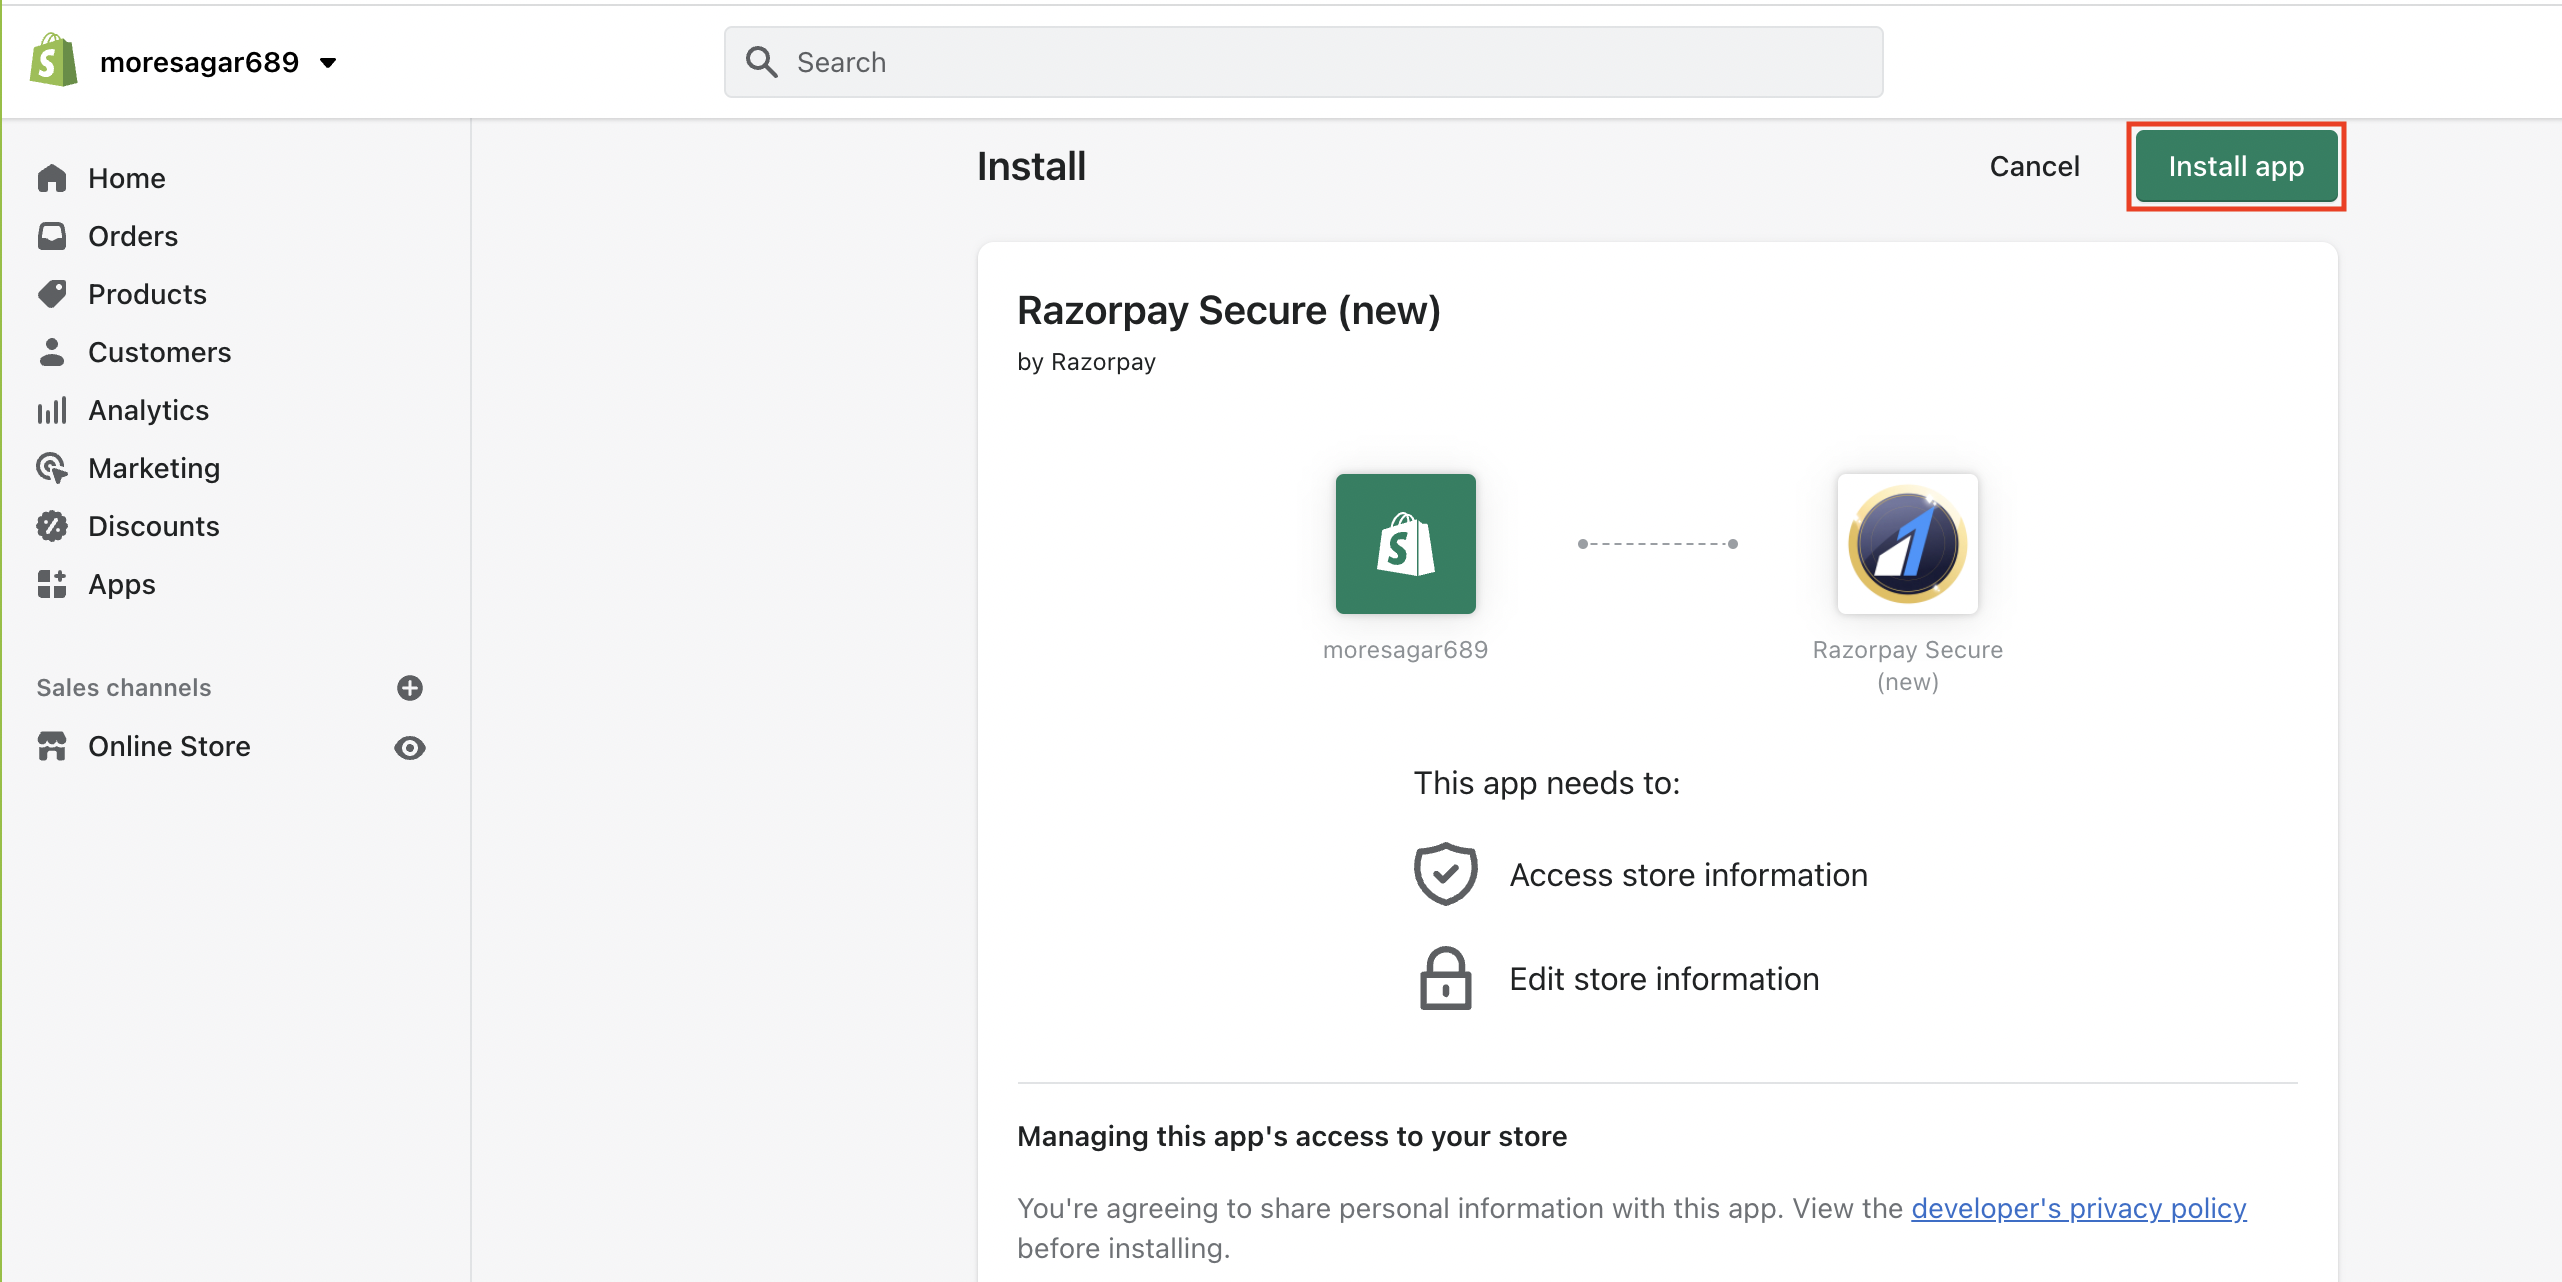
Click Install app.
You will be redirected to a landing page. Click Existing merchant.

Click Login.
Make sure you login with your owner credentials to connect Razorpay with Shopify successfully.
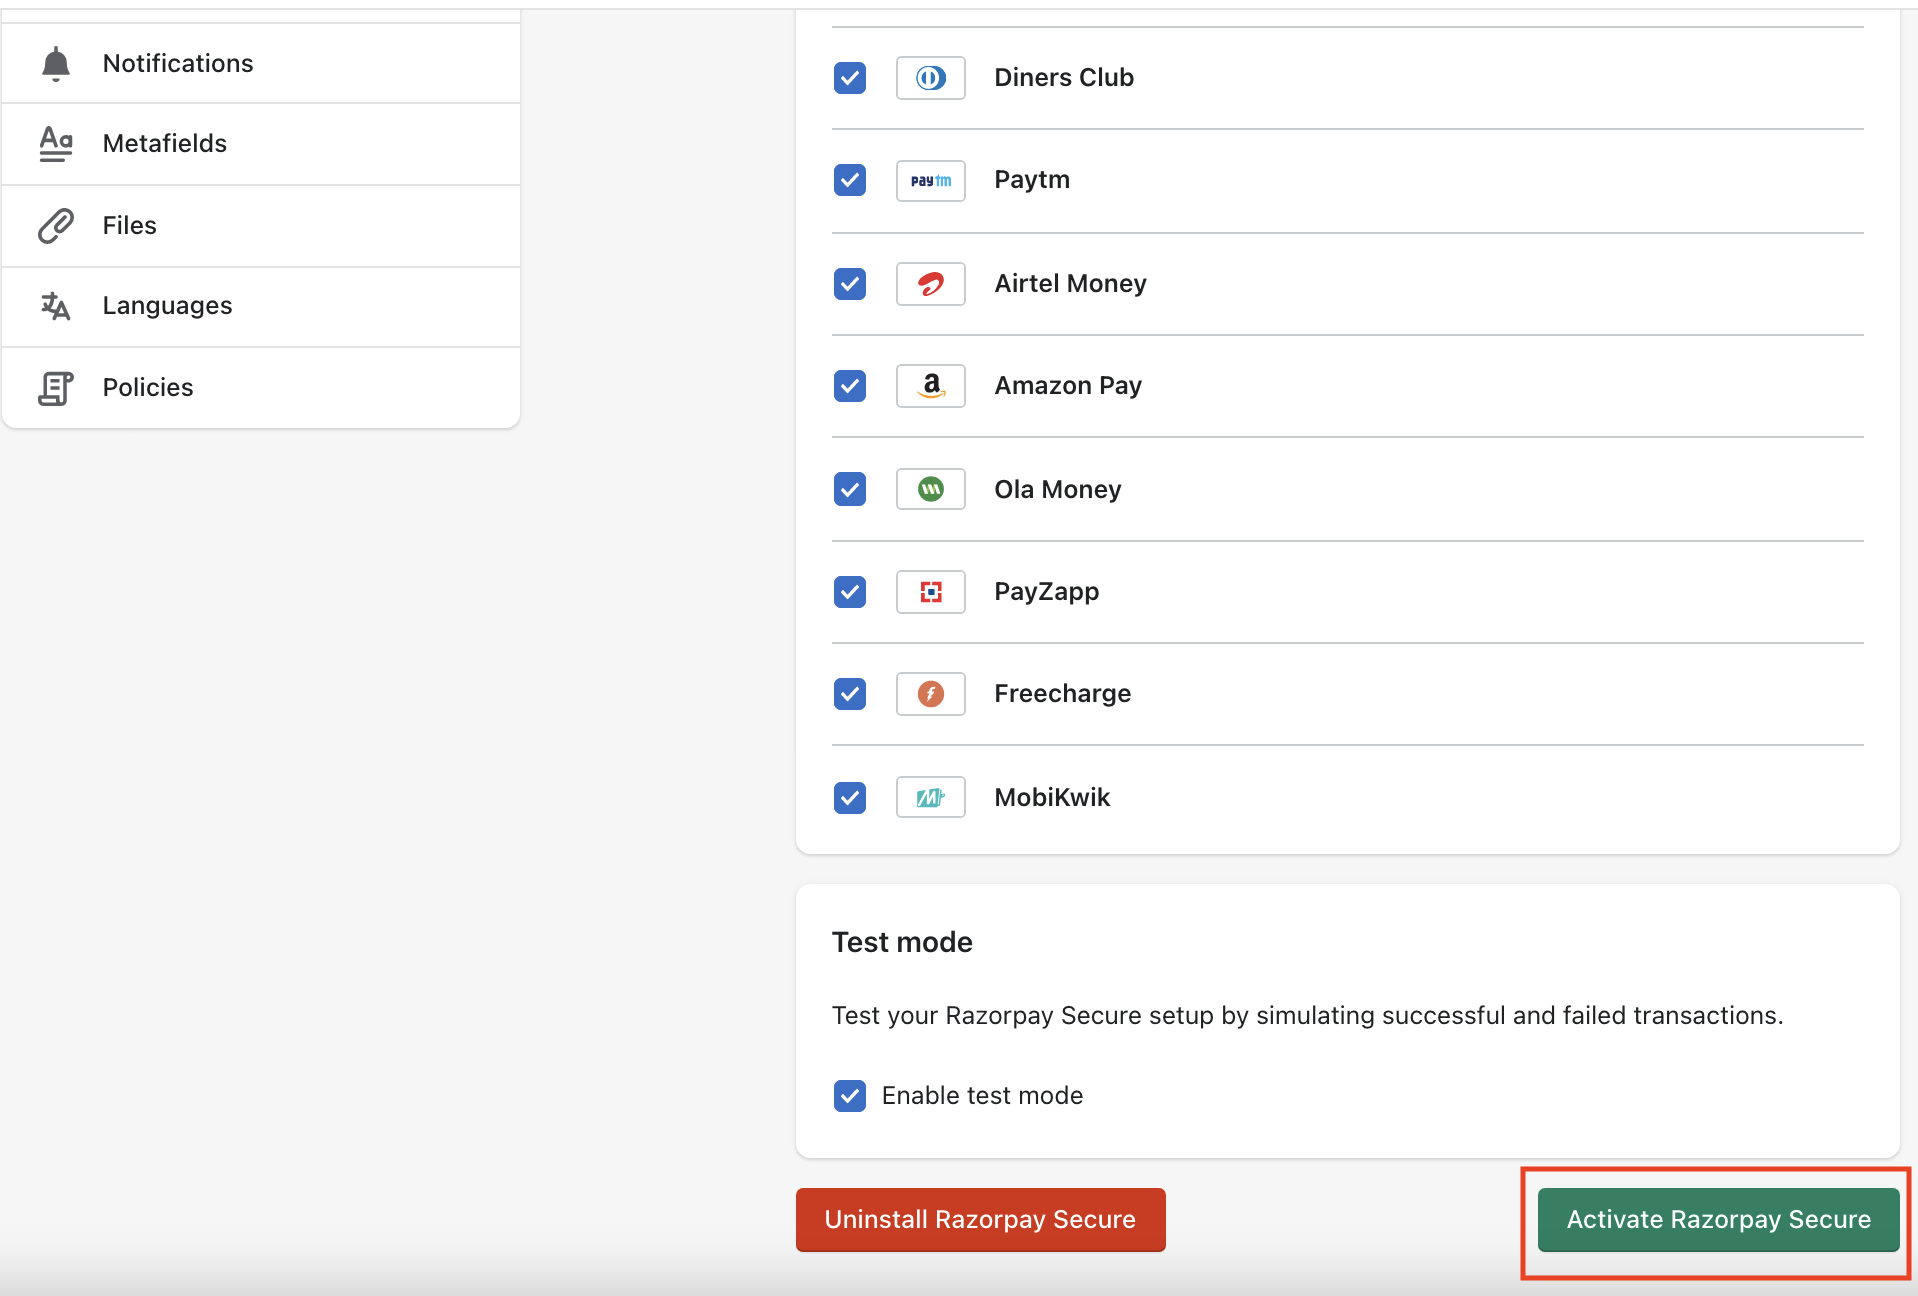
Click Activate Razorpay Secure on the activation screen on your Shopify Dashboard.
Razorpay Secure now appears as a Payment Gateway on your Shopify Store checkout.

Watch Out!
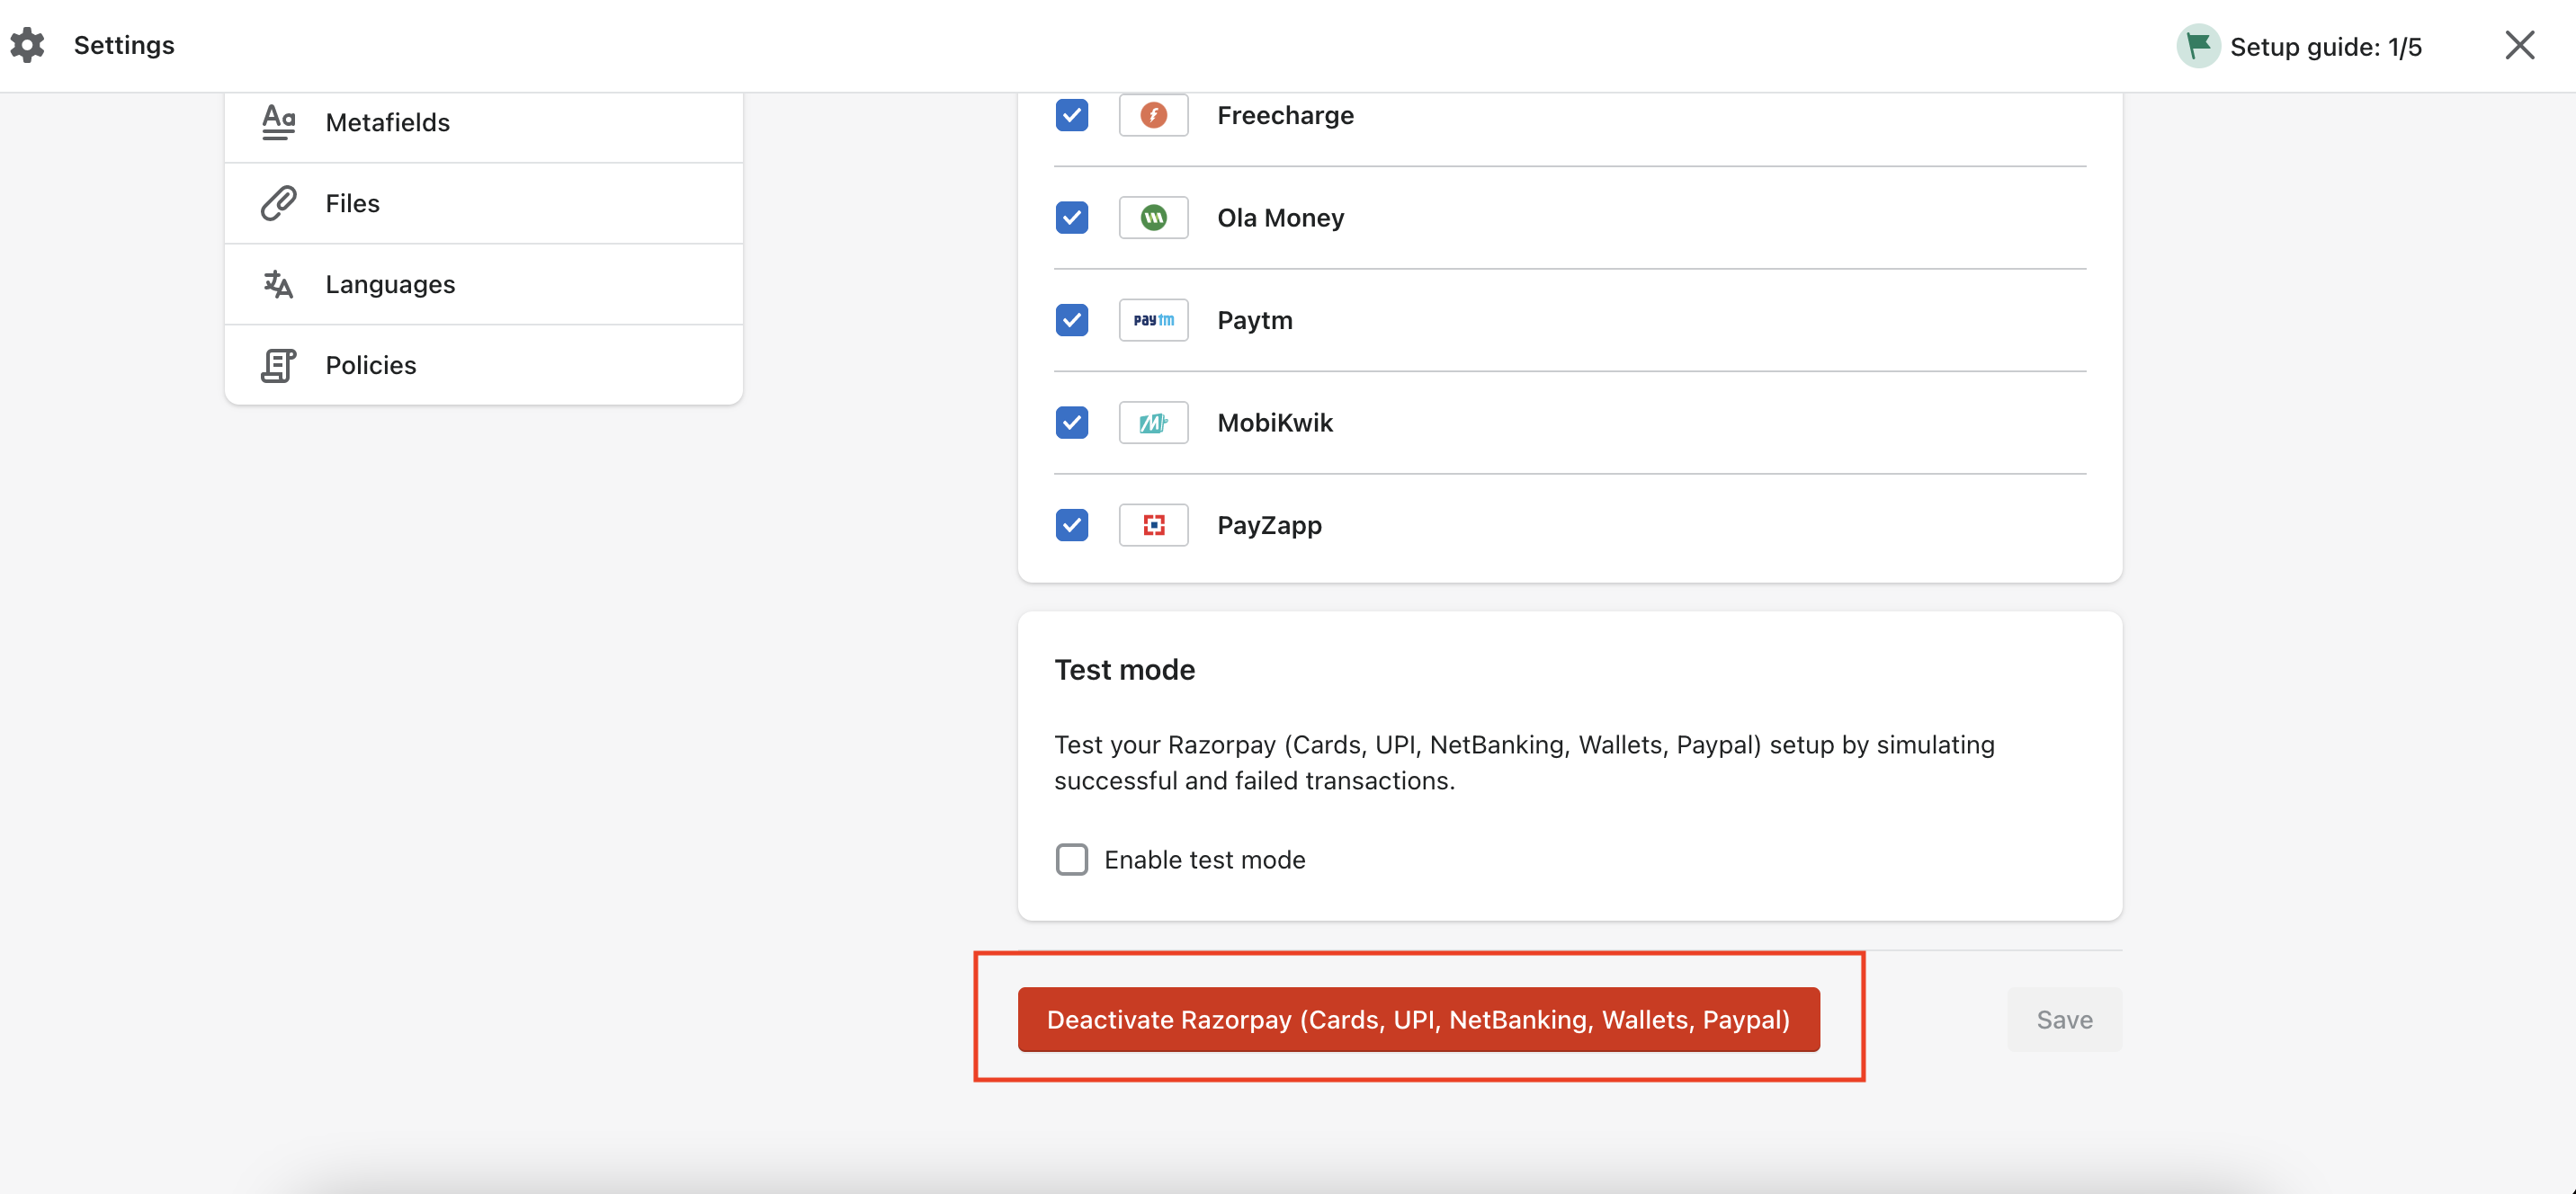
Ensure you deactivate the existing Razorpay plugin after activating the new Razorpay Secure plugin.
To deactivate the existing Razorpay plugin:
Click on this link to access the existing Razorpay plugin on your Shopify store.
Click Deactivate Razorpay to deactivate the existing Razorpay plugin.
ON THIS PAGE