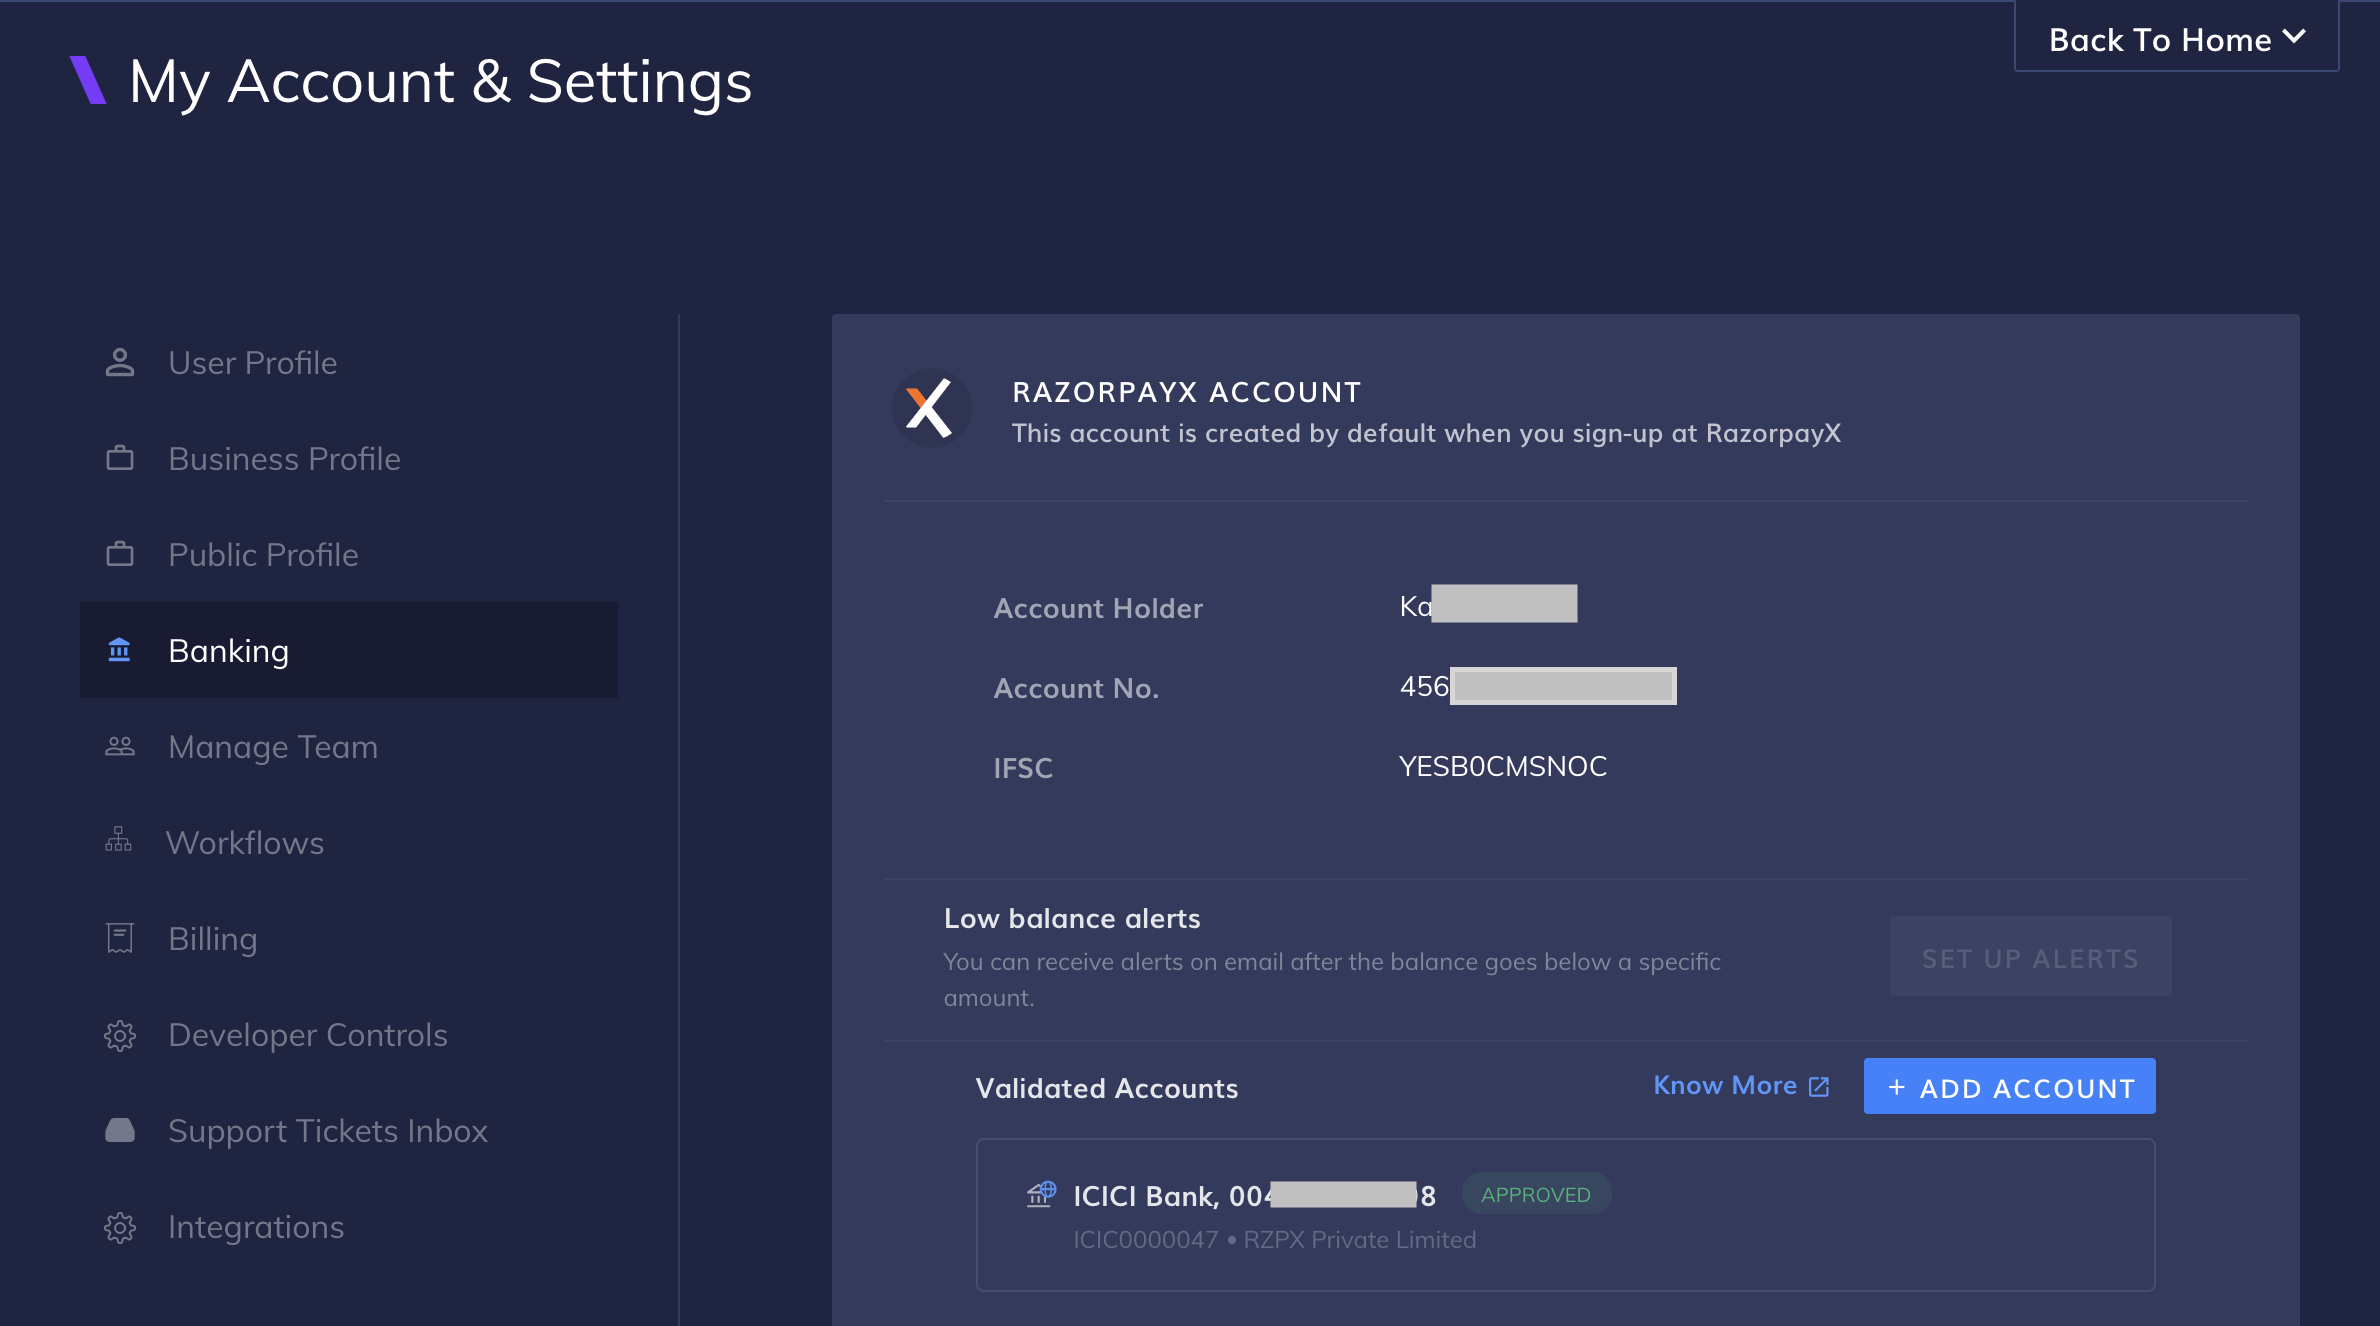
The Virtual account is available to you as soon as you sign up with RazorpayX. The Virtual account has an account number and IFSC. You can get these details on your RazorpayX Dashboard. Go to My Account & Settings on the RazorpayX Dashboard, and click on Banking in the left-hand side menu. You will see your account details as shown here:
For a safer and secured banking experience, you must add funds to your Virtual account from validated bank accounts only. You can add upto 5 accounts for fund loading on the RazorpayX Dashboard.
The Current account offers all standard banking features like cheque book, debit card and account statement.
To request for a Current account:
Raise a request using the support form from the RazorpayX Dashboard.
After receiving your request, we will contact you and initiate the process to open a Current account. You can check the progress on your RazorpayX Dashboard. The following status updates will be visible on your Dashboard.
Status
Description
Process Initiated
We have received your request and will contact you to understand your requirements and help you gather the documents required to open a Current account.
We inform our partner bank RBL to contact you, collect the required documents and take the process further.
You can add funds to your RazorpayX virtual account only through validated bank accounts. For more information on the validation process, refer Source Account Validation.
If your account does not have a sufficient balance, payouts are queued and processed when you add funds to your account. This could cause delays in processing payouts and a bad experience for your customers or vendors.
To help you avoid low balance scenarios, you can set up email alerts when your account balance falls below the limit set by you.
Navigate to My Accounts & Settings → Banking → Low Balance Alerts.
Watch Out!
You can set Low Balance Alerts only in Live mode. It does not work in Test mode.
The following options are available when setting low balance alerts:
Independent Limits You can set up independent limits for each bank account linked to your RazorpayX account. For example, you can set the limit as ₹50,000 for your virtual account and ₹75,000 for your current account.
Email Addresses You must enter the email address to which the email alerts must be sent. You can enter multiple email addresses. You can also send these emails to users who are not part of your RazorpayX team.
Notification Frequency You can select how often you want the email alerts to be sent to you. The default is set to 8 hours. The available options are 4, 8, 12 and 24 hours.