Switch to Test Mode🔗
Click on the user profile icon to switch to test mode.
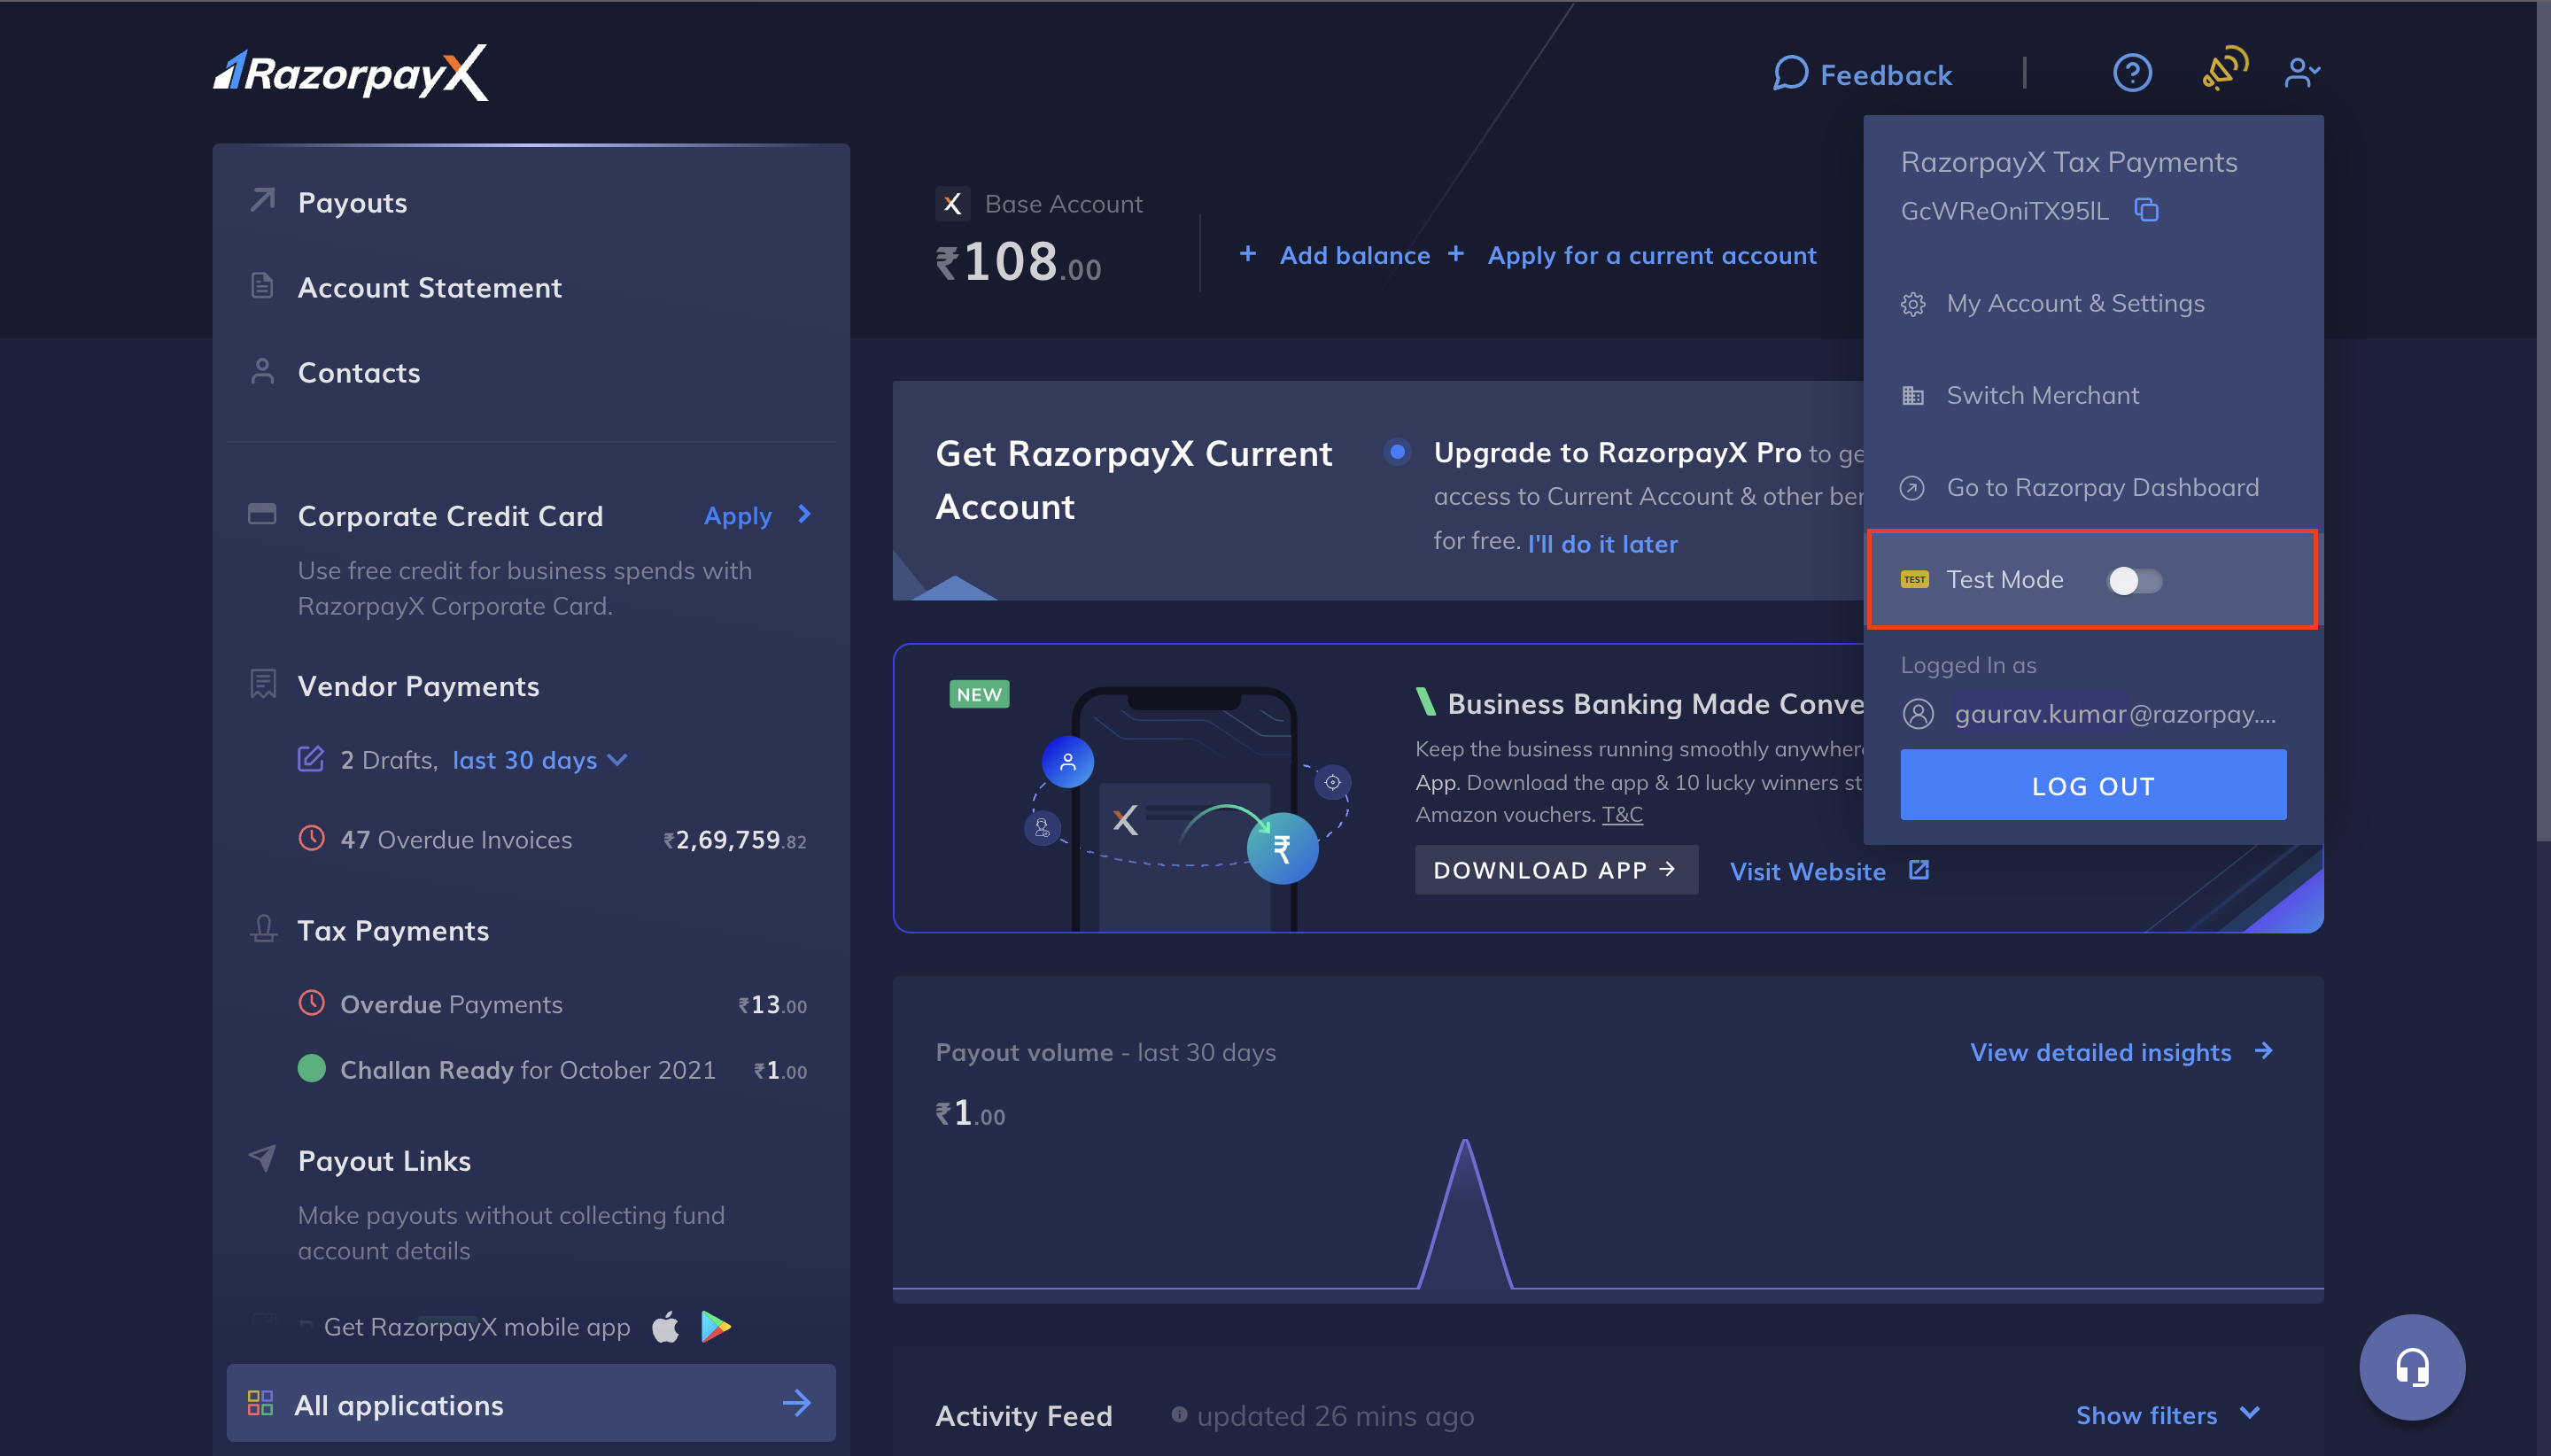
Use test mode to test your integration, add funds, view fund details and execute a list of APIs.
RazorpayX test mode is a replica of RazorpayX in a sandbox environment that allows you to test your integration before you switch to Live Mode. You can test the following using the Test Mode:
Feature | API | Dashboard | Bulk Upload |
|---|---|---|---|
✓ | ✓ | ✓ | |
✓ | ✓ | ✓ | |
✓ | ✓ | ✓ | |
✓ | ✓ | ✓ |
Handy Tips
Click on the user profile icon to switch to test mode.
Just like in the live environment, you will need to add funds in the test mode before you can make payouts. Test mode uses its own dummy balance. No real money is used in the test mode.
To add funds to your test mode, click + Add test balance and follow the on-screen instructions.
Handy Tips
The account details in the test mode are dummy details. Do not load real money to this account.
Watch this video to see how to add funds in the test mode.
To make a payout, you need to create a Contact. The table below lists the various Contact actions you can perform in the test mode:
Action | API | Dashboard | Bulk Upload |
|---|---|---|---|
Create a contact | ✓ | ✓ | ✓ |
Update a contact | ✓ | ✓ | x |
View contact details | ✓ | ✓ | x |
Mark as inactive | ✓ | ✓ | x |
You can create Contacts using APIs and create Contacts in bulk.
After you create a Contact, you need to create a Fund account for the Contact. You can create Fund accounts in the test mode only using Contacts created in the test mode. Payouts are made to the Fund account linked to the Contact.
The table below lists the various Fund account actions you can perform in the test mode.
Action | API | Dashboard | Bulk Upload |
|---|---|---|---|
Create a fund account | ✓ | ✓ | ✓ |
View fund account details | ✓ | ✓ | ✓ |
Mark as inactive | ✓ | ✓ | x |
You can create Fund accounts using APIs and create fund accounts in bulk.
Below is the payout life cycle.

Know more about payout states and its life cycle.
Watch Out!
The Approval Workflow is not available in the test mode. This means the pending and rejected states are not available in the test mode.
The table below lists the various payout actions you can perform in the test mode.
Action | API | Dashboard | Bulk Upload |
|---|---|---|---|
Create a payout | ✓ | ✓ | ✓ |
View payout details | ✓ | ✓ | x |
You can create contacts using APIs and create contacts in bulk.
By default, Payouts created in the Test Mode acquire the processing state. However, if you do not have sufficient balance, the payout acquires the queued state. In this case, add funds to move the payout to the processing state.
From the processing state, you will have to manually move the payout to the next state from the Dashboard. You can move it forward to any state in the payout lifecycle. Unlike the Live Mode, this does not happen automatically.
Watch this video to view the payout states.
The Test Mode has its own account statement based on transactions made in the Test Mode. You can view the account statement on the RazorpayX Dashboard or fetch details using the Transaction APIs.
Know about webhooks, how to set them and the sample payloads.
The following webhook events are available in the test mode:
payout.queuedpayout.initiatedpayout.processedpayout.reversedtransaction.created