Make GST payments using the RazorpayX Tax Payment app.
RazorpayX now offers GST Payment App for the benefit of its users. You can make GST payments from the RazorpayX Dashboard without the need to visit the GSTN portal. Some of the advantages of using the RazorpayX Dashboard for making GST payments are:
Don't have to use the GSTN portal to pay dues.
Consolidated view of all your payouts and challans at a single location.
Your Chartered Accountant (CA) has access to all the challans without manual intervention.
Chartered Accountants also benefit from using the RazorpayX Dashboard for making GST payments for their clients because:
Your personal accounts remain untouched.
You can avoid multiple back and forth with your client for GST payment.
You can focus on compliance rather than payment procedures.
Watch this video to know more about making GST payments through RazorpayX:
Handy Tips
With RazorpayX, you will have access to historical challans for GST payments made through the Dashboard.
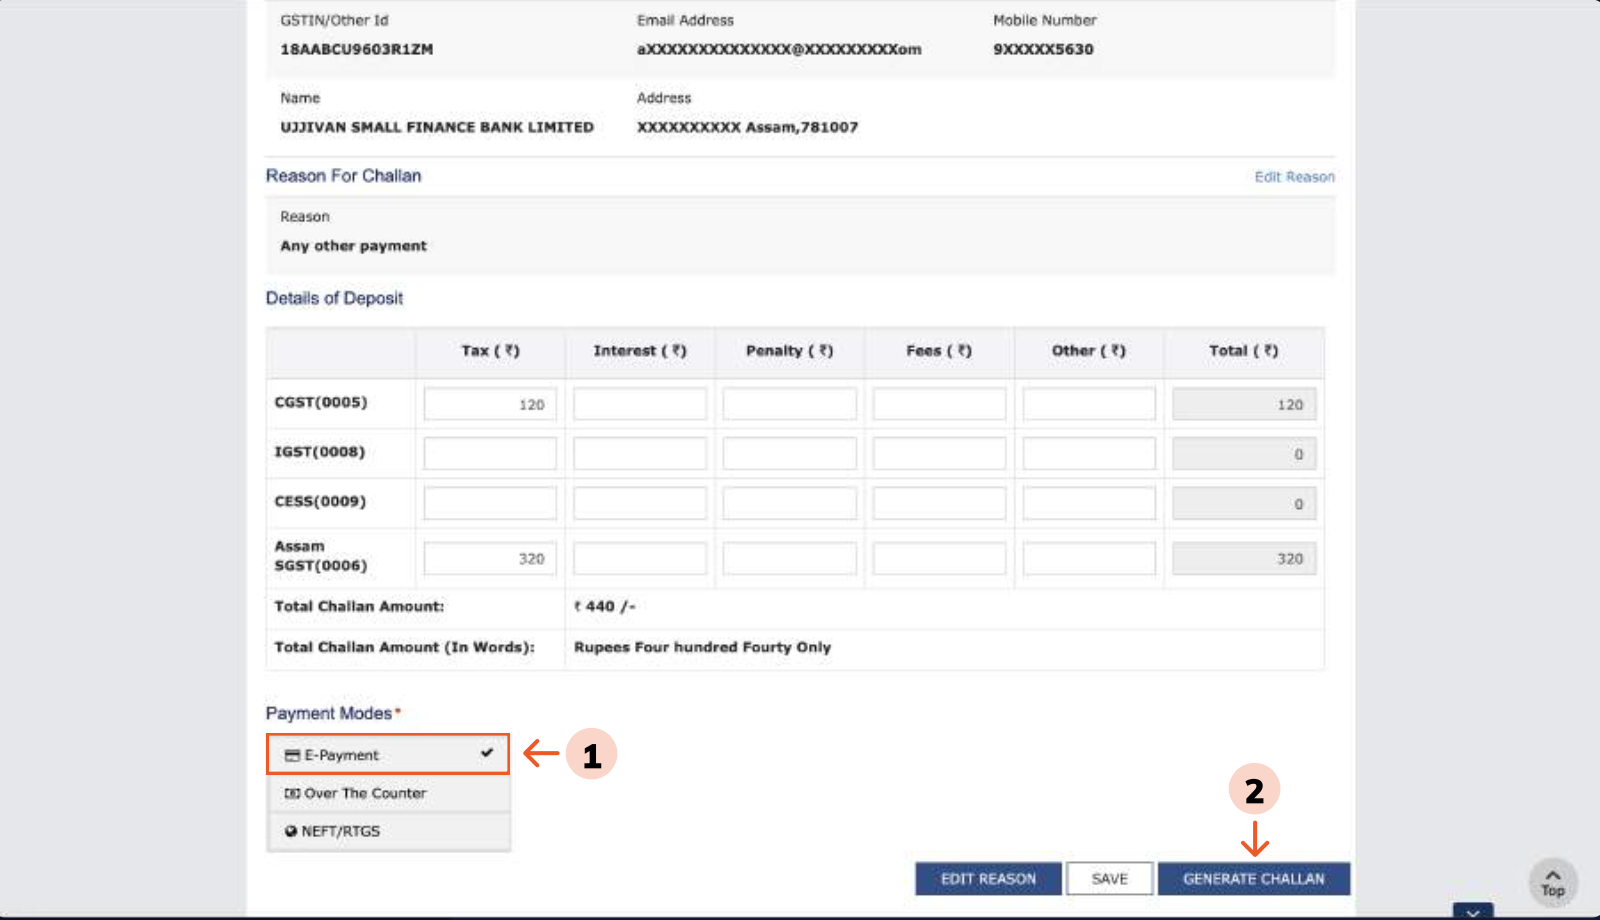
Before you begin to use RazorpayX for GST payments, you must send generate the challan on the GST portal. To do this:
Enter your tax deposit details such as tax, interest, penalty and so on in the GSTIN portal. Select E-Payment as the Payment mode and click GENERATE CHALLAN as shown below:
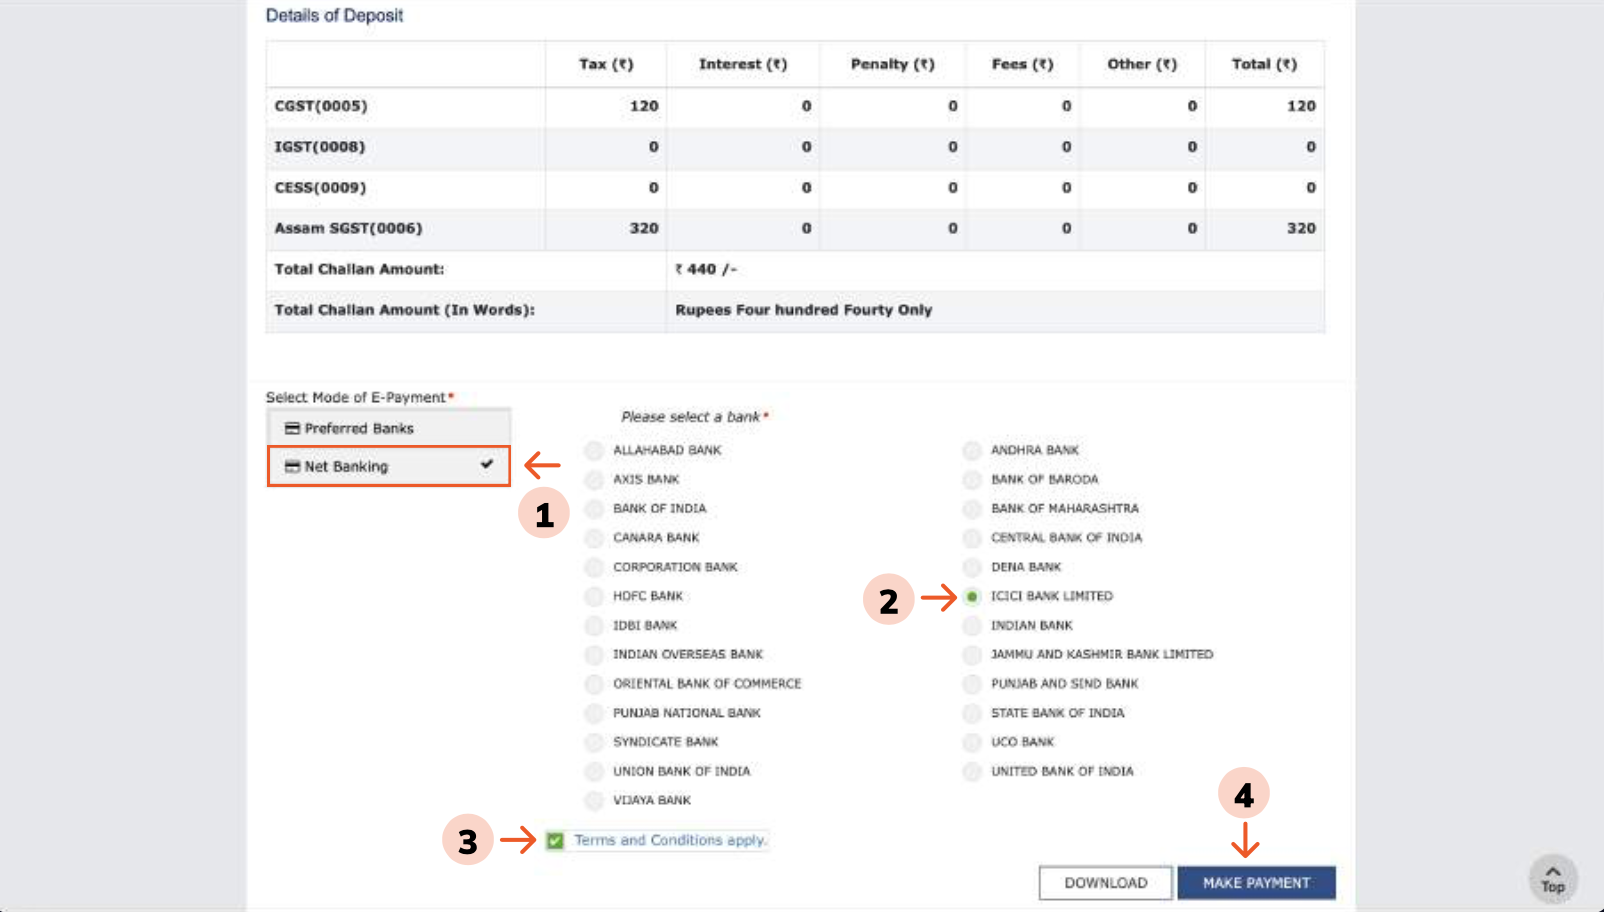
Once challan is generated, select Net Banking. A list is displayed to select the bank through which you can make the payment. Select ICICI BANK LIMITED. Check the Terms and Conditions apply box and select MAKE PAYMENT as shown:
Watch Out!
It is mandatory to select ICICI Bank Limited because RazorpayX uses ICICI Bank's APIs to fetch challans from GST Portal to RazorpayX.
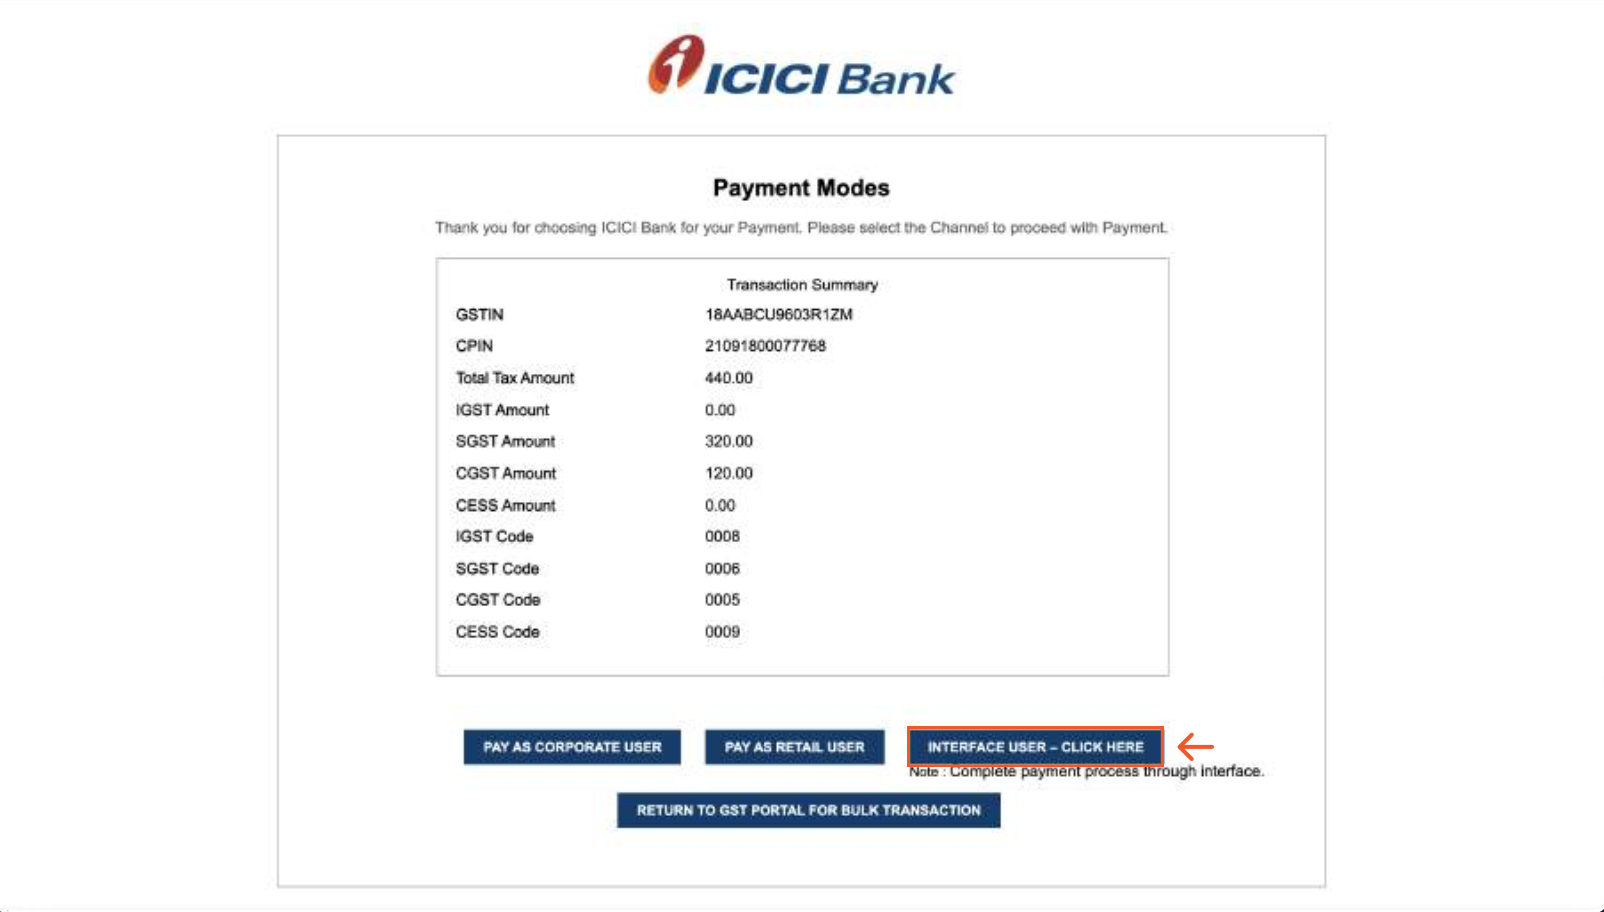
A payment confirmation screen is displayed. Select INTERFACE USER - CLICK HERE to import this challan to RazorpayX as shown below:
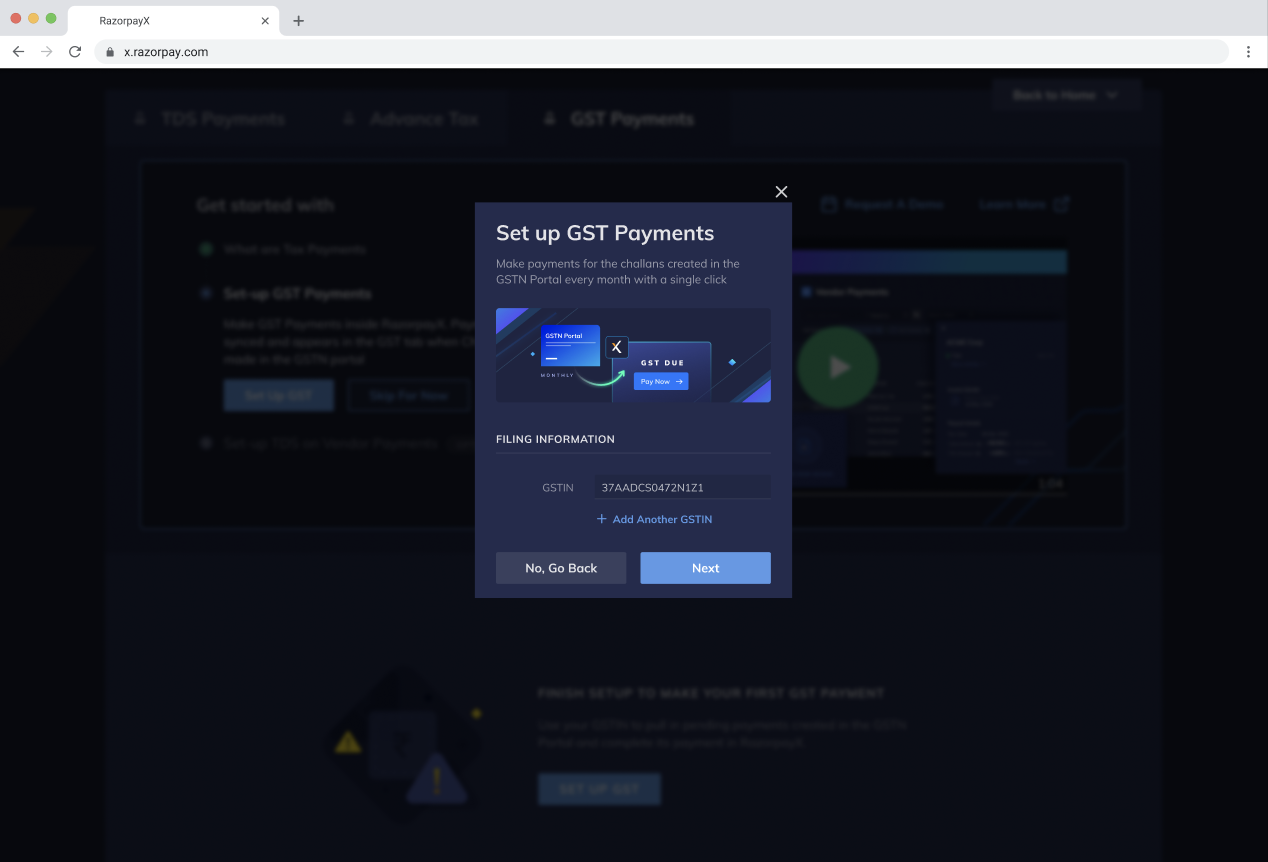
On the GST Payments page, enter your GSTIN and click Next as shown below:
Handy Tips
You can enter multiple GSTIN numbers to import challans generated for each of them.
Select Mode of E-Payment as directed. Please note that the mode of payment should be the same as entered in the GSTN portal. Also, enter the email address of your CA/Accounting team (so that they will get the GST Portal Setup Guide) and click Email to continue as shown below:
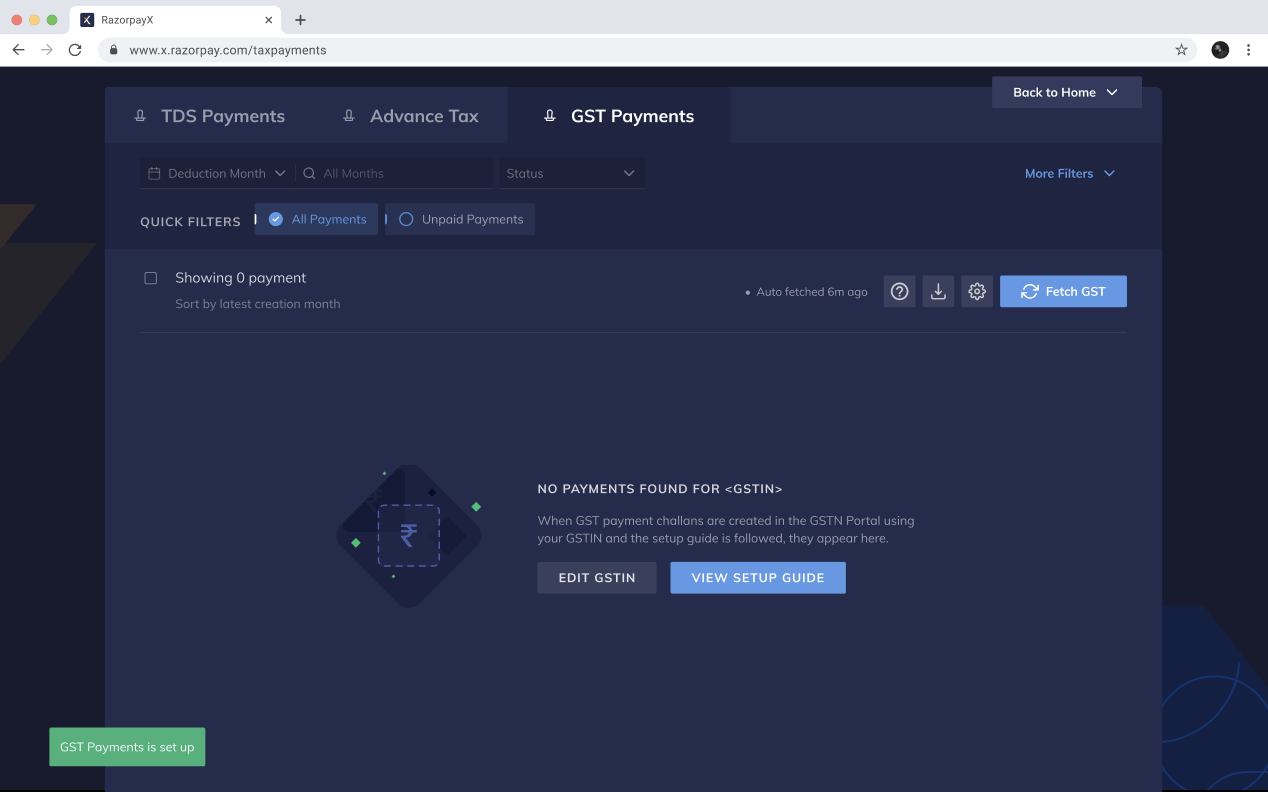
With this, the one-time setup of GSTN is complete, and a success message is displayed in the GST Payments tab. Click Fetch GST to fetch challans from the GSTIN portal as shown below:
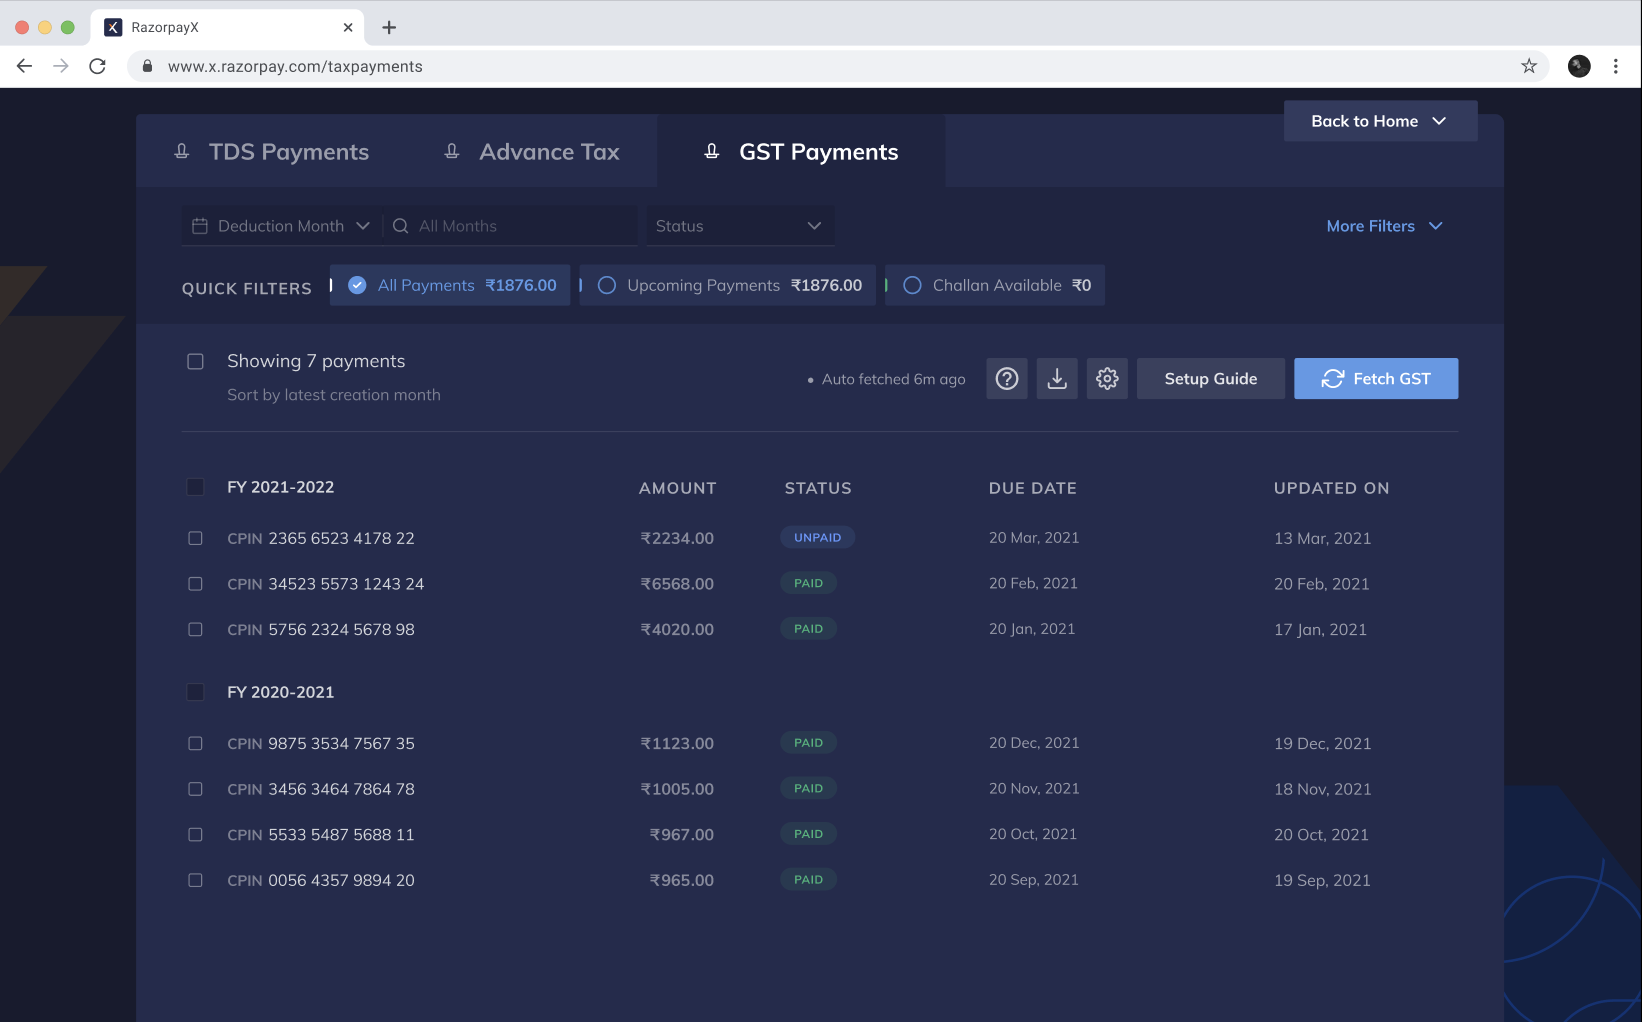
Once you fetch all the challans, they are displayed in the GST Payments tab as shown below:
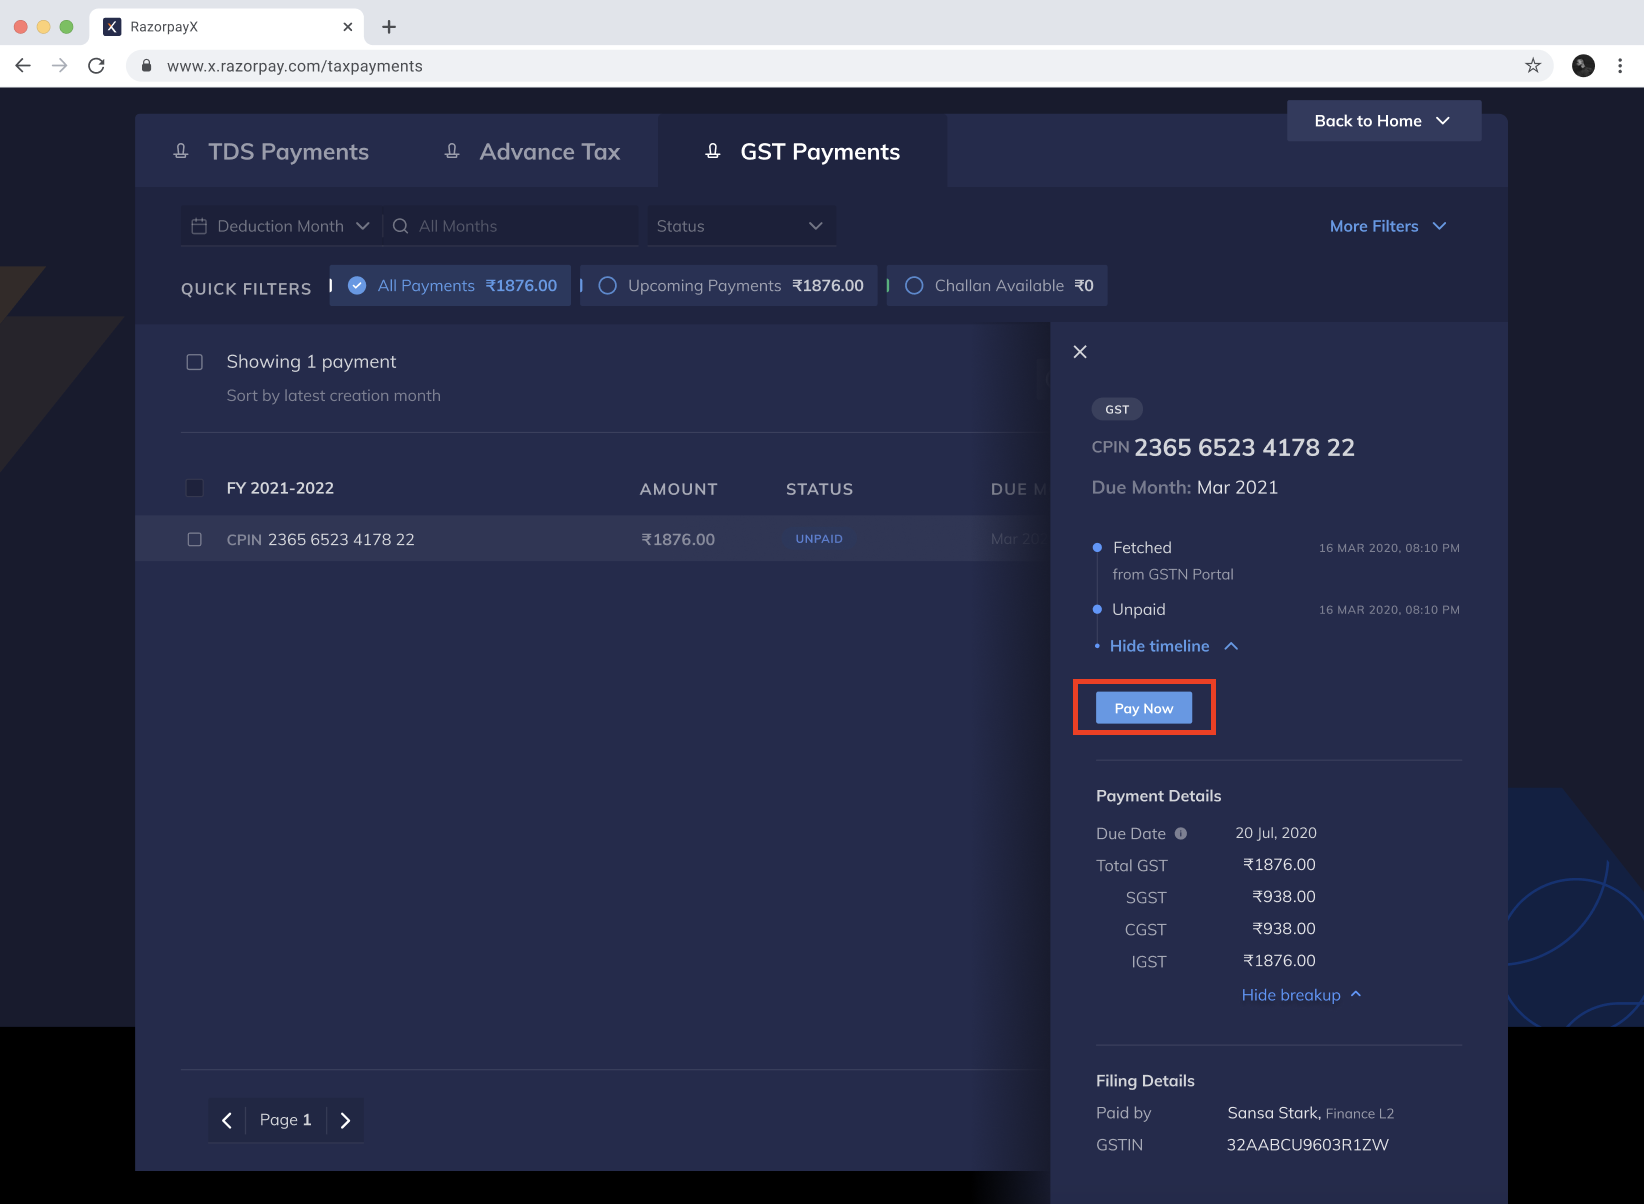
Click on the invoice row for which GST payment is due. The Invoice Details are displayed in a pop-out page.
Verify the Payment Details. You can use the Show breakup link to view details of GST, SGST, CGST, and IGST.
Click Pay Now and follow the regular method to complete the payment as shown below:
Handy Tips
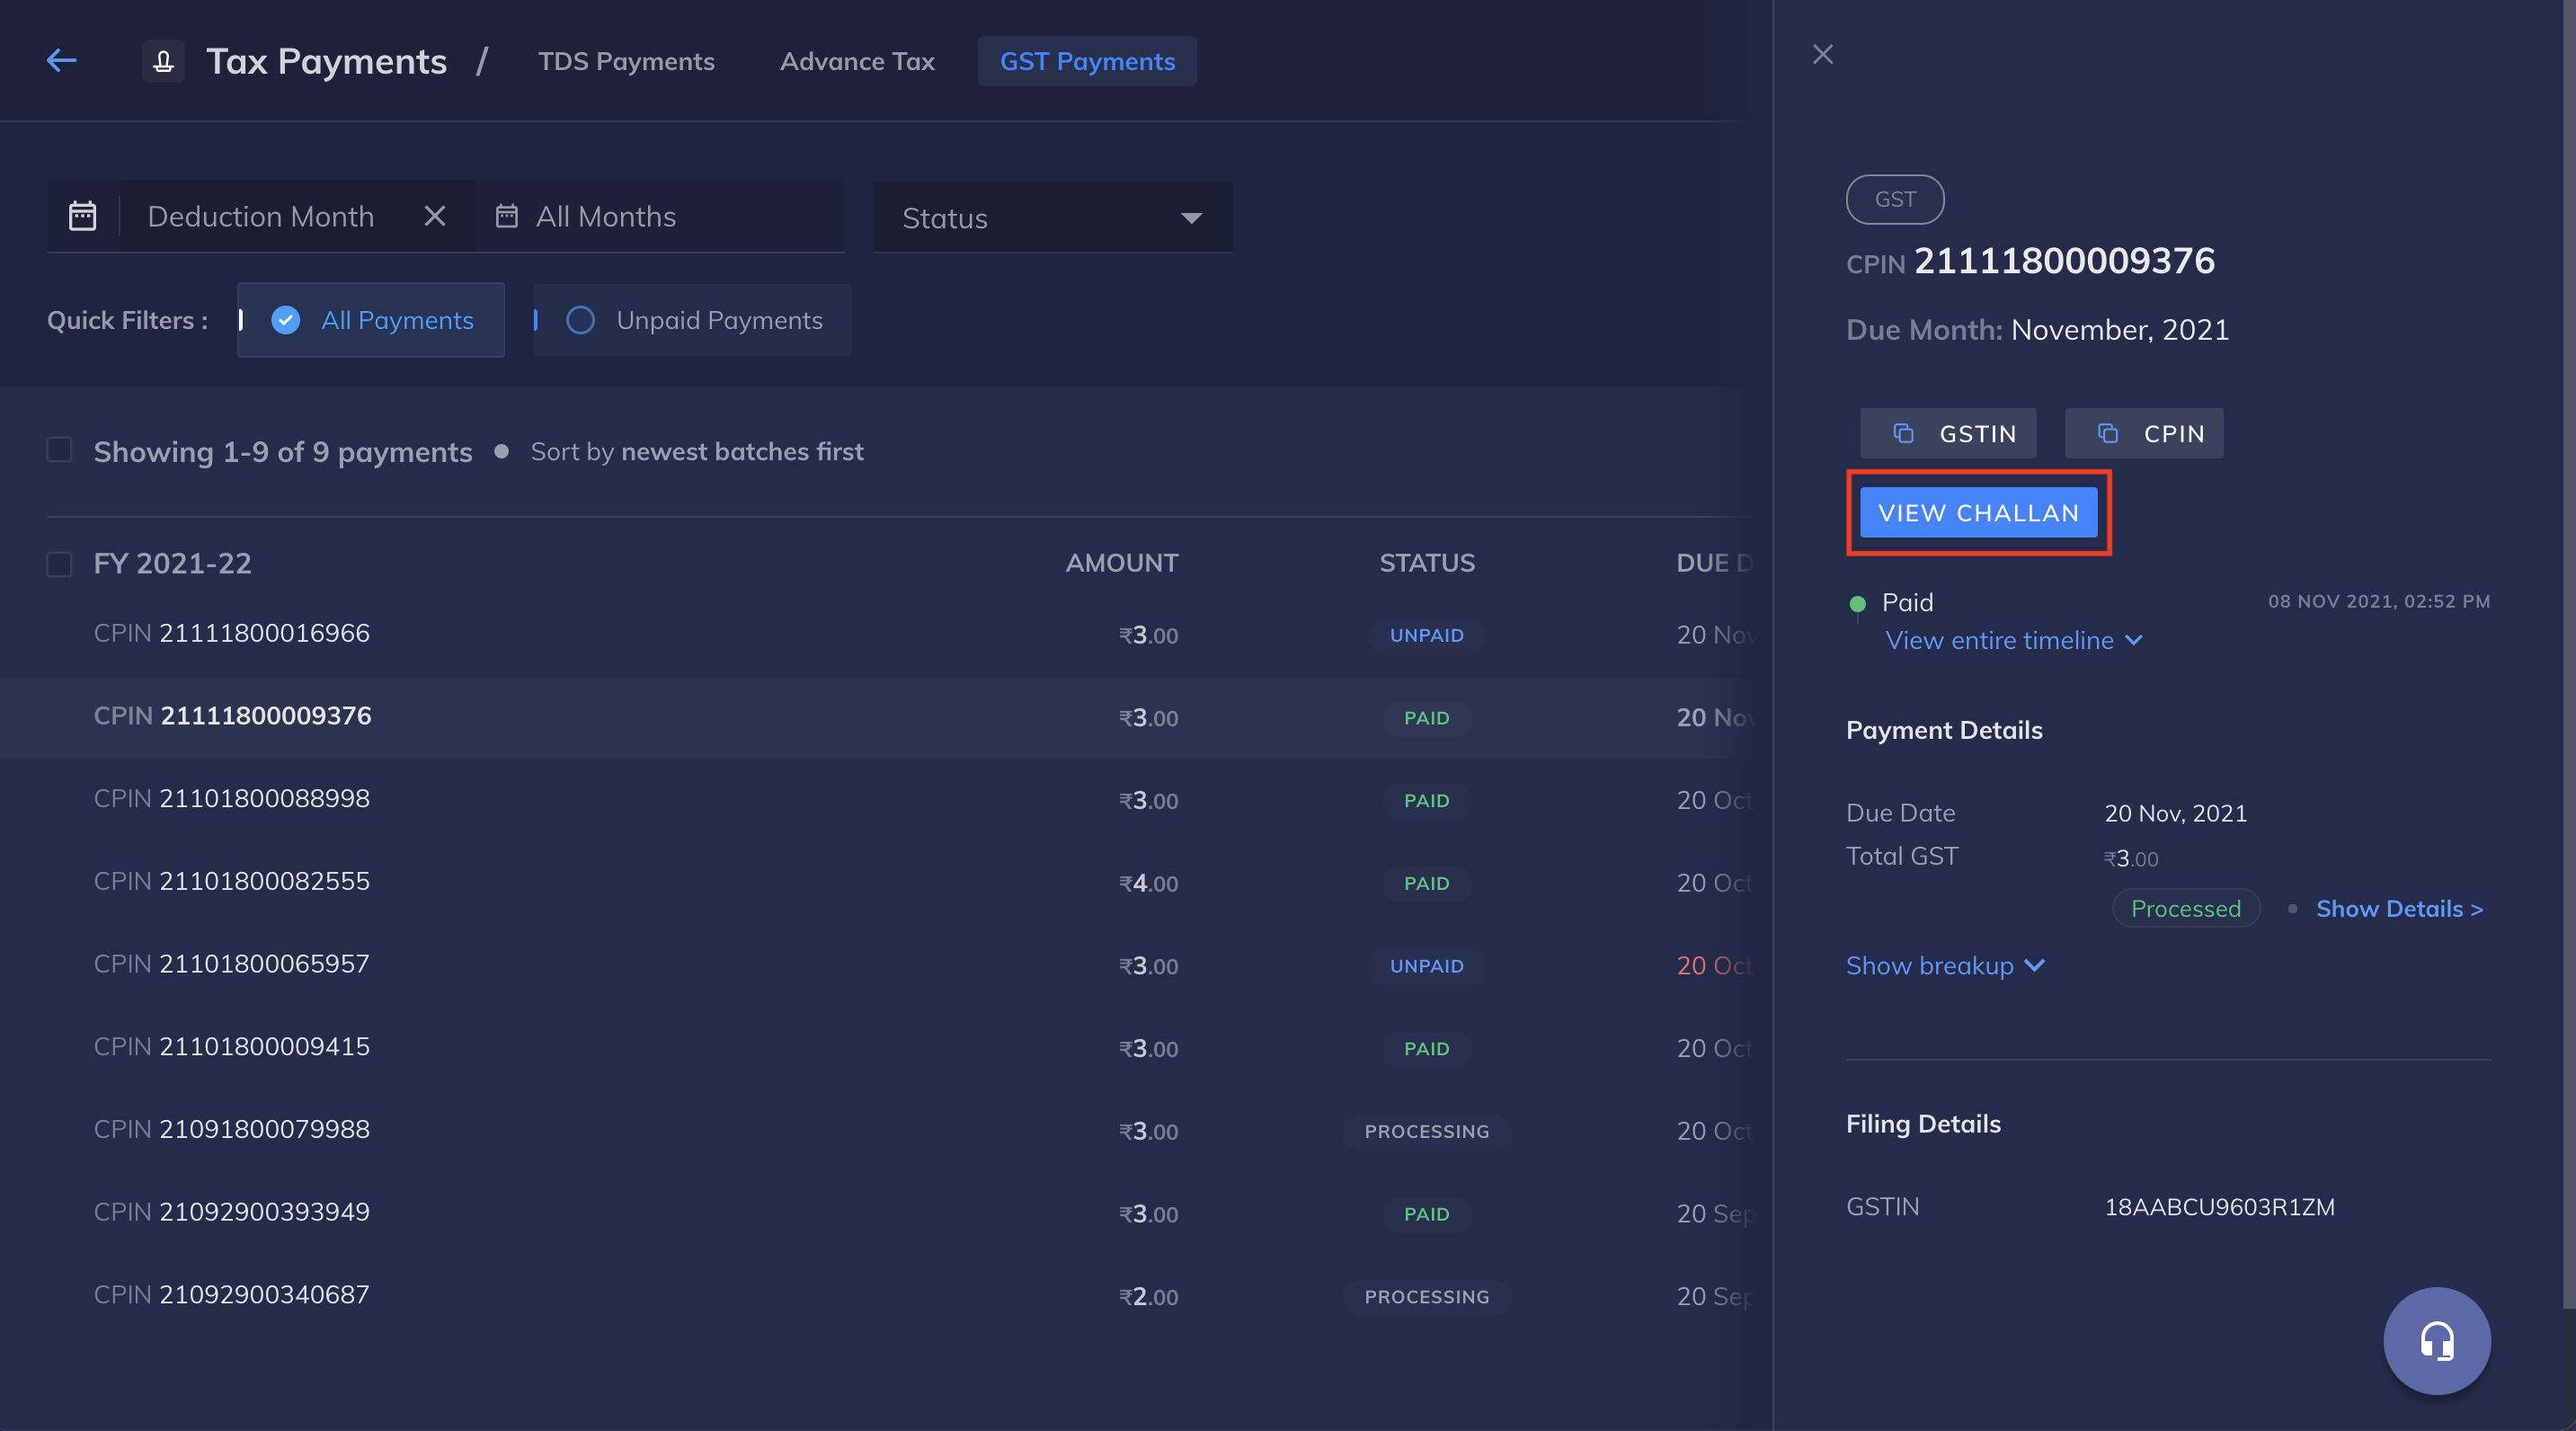
Once the payment is made on RazorpayX, you can use the VIEW CHALLAN button to download the challan. Clicking on VIEW CHALLAN redirects you to the GST portal. You can copy and paste the CPIN and GSTIN from the RazorpayX Dashboard and use it to download the challan as shown here: