Learn how to set up webhooks for recurring payments, available webhook events and sample payloads for these events. Webhooks are the best ways to receive alerts about the authorization payment, the status of tokens and subsequent recurring payments.
Webhooks (Web Callback, HTTP Push API or Reverse API) is one way one web application can send information to another application in real-time when a specific event happens.
Example Suppose you have subscribed to the order.paid webhook event, you will receive a notification every time a user pays you for an order.
APIs send you the data when you request it. For Webhooks, you do not need to make a request. You receive the data when it is available.
Example If you need to know whether a payment link is paid or not, using APIs, you need to keep polling every few seconds until someone pays. However, if you are using Webhooks, you can configure a webhook event payment_link.paid to receive notifications when a customer makes the payment using the link.
You can use Razorpay Webhooks to configure and receive notifications when a specific event occurs.
When one of these events is triggered, we send an HTTP POST payload in JSON to the webhook's configured URL.
You can set up Webhooks from your Razorpay Dashboard and configure separate URLs for Live mode and Test mode. Know more about setting up Payments webhooks and RazorpayX webhooks.
A Test mode webhook receives events for your test transactions. Know more about testing Webhooks.
In webhook URLs, only port numbers 80 and 443 are currently allowed.
There could be scenarios where your endpoint might receive the same webhook event multiple times. This is an expected behaviour based on the webhook design.
To handle duplicate webhook events:
You can identify the duplicate webhooks using the x-razorpay-event-id header. The value for this header is unique per event.
Check the value of x-razorpay-event-id in the webhook request header.
Verify if an event with the same header is processed at your end.
All webhook responses must return a status code in the range 2XX within a window of 5 seconds. If we receive response codes other than this or the request times out, it is considered a failure.
On failure, a webhook is re-tried at progressive intervals of time, defined in the exponential back-off policy, for 24 hours. If the failures continue for 24 hours, the webhook is disabled. You need to enable the webhook from the Razorpay Dashboard after fixing the errors at your end. Know more about enabling Webhooks.
Handy Tips
When a webhook gets disabled, you receive an email notification on the email id you configured while setting up the webhooks.
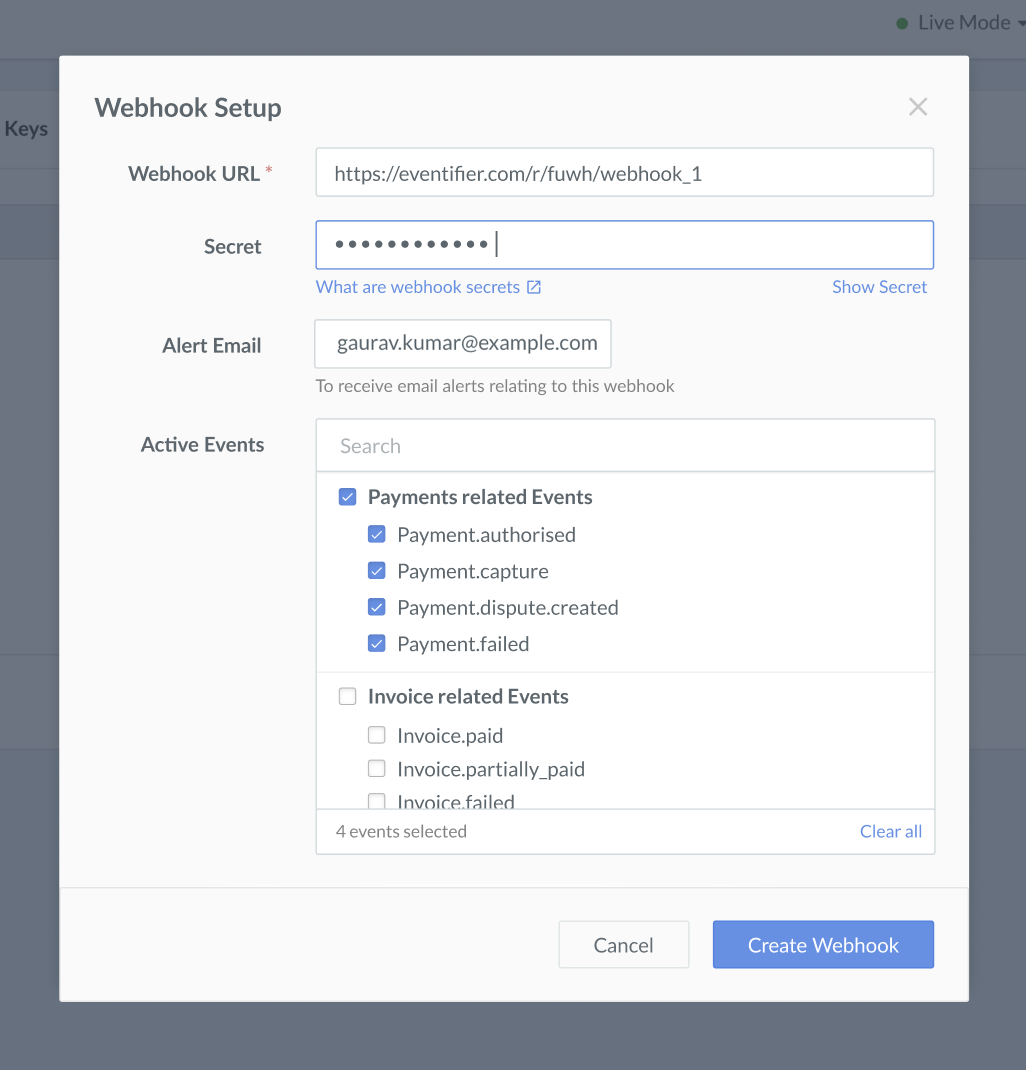
Enter the URL where you want to receive the webhook payload when an event is triggered. We recommended using an HTTPS URL.
Handy Tips
You can set up to 10 URLs to receive Webhook notifications. Webhooks can only be delivered to public URLs. If you attempt to save a localhost endpoint as part of a webhook setup, you will notice an error. Know more about testing Webhooks on an application running on localhost.
Enter a Secret for the webhook endpoint. The secret is used to validate that the webhook is from Razorpay. Do not expose the secret publicly. Know more about how to validate webhooks.
Handy Tips
When setting up the webhook, you will be asked to specify a secret. Using this secret, you can validate that the webhook is from Razorpay. Entering the secret is optional but recommended. The secret should never be exposed publicly.
The webhoook secret does not need to be the merchant secret key provided by Razorpay.
In the Alert Email field, enter the email address to which the notifications should be sent in case of webhook failure. You will receive webhook deactivation notifications to this email address.
Select the required events from the list of Active Events.
Click Create Webhook.
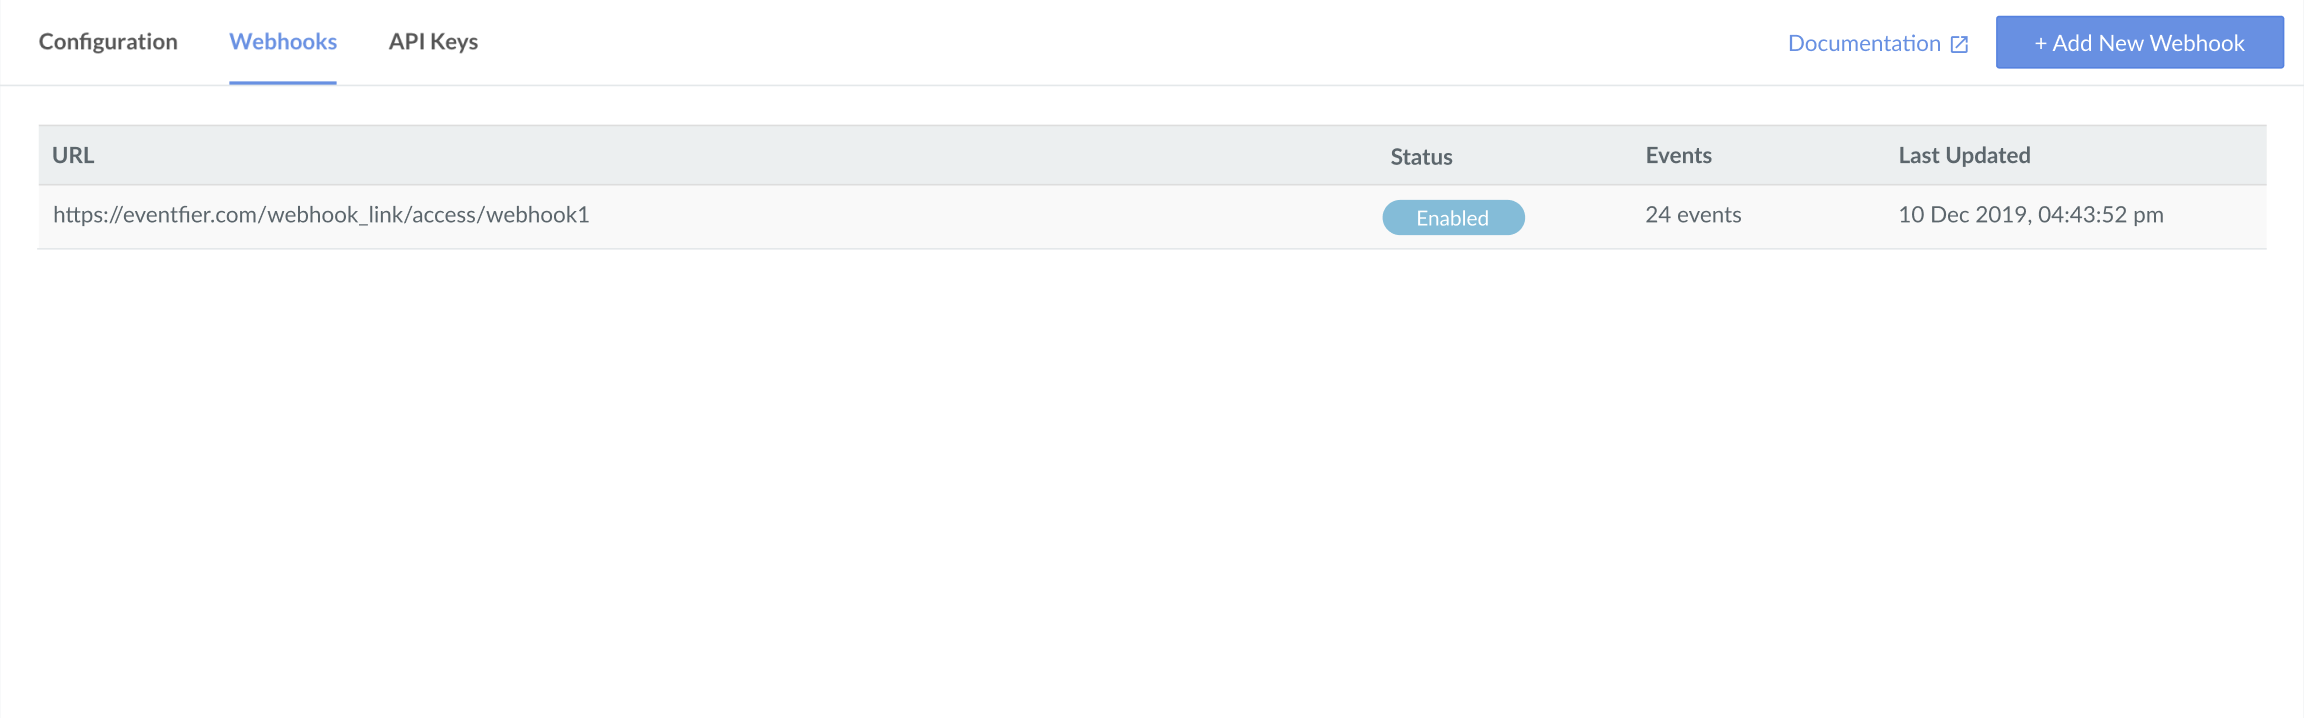
After you set a webhook, it appears on the list of webhooks.
You can click Edit to make changes to the webhooks.
When your webhook secret is set, Razorpay uses it to create a hash signature with each payload. This hash signature is passed with each request under the X-Razorpay-Signature header that you need to validate at your end. We provide support for validating the signature is in all of our language SDKs.
Handy Tips
If you have changed your webhook secret, remember to use the old secret for webhook signature validation while retrying older requests. Using the new secret will lead to a signature mismatch.
Do Not Parse or Cast the Webhook Request Body
While generating the signature at your end, ensure that the webhook body passed as an argument is the raw webhook request body. Do not parse or cast the webhook request body.
X-Razorpay-Signature
The hash signature is calculated using HMAC with SHA256 algorithm; with your webhook secret set as the key and the webhook request body as the message.
You can also validate the webhook signature yourself using an HMAC as shown below:
Copykey                = webhook_secret
message            = webhook_body // raw webhook request body
received_signature = webhook_signature

expected_signature = hmac('sha256', message, key)

if expected_signature != received_signature
    throw SecurityError
end
Indicates that the payment has been authorized. A payment is authorized when the customer’s payment details are successfully authenticated by the bank.