Integration Steps🔗
- Embed the JavaScript File.
- Create an HTML Element.
- Add the Widget Snippet.
- Raise the Activation Request.
Step 1: Embed the JavaScript File🔗
To integrate the widget on your website, embed the JS file into your website.
Copy<!-- Add script in head -->
<script src="https://cdn.razorpay.com/widgets/affordability/affordability.js">
</script>
Step 2: Create an HTML Element🔗
Create an HTML element with an id to indicate where the affordability widget should appear.
Example🔗
Copy<div id="razorpay-affordability-widget"> </div>
Step 3: Add the Widget Snippet🔗
Copy-paste the following snippet to the JS file and link it to your HTML file.
Copyconst key = "YOUR_KEY_ID";
const amount = "product_price";
window.onload = function() {
const widgetConfig = {
"key": key,
"amount": amount,
};
const rzpAffordabilitySuite = new RazorpayAffordabilitySuite(widgetConfig);
rzpAffordabilitySuite.render();
}
Watch Out!
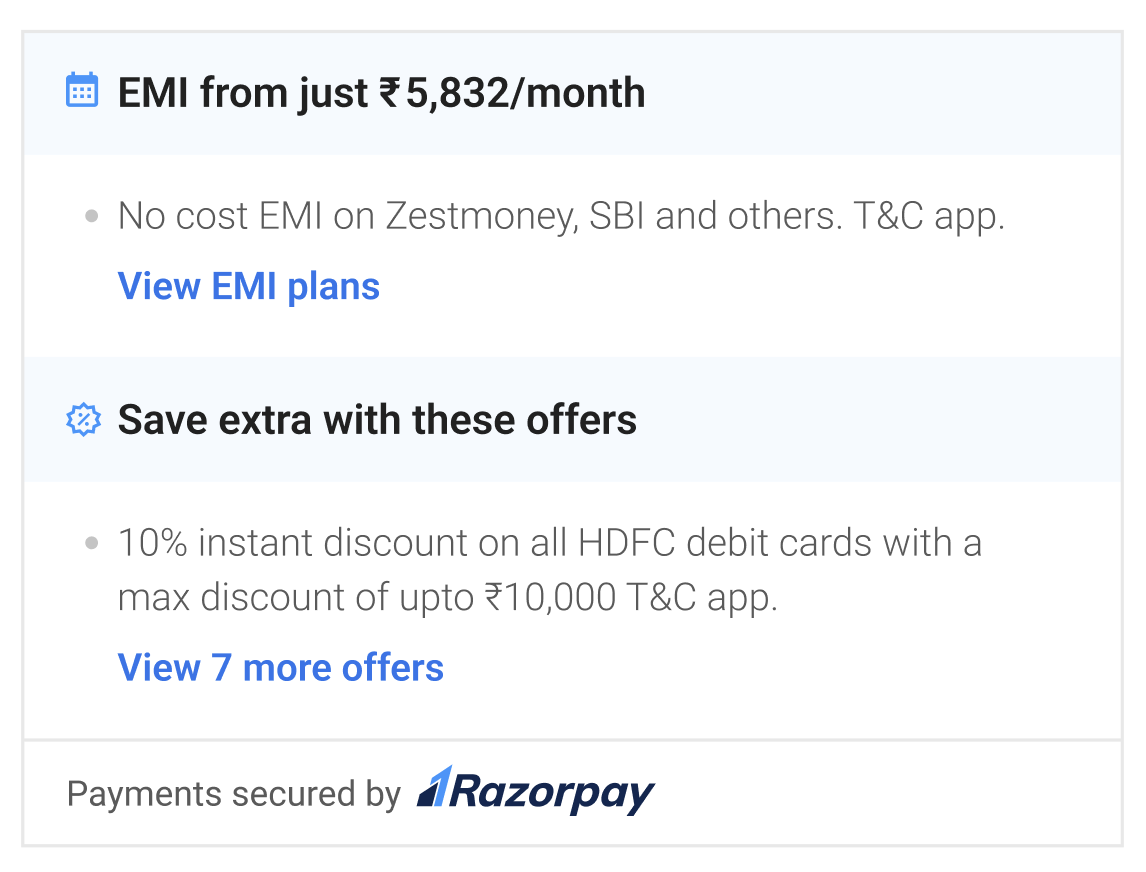
Ensure you pass the final amount to the widget which you display to your customers on product and checkout pages.
Parameters🔗
keymandatorystringAPI Key ID generated from the Razorpay Dashboard.amountmandatoryintegerThe amount to be paid by the customer in paise. For example, if the amount is ₹4000, enter400000.targetmandatorystringid of the target element created in the previous step.
Sample Code🔗
Given below is the sample code to embed the widget on your website.
Copy<!-- Add script in head -->
<script src="https://cdn.razorpay.com/widgets/affordability/affordability.js">
</script>

<div id="razorpay-affordability-widget"> </div>

<script>
const key = "YOUR_KEY_ID";
const amount = "product_price";

window.onload = function() {
 const widgetConfig = {
	"key": key,
	"amount": amount,
 };
 const rzpAffordabilitySuite = new RazorpayAffordabilitySuite(widgetConfig);
 rzpAffordabilitySuite.render();
}
</script>
Step 4: Raise the Activation Request🔗
Reach out to your sales PoC or raise an integration support ticket on the Razorpay Dashboard to enable this feature on your website.
To raise a ticket:
-
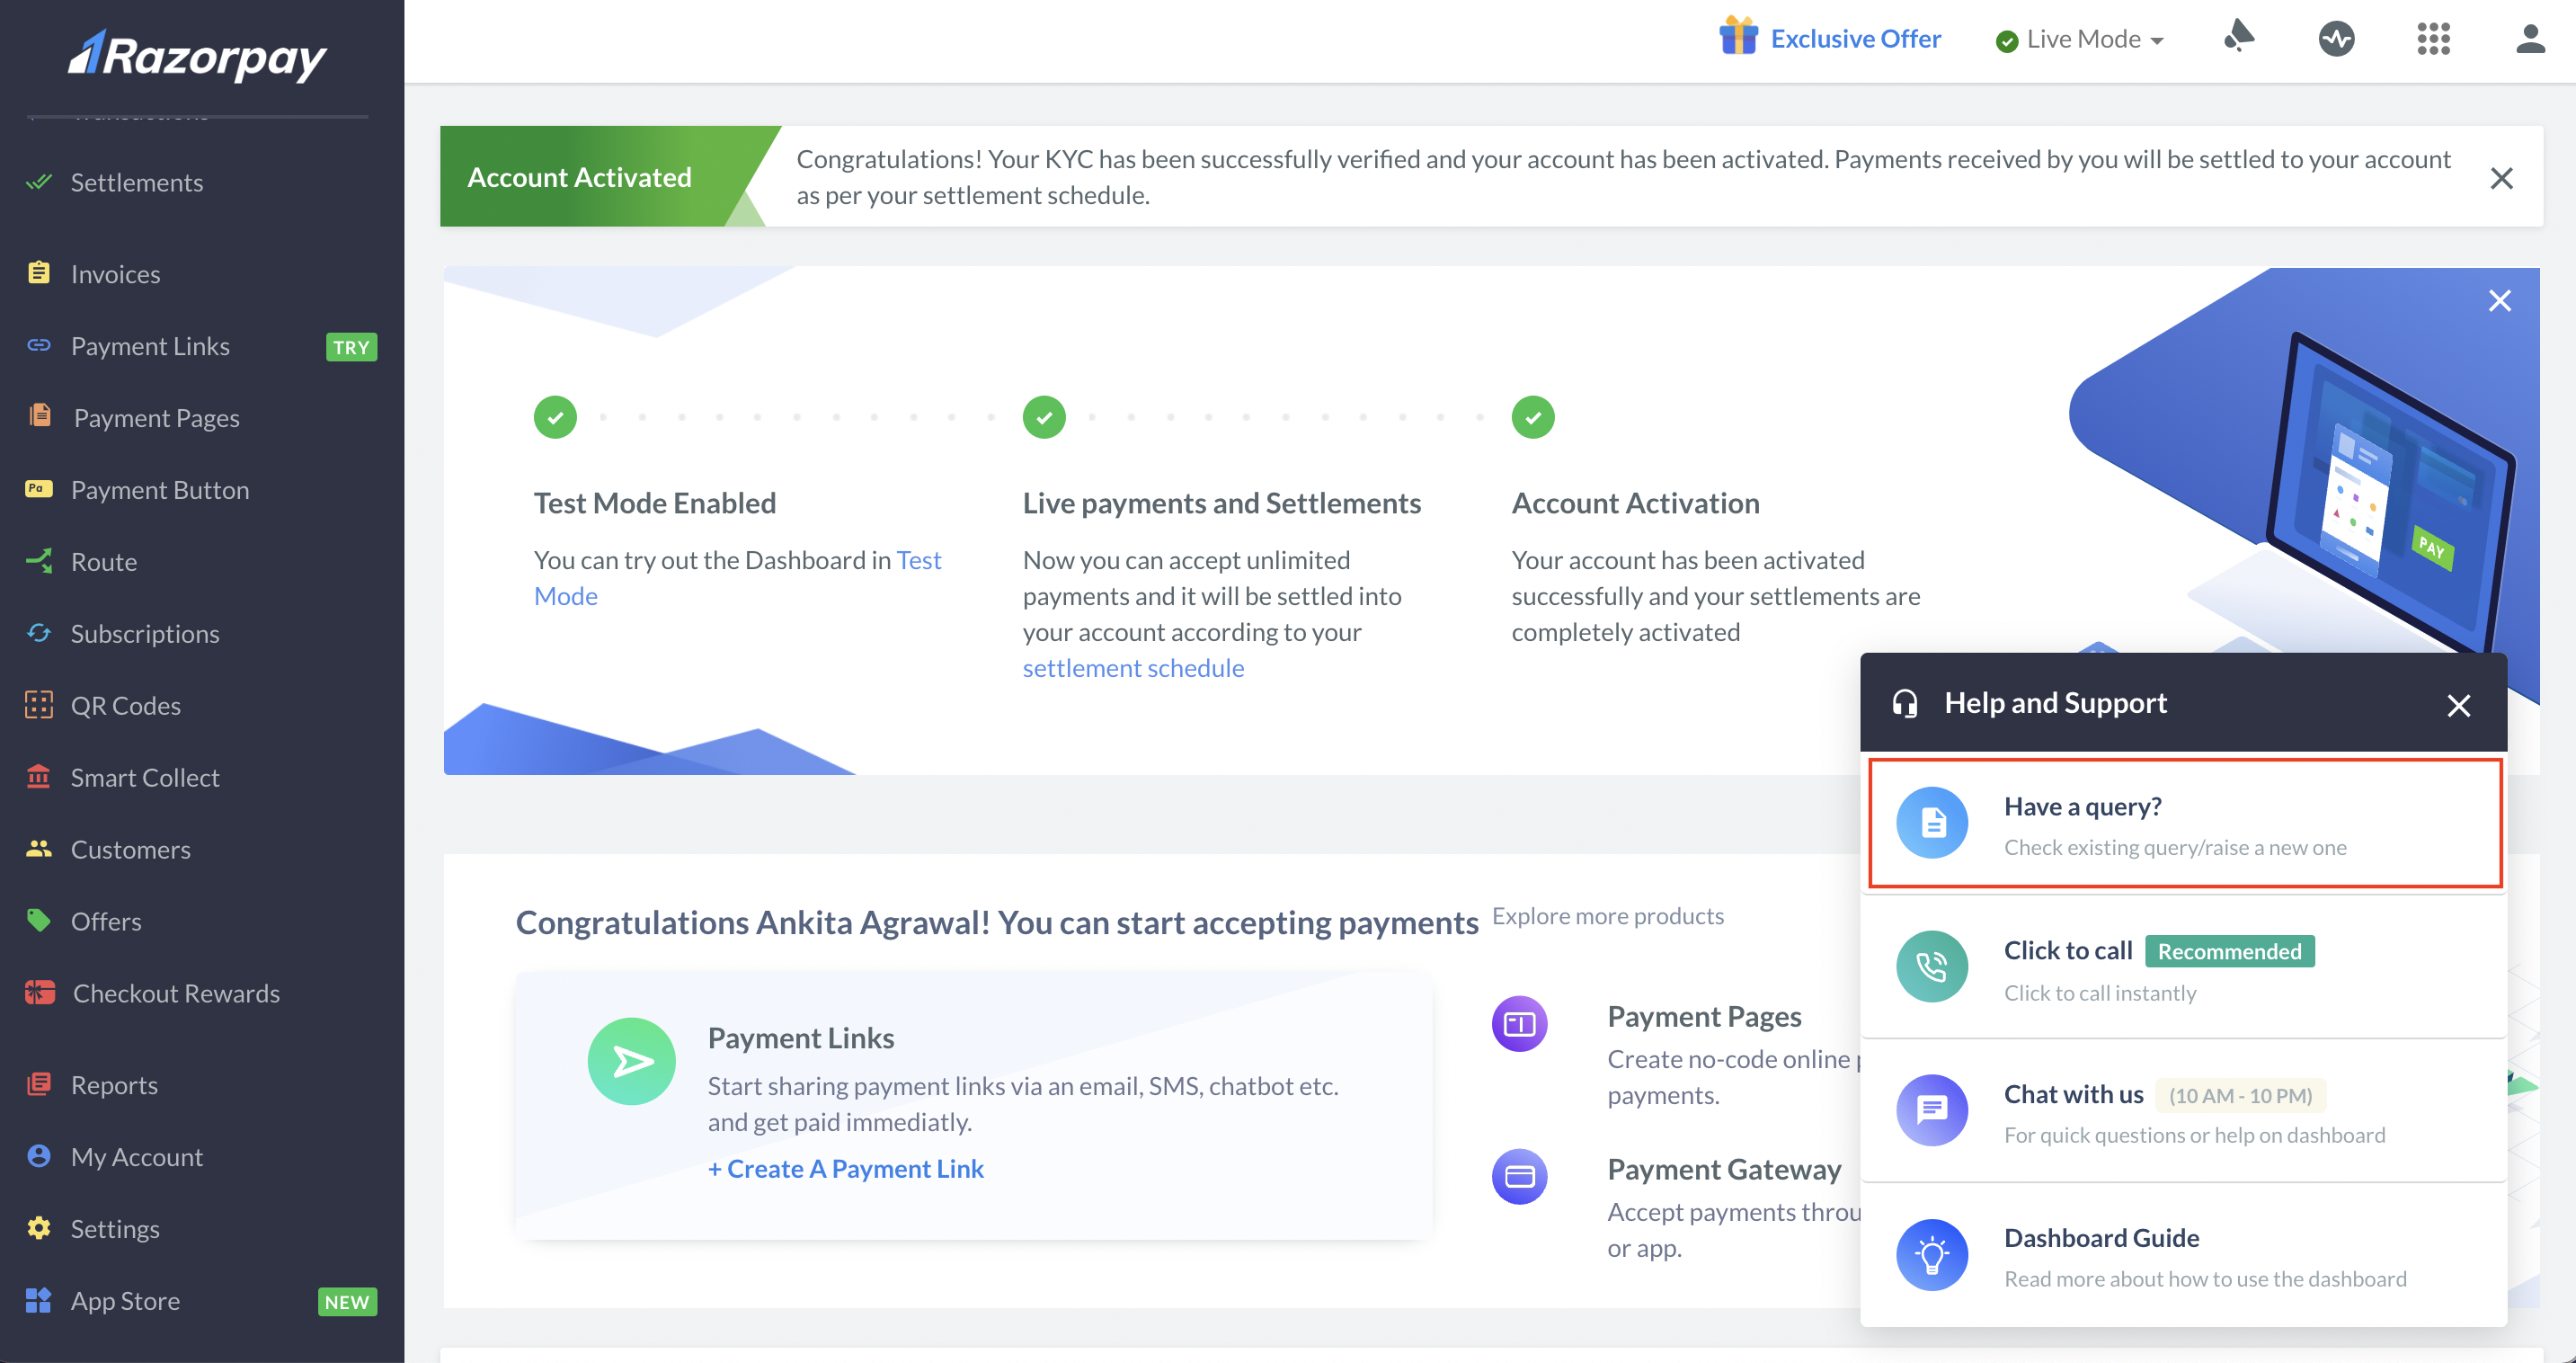
Log into the Razorpay Dashboard.
-
Click Help to open the support pop-up and click Have a query.
-
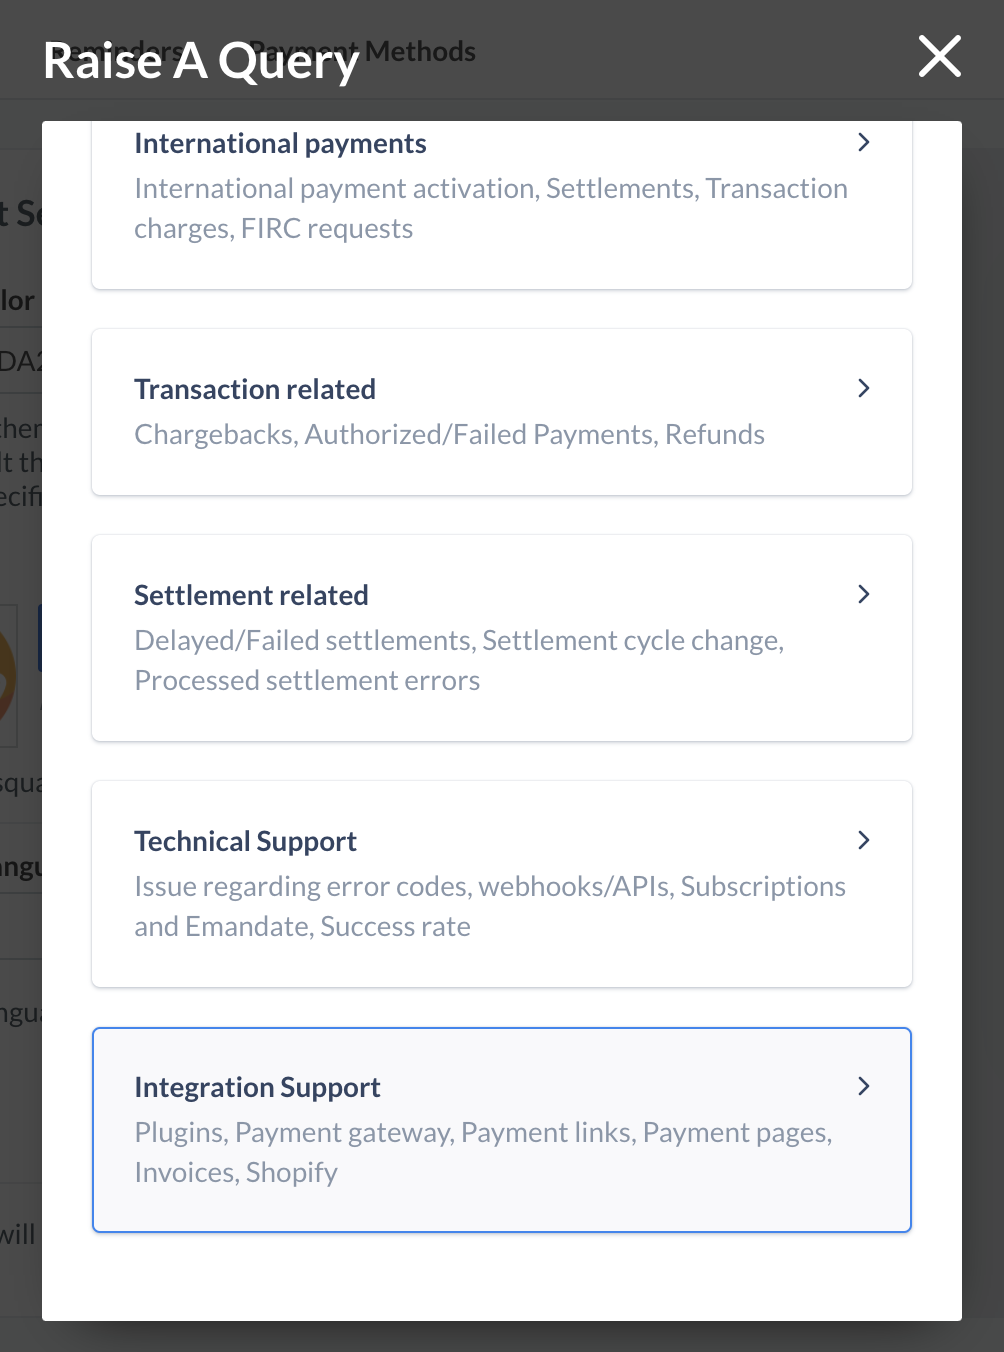
Scroll down and select Integration Support.
-
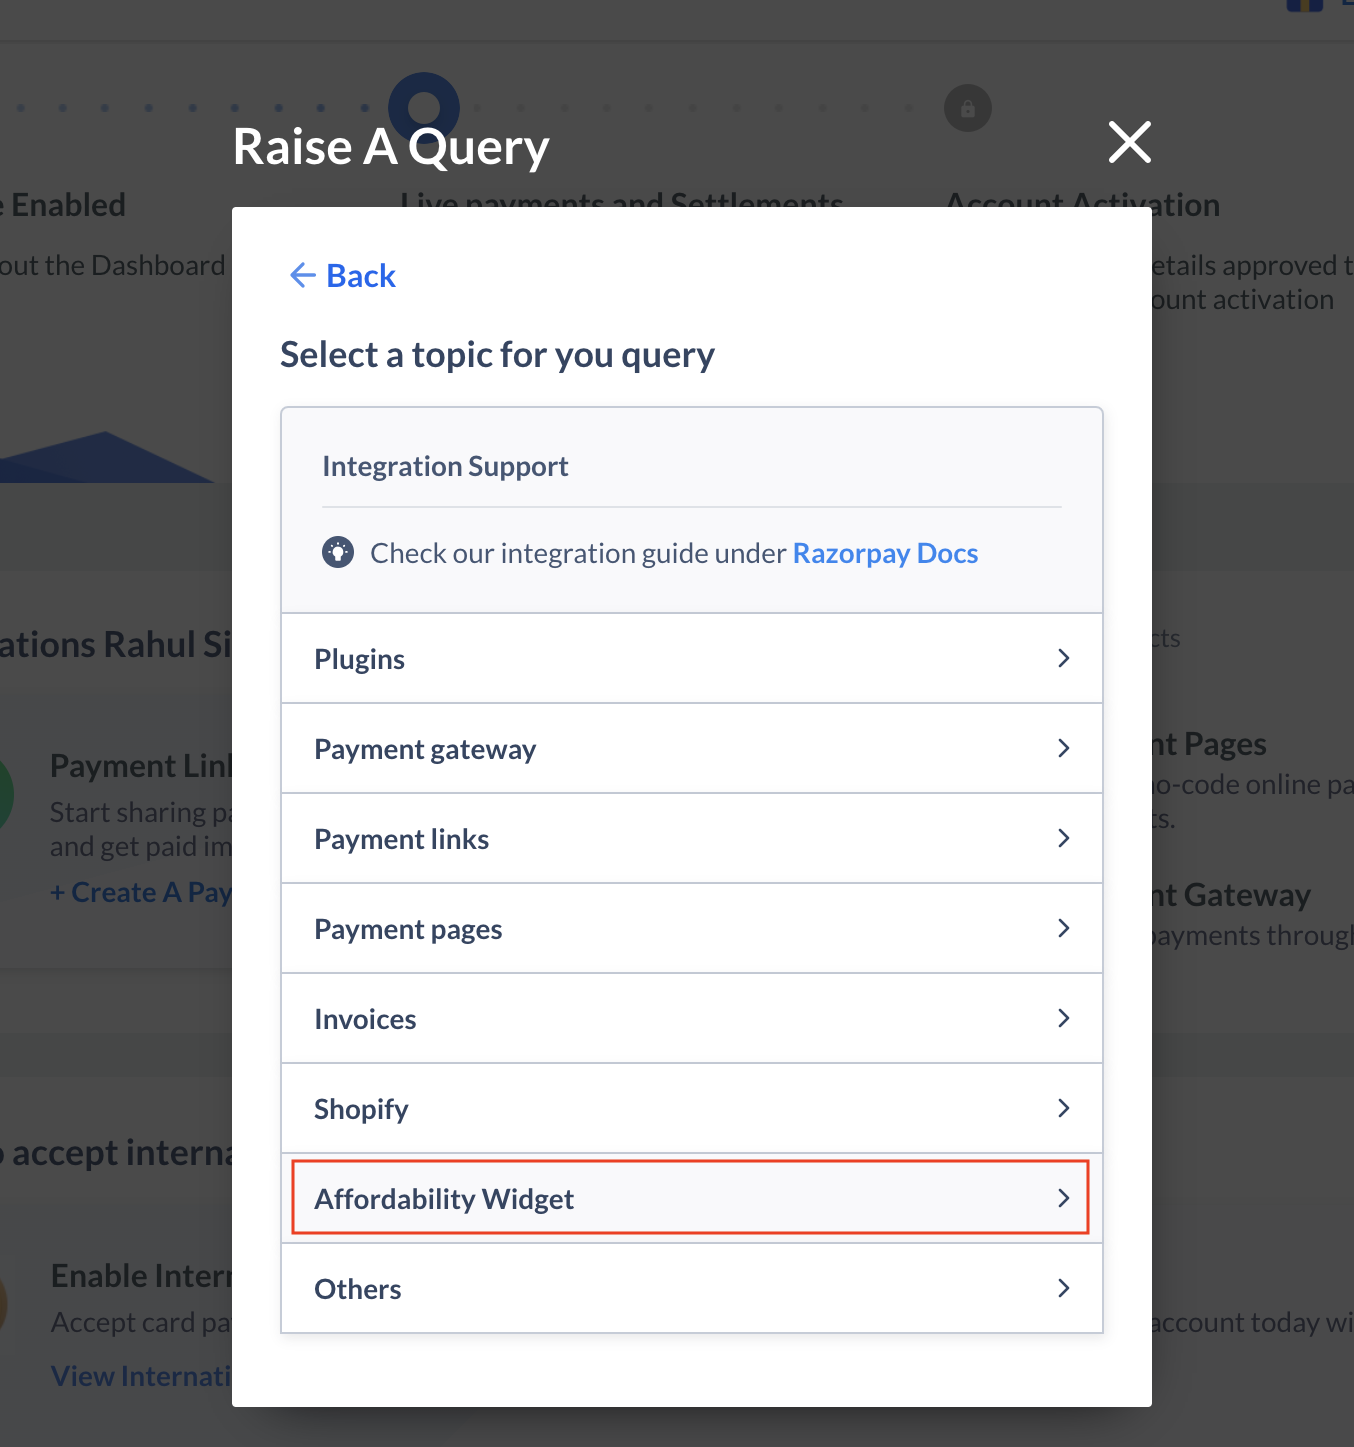
Select Affordability Widget from the list of topics.
-
Enter the required details and click Submit.
We will evaluate your request and enable the feature at the earliest. You can also track the status of your ticket.