Integrate Payment Pages with Shiprocket
Integrate Shiprocket with Payment Pages.
Shiprocket is India's leading logistics software, offering automated shipping solutions. With the help of Shiprocket, you can ship anywhere in India and abroad using the best courier companies and at discounted rates.
Integrating with Shiprocket will help you dispatch your products seamlessly to your customers in a few simple steps.
You can integrate Shiprocket with your Payment Page using the following steps.
-
Log in to the Dashboard and navigate to Payment Pages.
-
Click the + Create Payment Page button.
-
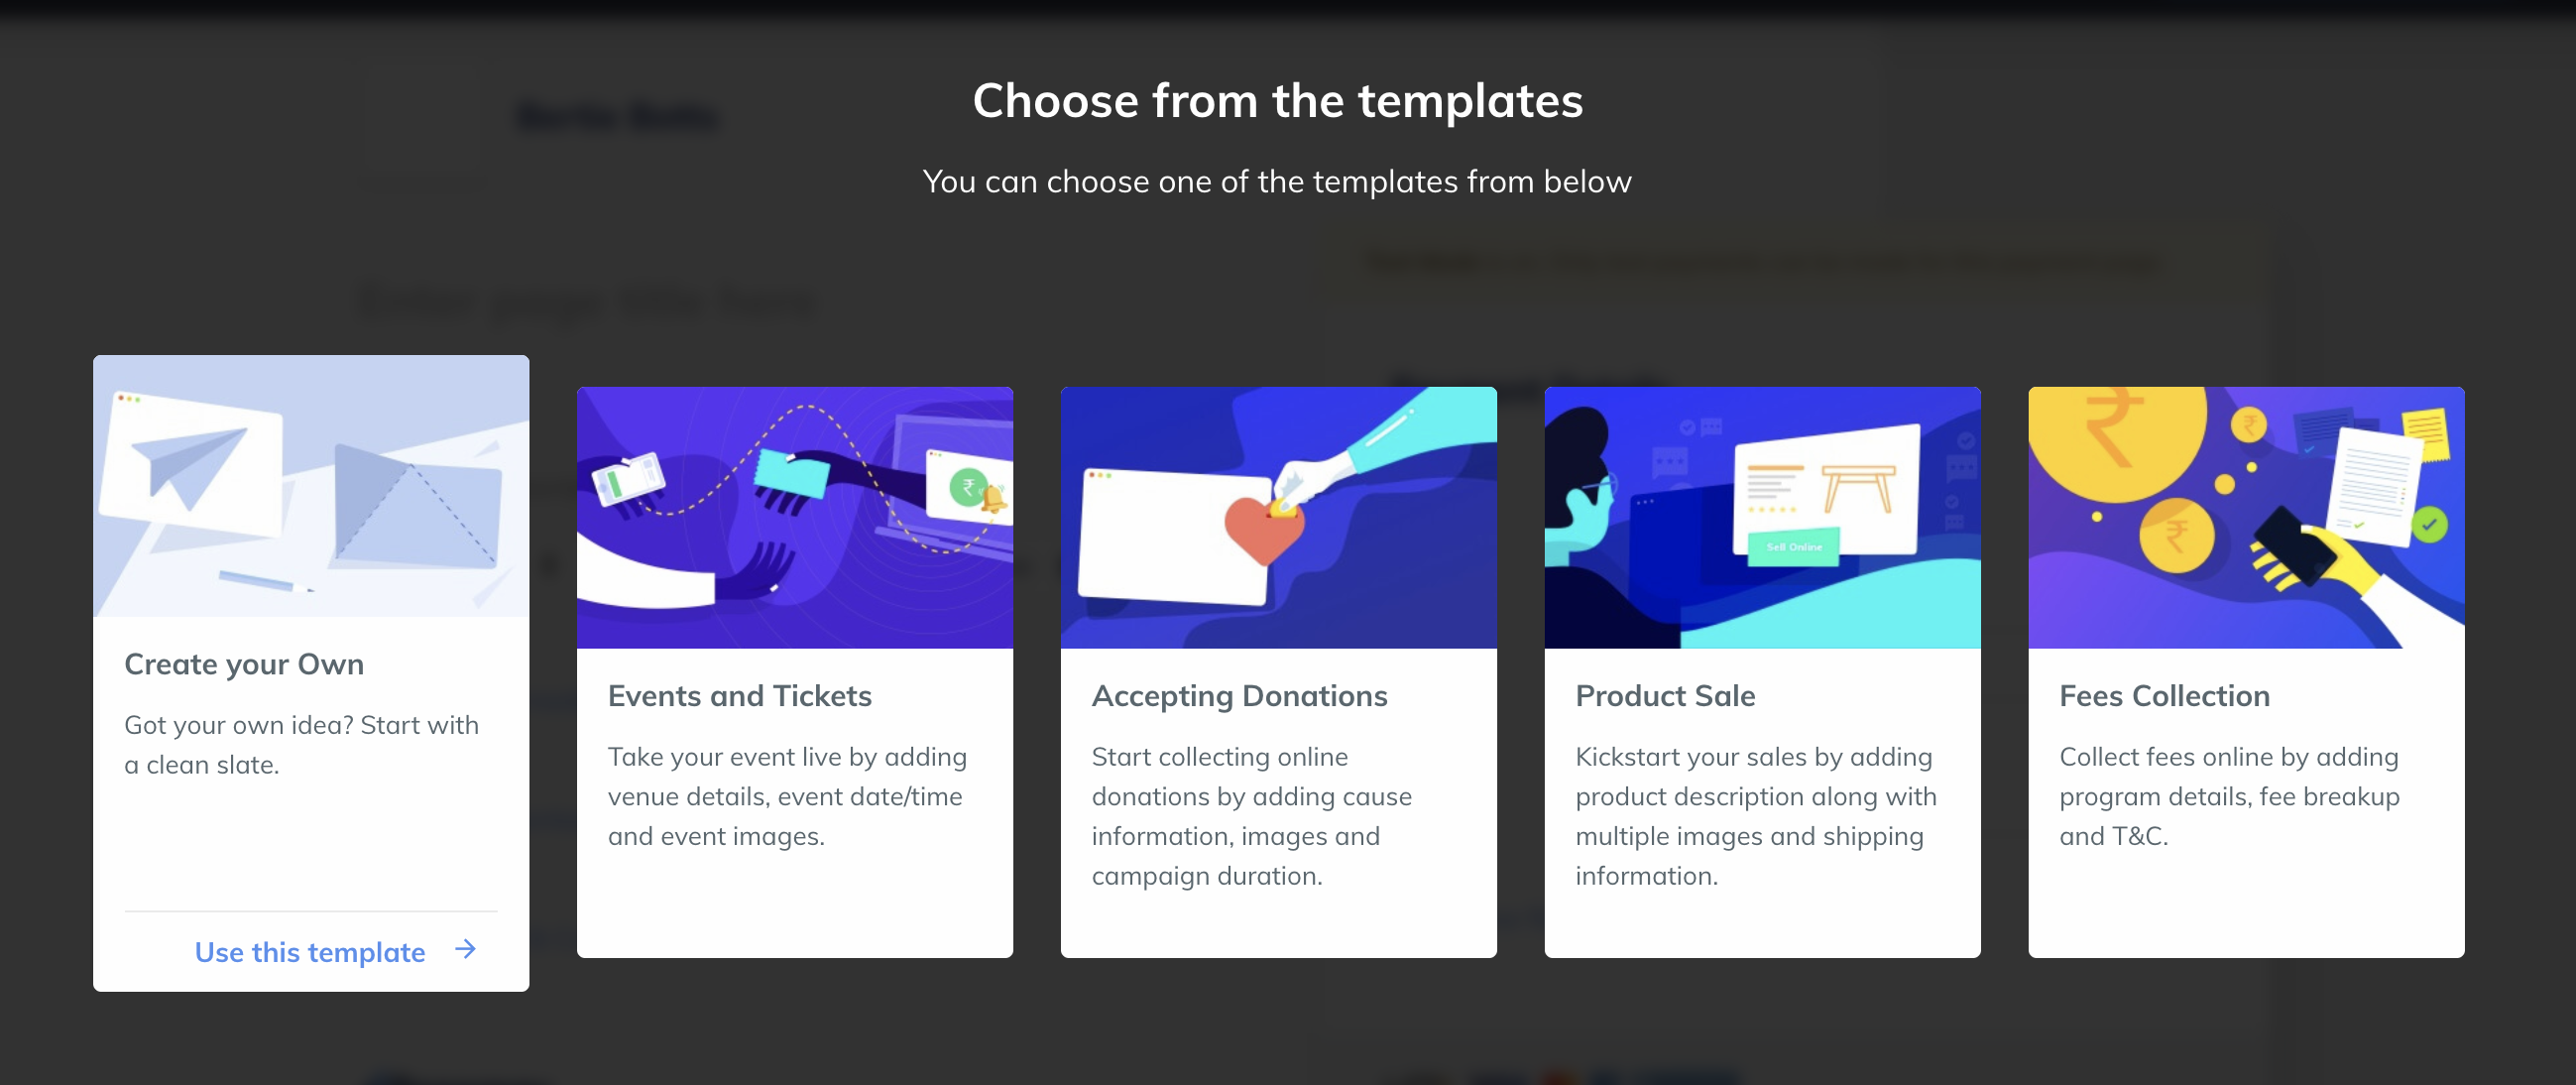
Select a template from the list or click Create your Own.
-
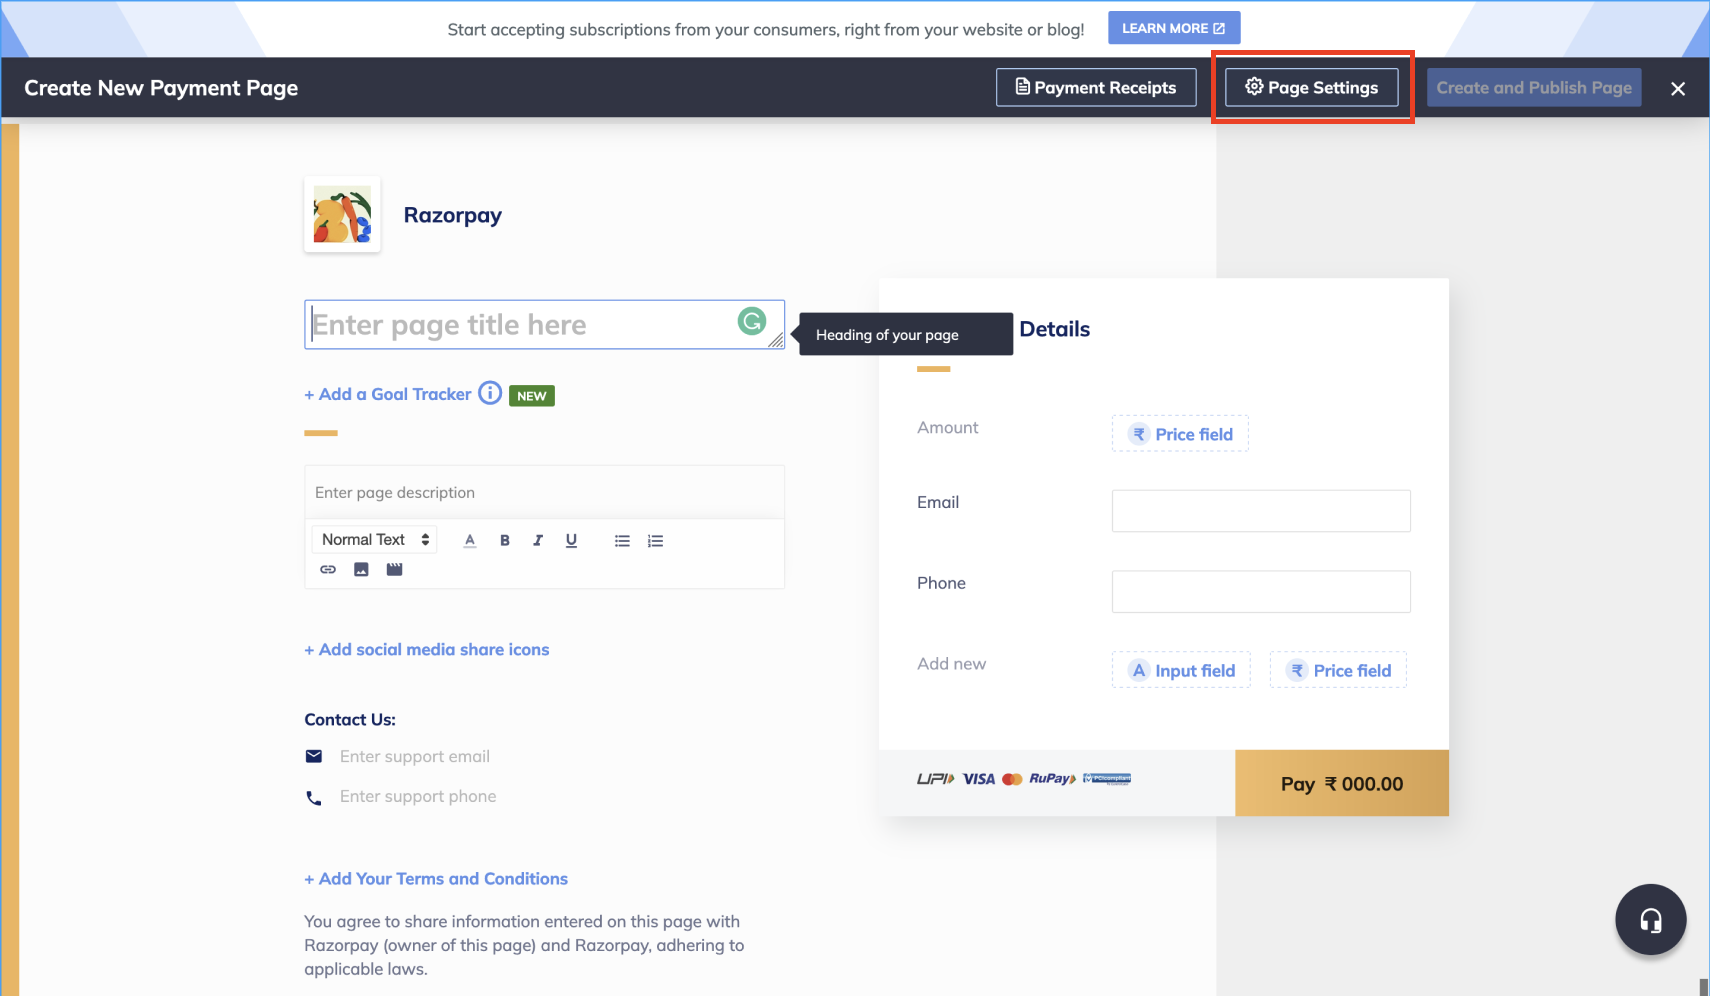
Click Page Settings.
-
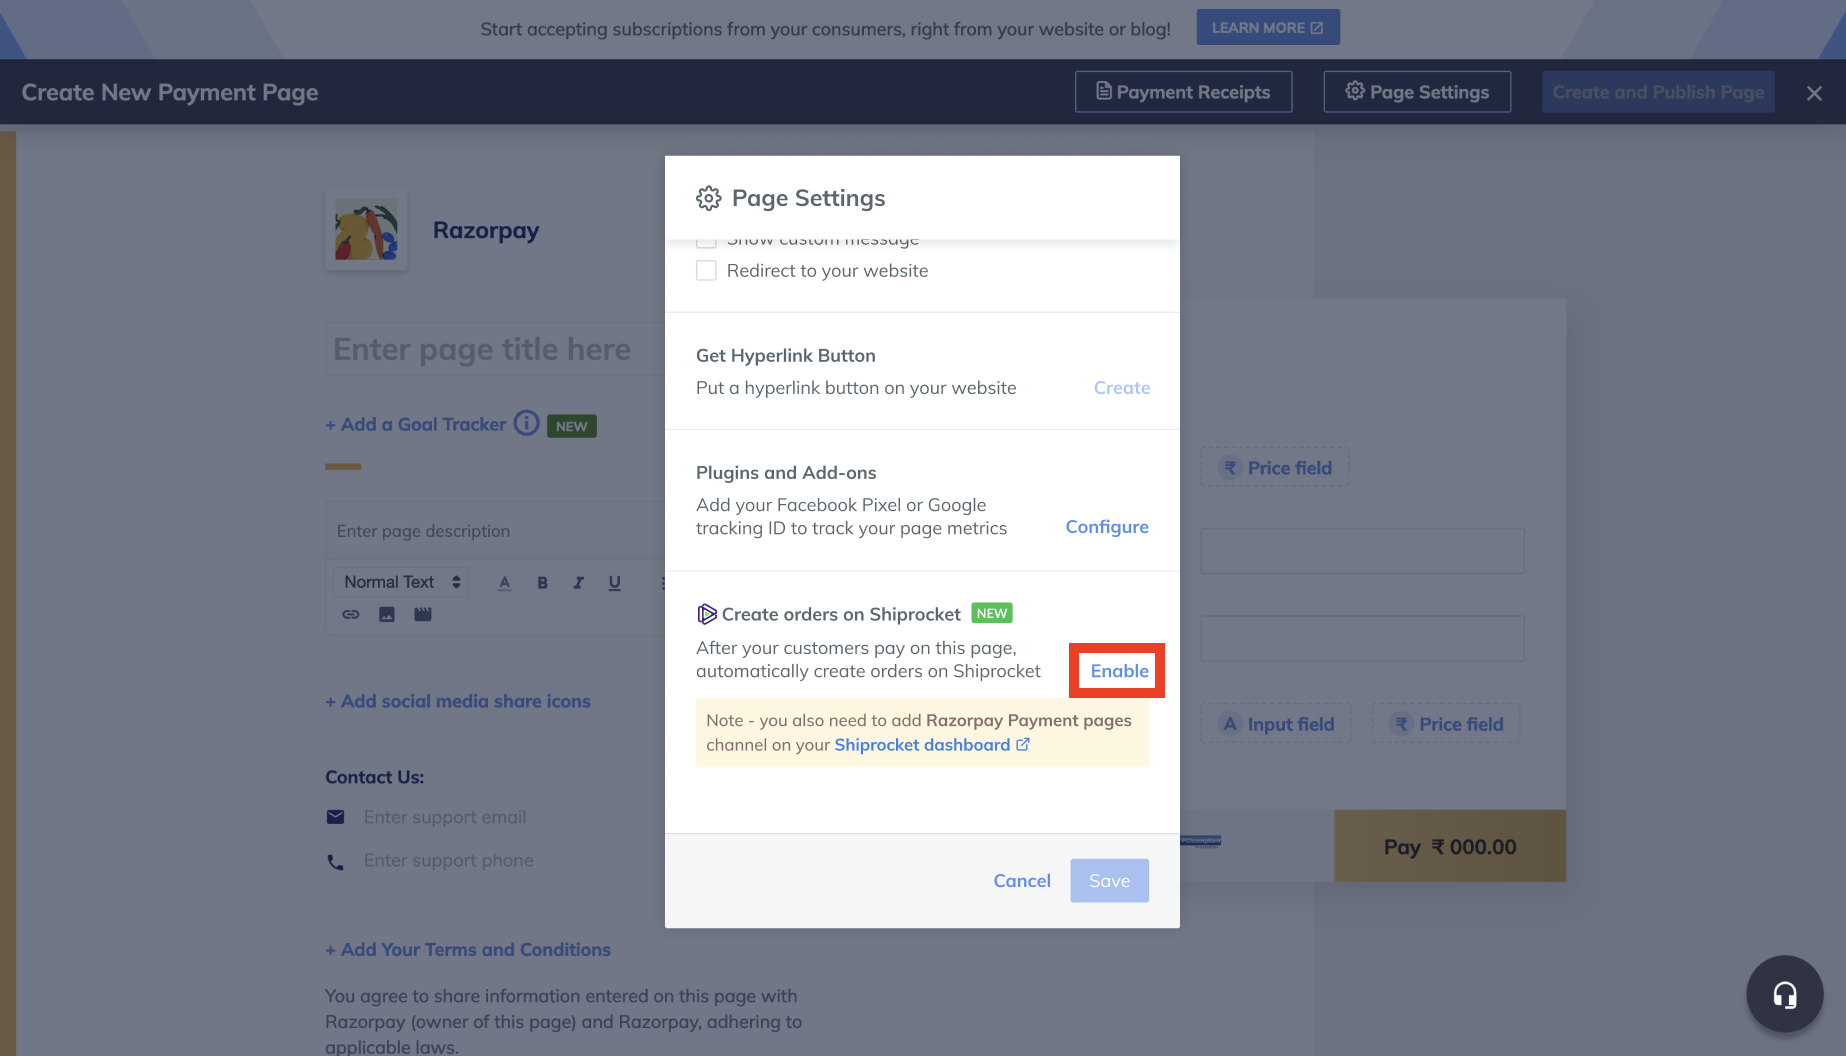
Scroll down to the Create orders on Shiprocket section and click Enable.
-
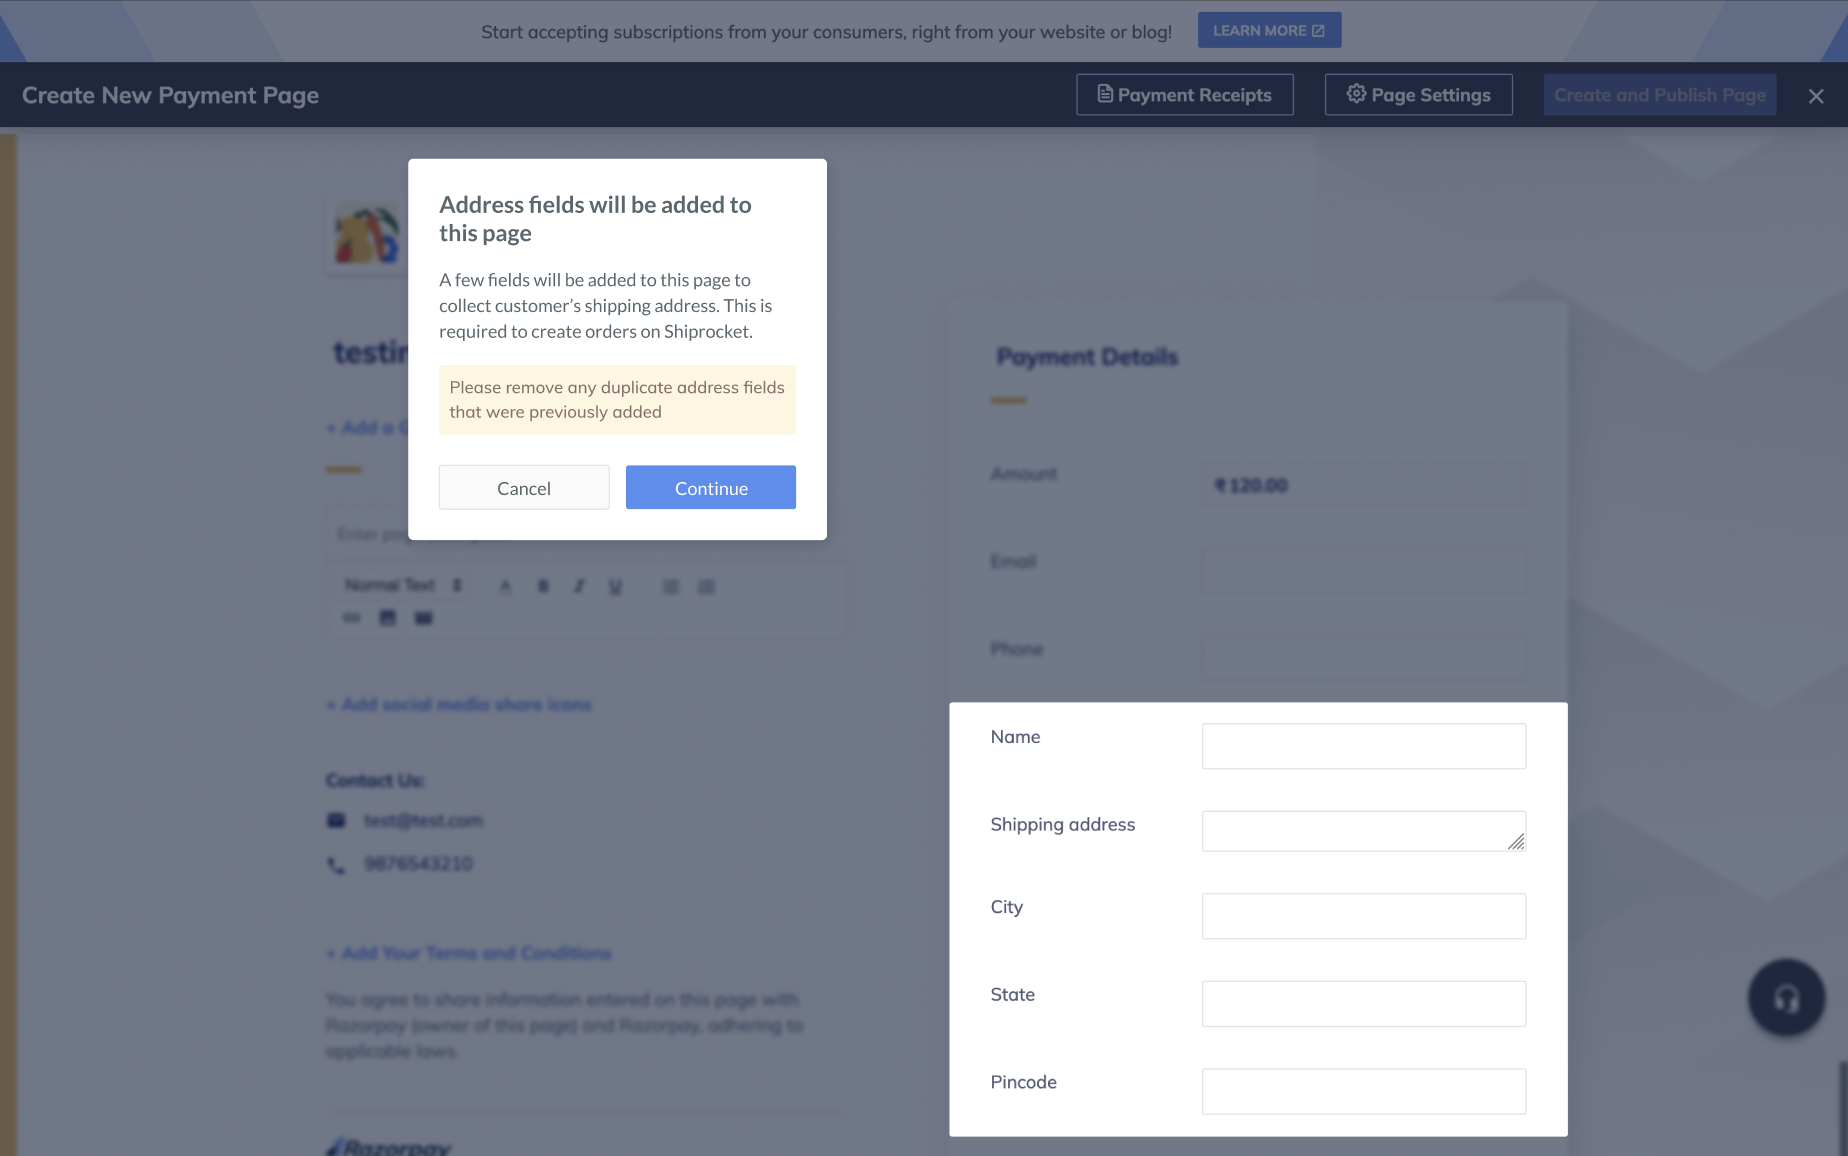
A pop-up will appear informing you that the following fields will be added to your Payment Page. Click Continue.
- Name
- Address
- City
- State
- Pincode
-
Continue with the creation of your Payment Page. Know more about how to Create a Payment Page.
- Log into your Shiprocket Dashboard. If you do not have a Shiprocket account, you will be asked to create one.
- On your Shiprocket Dashboard:
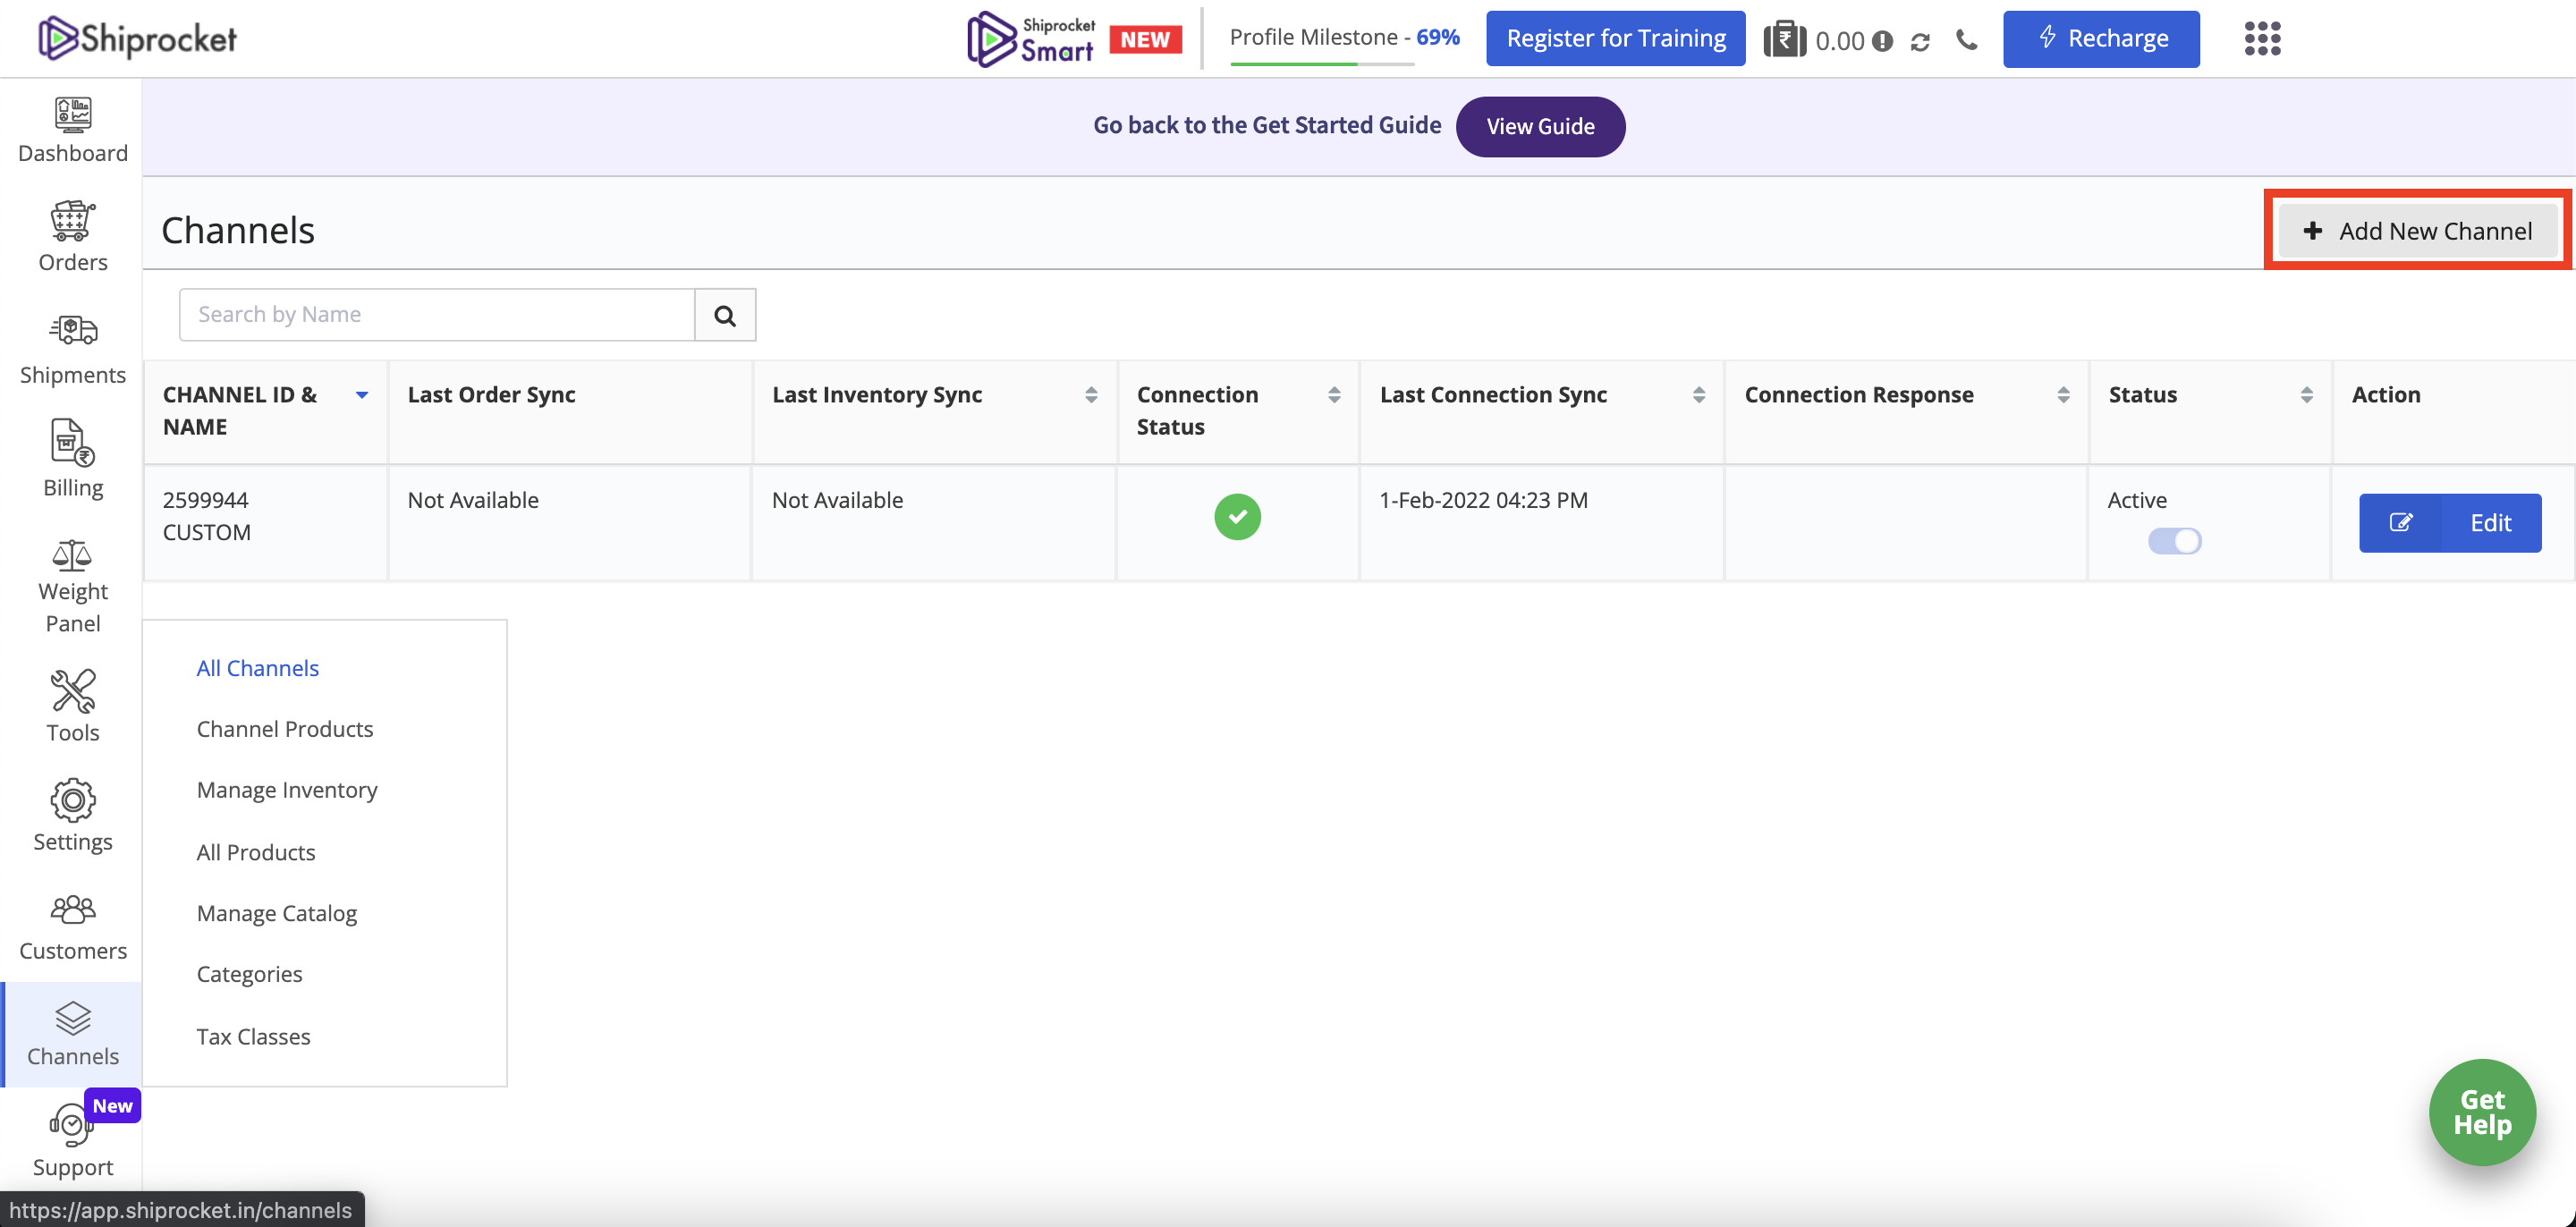
-
Navigate to All Channels and click + Add New Channel.
-
Navigate to Razorpay Payment Pages and click Integrate.
-
Click Connect with Razorpay. You will be redirected to the Razorpay login page.
- Log in to your Razorpay Account.
- On the Authorize Shiprocket page, click Authorize to verify your account integration with Shiprocket.
After this, you will be redirected to the Shiprocket channel page. Here you can edit your Razorpay channel as per your preferences.