Check how RazorpayX Vendor Payment app works. Manage user roles and check how to mark an invoice as paid.
When you purchase goods or avail services from a vendor, it is usually on credit. The vendor sends you an invoice and expects payments as per the agreed payment terms. You make the payment after deducting TDS, if any.
You can use the RazorpayX Vendor Payments to automate the process of making payments to your vendors in three simple steps:
Upload an invoice on the RazorpayX Dashboard.
Add vendor details.
Make the payment as per your business requirements.
Watch Out!
This feature is not available in the Test mode and only available in the Live mode.
Watch the below video to understand how vendor payments work.
Your vendors send you an invoice that you have to pay.
Upload the invoice on the RazorpayX Dashboard. The invoice details are auto-read and uploaded using the OCR technology.
Select an existing vendor or create a new vendor. The vendor is the person or entity to which the invoice payment is to be made.
Select a Fund account for the vendor or create a new Fund account. These are the account details (bank account or UPI ID) to which the amount is transferred.
Review the Invoice Details such as due date, TDS category and Amount to Vendor.
You can either:
Save the invoice and pay it at a later time. You will be sent reminders as you get closer to the due date.
Make the payment immediately.
Once you make the payment, it follows the Approval Workflow set on your RazorpayX account.
While creating an invoice, you can select from the existing TDS categories on RazorpayX. The calculations are made based on the chosen category’s percentage. However, for some cases, the TDS might differ, so you can edit the amount manually:
To deduct flat 20% TDS when the PAN of the vendor is unknown.
To deduct TDS at a lower rate based on a certificate from the government for a particular vendor.
To deduct TDS on a cumulative basis when the contractor’s yearly income goes over a certain threshold.
GST breakup is one of the vital pieces of information on the invoice. It is necessary to keep a record of this. RazorpayX enables you to select the type of breakup and edit the amount accordingly. It also records the GST split in the report for accurate bookkeeping.
Given below are 2 ways to apply GST:
Intrastate purchase
Levies CGST and SGST
Interstate purchase
Levies IGST
For example, the invoice amount is ₹100 and the subtotal is ₹80.
You might have uploaded an invoice on Vendor Payment , but made the payment offline. In such scenarios, you can mark the invoice as paid via the RazorpayX Dashboard. The invoice is moved to the Paid state without creating a corresponding payout.
When marking an invoice as paid, you have the option to select the external method you chose to pay the invoice (such as bank transfer, cheque or cash). This makes Vendor Payments an end-to-end solution to track all your vendor payments, irrespective of how you choose to make the payment.
Invoices marked as *paid are considered for TDS payments. This allows you to calculate and pay the TDS using Tax Payments.
Here is a short video on how to mark an invoice Paid.
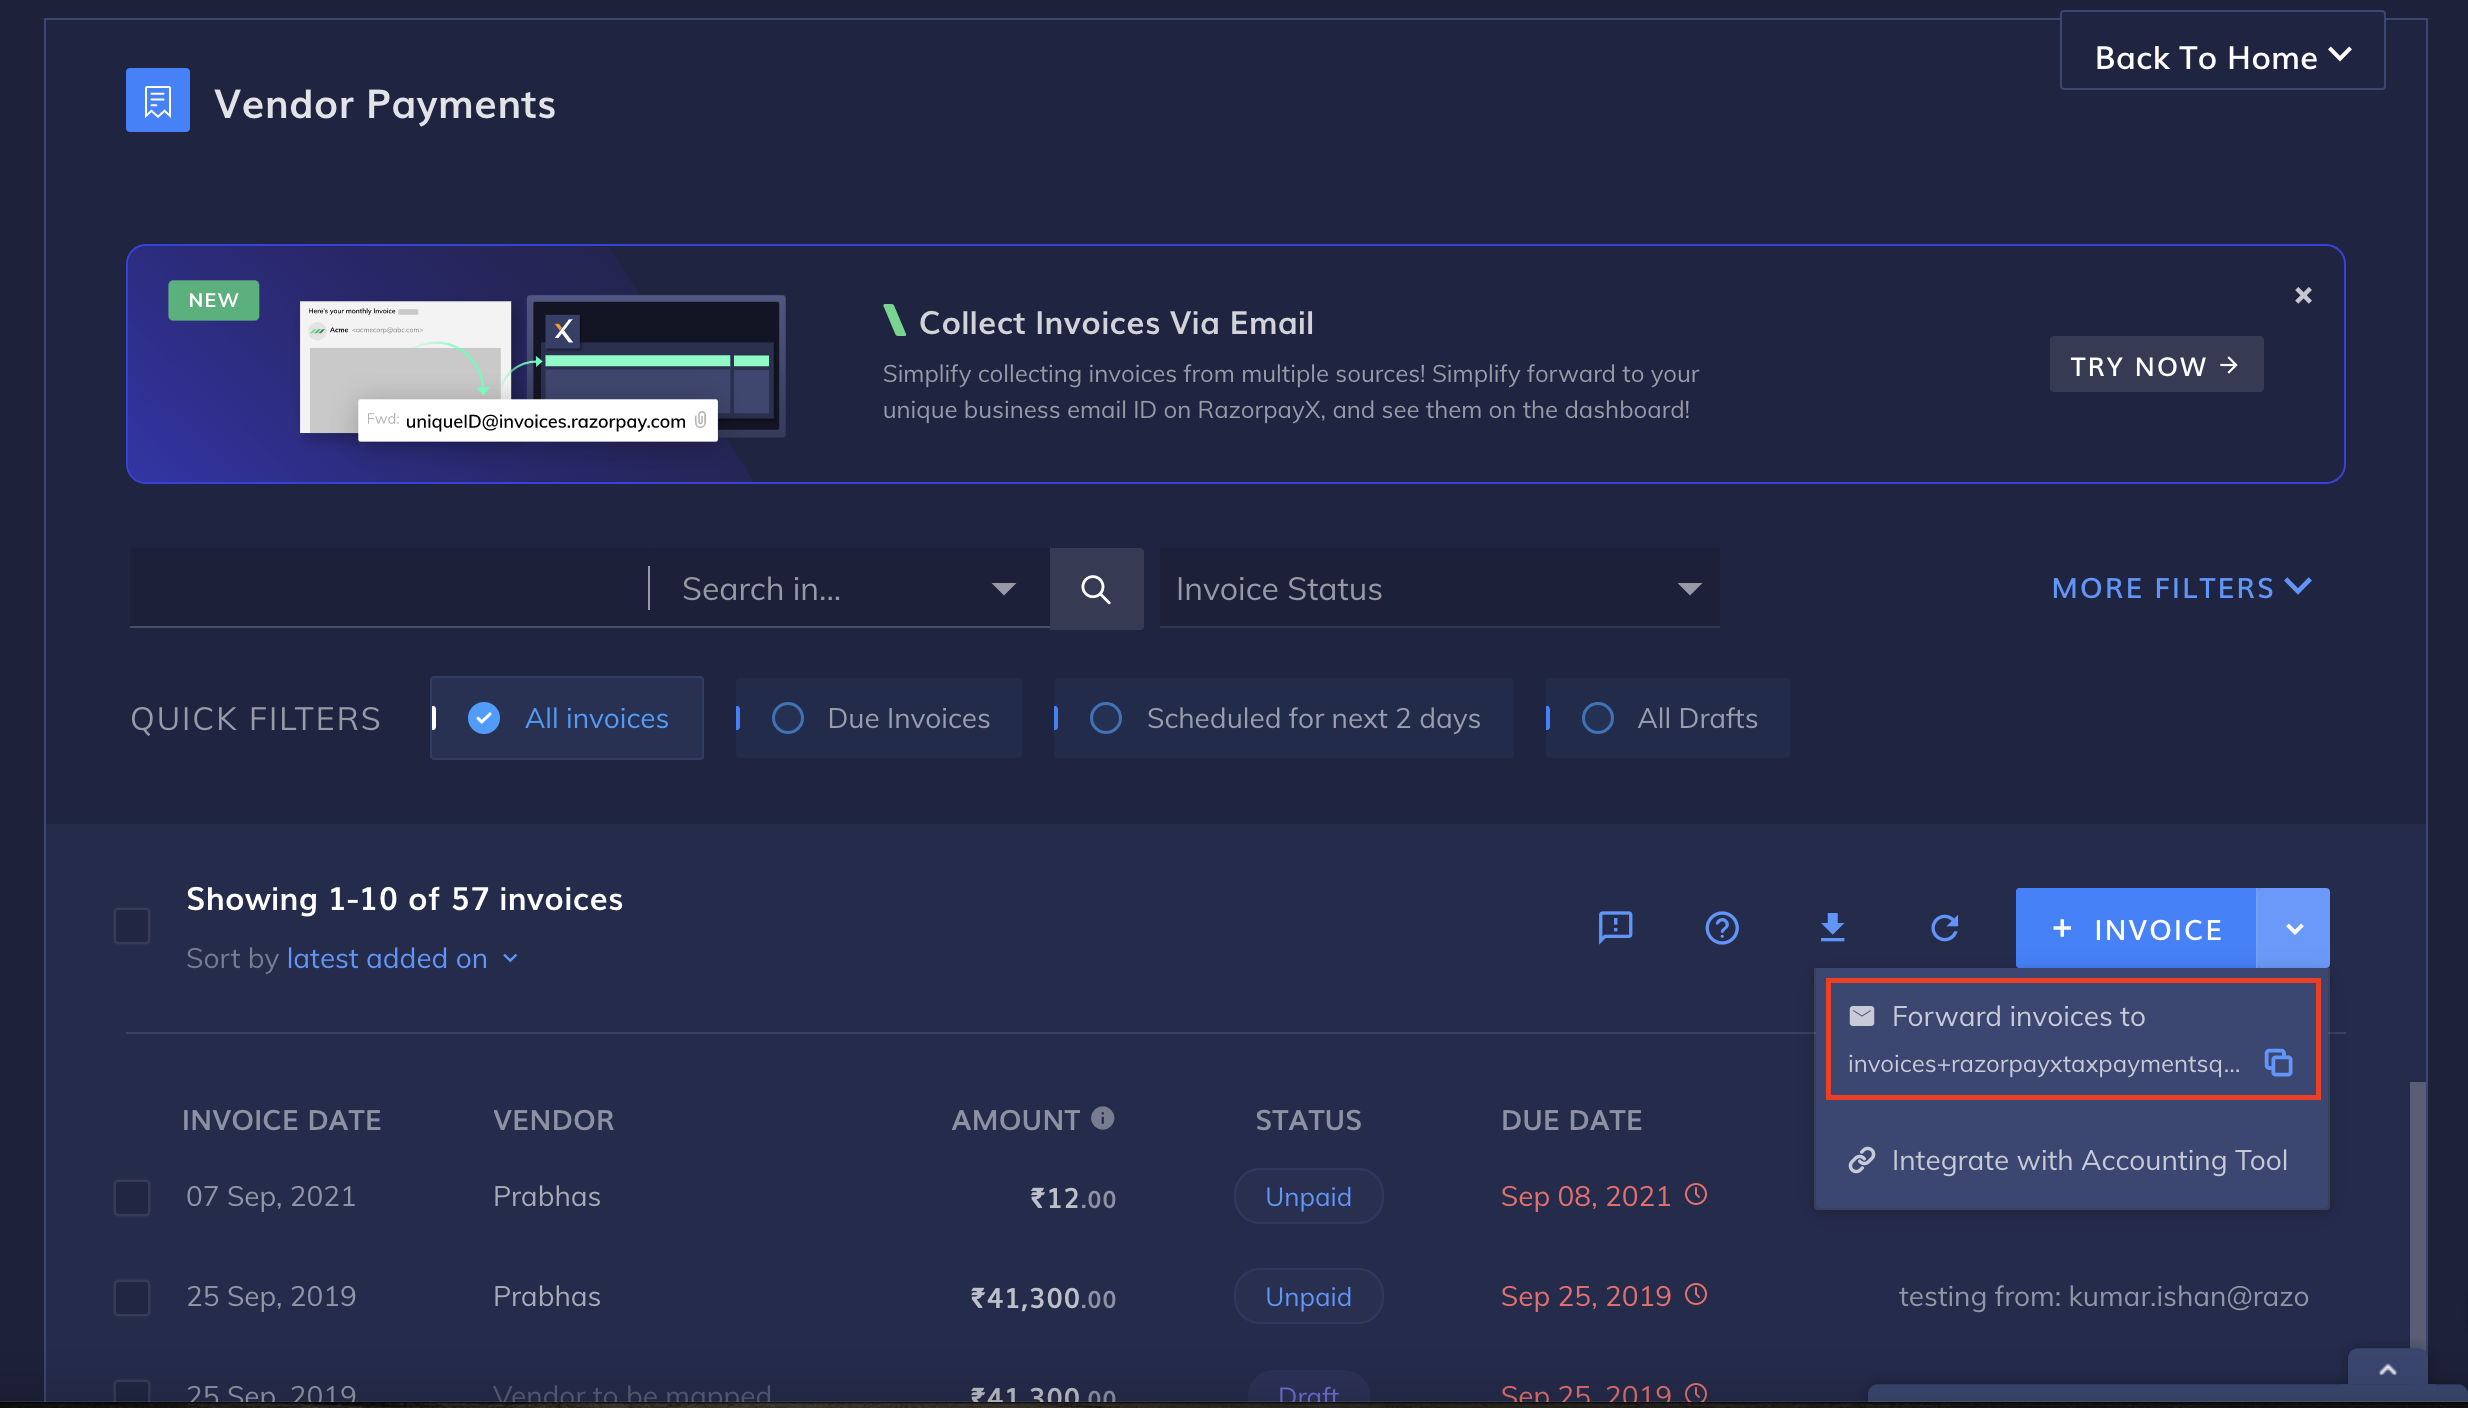
Apart from uploading invoices, or creating them manually, you can also create invoices using email. Invoices are automatically generated in RazorpayX when you forward an email containing an invoice to a dedicated email address provided to you by Razorpay.
Here is how it works:
Razorpay creates a unique email address for you to collect and create invoices.
You can give this email address to your vendors for them to forward invoices.
You can forward invoices received through other email addresses also to this email address.
Razorpay will read data in the email and automatically generate invoice. The invoice is displayed on the Vendor Payments dashboard in the draft state.
You can add relevant details to the draft invoice and create payout or save it as an unpaid invoice.
You can accept or reject or schedule payouts for these invoices via the Vendor Payments dashboard.
Your unique business email address is visible on the Vendor Payments dashboard. You can copy this email address and use it to forward invoices received through other email addresses as shown below:
You can assign assign users roles to limit their access to the RazorpayX Dashboard as per your business requirements. Know more about Vendor Payments - Standard User Roles.