Create a Subscription Button🔗
-
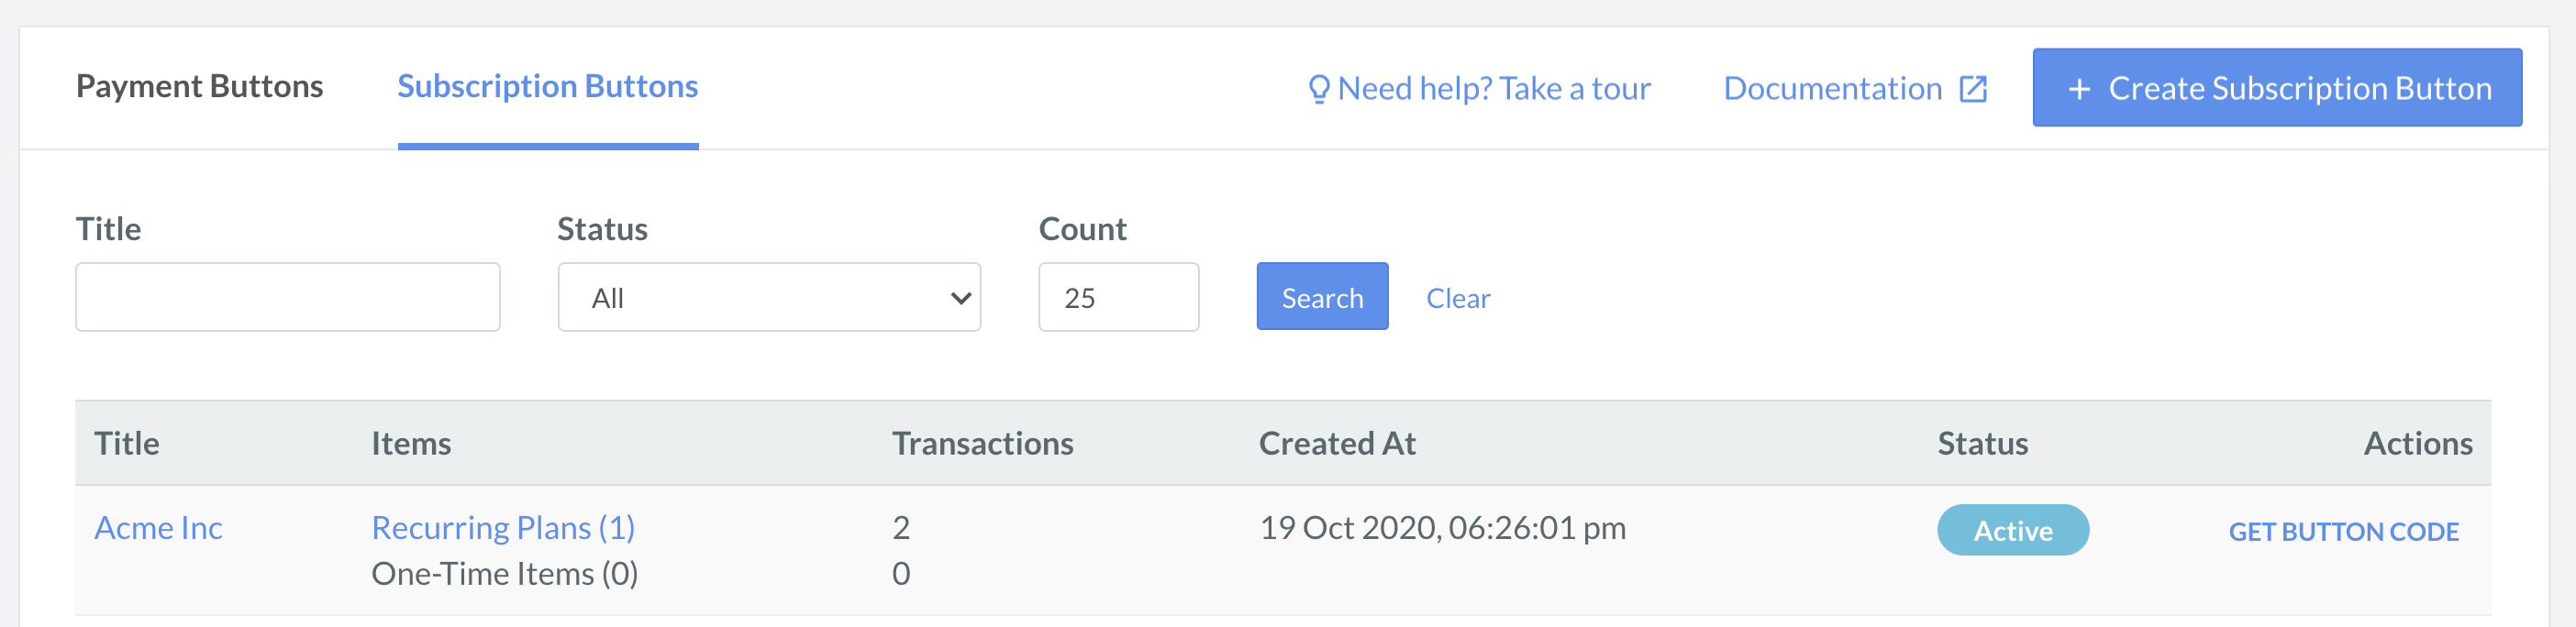
Log into the Razorpay Dashboard and navigate to Payment Button.
-
Click Subscription Buttons tab, and then click + Create Subscription Button.
-
Follow these steps to create the button:
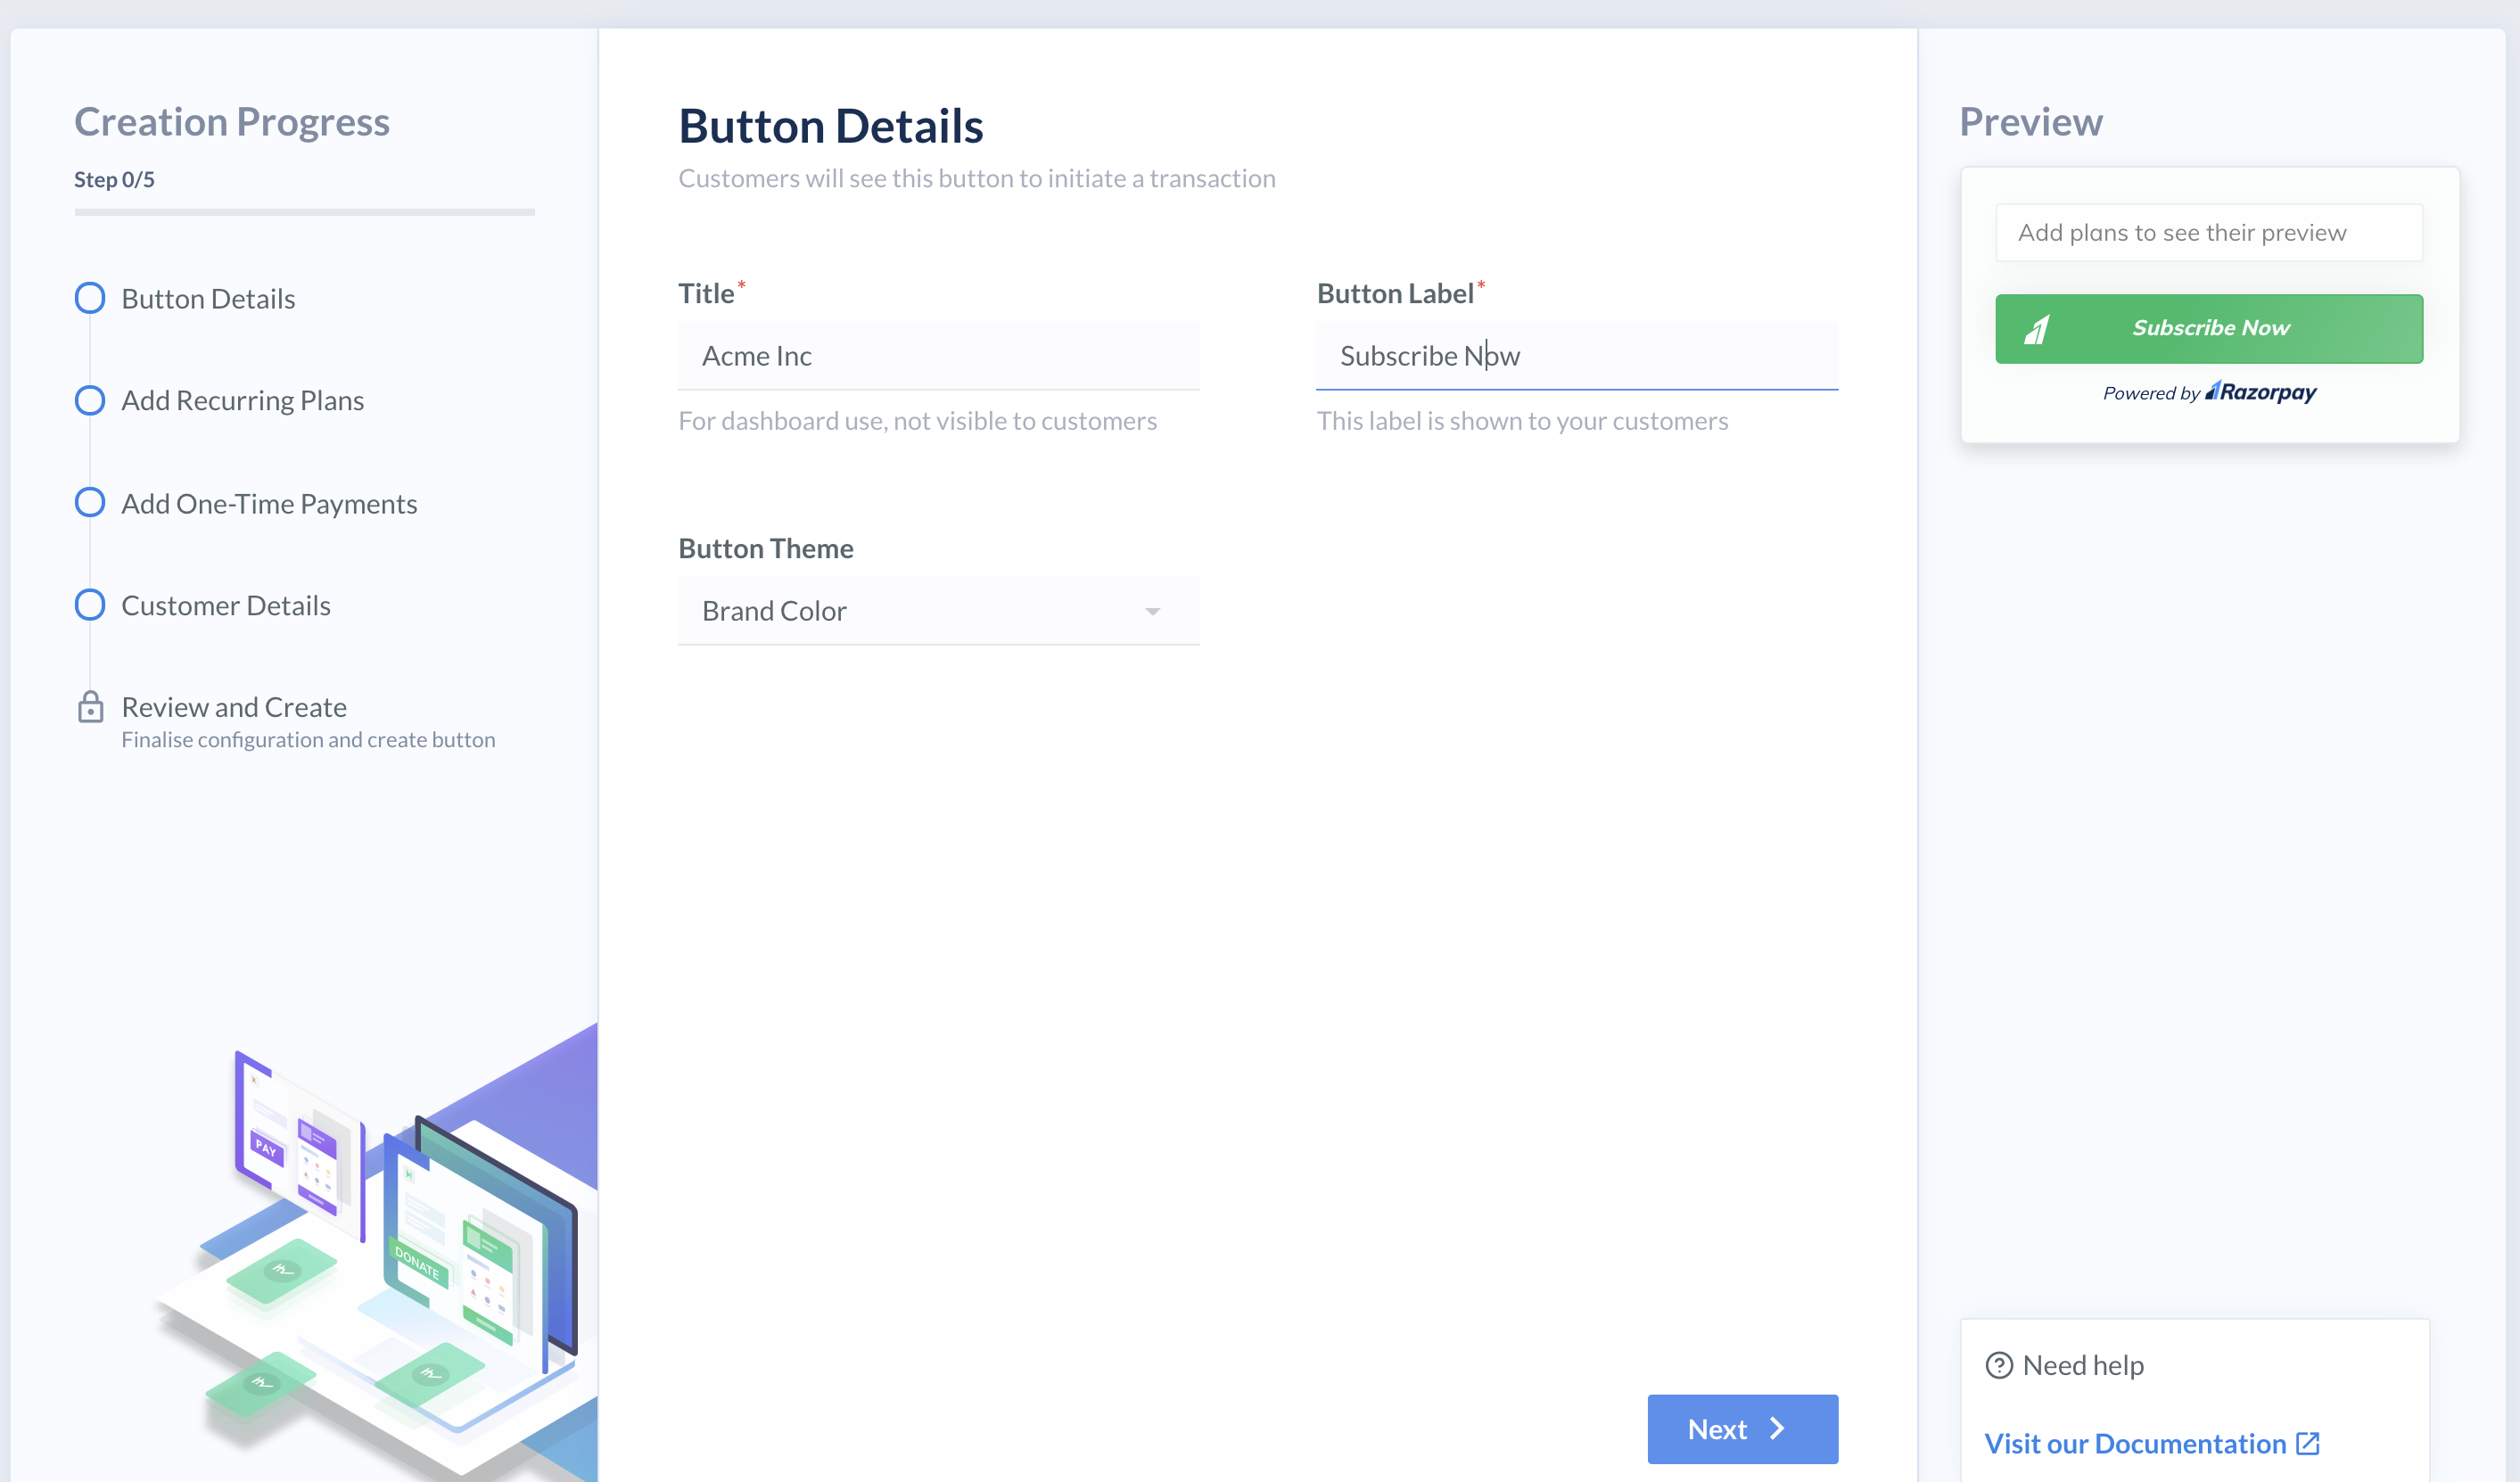
Step 1: Button Details🔗
In Button Details, enter the relevant information:
- Title - Provide a name for the button. This name is for your internal reference and will appear on the Dashboard. It will not be visible to your customers. For example, Acme Inc.
- Button Label - Text on button to be displayed to customers. Please enter alphanumeric characters only. The maximum character limit is 20. For example, your button label can be Subscribe Now.
- Button Theme - You can choose between the following themes:
- Razorpay Dark
- Razorpay Light
- Razorpay Outline
- Brand Color (This is the color configured by you on the Dashboard)
- Click Next.
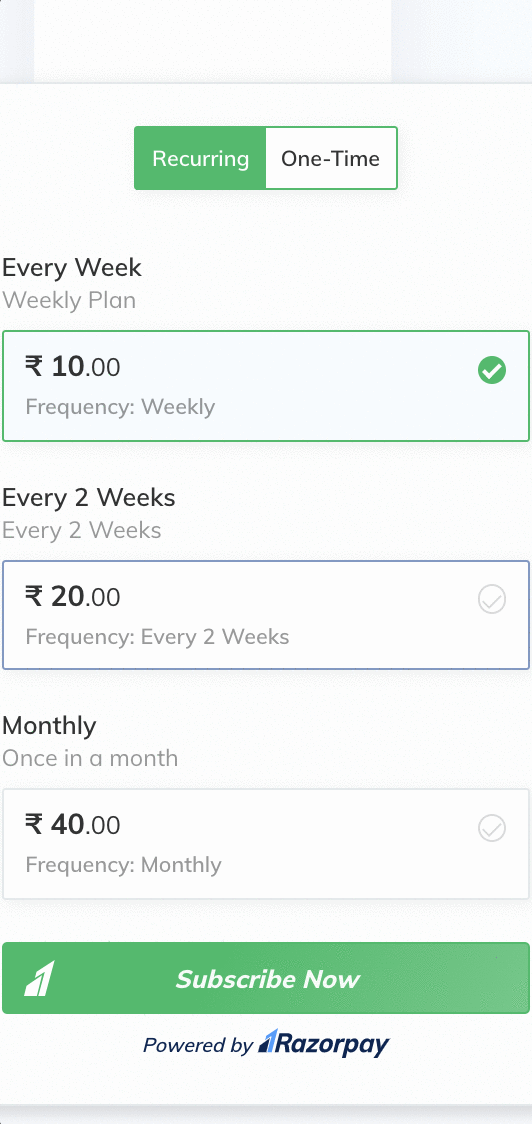
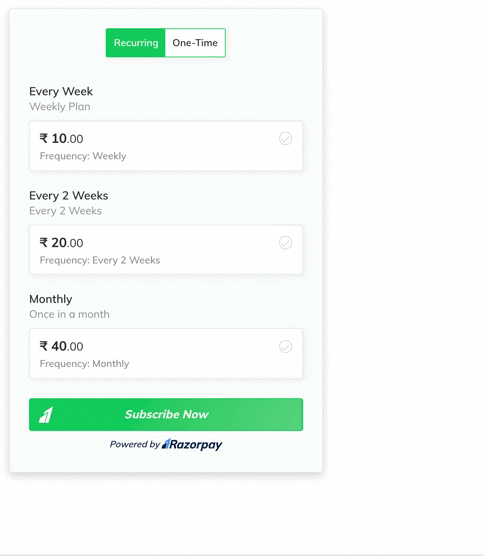
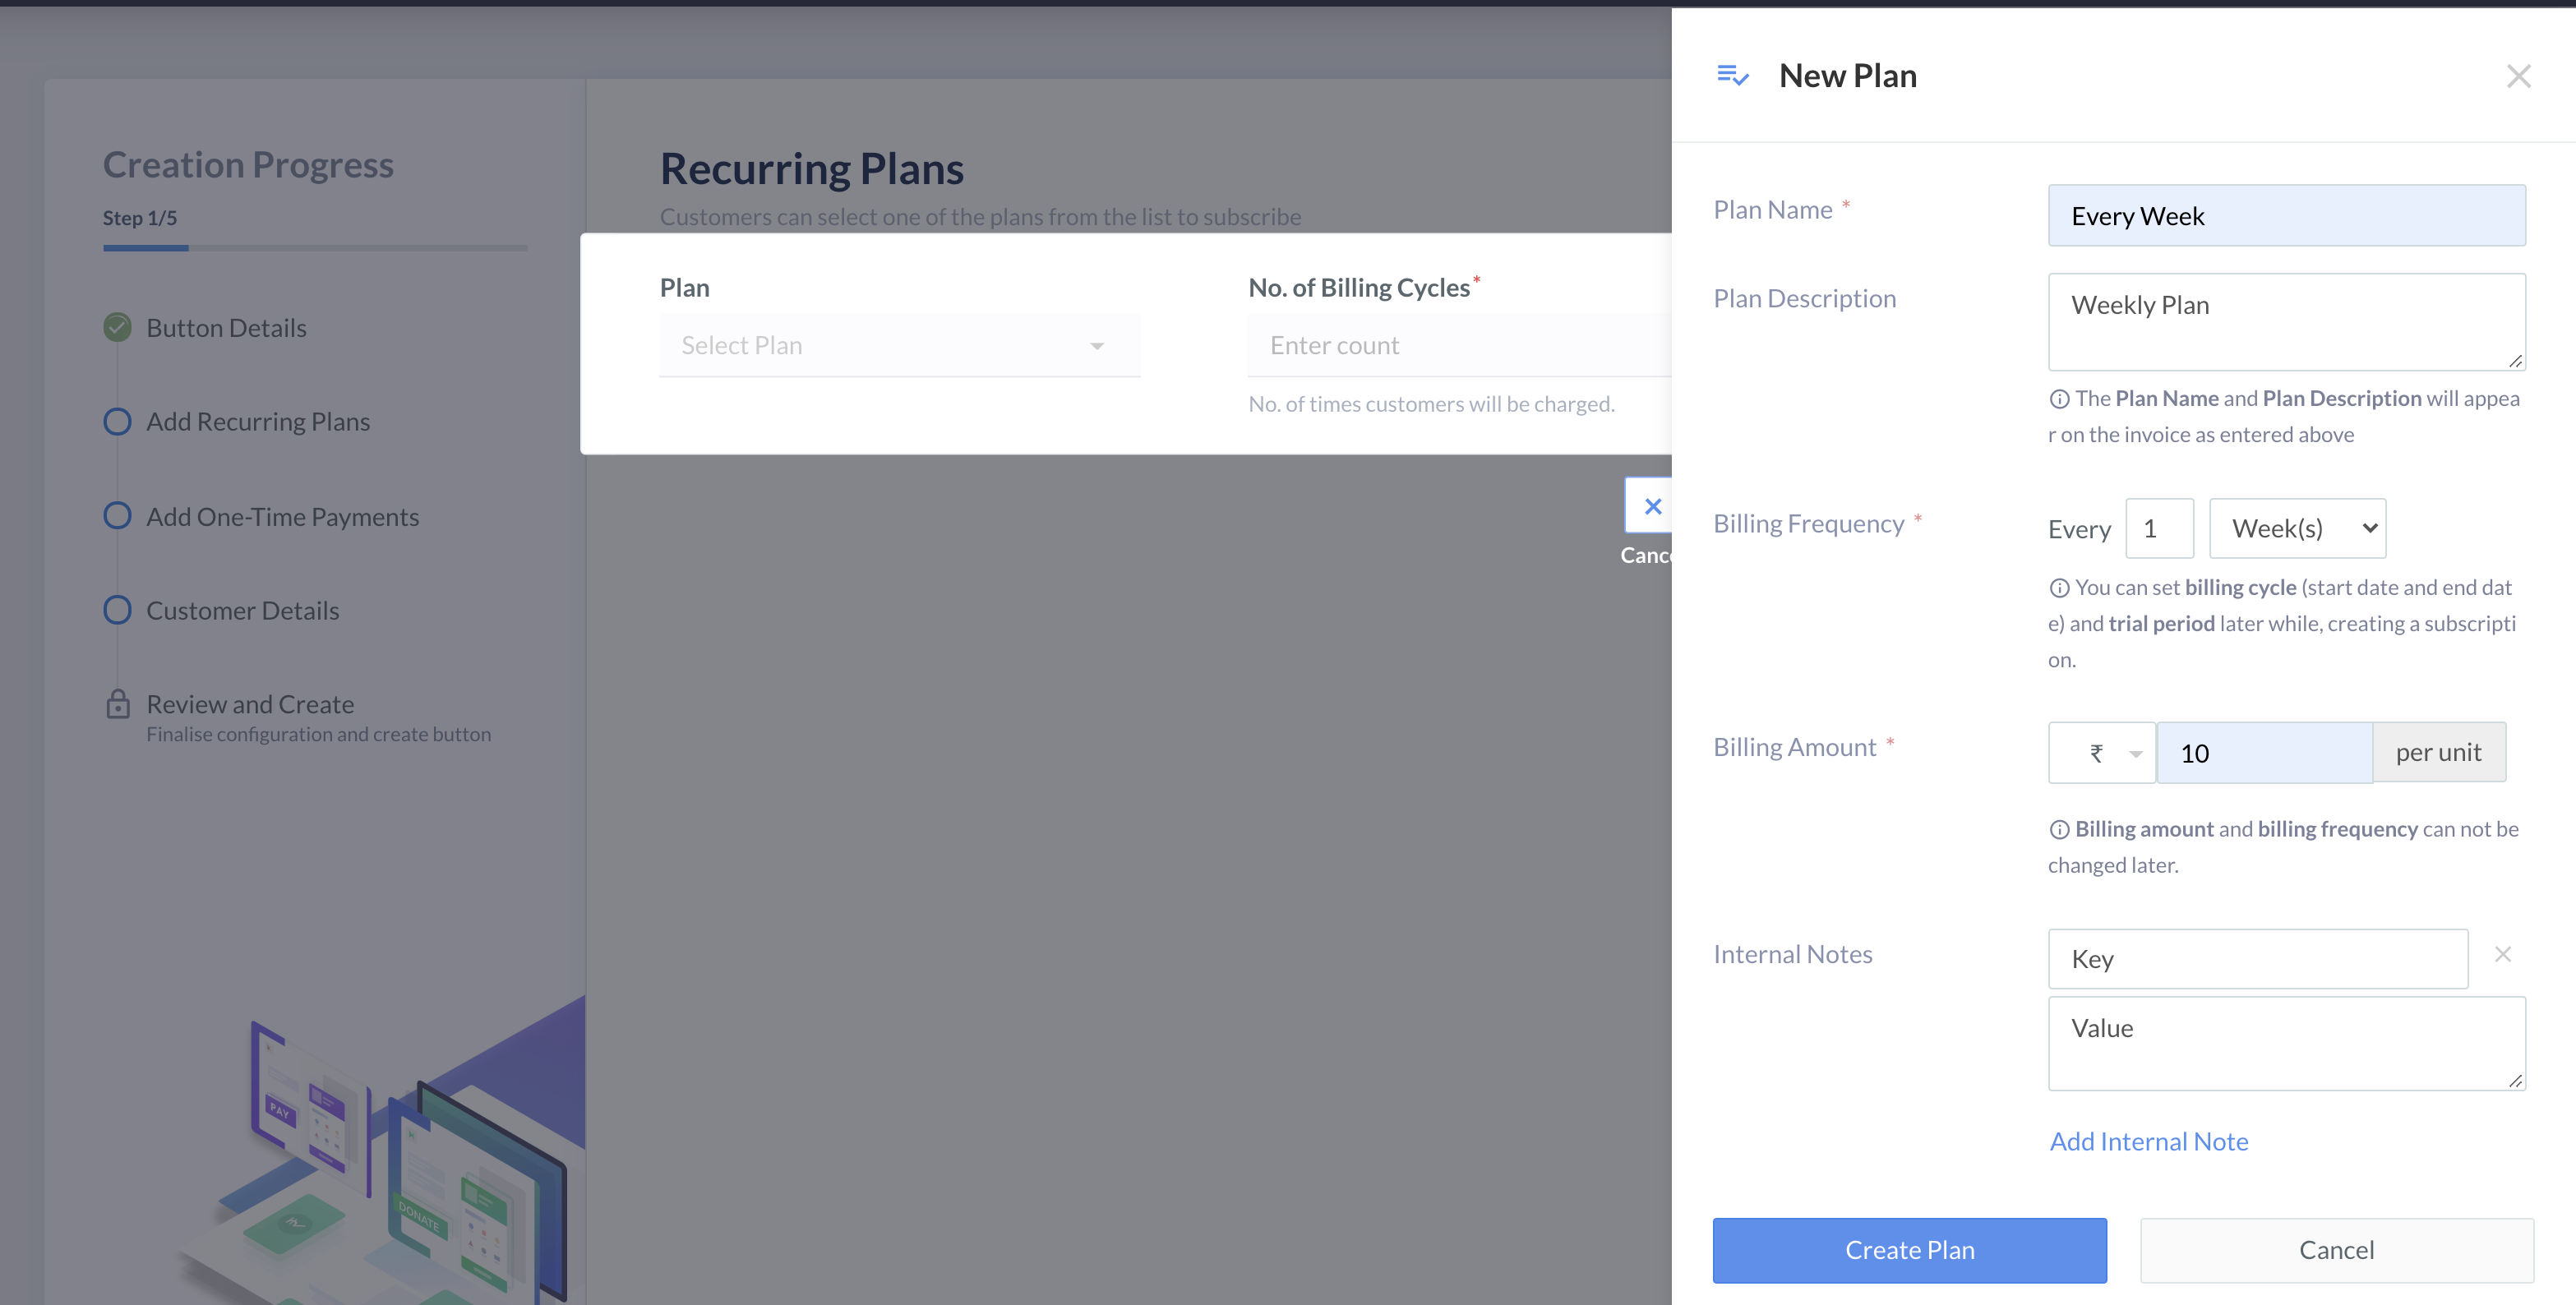
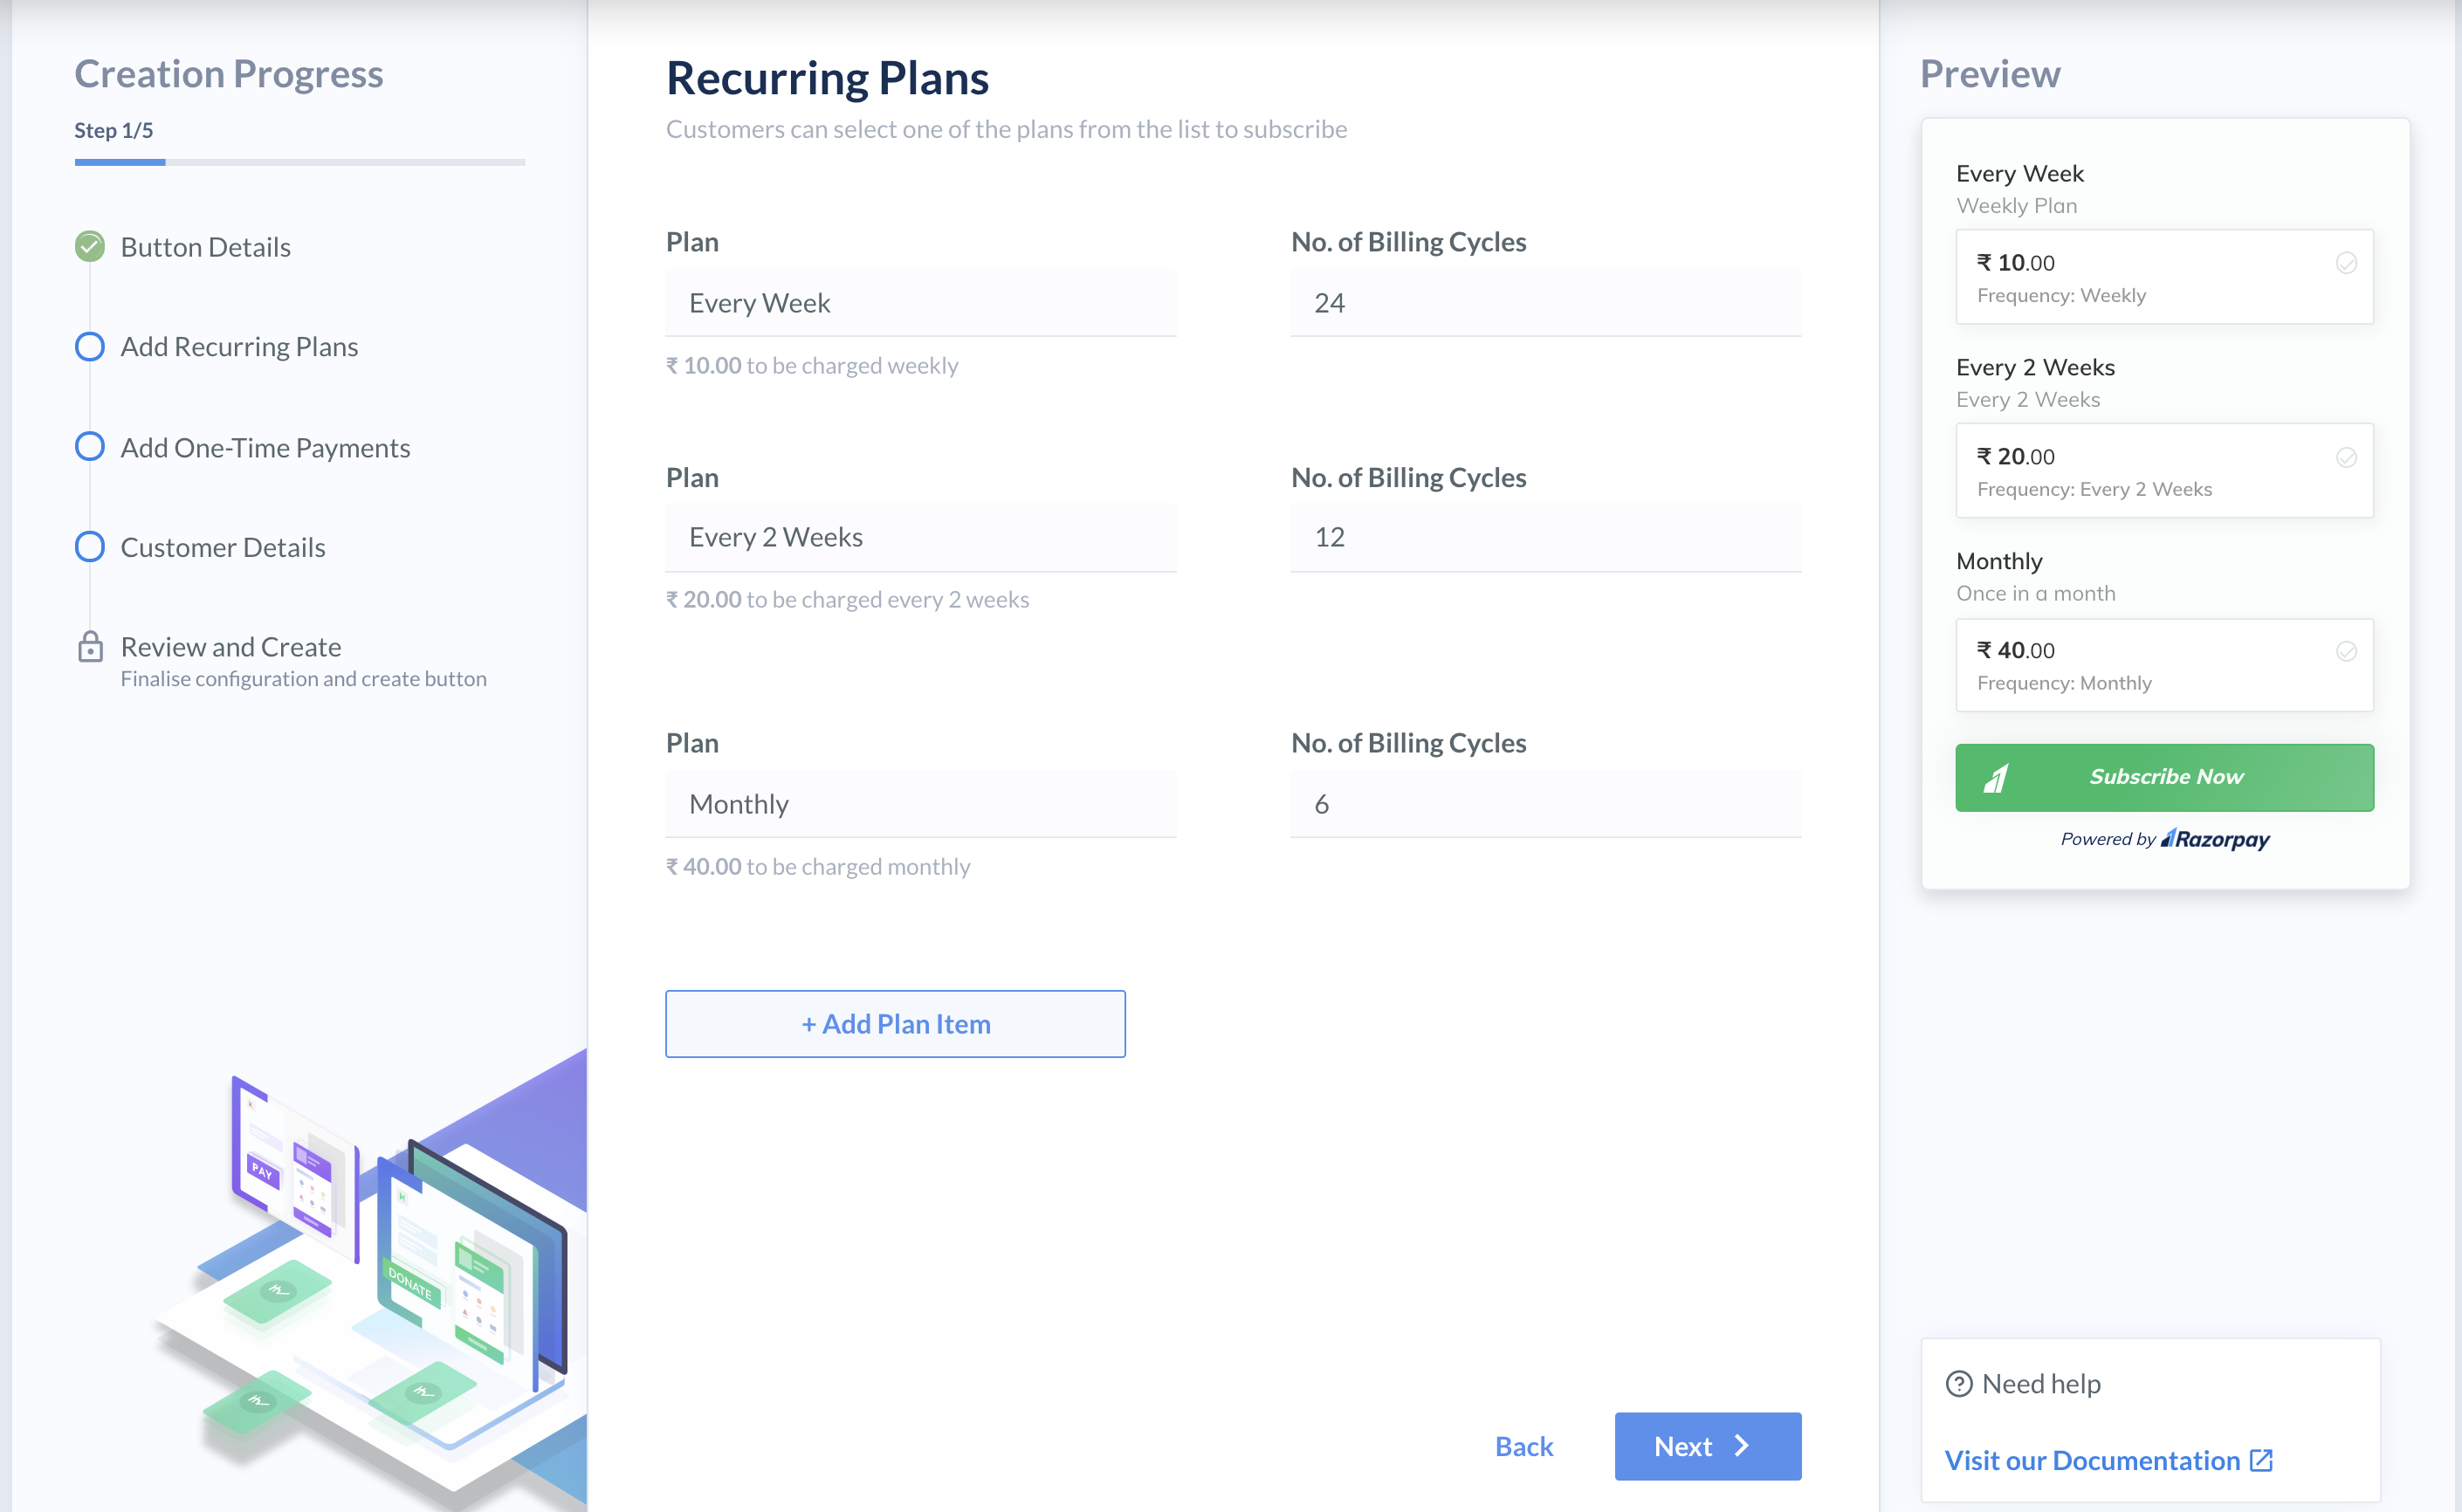
Step 2: Recurring Plans🔗
In the Recurring Plans, add Plans and No. of Billing Cycles.
-
Click + Add Plan Item.
-
To create a new plan, click Add New Plan.
-
Enter the following details:
- Plan Name
- Plan Description
- Billing Frequency: The time interval at which you want to charge your customer. For example, once in a week.
- Billing Amount: The amount you want to charge for every payment.
- Internal Notes.
-
Click Create Plan.
-
Select a Plan from the list, add No. of Billing Cycles and click Save.
Note:
You can add a maximum of 5 Plans.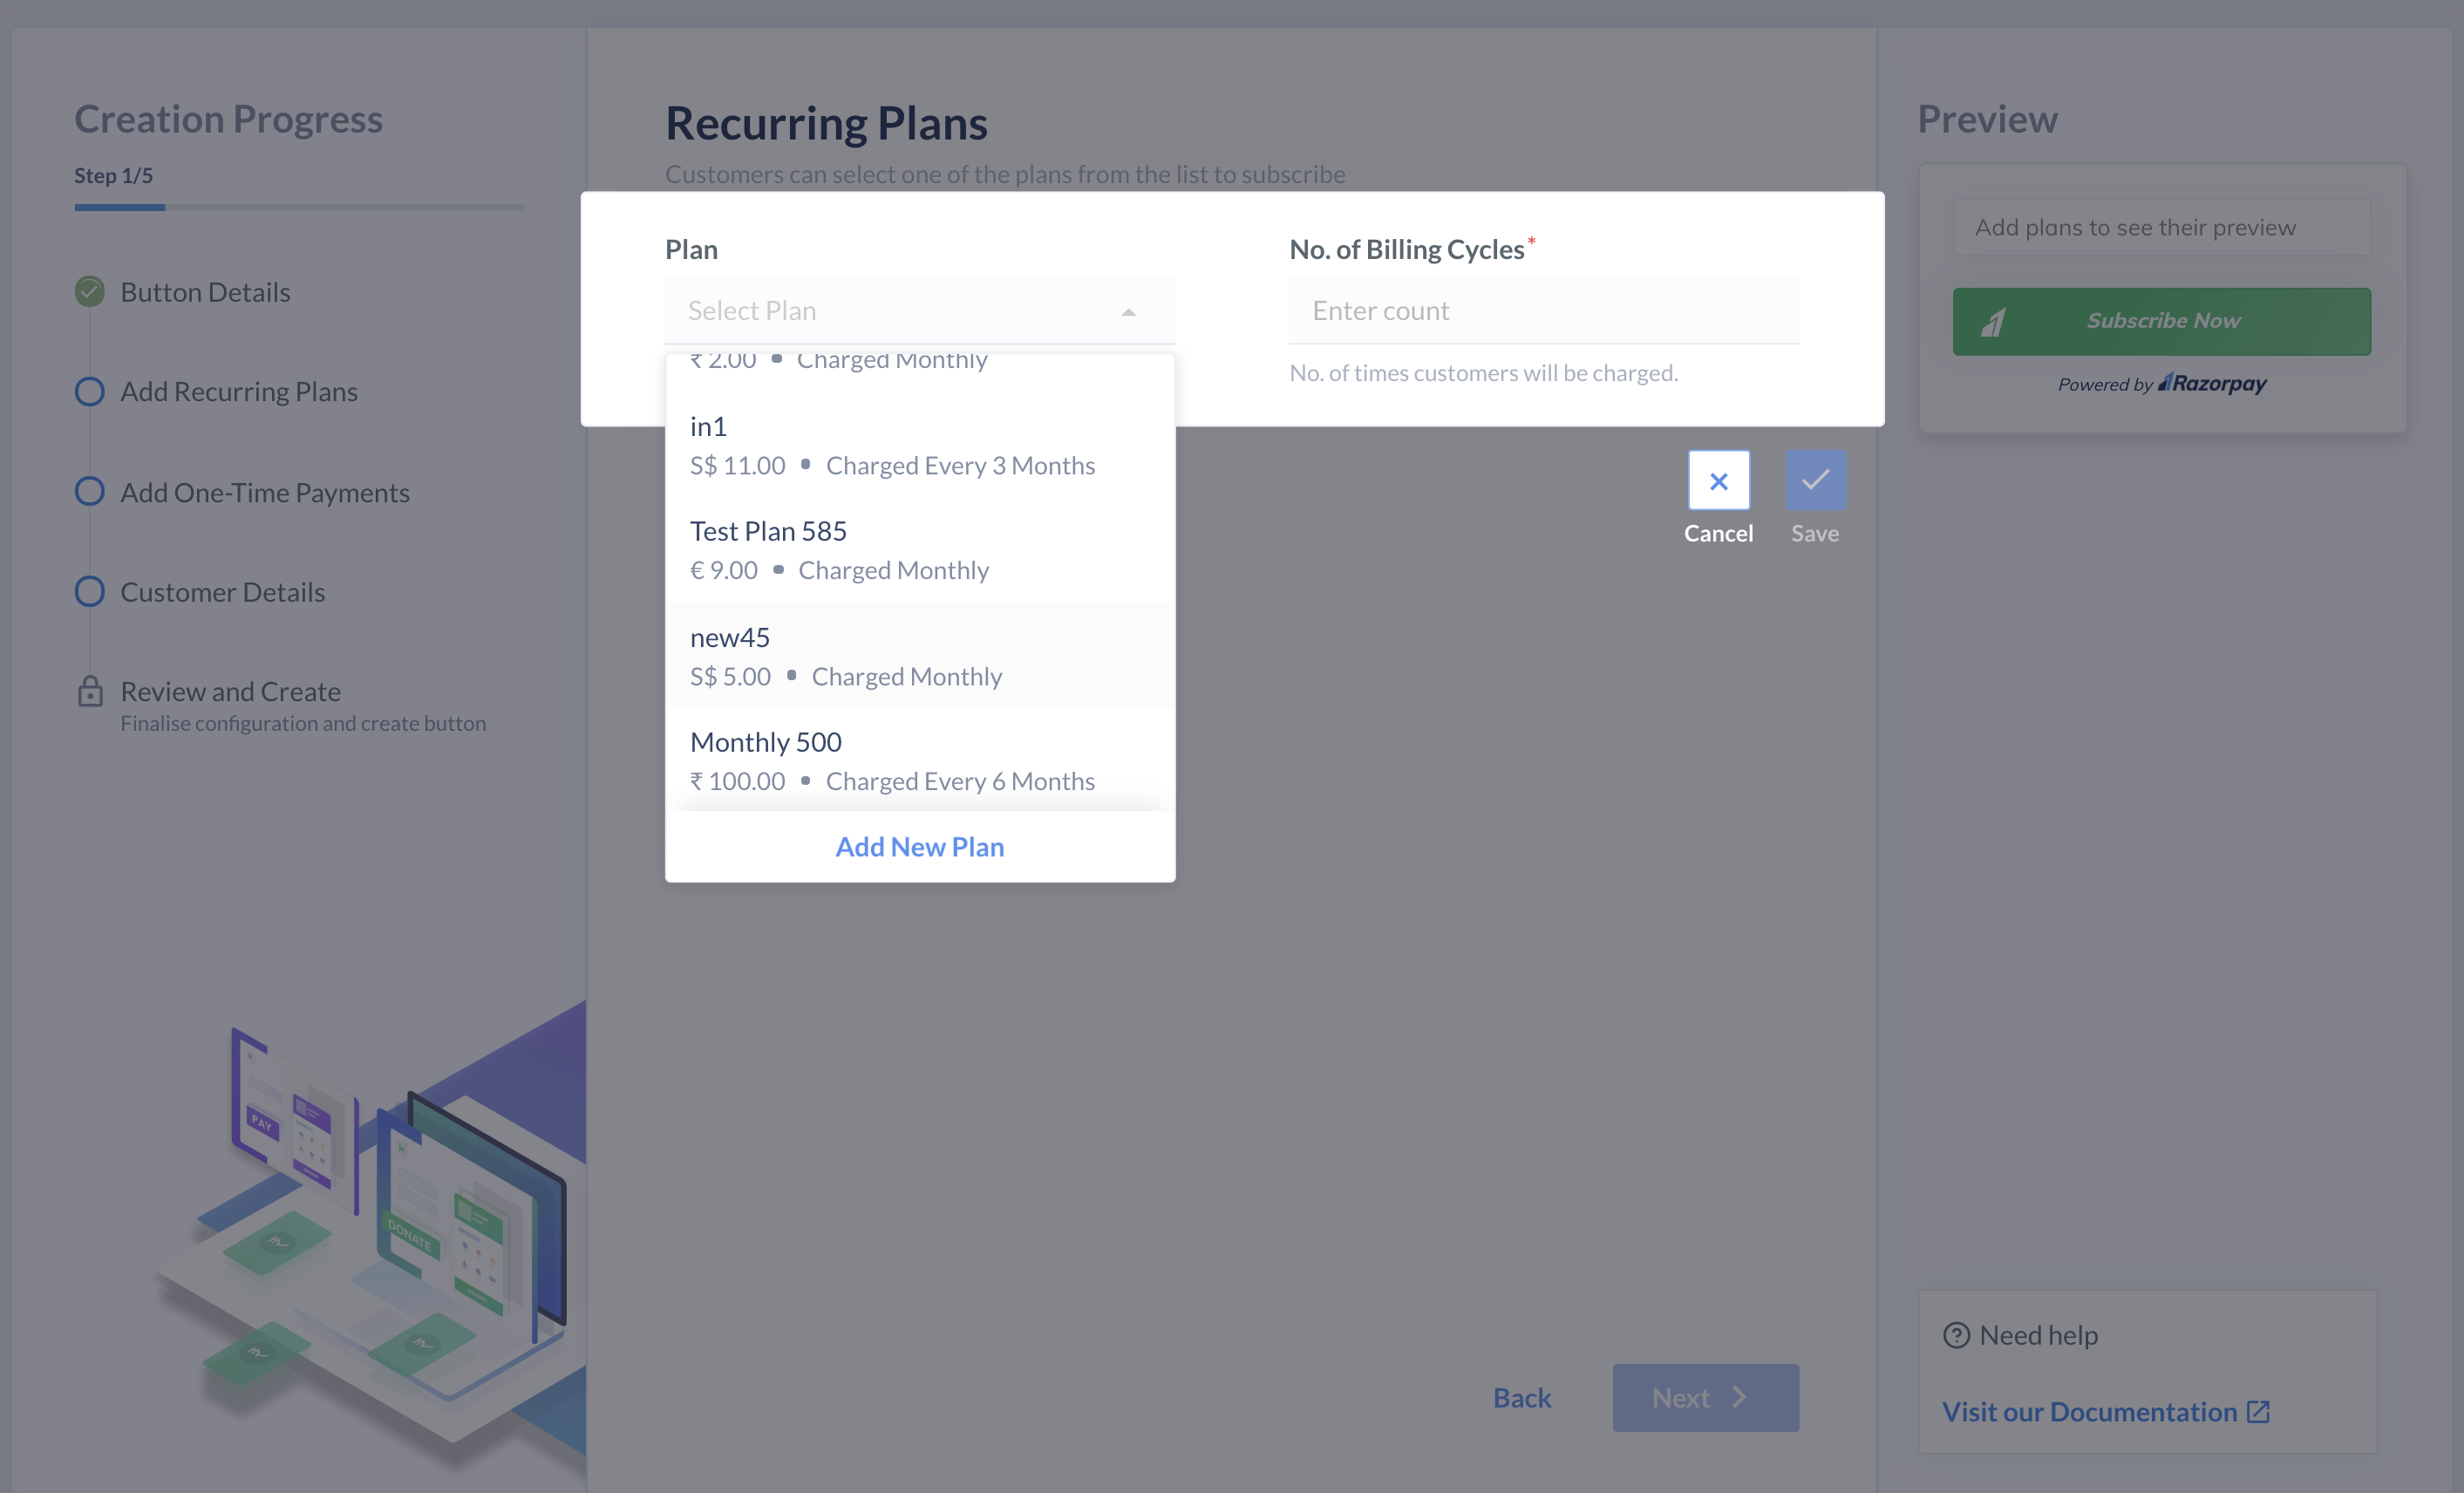
-
Click + Add Plan Item to add more plans.
-
Click Next.
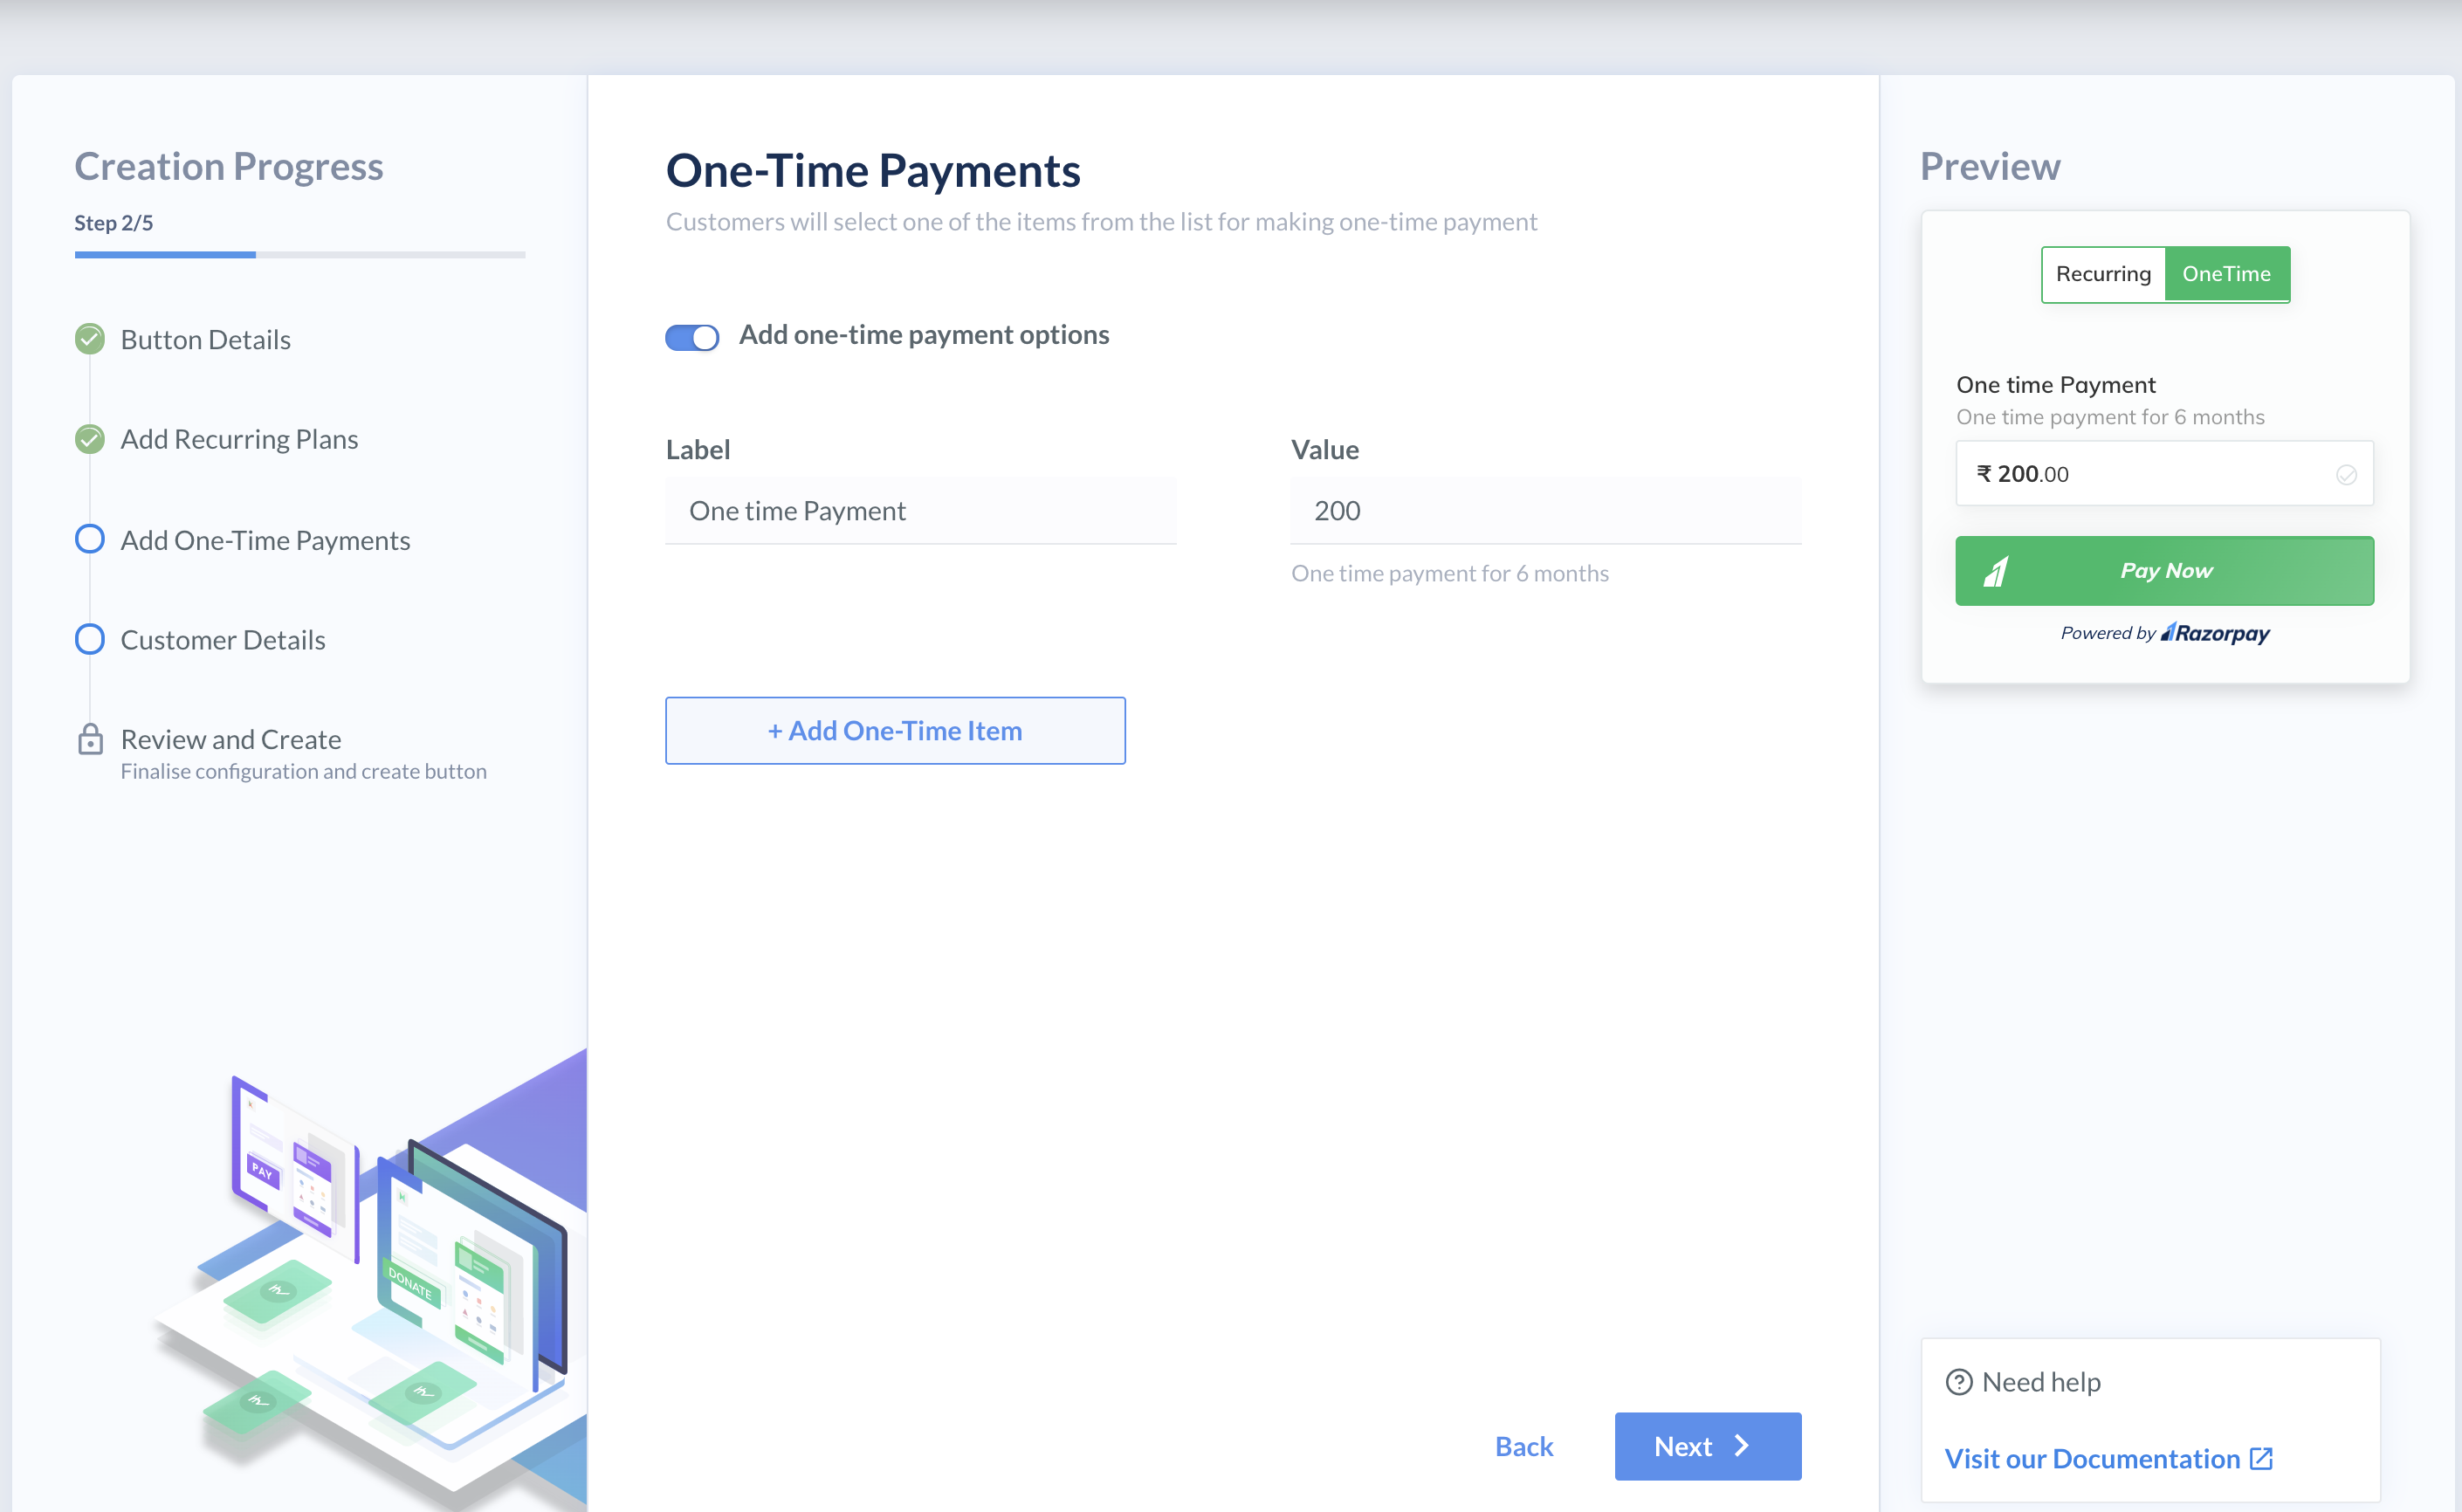
Step 3: One-Time Payments🔗
This is an optional step. If you want to provide one time payment option, follow these steps:
- Click the slide-bar.
- Enter the name of label in the Label text box.
- Enter the one time payment amount in the Value text box.
- Add a description.
- Click + Add One-time Item to add more options.
- Click Next.
Step 4: Customer Details🔗
In the Customer Details, configure the information that must be entered by the customer while making the payment. By default, Email and Phone must be entered. However, you can edit the labels of these fields.
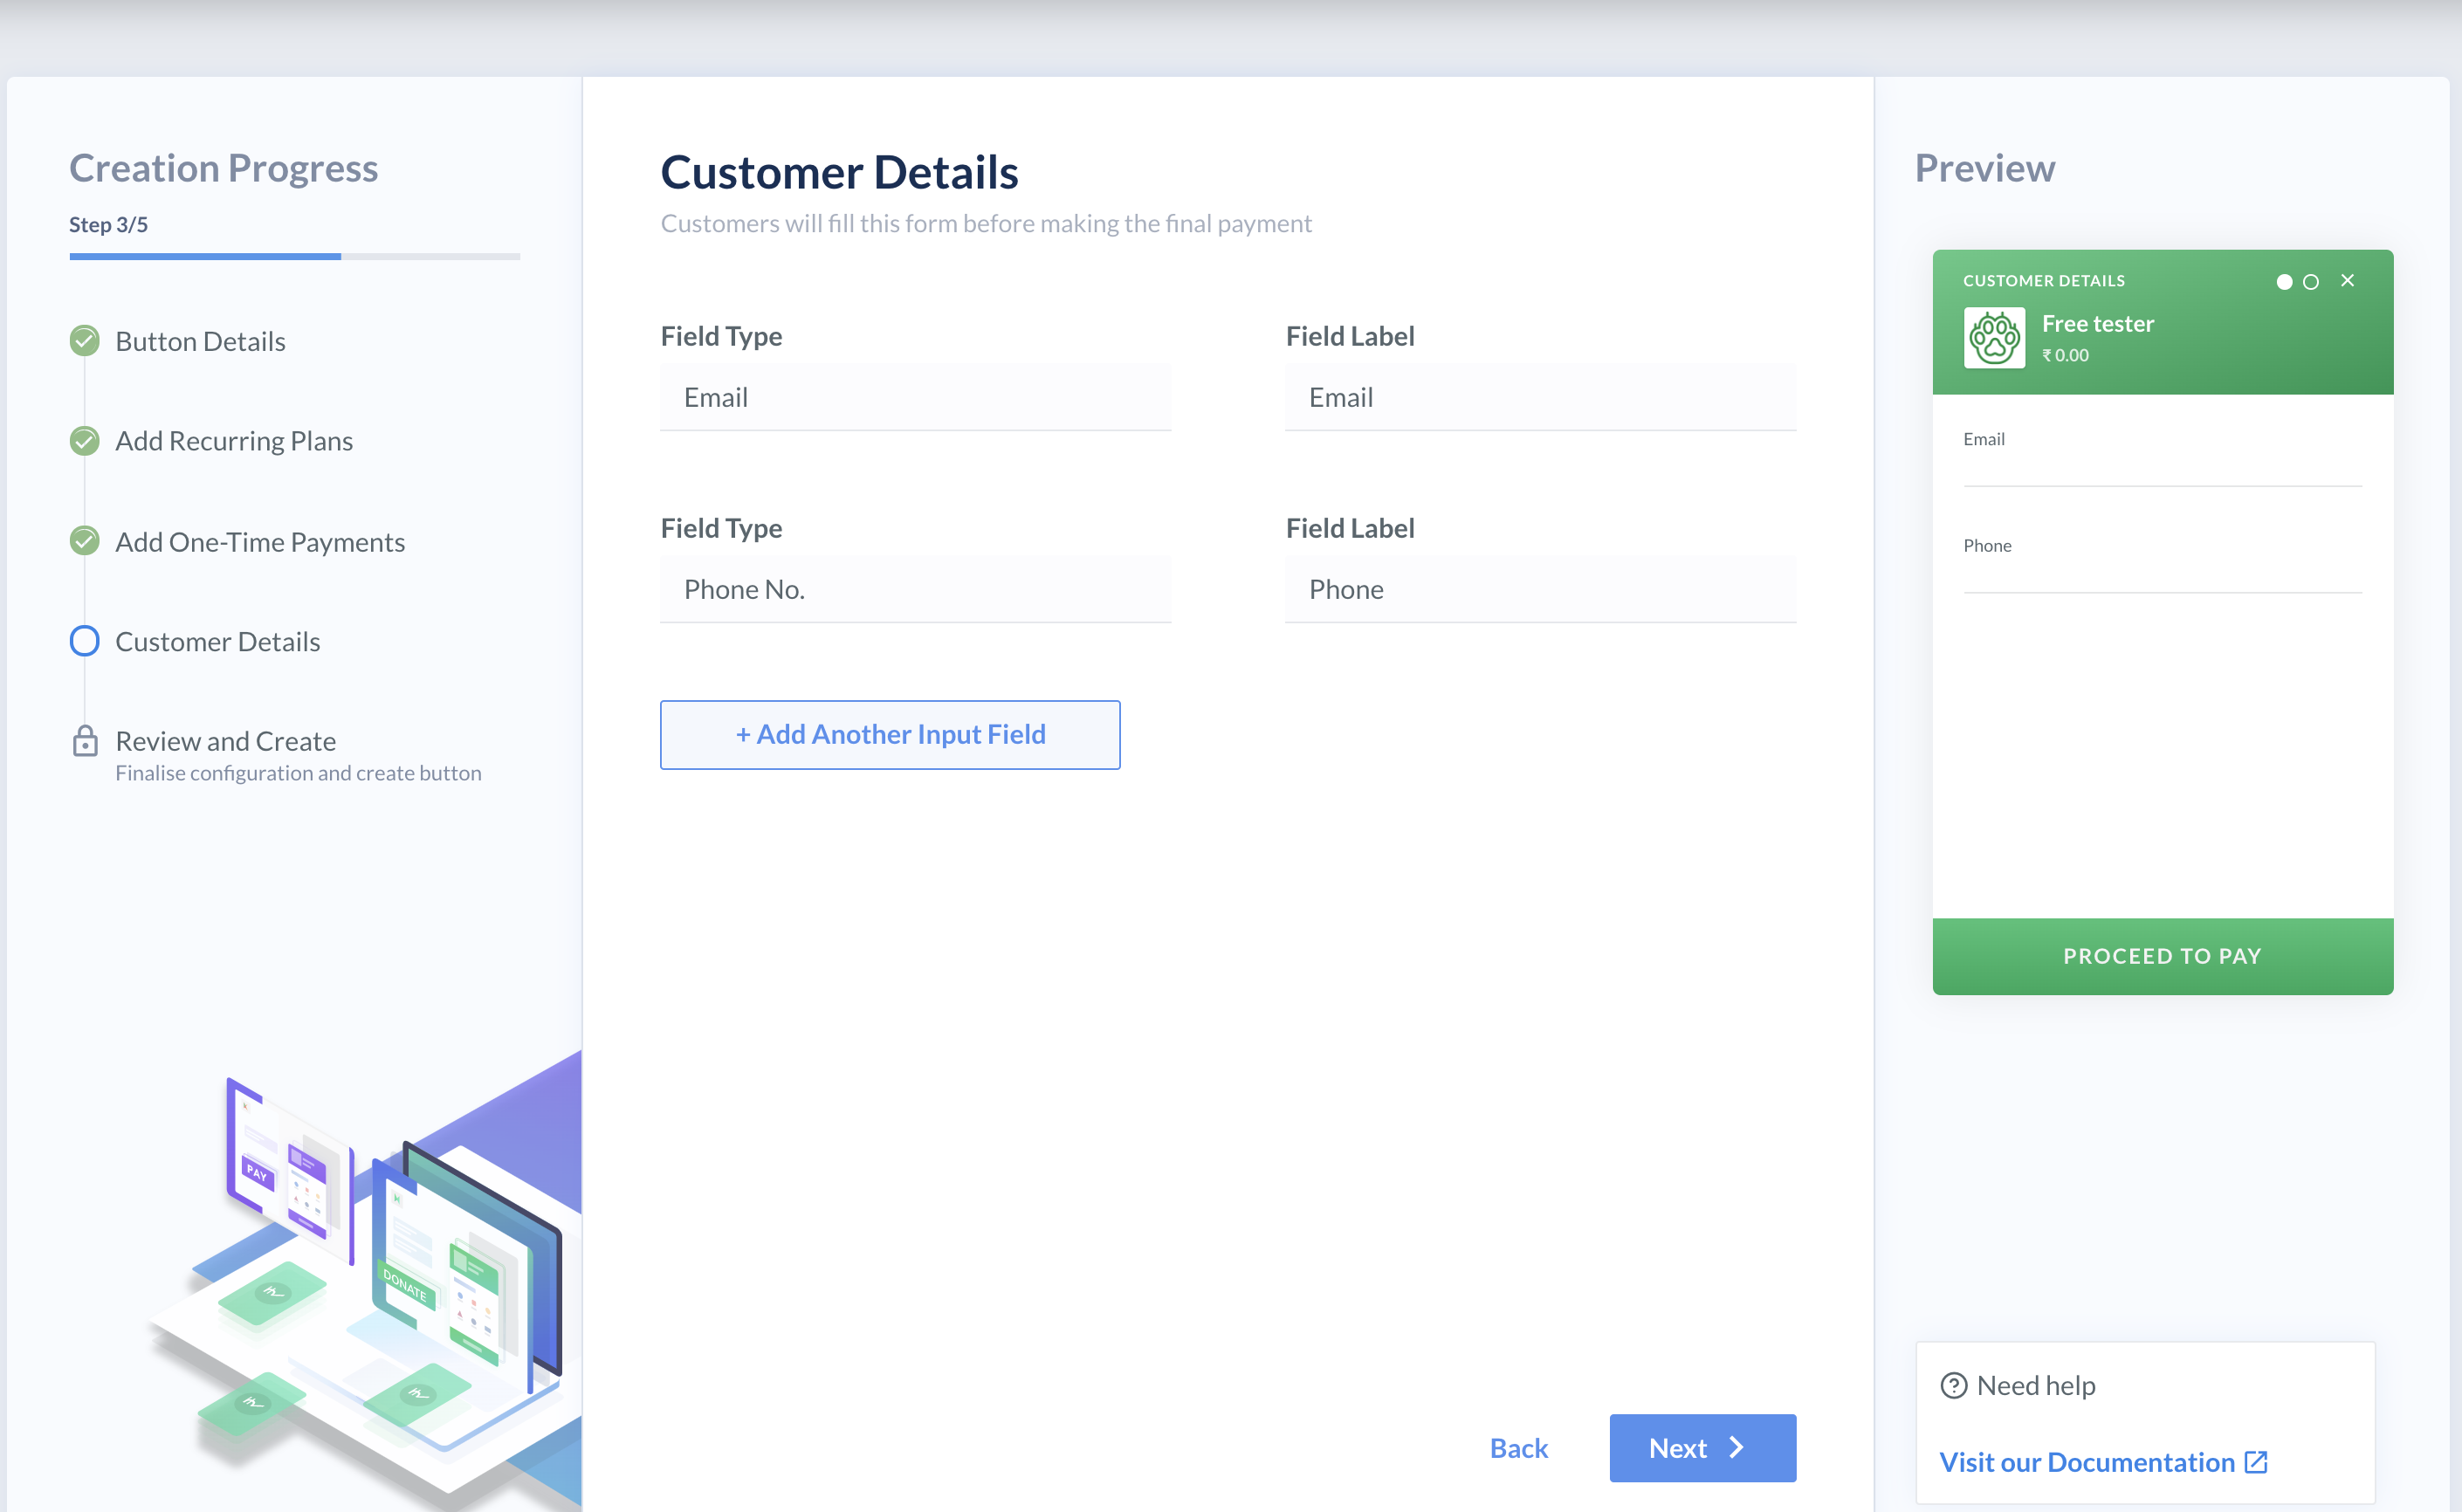
Additionally, if you want to collect more information from the customer, you can add more custom fields:
-
Click + Add Another Input Field.
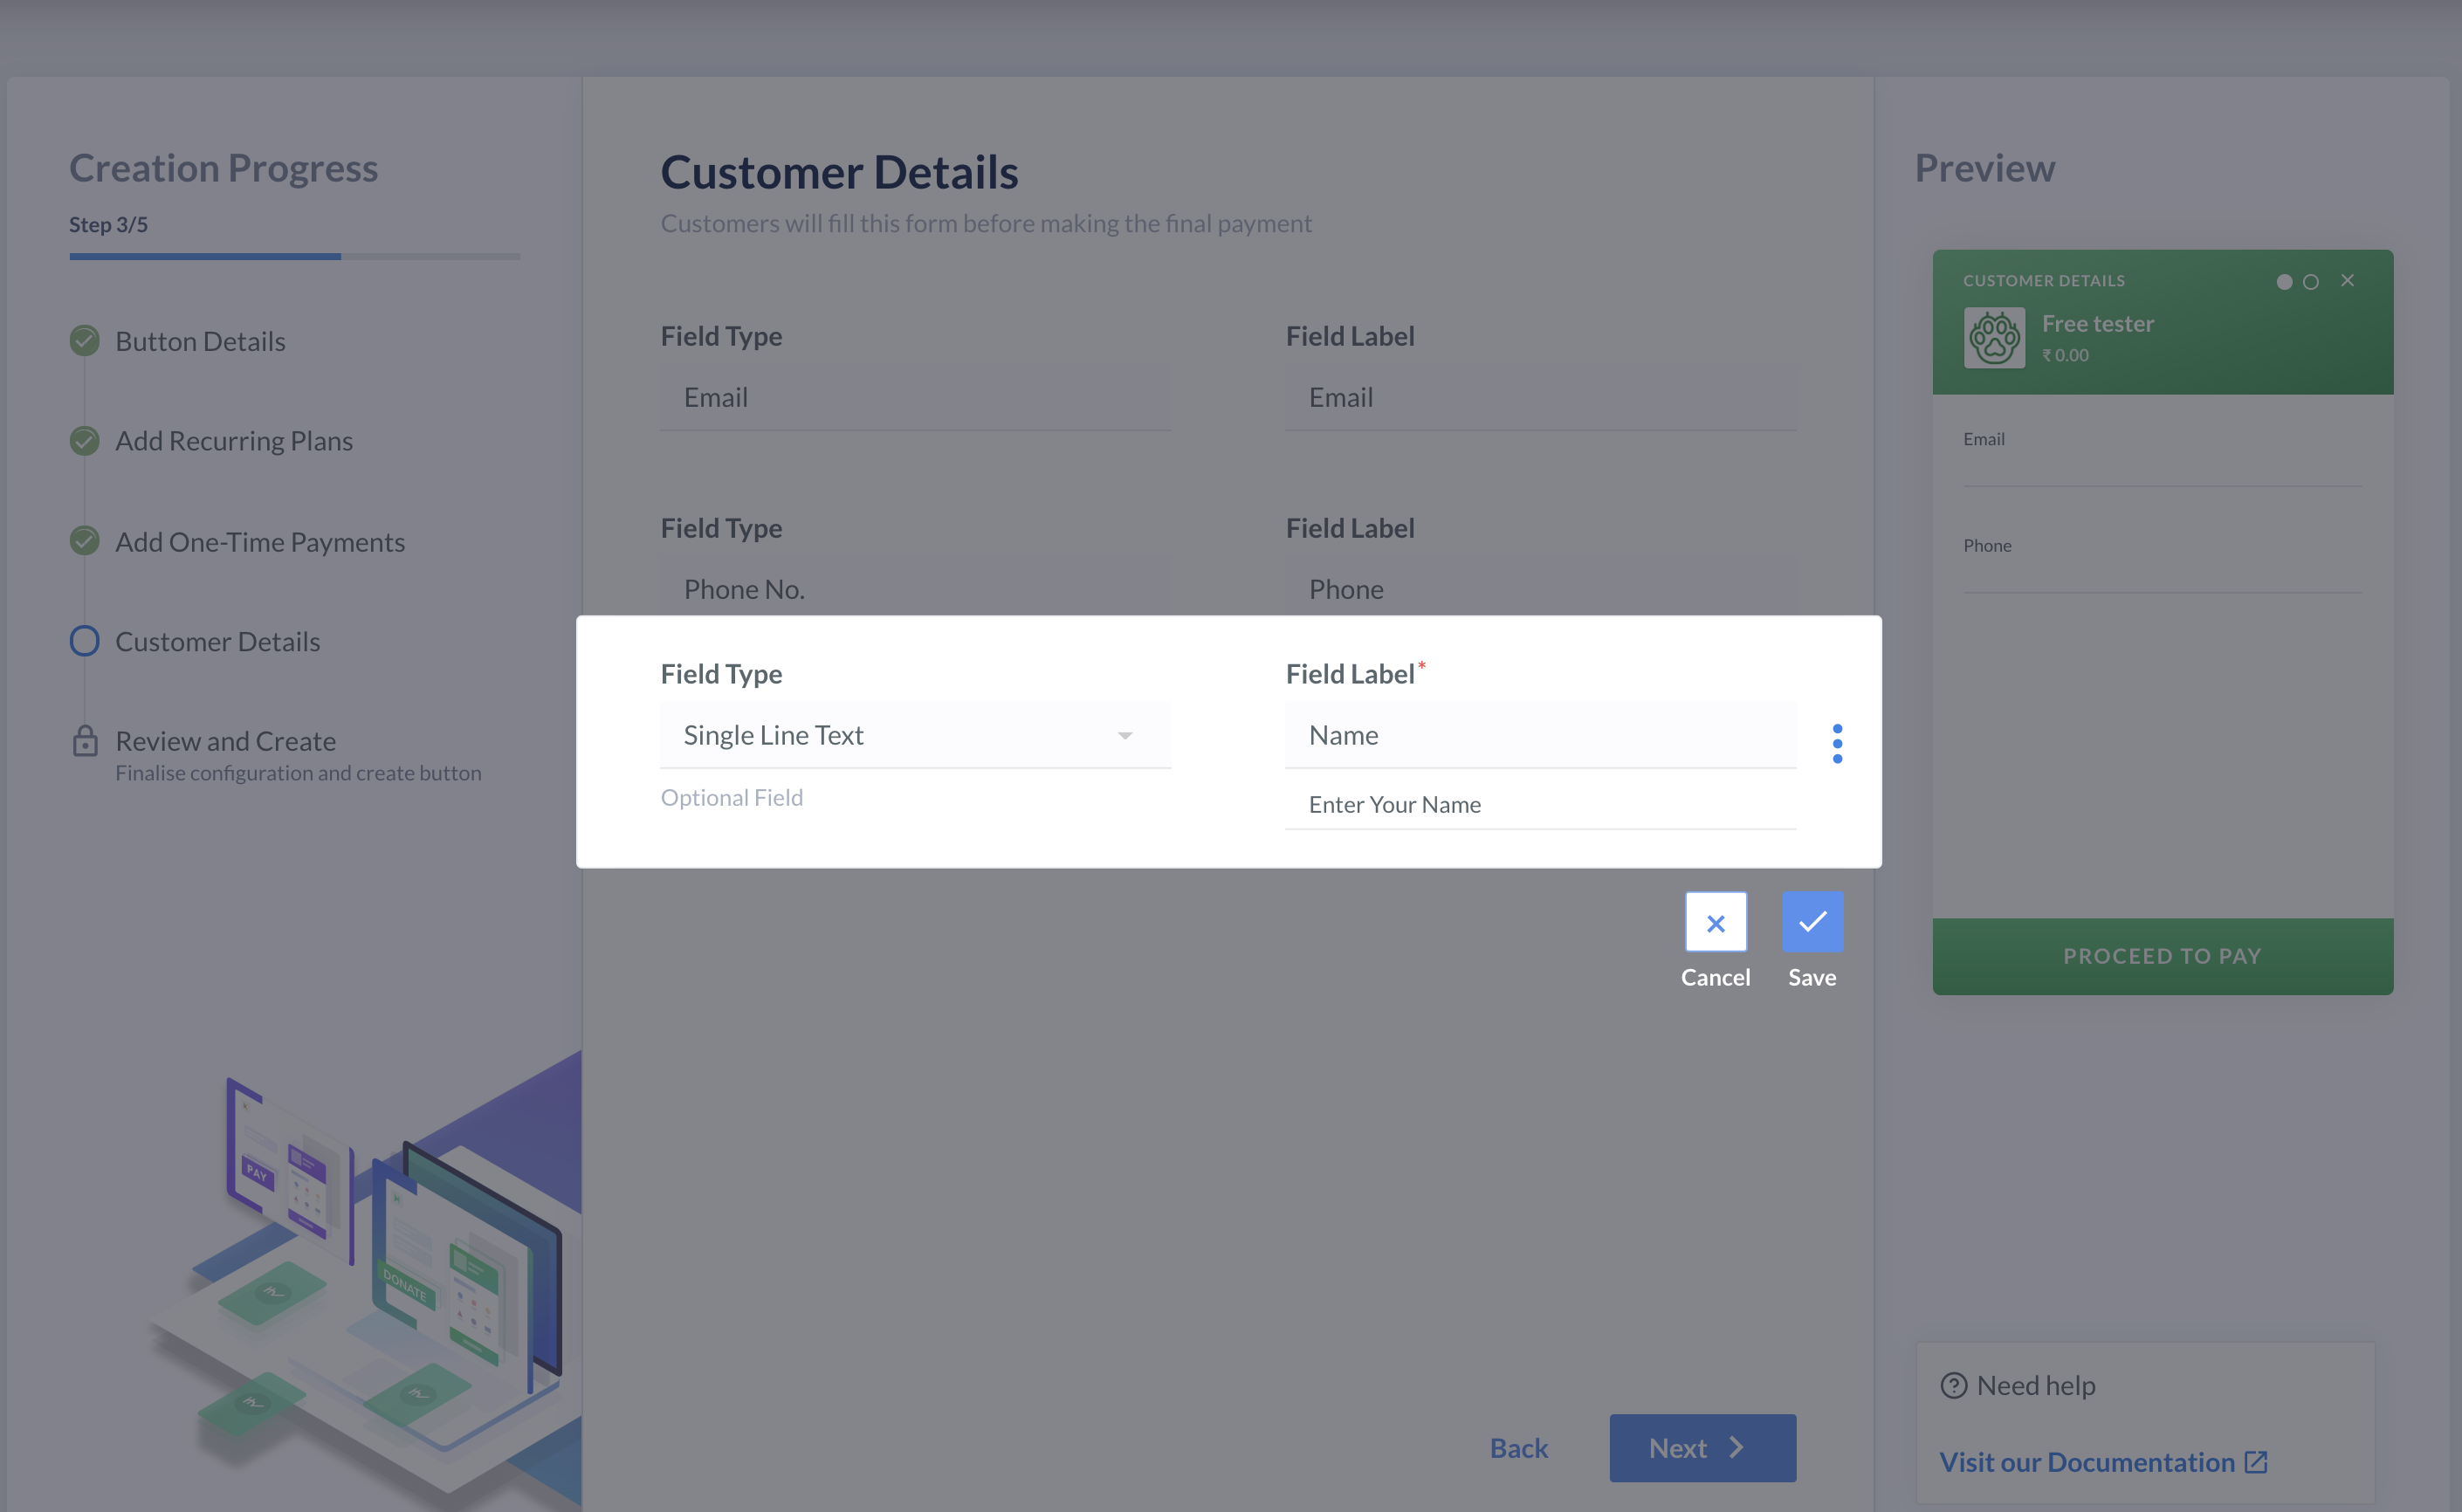
-
Enter the following details in the modal:
- Select the relevant field type. For example, if you want the customer to enter their name, select Single Line Text.
- Enter the label for the custom field. For example,
Name. - If required, click more and add a description for the field.
- Select Optional Field.
- Click Save.
-
To proceed, click Next.
The data entered by the customers will be available in the Transaction Details report.
Step 5: Review and Create🔗
- Review the details entered in the previous sections.
- Click Back to navigate to the previous steps for any changes.
- Click Create Button.
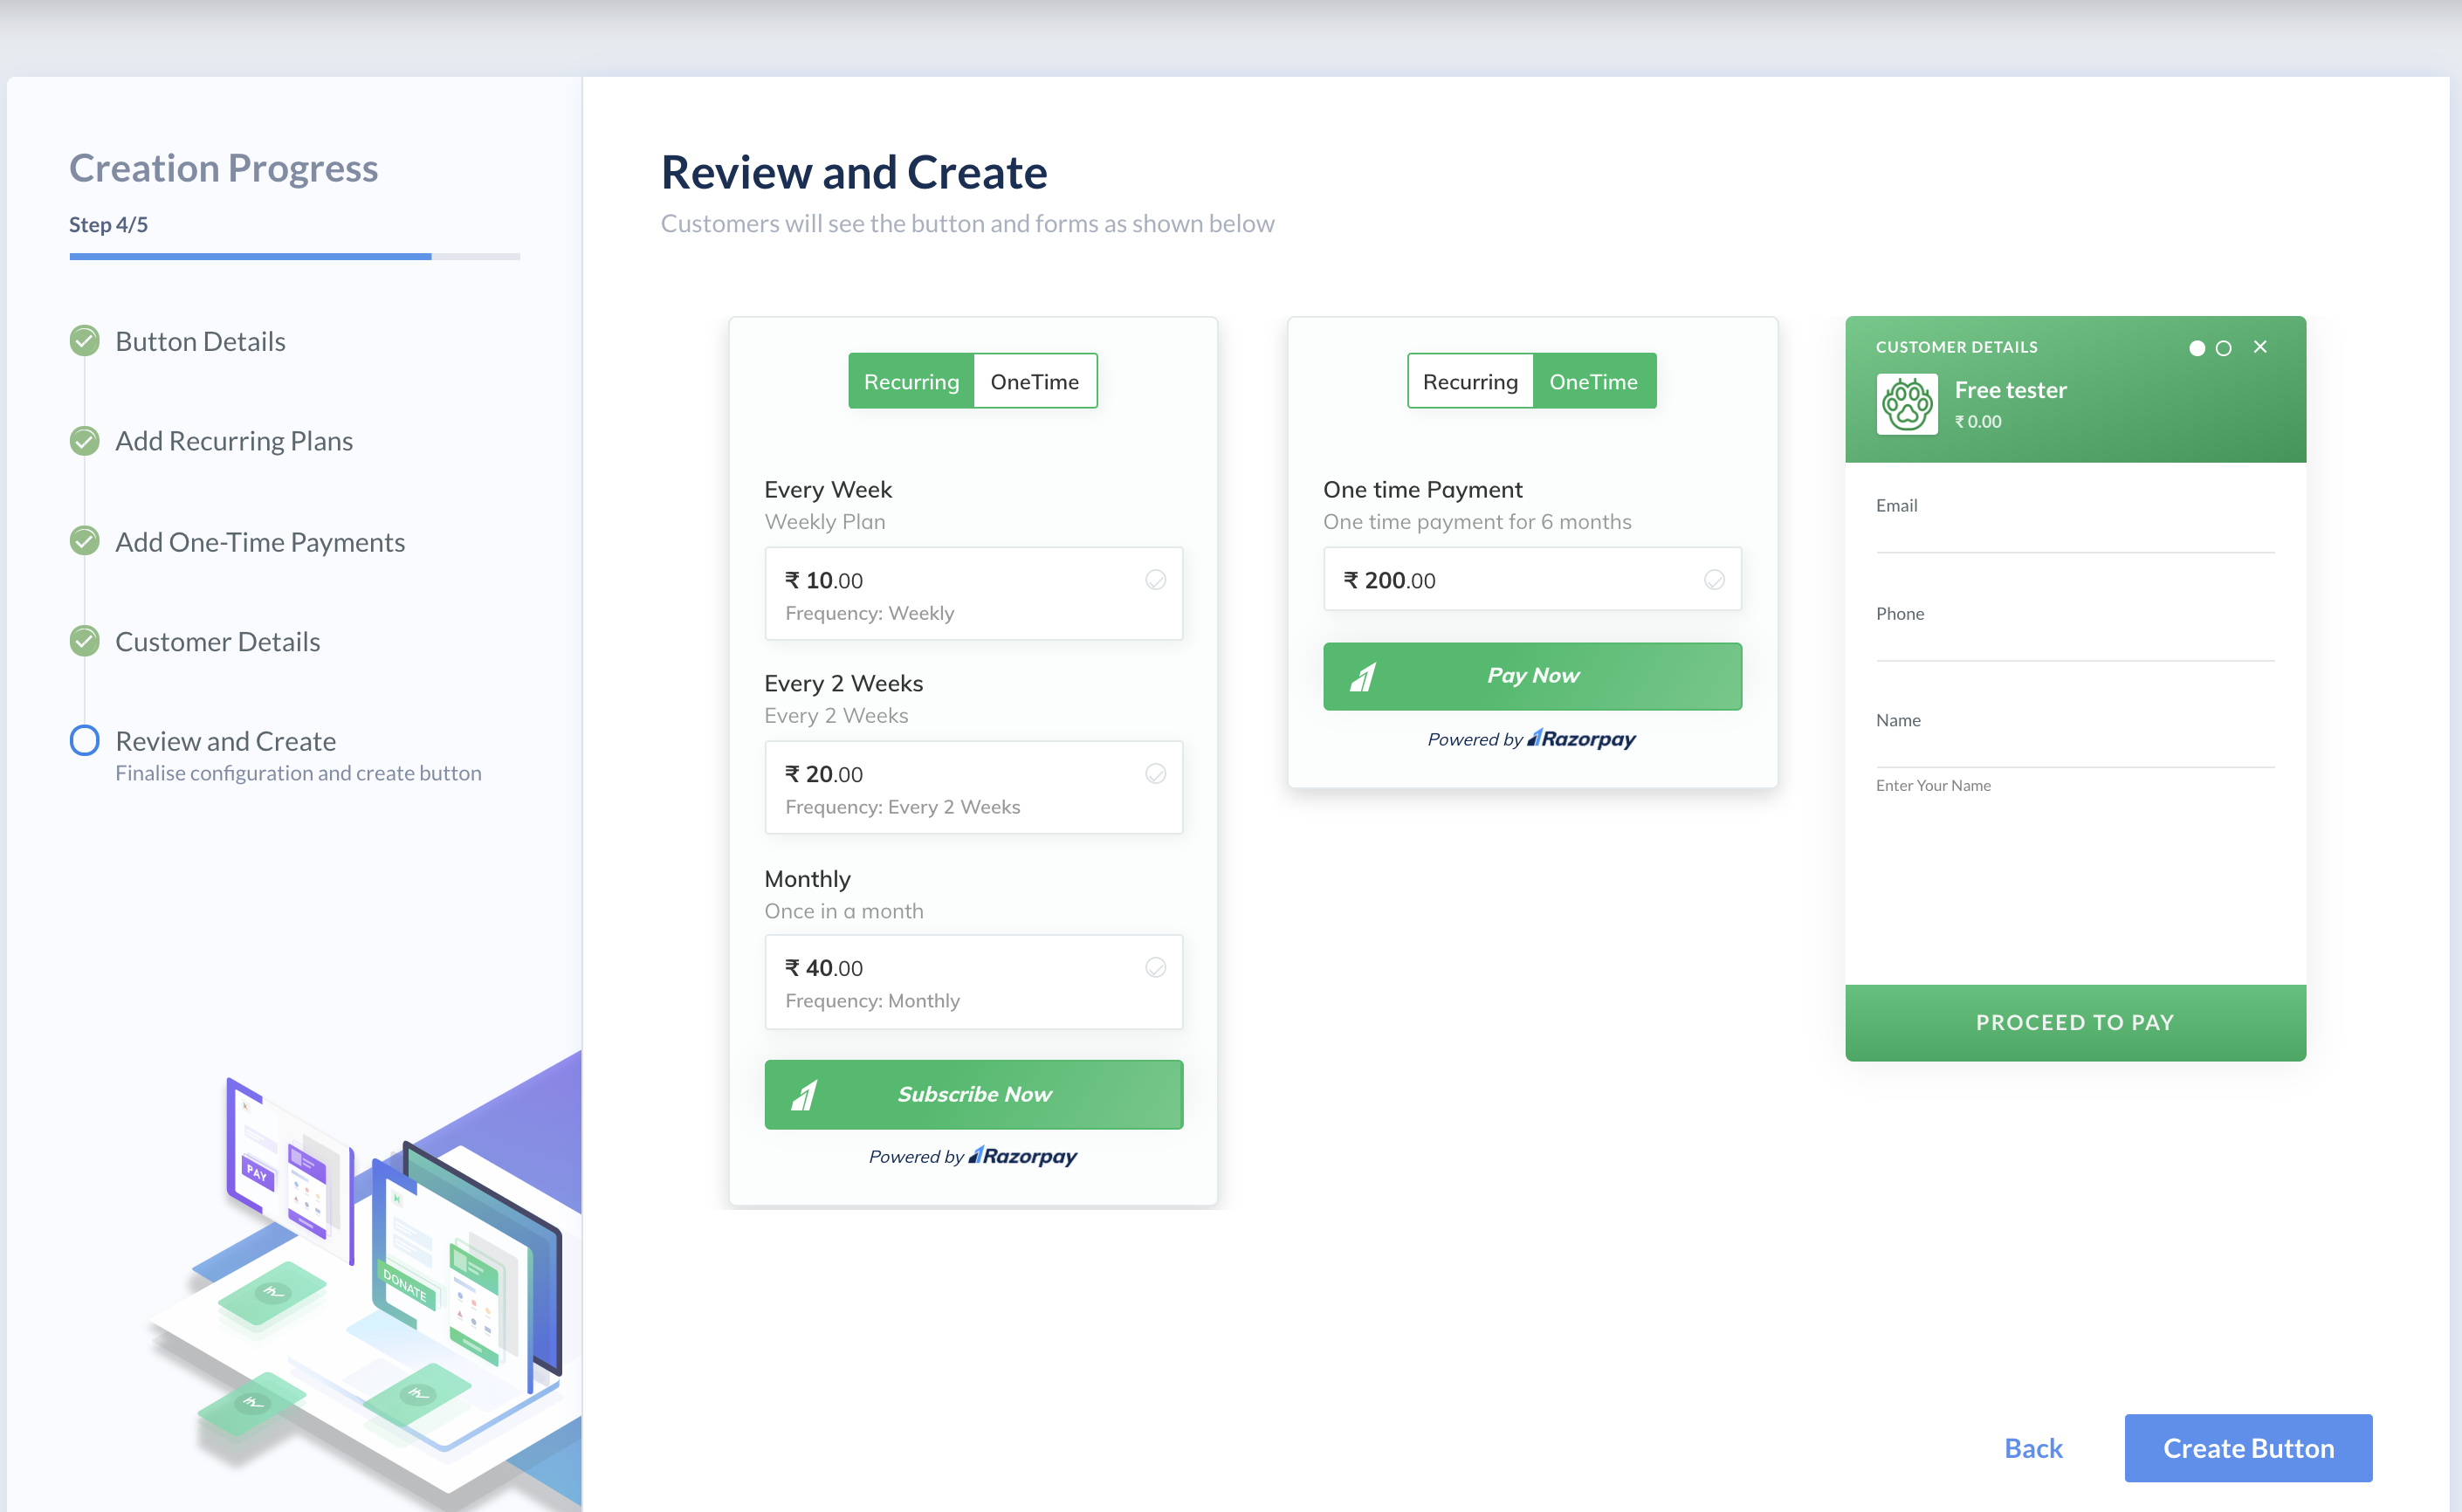
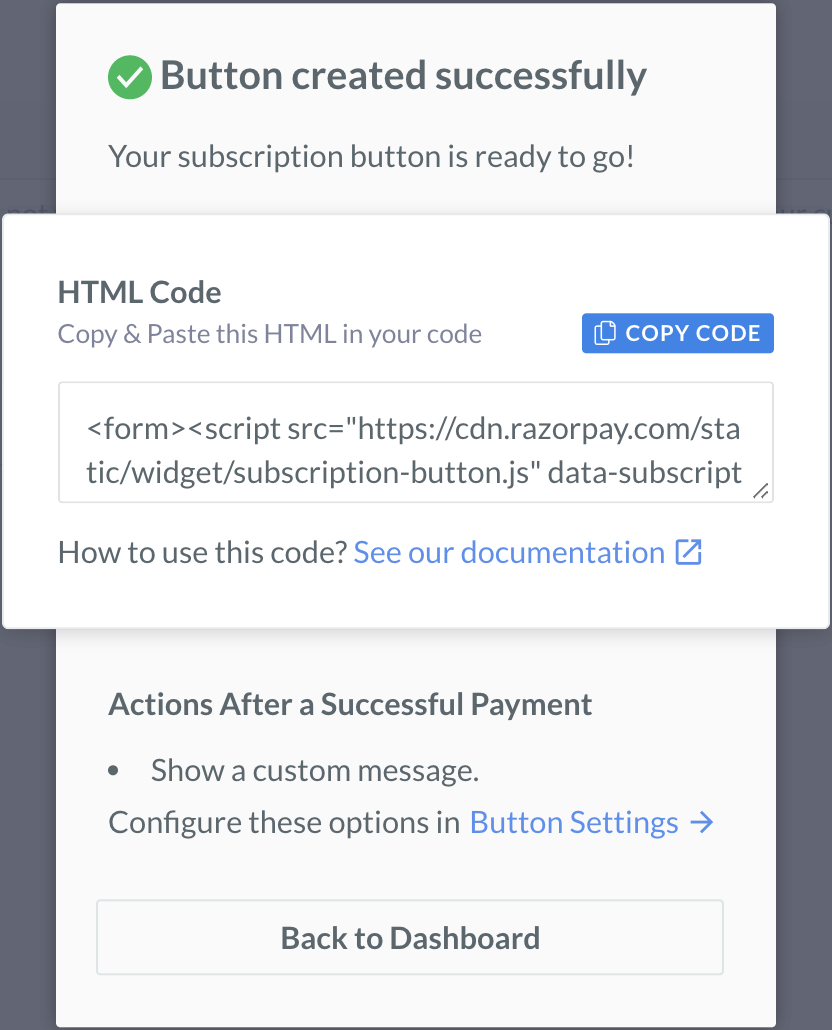
The button created successfully. Copy the HTML Code and embed it in your webpage. Once this is done, the Subscription button will appear on your website.