Create Virtual Accounts🔗
Handy Tips
Currently, we support creation of virtual UPI IDs in the live mode only. However, virtual bank accounts can be created in the test and live modes.
Watch this video to create a Virtual Account.
To create a virtual account from the Dashboard:
-
Log into the Dashboard and click Smart Collect.
-
Click + Create Virtual Account.
-
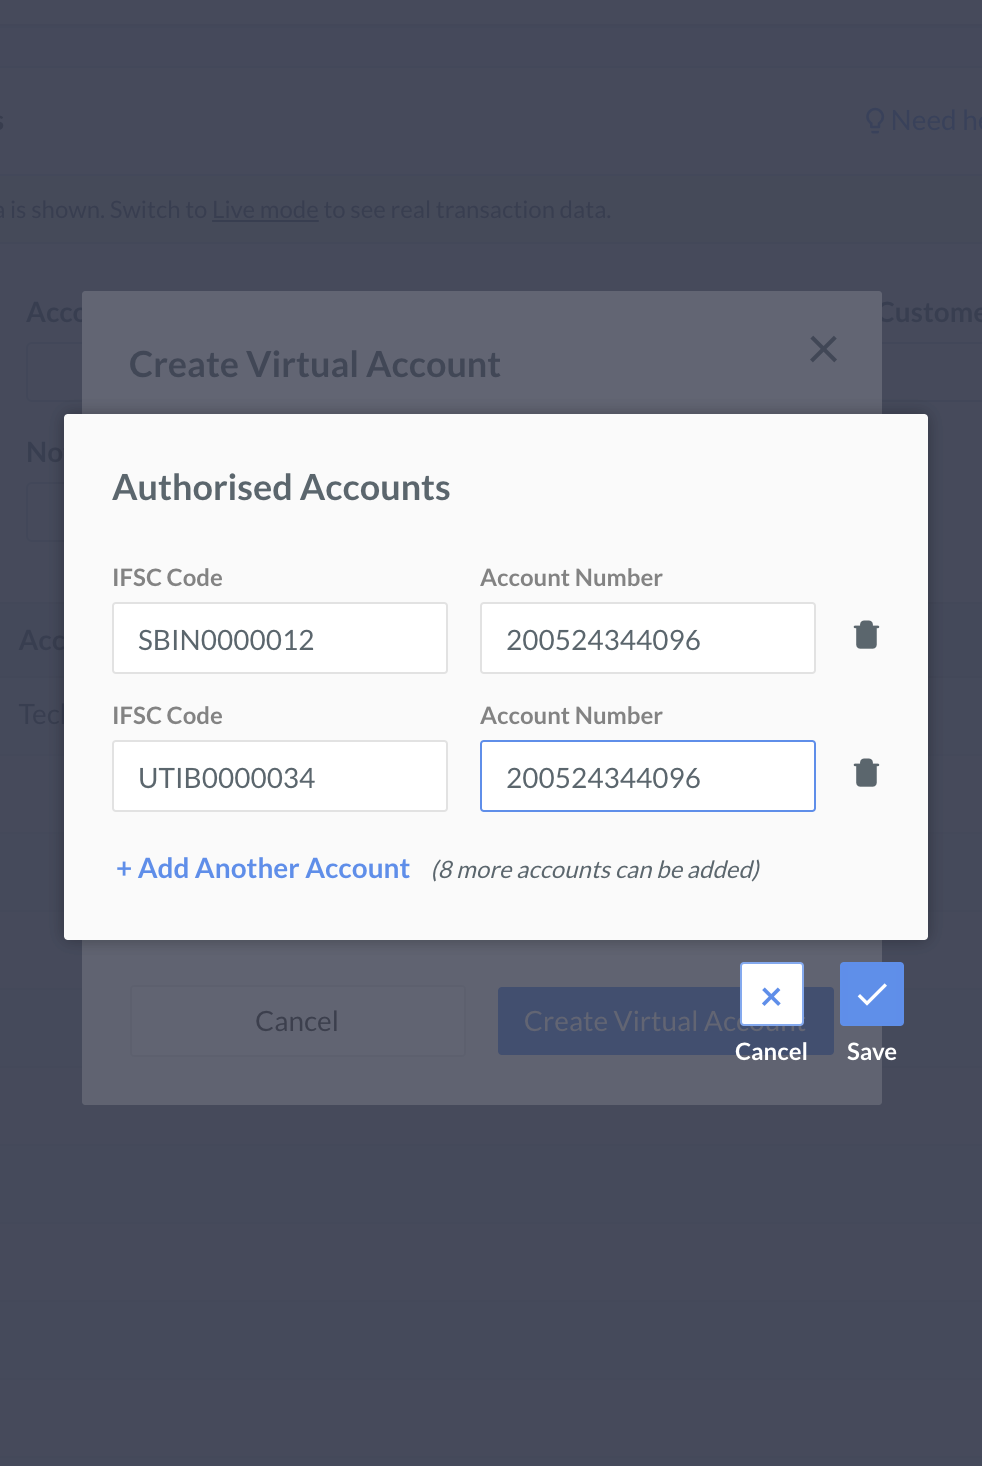
Select the type of receiver in Methods to accept payments in this account field.
By default, both Bank Transfers (NEFT, RTGS, IMPS) and UPI Transfer are enabled. This means that both virtual bank account and UPI ID can be created for the customer. You can choose to disable either as per your needs.-
Enable Bank Transfer (NEFT, RTGS, IMPS) to create a virtual bank account.
-
Enable UPI Transfer to create a virtual UPI ID.
- Create custom UPI ID - You can enter a custom descriptor, that is, a unique identifier for the customer in the UPI ID field. It can be a combination of letters and numbers, with a length of 12 characters. For example,
gauravkumar1. If this field is left bank, the UPI ID is auto-generated.
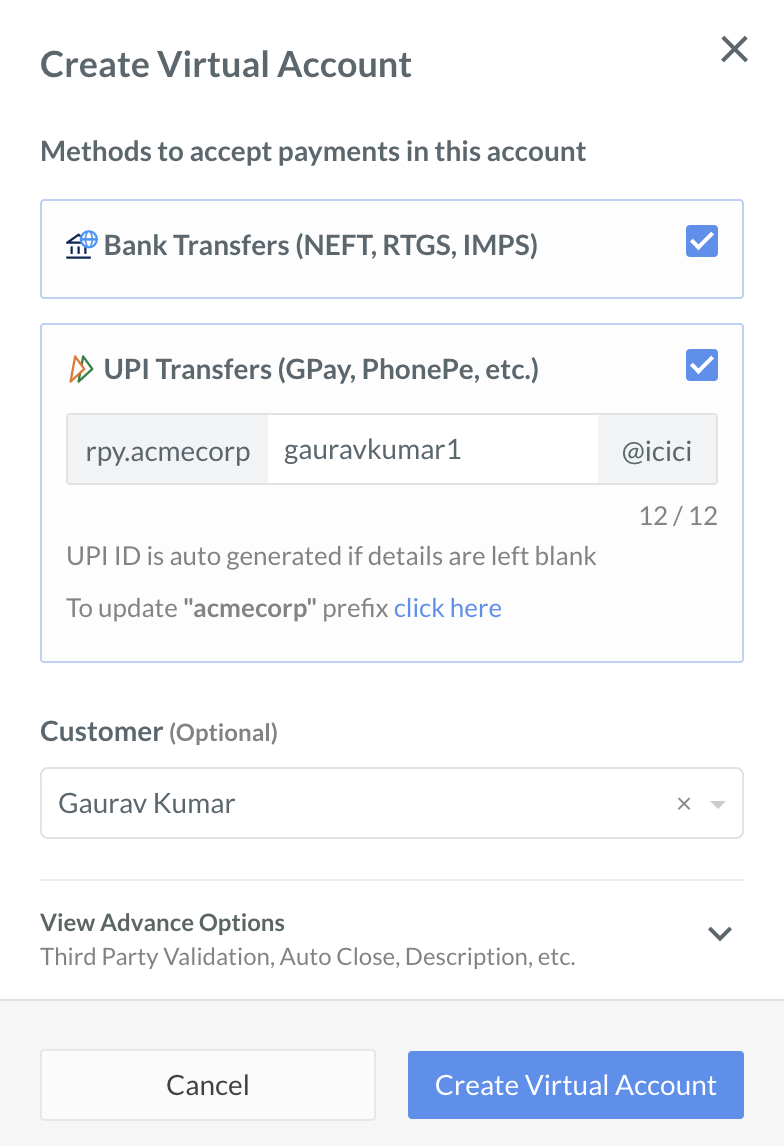
- The prefix,
acmecorpcan be modified using the click here link. This opens a small modal where you can enter a new prefix.
Handy Tips
An unregistered merchant cannot modify the structure (prefix and descriptor) of the UPI ID.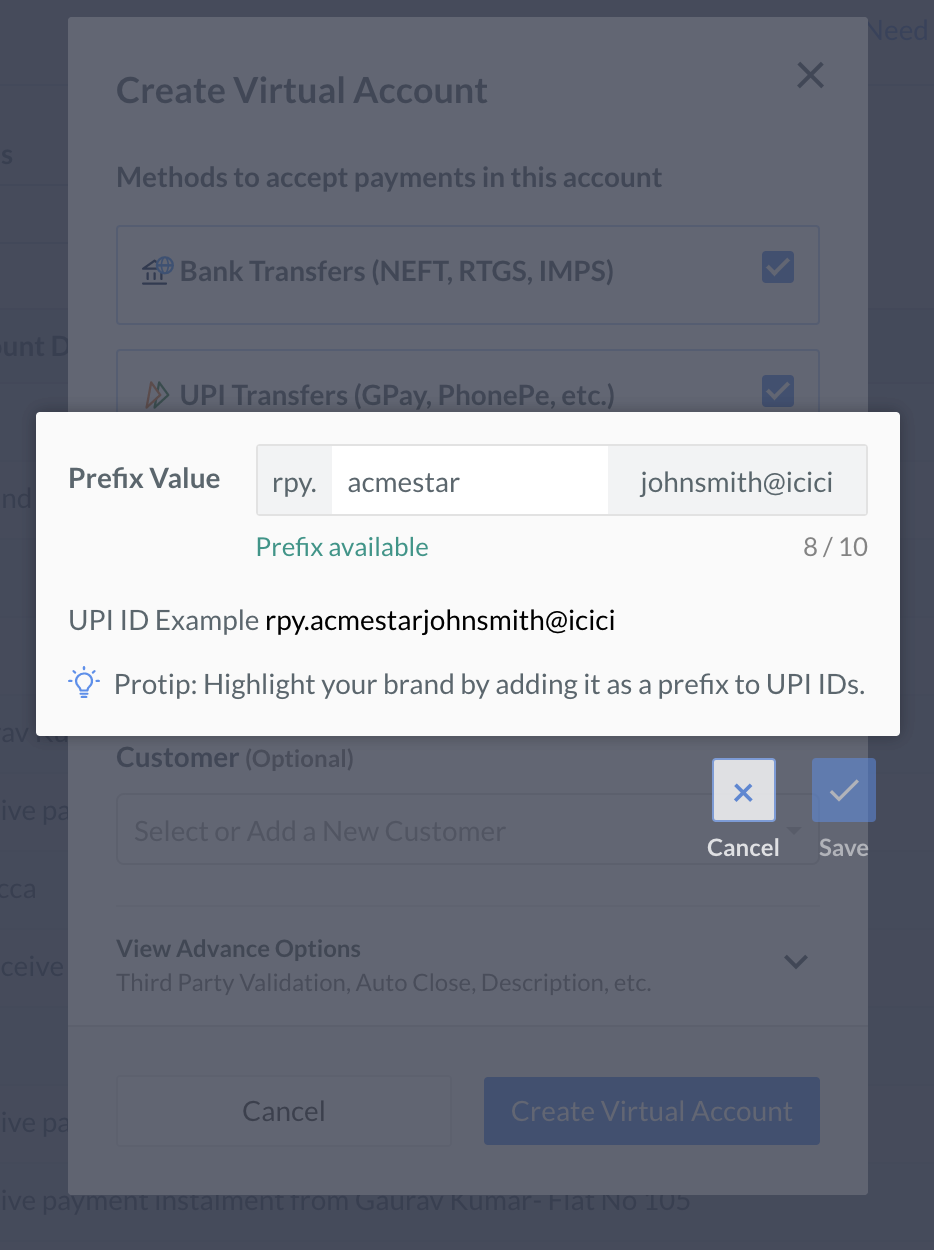
- Create custom UPI ID - You can enter a custom descriptor, that is, a unique identifier for the customer in the UPI ID field. It can be a combination of letters and numbers, with a length of 12 characters. For example,
-
-
Select the Customer from the dropdown list. You can also create a new customer on-the-fly. You may skip this step and proceed with creation, if you do not wish to tag it to a specific customer. However, you cannot modify the virtual account and tag it to the customer later.
-
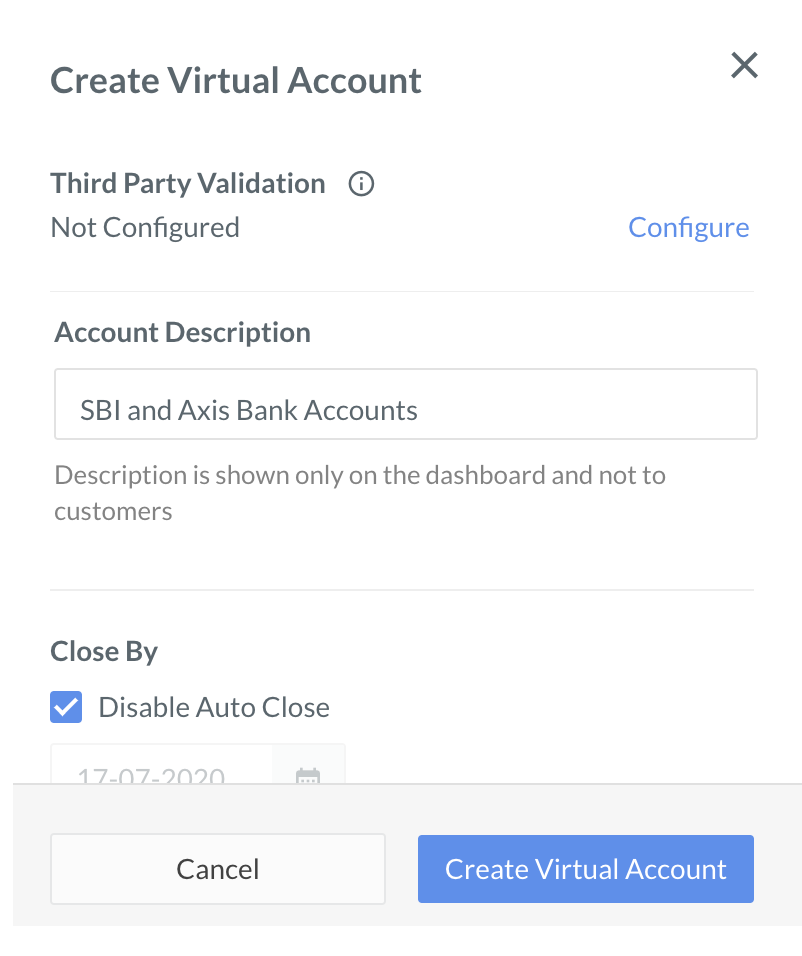
Click View Advance Options.
-
Add an Account Description for your internal reference.
-
You can set a closure date for the virtual account using the Close By option. Click Disable Auto Close option and select the date and time at which the account must be automatically closed. Ensure that the time specified is at least 15 minutes after the creation time.
-
Click Add Internal Note to enter any notes for internal reference.
-
Click Create Virtual Account.
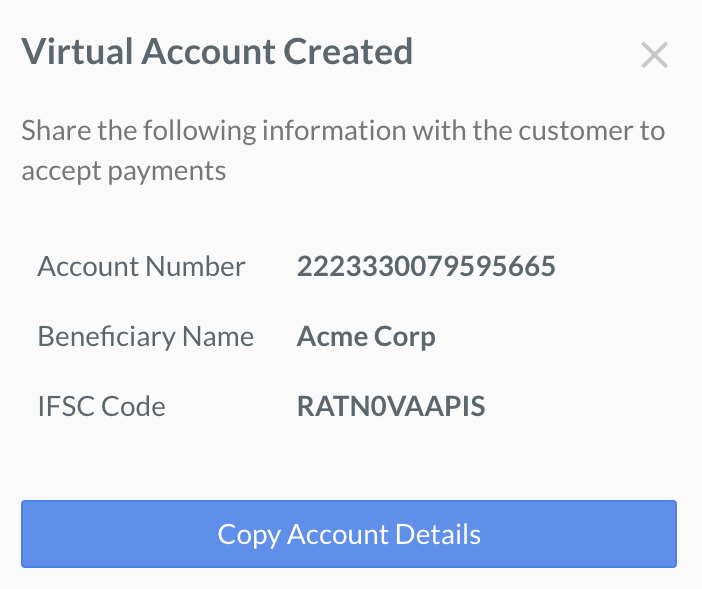
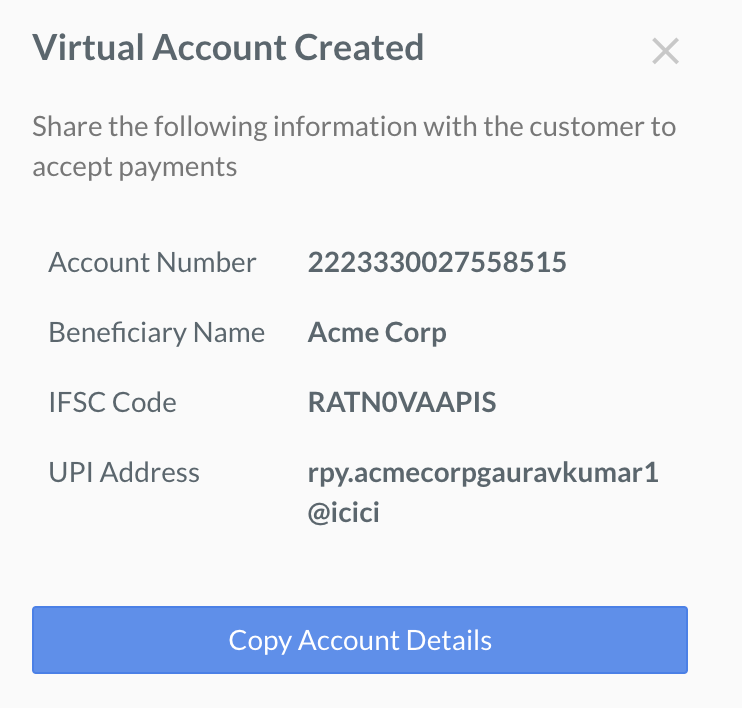
Once the virtual account has been created, you can copy the details and share them with your customer.
Handy Tips
While sharing the details of VAs (created using RBL bank) with the customers, ensure that the fifth character in the IFSC is number 0 and not the letter O. For example, valid IFSC is RATN0VAAPIS and not RATNOVAAPIS.
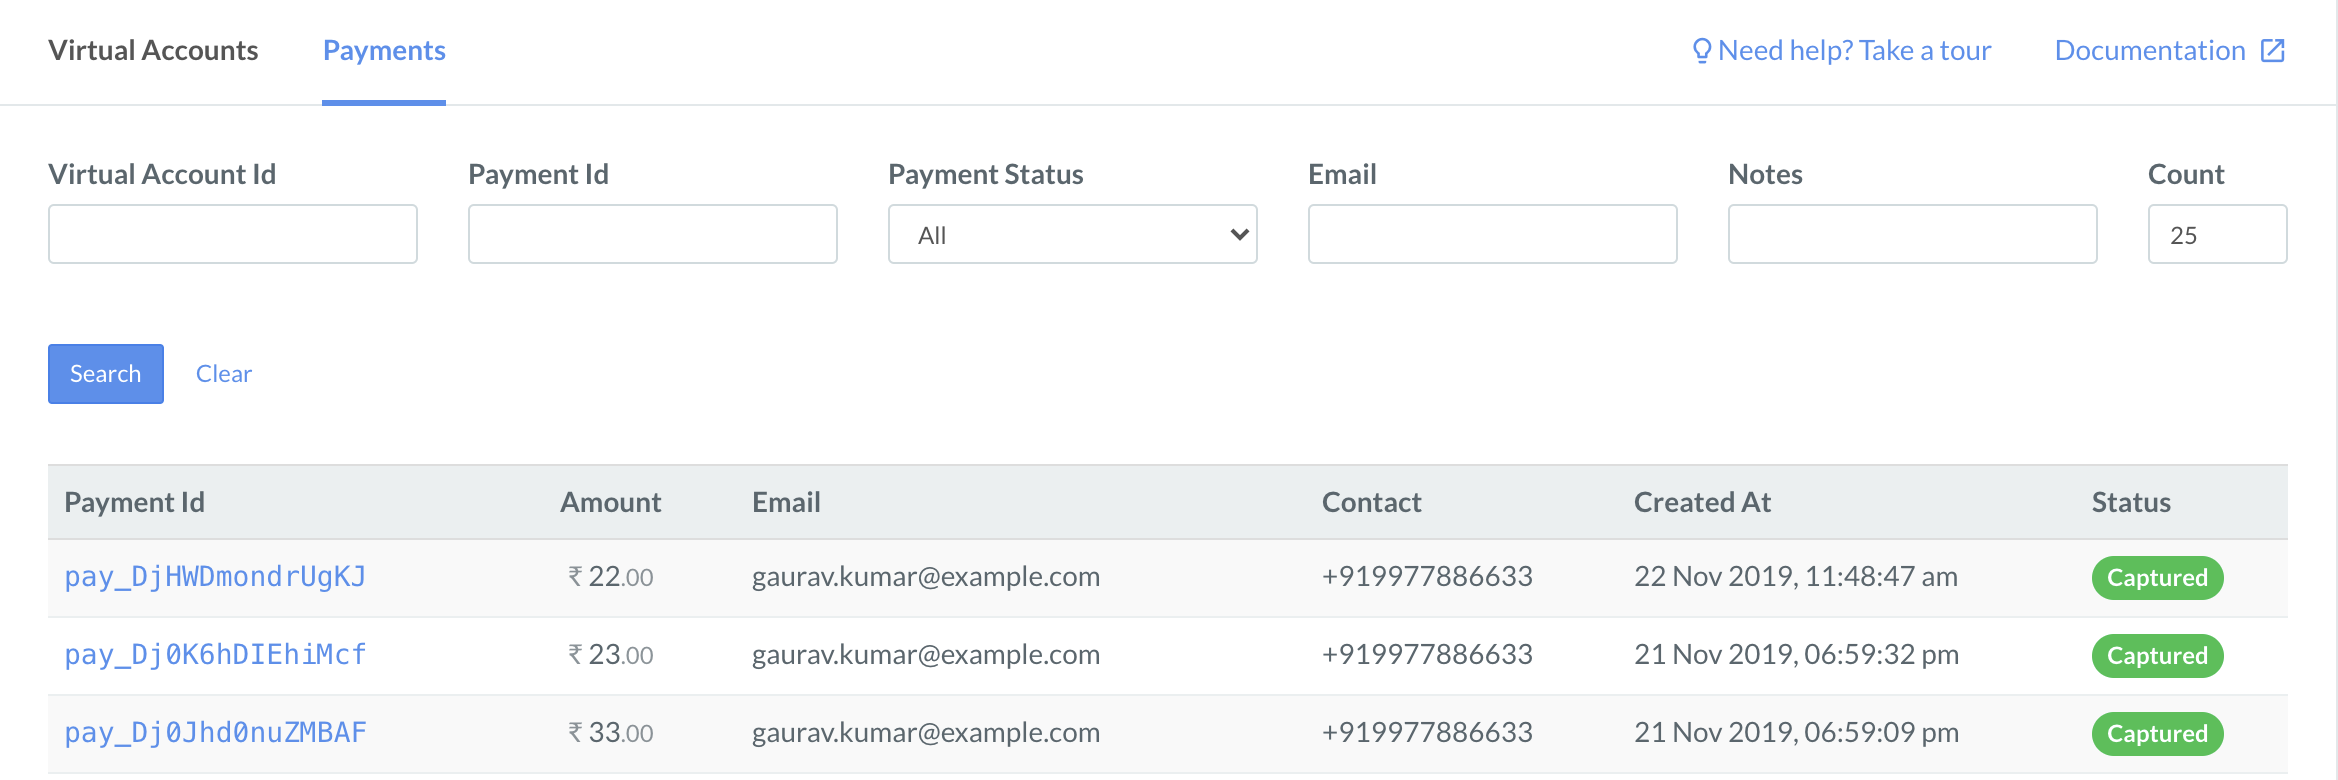
The virtual account appears in the list as shown below: